How to Listen to Music on Amazon Echo: Complete Guide

The content discusses how to play music on Amazon Echo using various services and how to set default music and podcast services. It also covers connecting and streaming music via Bluetooth.

RAYMOND OGLESBY @RaymondOglesby2
August 27, 2024– 7 minutes read time

This is for devices using Amazon Echo device. Screenshots are from iPhone 14 Pro running iOS 17.6.1

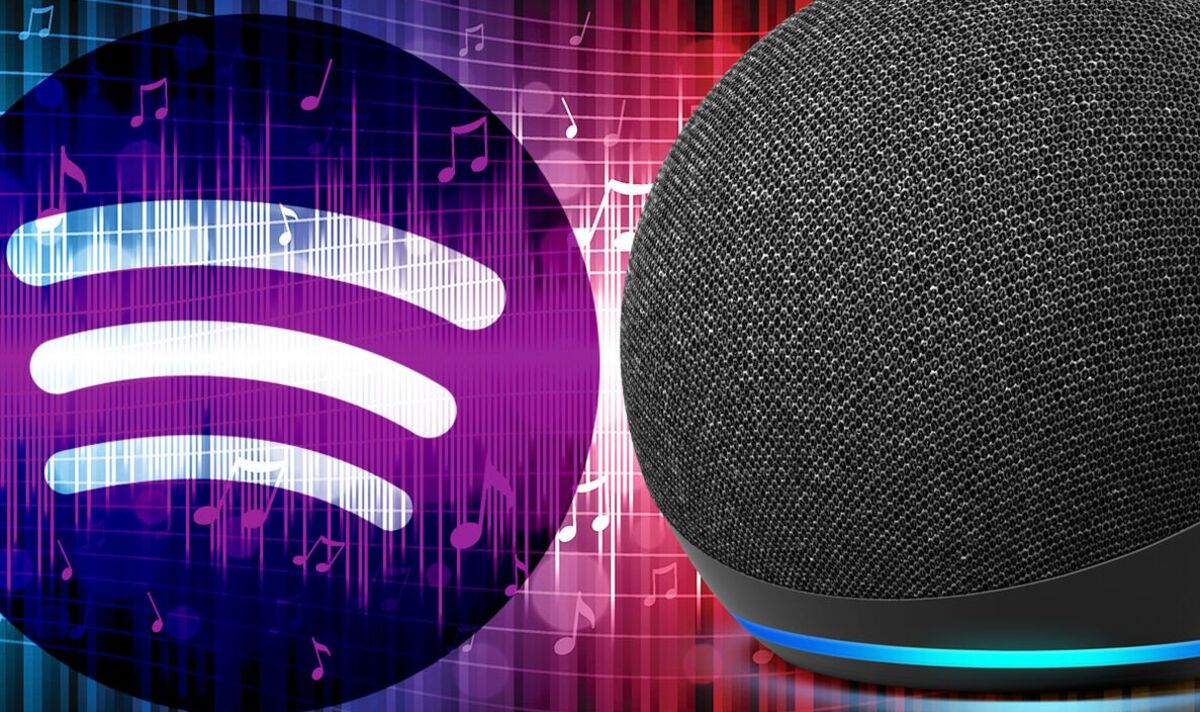
Alexa is a jack of all trades, but Amazon’s digital assistant can also help you listen to music via Pandora, Spotify, and other streaming services on your Echo device. Let’s explore listening to music on your Echo.

Your Amazon Echo possesses various skills, but its ability to play music is most useful and enjoyable. You can listen to music in various ways, though the process differs depending on whether you want to hear your own media library or stream songs from a specific service.

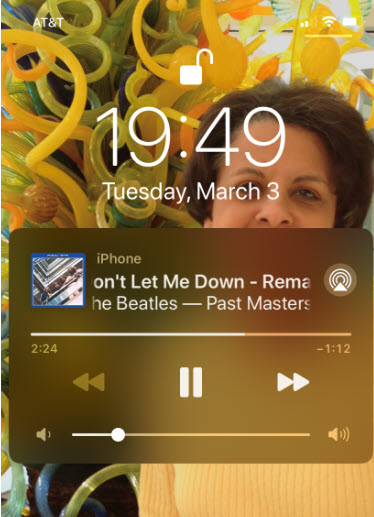
Amazon does not make it easy if you are looking to listen to music that you own, though it’s still doable. Your best bet is to stream music from your phone to your Echo over Bluetooth.

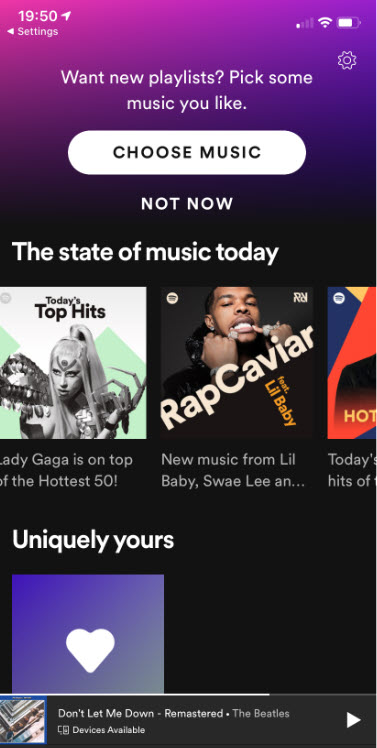
The simplest way to play music on your Echo device is to listen through a music streaming service. By default, your Echo will link to Amazon Music, or Amazon Music Prime if you are a Prime member. You can also connect to other popular music services and wirelessly stream songs directly from your mobile device.

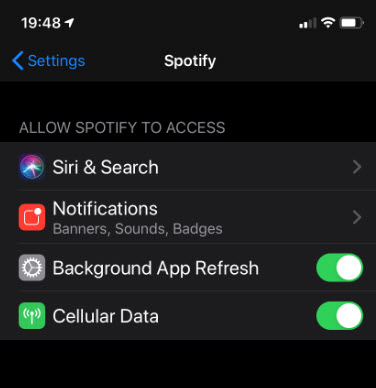
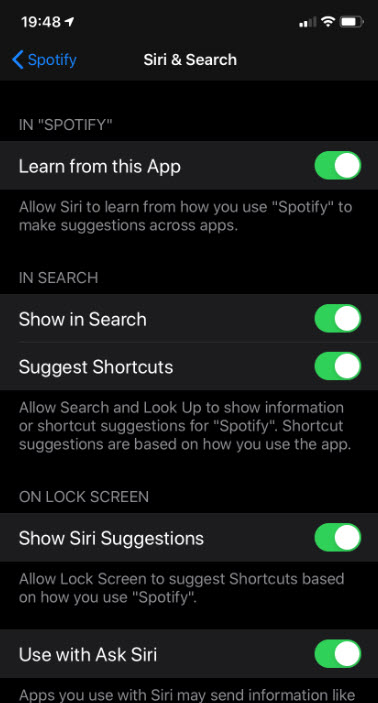
After you set up your Amazon Echo, you can link your favorite music services, including Amazon Music, Apple Music, Deezer, iHeartRadio, Pandora, SiriusXM, Spotify, Tidal, TuneIn, Vevo, and Global Player. They all need an account with each one before accessing it through your Echo.

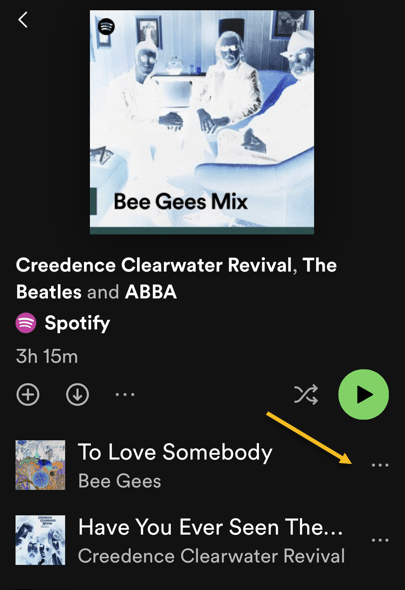
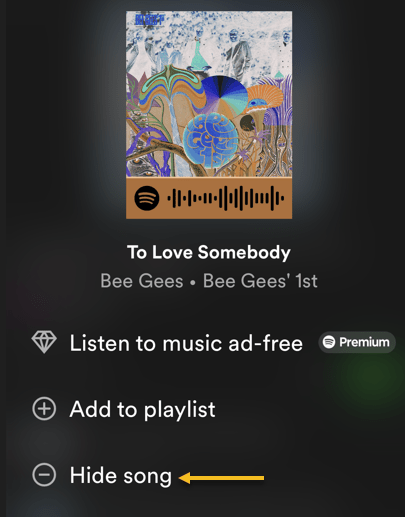
While most of these services have premium subscription options, you do not need to pay to play music through your Echo device. If the service offers a free tier, you can still listen (in a limited capacity). Refer to the below image:

Echo 1
Available Echo services

First, open the Alexa app on your mobile device to start playing music through your service of choice.

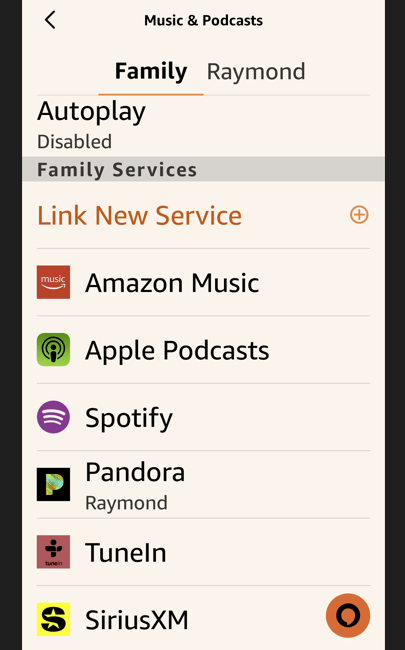
Next, tap More > Music & More, then swipe down the screen to the Link New Service section

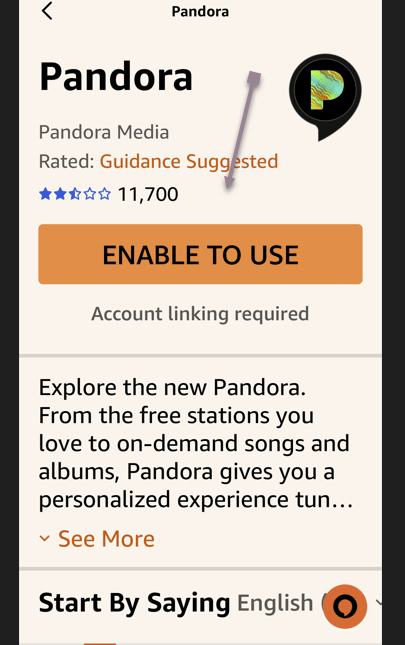
Now, tap the service name (we are selecting (Pandora), you want to add and choose Enable to Use. See the below image:

Echo 2
Enabling a service (Pandora)

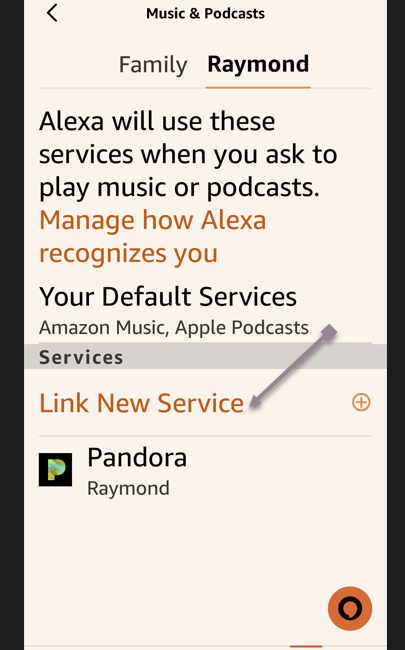
Alternatively, tap the settings gear at the top right of the Music & More screen and tap Link New Service to see all the available services you can add. See the following image:

Echo 3
Selecting to link a new service (Pandora)

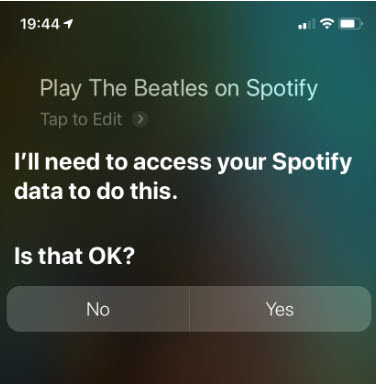
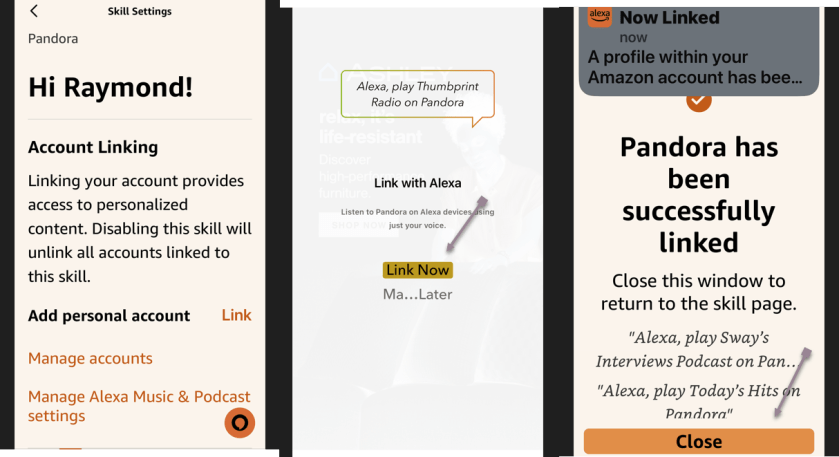
Next, sign in to that service and agree to let Alexa access your data. Refer to the below image:

Echo 4
Successful linking a new service (Pandora)

Now, after you finish adding your services, scroll to the bottom of the Music page in the Alexa app. You should see all the new services you previously added. To start playing music, you can open a streaming app and select your Echo as the destination to begin listening.

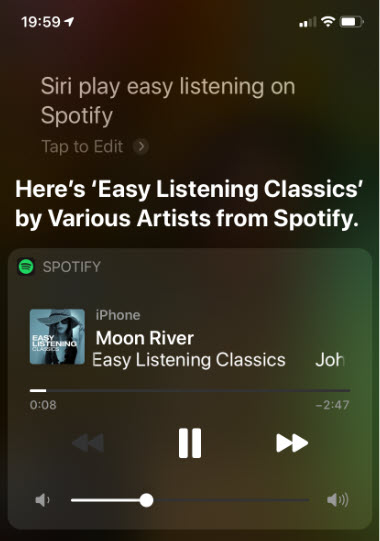
You can also ask your Echo to play music by specifying the name of the service. For example, you could say something like “Alexa, play the Rolling Stones from Apple Music,” or “Alexa, play country music from Pandora“.

You must set one as the default to avoid specifying a service in your command. You can do this for both music and podcasts. First, head back to the Music & More screen in the Alexa app, tap the Settings icon at the top, and then select Default Services.

Next, tap Change next to Music and select the service you wish to set as the default for playing music. Tap Change next to Artist and Genre Stations to set default stations for a specific artist and genre. You can then tell Alexa to play music from an artist or genre, and it will play it from your default. service. See the below image:

Echo 5
Selecting to change your default services

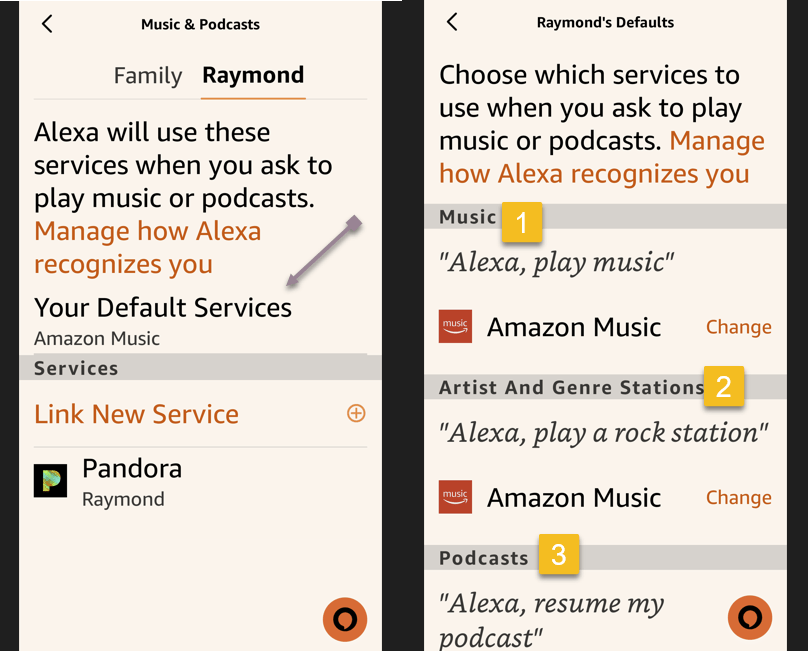
Now, tap Change next to Music to set your music default service. Then tap Change next to Podcasts to set your default podcast service. See the following image:

Echo 6
Changing your default services

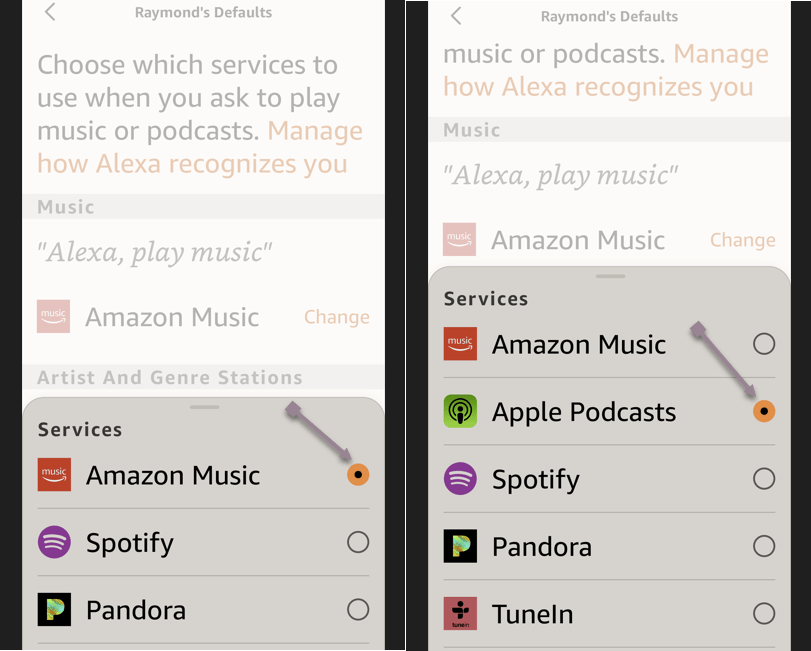
When you ask Alexa to play a song, album, artist, genre, or station, you can simply tell it what you want to play, and it will pull the music from the appropriate place without you needing to specify the name of the service. Refer to the below image:

Echo 7
Playing your selection

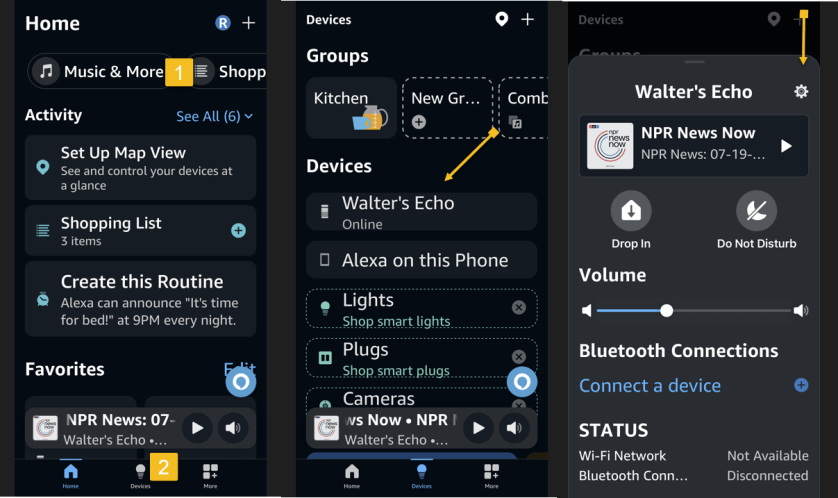
You may need to change the default speaker if you do not hear sound from your Echo device.

First, head to Music & More and tap the Groups icon in the bottom middle of the screen.

Next, tap your Echo device, then tap its Settings gear icon. See the below image:

Echo 8
Accessing Settings for your Echo device

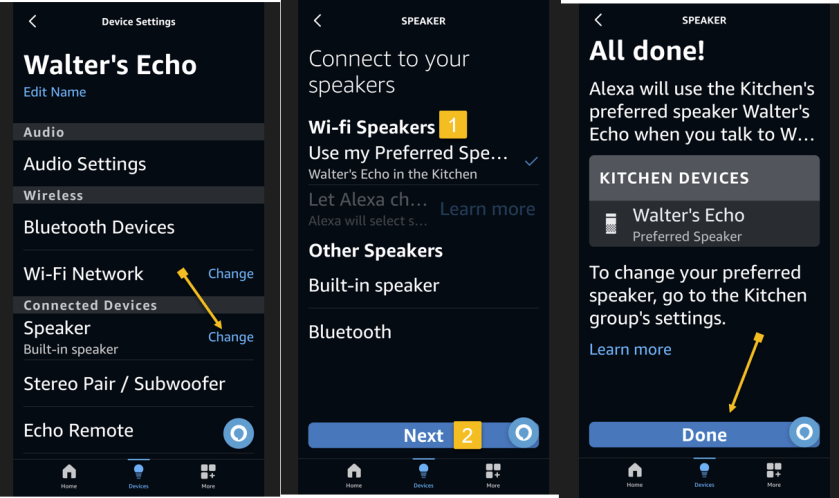
Now, tap the Change link and select your preferred speaker.

Next, tap the Next button. You will receive a message that your preferred speaker has been set. Simply tap Done to close the message. See the following image:

Echo 9
Changing your default speaker

Instead of listening to music directly from your Amazon Echo device, you can stream songs from your mobile device or computer to the speaker through Bluetooth.

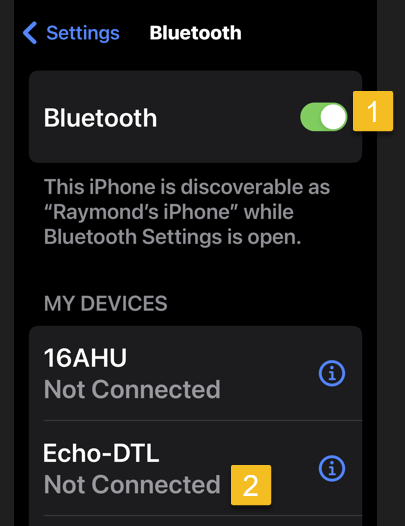
With your phone or tablet nearby, say “Alexa, pair,” and your Echo will enter pairing mode. Open the Bluetooth settings screen on your device and tap your Echo (it should appear as Echo-XXX) when it shows up. Alexa then announces the connection. Refer to the below image:

Echo 10
Choosing to connect your Echo device

Alternatively, you can pair the Echo to your mobile device through the Alexa app. Head to Devices and select the Echo you want to pair with your phone or tablet.

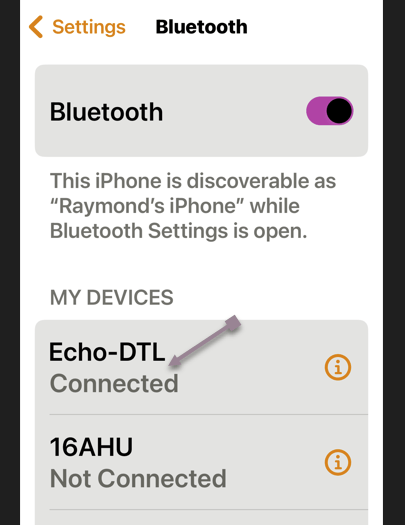
First, under Bluetooth Connections for that device, tap Connect a device. Choose your device, and your Echo is connected. See the below image:

Echo 11
Your Echo device is connected

Now, the audio will go through your Echo device when you play music from your phone or tablet. You can then control playback from your mobile device or Alexa.

To disconnect your Echo from your mobile device, say, “Alexa, disconnect from [name of device].”

You can always reconnect the device by saying “Alexa, connect to [name of device]”.

Disclaimer

Technology is always changing. Rarely is there static tech for smartphones and desktops. Thus, the contents of this post are only valid at the time of writing. Blog posts older than six months may have directions incompatible with your device or OS. Hopefully, older post content will continue to work as advertised. Thank you for reading TechSavvy.Life for Technology at Work For You.

“In the real world, the smartest people are people who make mistakes and learn. In school, the smartest people don’t make mistakes.”

Robert T Kiyosaki

That’s it. Please feel free to share this post! One way to share is via Twitter.

Just click the Tweet icon below. This will launch Twitter where you click its icon to post the Tweet.

Checkout TechSavvy.Life for blog posts on smartphones, PCs, and Macs! You may email us at contact@techsavvy.life for comments or questions.

Was this post helpful? We would love to hear your comments. Do you have a computer or smart device tech question? I will do my best to answer your inquiry. Just send an email to contact@techsavvy.life. Please mention the device, app, and version you are using. To help us out, you can send screenshots of your data related to your question.

You can access the E-book from a Kindle device, or the Kindle App for a desktop or smartphone. The apps are free.

The author’s Vietnam eBook on the Battle for Tra Bong Vietnam: Events and Aftermath

How to Hide and Unhide Spotify Songs

If you do not wish to listen to certain songs or hide those songs so they do not play when you are using Spotify, we will show you how. You can unhide your songs in the future if you change your mind.

RAYMOND OGLESBY @RaymondOglesby2
September 12, 2023

This is for iPhone and Android. Screenshots are from iPhone 14 Pro running iOS 16+ and Windows 10

If you do not wish to listen to certain songs or hide those songs so they do not play when you are using Spotify, we will show you how. You can unhide your songs in the future if you change your mind.

Note: You can not hide songs in your own playlists. If you do not want a specific song in your playlist, simply remove it from the list.

Hide Songs on Spotify

To hide a song so it does not play when you are listening to your music, use the following steps in the Spotify app on your iPhone or Android phone.

First, launch Spotify on your phone and find the music track to hide. Then, next to the song, tap the three dots (the Menu icon). Refer to the below image:

Spotify 1
Accessing the Menu of the song to Hide

Next, in the menu that opens, select Hide Song. See the below image:

Spotify 2
Selecting the option to Hide your song

Now, Spotify will immediately hide your song in your list. See the following image:

Spotify 3
Your hidden song is greyed out

Unhide Songs on Spotify

If you have changed your mind about a song and want to unhide that song, follow the following steps to see your hidden songs and unhide them.

First, open Spotify on your phone. Then, find the playlist or album where you hid your song.

Next, find your hidden song (which will be grayed out), and next to that song, tap the three dots (the Menu icon). Refer to the below image:

Spotify 4
Accessing the Menu to unhide a song

Now, in the open menu, select Hidden. See the below image:

Spotify 5
Selecting the option to unhide your song

Now, Spotify will unhide your song, allowing you to tap and play it. See the following image:

Spotify 6
Your hidden song is now visible


For Desktop Only

You can not hide songs on Spotify’s desktop and web versions. Only the platform’s mobile app allows you to hide and unhide songs, as of this writing.

If you have an unwanted song in your playlist (not a Spotify sample playlist), remove it from your list and the app will not play it. To do that, access your playlist and find that song. Next to the song, click the three dots (the Menu icon) and choose Remove from this playlist. See the following image:

Spotify 7
Selecting to remove your song on the desktop

Spotify will remove the selected song from your playlist, and you are all done.

Disclaimer

Technology is always changing and rarely is there static tech for smartphones and desktops. Thus, the contents of this post are only valid at the time of writing. Blog posts older than six months may have directions incompatible with your device or OS. Hopefully, older post content will continue to work as advertised. Thank you for reading TechSavvy.Life for Technology at Work For You.

Quote For the Day

“Motivation is what gets you started. Habit is what keeps you going.

Jim Rohn

Tweet Info

That’s it. Please feel free to share this post! One way to share is via Twitter.

Just click the Tweet icon below. This will launch Twitter where you click its icon to post the Tweet.

Checkout TechSavvy.Life for blog posts on smartphones, PCs, and Macs! You may email us at contact@techsavvy.life for comments or questions.

I Would Love to Hear From You

Please feel free to leave a comment. I would love to hear from you. Do you have a computer or smart device tech question? I will do my best to answer your inquiry. Just send an email to contact@techsavvy.life. Please mention the device, app, and version you are using. To help us out, you can send screenshots of your data related to your question.

Author’s E-Book

You can access the e-book from a Kindle device, the Kindle App for the desktop or smartphone, which is a free app.

The author’s Vietnam eBook on the Battle for Tra Bong Vietnam: Events and Aftermath

How to Use Spotify with Siri on iPhone

If you’re running iOS 13 or higher, you can directly ask Siri to play your favorite playlist, song or an artist on Spotify. iOS 13+ expands third-party support for Siri which now includes Spotify. This means you can get Apple Music style playback controls with Siri on your iPhone. Here’s how to set it up.

If you already have the Spotify app installed, and you’re logged into your account, all you have to do is start talking to Siri. Say “Play the Beatles on Spotify”.

This is for iPhone or iPad running iOS 13 or above

Dilbert Goals
Copyright Scott Adams, Inc./Distributed by Universal Uclick for UFS

Enable Spotify Access to Siri

As this is your first time using Spotify with Siri, it will ask for permission to access your Spotify data. Simpily tap the Yes button. Refer to below image:

Siri and Spotify 1
Giving permission to access Spotify

Spotify will start playing the music you requested. You’ll see a Now Playing widget playback control on the Siri screen.

You can also control the Siri access for Spotify from your iPhone.

  • Open Settings
  • Select Spotify
  • Select Siri & Search. See following image:
Siri and Spotify 2
Accessing Siri and Search

At the bottom of the screen, toggle on the Use with Ask Siri feature to enable Siri access for Spotify. Refer to below image:

Siri and Spotify 3
Toggle on the Use with Ask Siri

Control Spotify on Using Siri

Once Spotify is connected to Siri, you can use it to play any song, album, artist or playlist. You can also get specific about albums and years of release.

Below are some Spotify commands you can use with Siri:

  • Play [song name] on Spotify
  • Play [album name] on Spotify
  • Play [artist name] on Spotify
  • Play on Spotify
  • Play my liked songs on Spotify
  • Shuffle on Spotify
  • Play the latest album by [artist name] on Spotify
  • Play [genre] music on Spotify

Other than these, you can use the standard playback controls in Siri as well. For instance, you can ask Siri to play, pause, skip, repeat, shuffle or go to the previous track. Refer to below image:

Siri and Spotify 4
The playback control

On your iPhone, you can also open Spotify and see what is playing at the bottom of the screen. See below image:

Siri and Spotify 5
Accessing Spotify to see what is playing

The following image is an example of using the Spotify command Play Easy Listening on Spotify:

Siri and Spotify 6
Listening to Easy Listening on Spotify

For now, Siri only supports playback features in Spotify. You can’t use Siri to interact with the app. For instance, you can’t search for something like a song in Spotify using Siri. You also can’t use Siri to add a song to a playlist either.

I Would Like to Hear from You

Please feel free to leave a comment. I would love hearing from you. Do you have a computer or smart device tech question? I will do my best to answer your inquiry. Please mention the device, app and version that you are using. To help us out, you can send screenshots of your data related to your question.

The author’s Vietnam eBook on the Battle for Tra Bong: Events and Aftermath