
RAYMOND OGLESBY @RaymondOglesby2
September 16, 2025 – 5 minutes read time
Overview
Duplicate photos take up valuable storage space and make it harder to keep your photos organized. The Photos app has the perfect solution for putting an end to duplicates once and for all!
Understanding the algorithm used by the Photos app to delete duplicate photos can save you the headache of attempting to retrieve a version of a photo you wanted to keep.
Let’s explore how to automatically find duplicate photos on iPhones and merge them to delete the lower-quality image.
Why You Will Like This Tip
- Save space and declutter your Photos app by automatically merging duplicate photos.
- Keep the higher quality version of duplicated photos.
System Requirements
This tip was performed on an iPhone 14 Pro running iOS 18.6.1.
Click here to learn how to update your iPhone to the latest iOS version.
How to Remove Duplicate Photos
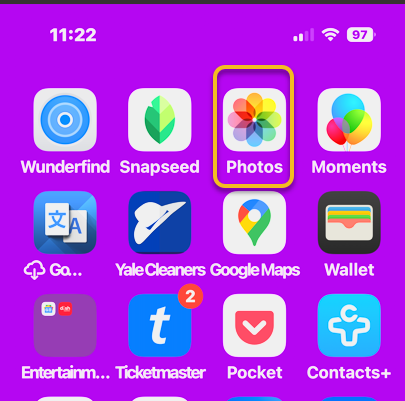
First, open the Photos app . Refer to the image below:
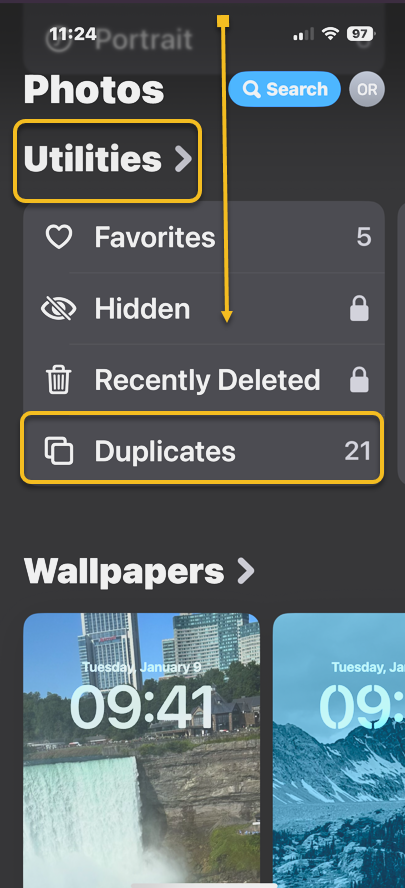
Next, scroll down until you see Utilities and select Duplicates underneath. If you do not see Duplicates as an option, you can select the Customize & Reorder button by scrolling to the bottom to get this option. See the image below:
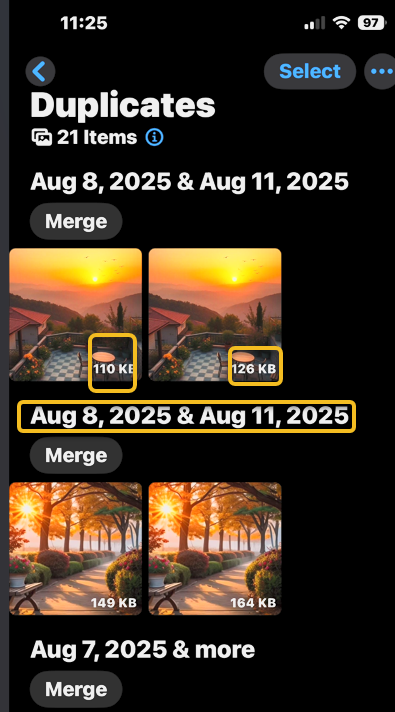
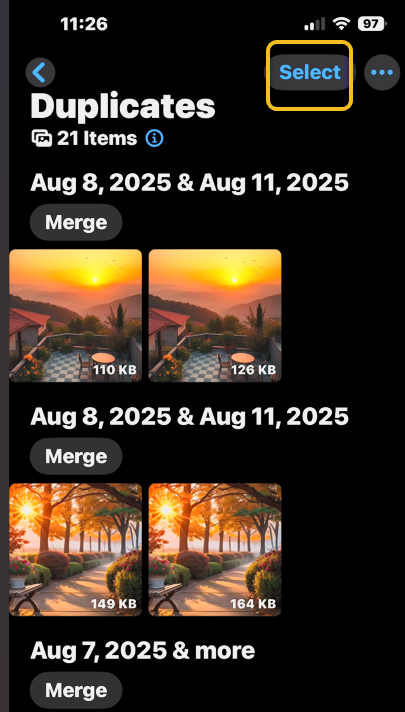
Now, you will see a list of duplicate photos, including the date you took or saved them, and the size of each image. See the following image:
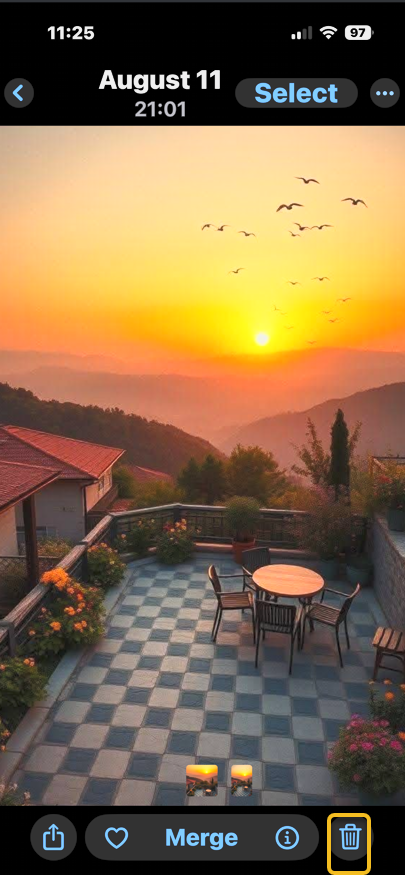
Next, you can go through them individually and tap on the one you wish to delete, then tap the Trash icon. Refer to the image below:
Now, you can also tap Select in the top right corner. See the image below:
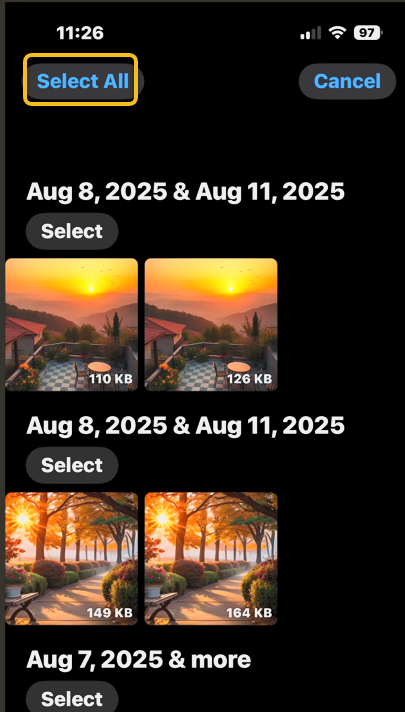
Next, you can either go through and tap the individual photos that you wish to delete so that you have more control over what you are keeping, or you can tap Select All. See the following image:
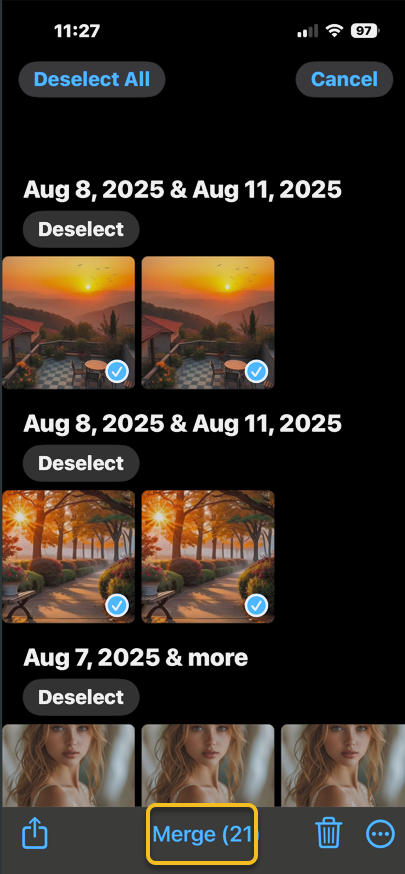
Now, if you tap Merge and confirm that you wish to merge the duplicates, it will keep the highest-quality image and relevant metadata while moving the rest to Recently Deleted. Refer to the image below:
Next, you can also go through individually and tap Merge to manually delete the duplicate. See the image below:

Now you know how to delete duplicate pictures on iPhones automatically or one by one, if you are worried about deleting something you wanted to keep, you have 30 days to restore it from Recently Deleted folder.
Note! Please keep in mind that the Photos app will identify duplicate photos of various qualities. If you just want to keep the photos on your phone and do not plan on printing them or entering photo contests, a lower-quality image might not be a problem for you. In this case, you may want to delete the higher-quality one because it takes up more storage, but otherwise, you will probably want to keep the higher-quality photo. It is also possible that one of the photos will be a Live photo while the other is not. Finally, it is possible that you edited one by blurring out sensitive information, yet it still shows up next to the unblurred one as a duplicate. If you automatically select them all and merge them, your iPhone will pick the highest-quality image with the most data. So while it should pick the best quality image, which is generally also the unedited version, because doctoring a photo lowers image quality, we cannot be sure that it will always pick the one you prefer. So keep in mind that this process may require some manual editing if you do not do it manually on a case-by-case basis.
Now you know how to find duplicate photos on iPhones and then merge them automatically or manually, all via the Photos app. Merging is a quick way to delete them and doing this helps you quickly clean up your Photos app and enjoy more storage on your phone. Before the iOS 16 update, you needed to use a duplicate picture finder app, but all subsequent software updates have included this handy feature.
Disclaimer
Technology is constantly evolving, and smartphone and desktop tech rarely remains static. Therefore, the information in this post is only accurate as of the date it was written. Blog posts that are older than six months may contain instructions that are no longer compatible with your device or operating system. We hope that the content from previous posts continues to function as intended. Thank you for reading TechSavvy.Life, where technology works for you.
Quote For the Day
“The advancement of technology is based on making it fit in so that you don’t really even notice it.”
– Mark Weiser, Chief Technologist at Xerox PARC
(X) Twitter Info
That’s it. Please feel free to share this post! One way to share is via Twitter.
Just click the Tweet icon below. This will launch Twitter where you click its icon to post the Tweet.
Checkout TechSavvy.Life for blog posts on smartphones, PCs, and Macs! You may email us at contact@techsavvy.life for comments or questions.
Tweet
I Would Like to Hear From You
We value your feedback! Was this post helpful? Please share your comments with us. If you have a tech question related to your computer or smart device, feel free to reach out. Just send an email to contact@techsavvy.life, and be sure to include the device, app, and version you are using. To assist us further, you can also attach screenshots related to your inquiry.
The author’s Vietnam eBook on the “Battle for Tra Bong Vietnam: Events and Aftermath” can be accessed from a Kindle device or the Kindle App for a desktop or smartphone. The apps are free.
