
RAYMOND OGLESBY @RaymondOglesby2
March 3, 2026 – 3 minutes read time
Overview
You can share iPhone contacts (also known as a contact card) directly from the Contacts app on your iPhone, and it does not involve copying and pasting or tediously typing it out!
When you add people to your contacts, a contact card is automatically created on your iPhone for each contact so that all of the contact’s information is grouped into one place. This makes it simple to share or send a contact on iPhone. Let’s explore how to share a contact on iPhone.
Key Takeaways
- Learn how to share contacts on iPhone so you can send your own or someone else’s contact card; no more typing out numbers!
- Customize which parts of the contact card you want to share; you can leave off the email address, phone number, first name, and/or last name.
System Requirements
This tip was performed on an iPhone 17 Pro running iOS 26.2.1.
Click here to learn how to update your iPhone to the latest iOS version.
Share a Contact
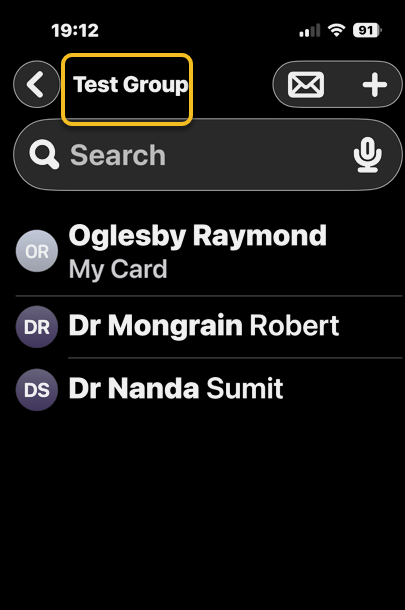
First, open the Contacts app. In our example, we are selecting a contact group from Contacts. Refer to the image below:
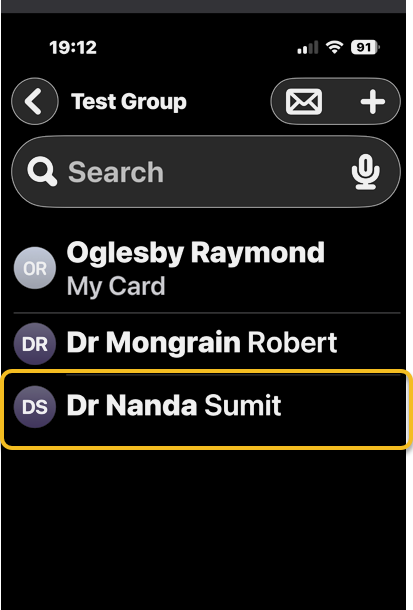
Next, tap the contact you wish to share. See the image below:
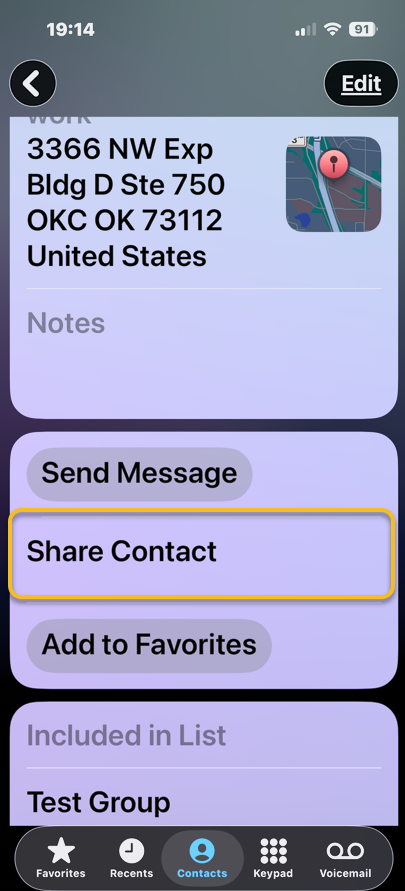
Now, tap Share Contact. See the following image:
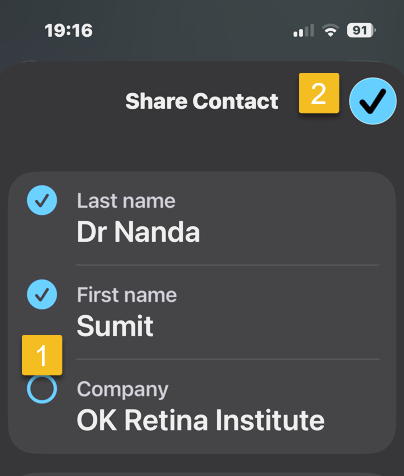
Next, tap the blue dot next to any part of the contact card you do NOT wish to share, then tap the check mark in the blue circle at upper right. Refer to the image below:
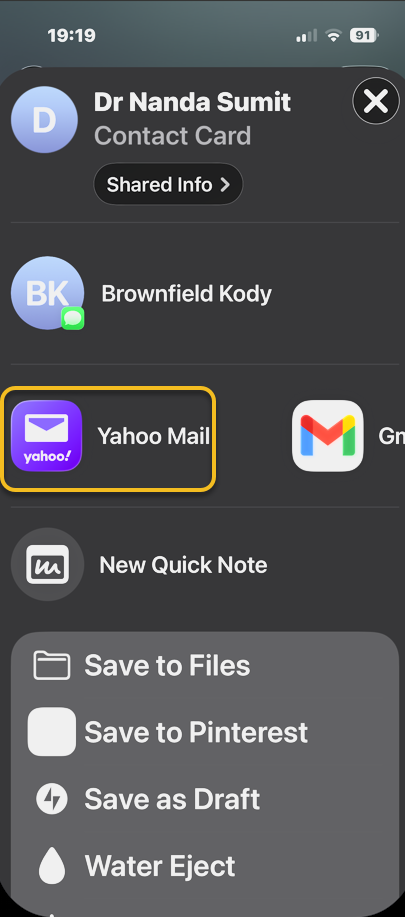
Now, tap a sharing method, such as email, text message, AirDrop, and more. See the image below:
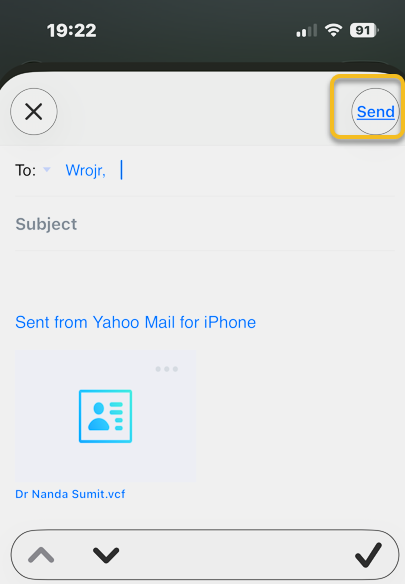
Next, choose a recipient and tap the Send icon to share the contact. See the following image:
Now you know how to send contact information on iPhone to recipients using the contact card on your phone! It’s never been easier to share a contact on iPhone.
Disclaimer
Technology is constantly evolving, and smartphone and desktop tech rarely remains static. Therefore, the information in this post is only accurate as of the date it was written. Blog posts that are older than six months may contain instructions that are no longer compatible with your device or operating system. We hope that the content from previous posts continues to function as intended. Thank you for reading TechSavvy.Life, where technology works for you.
Quote For the Day
It’s supposed to be automatic, but actually, you have to push this button.
– John Brunner
(X) Twitter Info
That’s it. Please feel free to share this post! One way to share is via Twitter.
Just click the Tweet icon below. This will launch Twitter where you click its icon to post the Tweet.
Checkout TechSavvy.Life for blog posts on smartphones, PCs, and Macs! You may email us at contact@techsavvy.life for comments or questions.
Tweet
I Would Like to Hear From You
We value your feedback! Was this post helpful? Please share your comments with us. If you have a tech question related to your computer or smart device, feel free to reach out. Just send an email to contact@techsavvy.life, and be sure to include the device, app, and version you are using. To assist us further, you can also attach screenshots related to your inquiry.
The author’s Vietnam eBook on the “Battle for Tra Bong Vietnam: Events and Aftermath” can be accessed from a Kindle device or the Kindle App for a desktop or smartphone. The apps are free.
