So, how do you fix the Windows detected a hard disk problem error in your PC? We are going to look at two ways to resolve this error.
Note! It is recommended to exit all running programs. Also, you may want to backup your important documents and files to an external drive or cloud storage.
This for for the Windows 10 operating system, other versions will be similar.
Related
How to Check Your Hard Drive Status
To Tweet about this post, click the Tweet icon below to launch Twitter, then click its Tweet icon to post.
Check out TechSavvy.Life for their blog posts on smartphone apps, PCs. and Macs!
Tweet
Open a Command Prompt
First, we have to open an administrative Command Prompt by using the Start menu. Click Start, type command in the Cortana search bar and you’ll see the Command Prompt menu options on the right. Now, just click the Run as administrator option. Refer to below image:

If you get the User Account Control dialog box, just click the Yes button.
Using the System File Checker Utility
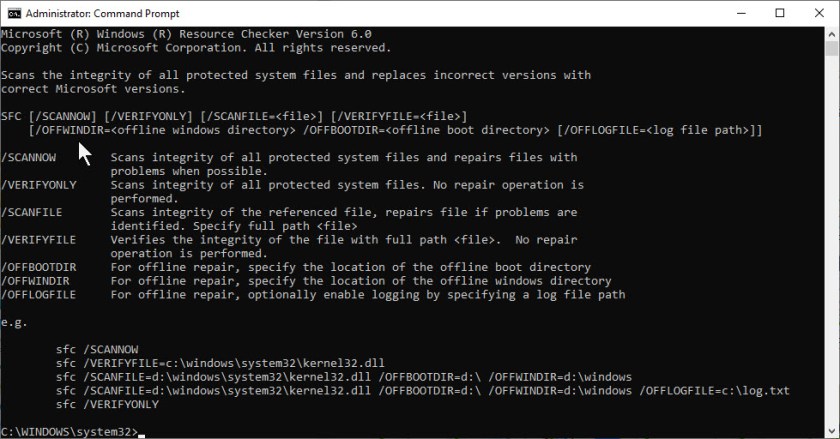
To preview the available options in using this utility, type in sfc help and press Enter. See below image:
We are going to opt in for the scannow option. Now, type in sfc /scannow and press Enter. This may take a little while, so be patient. Before you close this Command Prompt window, ensure that it is 100% complete. See following image for a result similar to yours:
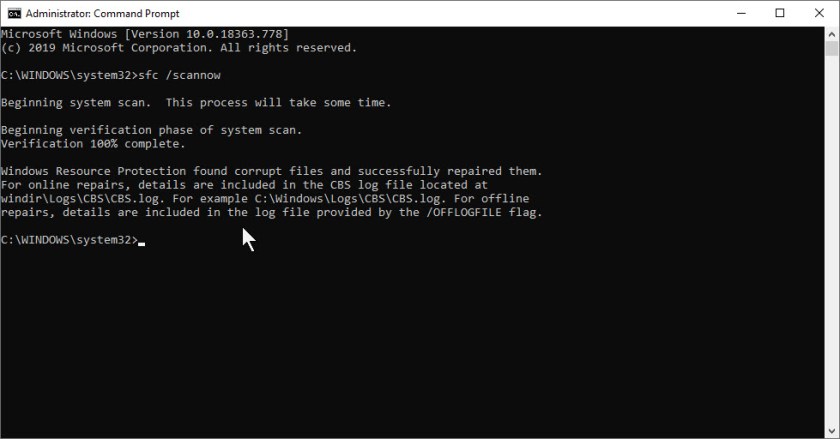
This option will scan all protected system files and replace all corrupted files with a backup copy. After the process is 100% finished, exit the Command Prompt, restart your machine and see if the problem is resolved. Notice, I had corrupted files that the utility resolved.
If you are still experiencing problems, lets try the second method to fix the error.
Using the Check Disk Utility
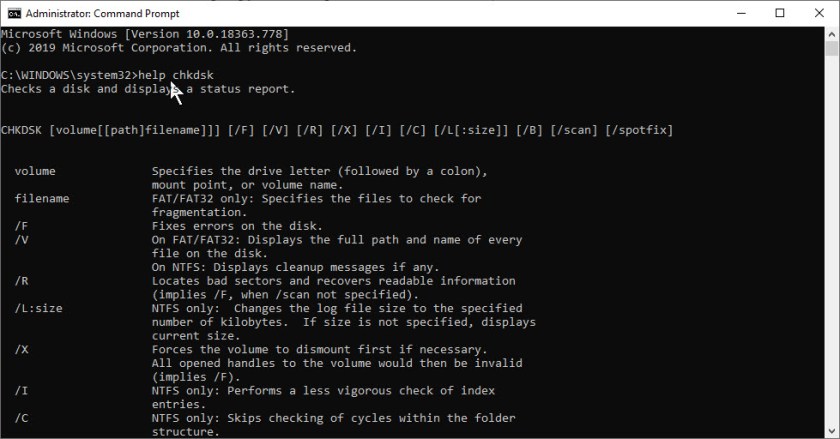
To preview the available options in using this utility, first open the Command Prompt and select the Run as administrator option as noted in the first image above. Then type in help chkdsk and press Enter. See below image:
First, lets scan your main volume, or drive C. Type in chkcsk C: /scan and press Enter. Refer to below image for results similar to yours:

If the scan shows no errors, then you are finished and your hard drive should be funcational. If not, we are going to opt in for several options as follows:
/f – fixes errors on the selected volume
/r – locates bad sectors and recovers readable information
/x – forces the volume to dismount first if necessary. Imples using the /f option.
Now, type in chkdsk C: /f/r/x and press the Enter key.
You may receive the following screen denoting that chkdsk needs to run after a restart. If so, respond with a y, exit the Command Prompt and restart your device. See below image:

If you need to check and fix a hard drive problem on other partitions, replace the drive letter C: with those partition letter (s).
Getting Rid of the Hard Disk Failure Message
Sometimes the message Windows detected a hard disk problem pops up even when there are no errors with the hard disk. In order to not be annoyed by this, you can follow the steps below to disable it.
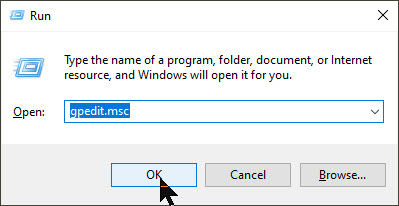
First, open the Run dialog box by pressing Windows+R key. Then type in gpedit.msc and click OK. Refer to below image:
Next, head to Administrative Templates > System > Troubleshooting and Diagnostics > Disk Diagnostics. Then double-click on Disk Diagnostics: Configure execution level on the right pane. See below image:

Now, click on Disabled option and click OK. See following image:

Finally, exit the dialog box and restart your PC. Your hard drive should now be fixed. If the error message no longer appears, navigate back to the image above and click the Enabled option, then exit and restart your machine. Congratulations, you are finished. Please feel free to share this post! One way to share is via Twitter, as mentioned below.
I hope you have found this post helpful. If so, click the Tweet icon below. This will launch Twitter where you click its icon to post the Tweet.
I have found TechSavvy.Life blog posts extremely helpful. Check them out for posts on smart phone apps, Macs and PCs!
Tweet
The following is a previous Twitter feed so you can view how a Tweet will be displayed.
I Would Like to Hear From You
Please feel free to leave a comment. I would love hearing from you. Do you have a computer or smart device tech question? I will do my best to answer your inquiry. Please mention the device, app and version that you are using. To help us out, you can send screenshots of your data related to your question.