Take Control of Your Social Media Feed with These Tips

Social media feeds are controlled by algorithms that track user interactions to serve content. Although helpful, they can misinterpret preferences. To regain control, users can reset their watch history on YouTube, adjust settings on Facebook and Instagram, and modify interests on LinkedIn and Twitter, or even create new accounts for a fresh start.

RAYMOND OGLESBY @RaymondOglesby2
October 15, 2024 – 9 minutes read time

This is for devices using Social Media. Screenshots are from iPhone 14 Pro running iOS 17.6.1

Click here to learn how to update your iPhone to the latest iOS version.

Almost everything you see in your social media feeds today is governed by algorithms. Think of them as the digital rules and intelligence that social media companies use to deliver a steady stream of interesting content to your eyes. They are invisible conductors that note everything you like, click, or comment on and use that information to serve up more content you likely engage with.

Algorithms are far from perfect, though. Sometimes, they pick up on the wrong signals and stuff your feed with things you do not care about. If you find yourself increasingly uninterested in the posts you see in your feed, it’s often possible to reset those algorithms. Doing it correctly can completely change what your social networks show when you log in. 

Let’s explore how to take back control of your social media.

YouTube feeds you content based on what you watch, search for, and subscribe to. As YouTube says on some pages (accessible below), “Keeping your history makes YouTube more personal.” But familiarity can breed contempt. 

First, reset your Watch History. On the mobile app:

Tap your name > Cog icon > Settings > Manage All History

Refer to the below image:

YOUTUBE WATCH HISTORY IMAGE
Manage YouTube history

From here, you have a few options. You likely have Auto-Delete (Off) set up; click that, and you can tell YouTube to delete the tracked history of anything older than 36, 18, or 3 months. The shorter the time frame, the bigger the reset to your suggestions will be. 

Alternatively, click where it says DELETE with a down arrow to access a menu to delete what you have seen today, in a custom range of time, or everything for all time. That final one is the nuclear option. Your suggestions will be totally fresh. 

While here, click the Saving Your YouTube History link to change what YouTube saves. You may not want it to save searches because you may look for some wacky stuff. Or set it to turn off any YouTube history saving whatsoever. Scroll down the page to YouTube Customize Your Feed Feedback and click Delete to get rid of videos you specifically picked for your home feed in the past. 

(On the desktop, click your avatar at the upper right and select Your Data in YouTube. Scroll down to YouTube Watch History and toggle the On button to Off so your history storage is paused. Click Manage your YouTube Watch History to access the menus as mentioned above, like Auto-Delete).

Clicking “Not Interested” under select videos can also impact the algorithm. 

For a genuinely full reset, unsubscribe to every YouTube channel you follow.

On mobile, click Subscriptions at the bottom, then click All at the top, and you will see the full list. Click the bell icon to the right of each for a menu that includes Unsubscribe. (On Desktop, use Subscriptions> Manage to get to the list with the menus.)

Facebook’s main display is called the Feed. It features updates, photos, videos, and more from people, Pages, and groups you follow.  posts based on what it believes you will like. 

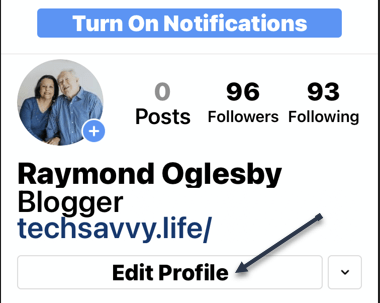
Thankfully, there are plenty of ways to adjust the Facebook Feed. Click your avatar profile pic at the upper right on the desktop and go to 

Settings and Privacy > Feed

You will see options here to manage your favorites (people/groups you want to see the most), unfollows (people you do not want to dump, but do not want to see as much of), snoozes (people you want to temporarily unfollow), and reconnect (it lets you turn off unfollows). See the below image:

Facebook Feed Settings
Manage Facebook feed

You can also opt to avoid looking at Facebook’s main page. Go right to Feeds (via the left-hand navigation), and then you can view only the Favorites, Friends, Groups, or Pages you want to see. 

As you use Facebook daily, be sure to perform hides, snoozes, and unfollows on posts as you encounter them to “train” the algorithm and steer it toward the kinds of content you actually want to see. 

You also can and should go into Facebook Ad Preferences and change things so you can impact the advertising in your Feed. You can also do this with ads as they pop up. Click the X to hide an ad immediately, or use the three-dot menu to hide or report it. You can also limit advertising topics you see by going to:

Settings & Privacy > Settings > Account Center > Ad Preferences > Customize ads

then click “See All” next to Ad Topics

You can use Page Moderation to block certain words or phrases so they do not appear, at least in the comments. Go to:

Settings > Followers and Public Content > Hide comments containing specific words

You choose the list of words to block.  

Since everything you see on Facebook is tied entirely to who you friend and follow, a complete reset would require you to unfriend everyone. Starting a new profile is more manageable. This is also pretty easy; click your profile pic to see a button that says See all profiles. In the following menu, it shows + Create new profile or Page. A personal profile is just for individuals, but you can make a new one to get a fresh, clean feed. A page is more for a business or organization, that multiple people can control. No matter what you create, you can easily switch back and forth between the profiles/pages. See the following image:

FACEBOOK NEW PROFILE.
Create Facebook profile

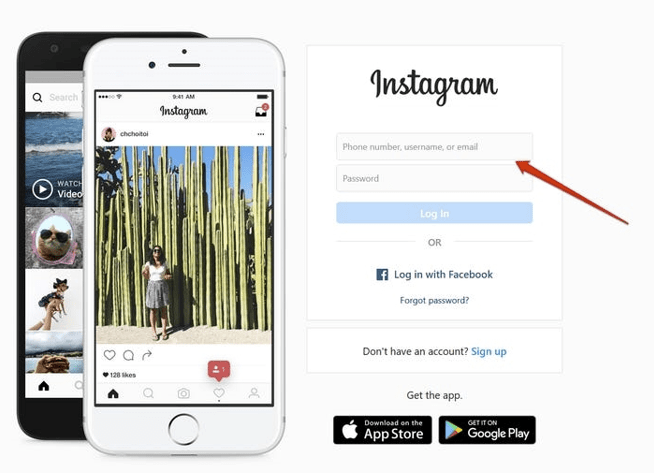
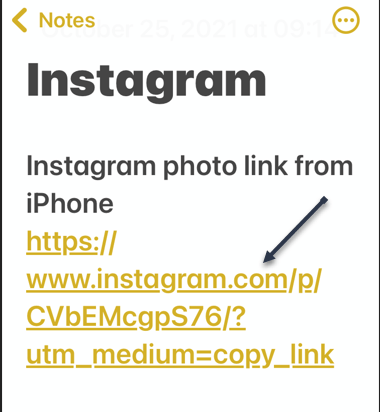
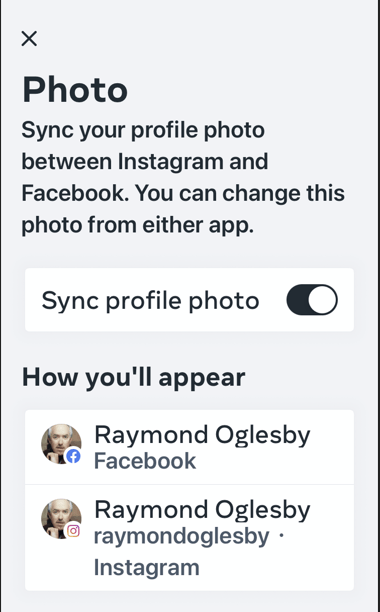
Instagram is part of Meta, just like Facebook, so many of the same rules we listed above apply. For example, the Ad Preferences/Ad Topics are similar. Access them by clicking:

Menu > Settings > Account Center > Ad Preferences

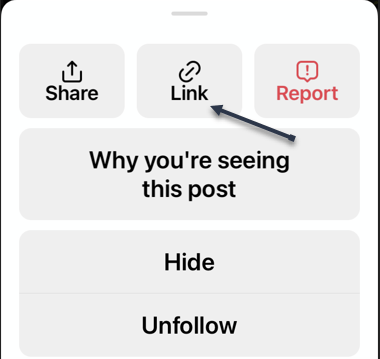
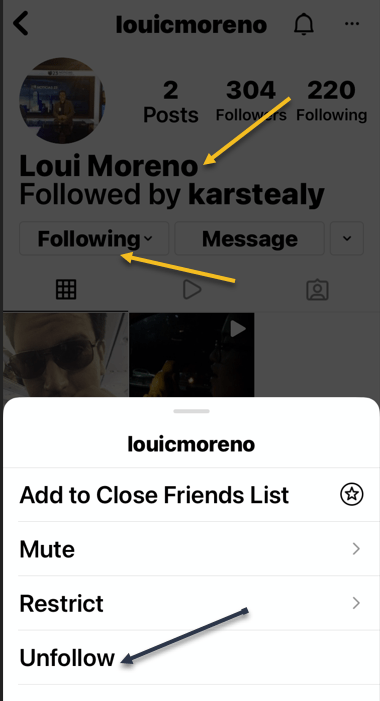
Again, there’s no direct way to reset the algorithm, but you can manipulate things by clicking the three-dot menu on posts to set the person as an unfollow or to add to favorites. Click into the account of someone you see, and on the following menu, you can add a person as Close Friend, Favorite, Mute (Posts and/or Stories), Restrict (which limits interaction without a complete block), or Unfollow.

Under Settings, you will find Muted accounts, Blocked accounts, Close Friends, and other lists you can change as desired. 

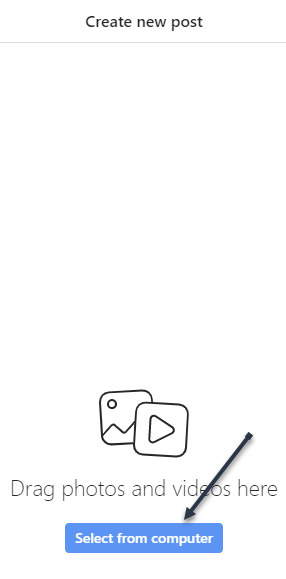
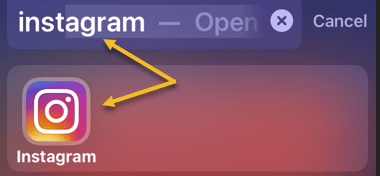
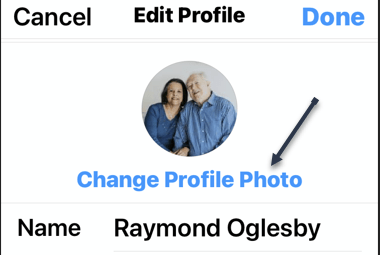
The best reset is to open a new account. You can do that by logging out of Instagram and creating a new user profile. After that, log in to either account, go to:

Settings > Account Center > Accounts > Add Account

and log into the second one. You can link the two accounts (or even a Facebook account) and switch between them. Remember, if you follow all the same people on the new account, it will look like the previous one. 

Twitter gives you so little control over your feed that if you want to reset the type of content that the platform serves you, your best bet is to start a totally new account. If that’s a bit too drastic for you, try to adjust your existing feed by going to

Settings & Privacy > Privacy and Safety > Content You See

This will let you uncheck topics and interests the service believes you are into. Sadly, you can not uncheck them all at once. Also, under Privacy and Safety, scroll down to Ads Preferences, and uncheck all that. 

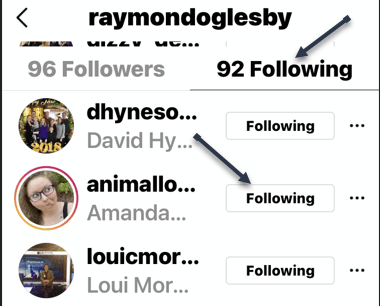
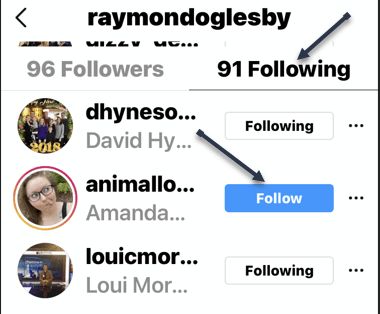
When using the service, click the 3-dot ellipsis menu on any ads you do not like to block them. Same with anyone you follow that you have lost interest in. If you want to really get rid of everyone you follow to start fresh, go to Following and click the Following button (it will turn to a red Unfollow) next to every name to unfollow; this will take a while if there are a lot of them. If you do not want to do it manually, there’s a Chrome extension called X (Twitter) Mass Unfollow.

Microsoft’s social network for businesspeople (or those looking for work) does a pretty good job of just showing you the people you follow, but likes to sneak in a few ads based on what it thinks you like. Under your profile, pick:

Settings & Privacy > Advertising Data > Interests and traits

uncheck anything you are not into. Or turn them all off, but of course, then your ads are less relevant.  In fact, go through all the “Data collected on LinkedIn” and “Third-party data” entries. If you turn them all off, you will get a totally new feed, albeit probably irrelevant.

Source: Social Media platforms

Technology is always changing. Rarely is there static tech for smartphones and desktops. Thus, the contents of this post are only valid at the time of writing. Blog posts older than six months may have directions incompatible with your device or OS. Hopefully, older post content will continue to work as advertised. Thank you for reading TechSavvy.Life for Technology at Work For You.

“Proverbs are all very fine when there’s nothing to worry you, but when you’re in real trouble, they’re not a bit of help.”

LM Montgomery

That’s it. Please feel free to share this post! One way to share is via Twitter.

Just click the Tweet icon below. This will launch Twitter where you click its icon to post the Tweet.

Checkout TechSavvy.Life for blog posts on smartphones, PCs, and Macs! You may email us at contact@techsavvy.life for comments or questions.

Was this post helpful? We would love to hear your comments. Do you have a computer or smart device tech question? I will do my best to answer your inquiry. Just send an email to contact@techsavvy.life. Please mention the device, app, and version you are using. To help us, you can send screenshots of the data related to your question.

The author’s Vietnam eBook on the “Battle for Tra Bong Vietnam: Events and Aftermath” can be accessed from a Kindle device or the Kindle App for a desktop or smartphone. The apps are free.

The author’s Vietnam eBook on the Battle for Tra Bong Vietnam: Events and Aftermath

Threads the New Social Media App

Meta, formerly known as Facebook, has made a history of copying features from other platforms. This time, Meta has launched Threads, a social media app connected to Instagram that works more like Twitter and should eventually connect to Mastodon.

RAYMOND OGLESBY @RaymondOglesby2
July 18, 2023

As of this writing, We have reached 50,000 views in 487 posts!!!

This is for devices that use social media

Meta, formerly known as Facebook, has made a history of copying features from other platforms. This time, Meta has launched Threads, a social media app connected to Instagram that works more like Twitter and should eventually connect to Mastodon.

Meta, as the maker of Facebook, Instagram, and WhatsApp, has been after Twitter for many, many years. The company attempted to buy Twitter back in 2008, but that did not work out. Last year, Elon Musk acquired Twitter, and then promptly ran it into the ground. That has led to a surge in popularity for Twitter-like platforms, and now Meta’s app is live.

What Is Threads

Threads is a micro-blogging platform that looks and feels just like Twitter, letting you post texts up to 500 characters. This is almost twice Twitter’s 280-character standard limit, but still just enough for posts to not look like so much text. The platform itself is heavily linked to Instagram, and if you have an Instagram account, you can sign up for Threads with a couple of taps. All handles are pre-reserved; your username on Instagram will be your username on Threads. Refer to the below image of Threads:

Threads 2

Threads is actually seeing plenty of adoption, with the platform getting up to 20 million users within the first hours of launch. However, many of those accounts are brands instead of actual people. Instagram’s user base is in the billions, so we can only expect this number to keep increasing as time passes.

As it keeps growing, we can also expect a number of other changes, too. Threads is supposed to play nice with Mastodon and the Fediverse, and it will be getting ActivityPub support down the road. The exact degree to which Mastodon and Threads will be interoperable remains to be seen, but you will be able to follow and interact with Mastodon users from Threads. Likewise, Mastodon users will be able to follow Threads users by using their full username, such as “@john@threads.net.”

Pause Before You Download

Be aware of Threads Privacy Policy and the Dara the app collects. In our opinion, the app collects way too much data about you. This includes Data from your: Health/Fitness, Financial info, Contact info, User Content, Browsing history, Usage data, Diagnostics, Purchases, Location, Contacts, Search history, Identifiers, Sensitive data, and Other data.

In contrast, Facebook and Instagram only track Contact info, Identifiers, and Other data.

According to its Privacy Policy, you cannot delete your Threads account, until you delete your Instagram account. You can deactivate your Threads account at any time but you can not delete your Threads account without also deleting your Instagram account.

Our Summary

We recommend you wait until the Data collection and Privacy Policy issues are addressed.

If You Want to Download the App

If you want to give it a spin, Threads is now available from the Apple App Store and the Google Play Store. In the Apple App Store and Google Play Store, the app name is “Threads, an Instagram app”. There are other Threads apps, so ensure you download the correct one.

Disclaimer

Technology is always changing and rarely is there static tech for smartphones and desktops. Thus, the contents of this post are only valid at the time of writing. Blog posts older than six months may have directions incompatible with your device or OS. Hopefully, older post content will continue to work as advertised. Thank you for reading TechSavvy.Life for Technology at Work For You.

Quote For the Day

Always deliver more than expected.

Larry Page

Tweet Info

That’s it. Please feel free to share this post! One way to share is via Twitter.

Just click the Tweet icon below. This will launch Twitter where you click its icon to post the Tweet.

Just click the Tweet icon below. This will launch Twitter where you click its icon to post the Tweet.

I Would Like to Hear From You

Please feel free to leave a comment. I would love to hear from you. Do you have a computer or smart device tech question? I will do my best to answer your inquiry. Just send an email to contact@techsavvy.life. Please mention the device, app, and version you are using. To help us out, you can send screenshots of your data related to your question.

Author’s E-Book

You can access the e-book from a Kindle device, the Kindle App for the desktop or smartphone, which is a free app.

The author’s Vietnam eBook on the Battle for Tra Bong Vietnam: Events and Aftermath

How to Create an Instagram Photo Post From a PC or Mac

Instagram is primarily used on smartphones, but you can also use it in a desktop browser on Windows or Mac. For years that meant only viewing your feed and messages, but it can also be used to upload photos too.

RAYMOND OGLESBY @RaymondOglesby2
January 5, 2022

Instagram is primarily used on smartphones, but you can also use it in a desktop browser on Windows or Mac. For years that meant only viewing your feed and messages, but it can also be used to upload photos too.

As of October of 2021, Instagram added the long-awaited ability to post to Instagram from the website. You get nearly all of the same filters and editing tools that you can find in the iPhone and Android app, too. Let’s explore how this is done.

This is for Windows, PC, Mac, Linux, and Chromebook using Instagram

Dilbert and Mars
Copyright Scott Adams, Inc./Distributed by Universal Uclick for UFS

First, head on over to Instagram.com in a web browser such as Google Chrome or Safari. Sign in with your Instagram account if you are not already signed in. Refer to the below image:

Instagram 1
Signing in to your Instagram account

Next, click the plus “+” icon in the upper right-hand corner. See the below image:

Instagram 2
Selecting to add a photo

Now, click Select From Computer and choose a photo from the file manager. See the following image:

Instagram 3
Selecting a photo from your device

Next, there are a couple of options where you can adjust the Aspect Ratio, Zoom in on the photo, or Add more photos to create a slideshow. In our example, we made no adjustments. Click Next when the photo is ready. Refer to the below image:

Instagram 4
Optionally adjust your photo

Now, you can choose a Filter or make some other adjustments to the photo. Click Next when the photo looks good. In our example, we set the Filter to Juno and increased the Temperature setting. See the below image:

Instagram 5
Optional adjustments you can make

Next, write a Caption in the text box, add a Location if desired, and click Share. See the following image:

Instagram 6
Setting a caption and location

Now, you will be given a message about successfully sharing your Instagram post. Refer to the below image:

Instagram 7
Post shared message

Your photo post will now be displayed on your Instagram account. Notice the warmer color and background from the original above. See the below image:

Instagram 8
Your photo post on Instagram

You can now post photos to your Instagram feed right from your Windows PC, Mac, Linux, or Chrome OS computer. This is especially useful for uploading photos that you have transferred onto your computer,

Quote For the Day

If we keep doing what we’re doing, we’re going to keep getting what we’re getting.

Stephen Covey

You are finished. Personally, I like this feature since I have most of my photos on my computer. Please feel free to share this post! One way to share is via Twitter.

Just click the Tweet icon below. This will launch Twitter where you click its icon to post the Tweet.

Check out TechSavvy.Life for blog posts on smartphones, PCs, and Macs! You may email us at contact@techsavvy.life for comments or questions.

I Would Like to Hear From You

Please feel free to leave a comment. I would love to hear from you. Do you have a computer or smart device tech question? I will do my best to answer your inquiry. Just send an email to contact@techsavvy.life. Please mention the device, app, and version you are using. To help us out, you can send screenshots of your data related to your question.

Author’s E-book

You can access the e-book from a Kindle device, the Kindle App for the desktop or smartphone, which is a free app.

The author’s Vietnam eBook on the Battle for Tra Bong Vietnam: Events and Aftermath

How to Obtain a Link to a Photo or Video on Instagram

If you would like to share an Instagram photo or video outside the platform, you will have to get that item’s shareable link.

RAYMOND OGLESBY @RaymondOglesby2
December 16, 2021

If you would like to share an Instagram photo or video outside the platform, you will have to get that item’s shareable link. Let’s explore how to get these links from your Instagram account, on either desktop or mobile.

Note! You can not get links to photos or videos that are in a private Instagram account. For these accounts, Instagram does not offer the option to get a link.

This is for devices running Instagram

Dilbert and Security
Copyright Scott Adams, Inc./Distributed by Universal Uclick for UFS

The instructions to get a link to a photo or video on Instagram are the same for all Instagram-supported devices, including Windows, Mac, Linux, and Chromebook computers, as well as iPhones and Android smartphones.

First, open Instagram and find the photo or video for which you want to get a shareable link. At the top-right corner of that item, click or tap the three dots Menu. Refer to the below image:

Link 1
Accessing the Menu

Next, choose Link on an iPhone or Copy Link on other devices. See the below image:

Link 2
Accessing the Link icon

Now, the link to your selected photo or video on Instagram will be copied to your device’s clipboard. Use the Paste option in any text field on your device to view your link. In our example, we pasted the link to the iPhone Notes app.

Your shareable Instagram link should look something like the following image:

Link 3
Your Instagram link

You may now send this link to your friends and family. They can click or tap it to access the photo or video on Instagram.

Quote For the Day

The system is that there is no system. That doesn’t mean we don’t have process. Apple is a very disciplined company, and we have great processes. But that’s not what it’s about. Process makes you more efficient.

Steve Jobs

That was easy. Please feel free to share this post! One way to share is via Twitter.

Just click the Tweet icon below. This will launch Twitter where you click its icon to post the Tweet.

Check out TechSavvy.Life for blog posts on smartphones, PCs, and Macs! You may email us at contact@techsavvy.life for comments or questions.

I Would Like to Hear From You

Please feel free to leave a comment. I would love hearing from you. Do you have a computer or smart device tech question? I will do my best to answer your inquiry. Just send an email to contact@techsavvy.life. Please mention the device, app, and version you are using. To help us out, you can send screenshots of your data related to your question.

The author’s Vietnam eBook on the Battle for Tra Bong Vietnam: Events and Aftermath

How to Unfollow People on Instagram

On Instagram, if you do not want someone’s updates to appear in your news feed anymore, you can unfollow them in your account.

RAYMOND OGLESBY @RaymondOglesby2
December 14, 2021

On Instagram, if you do not want someone’s updates to appear in your news feed anymore, you can unfollow them in your account. Let’s explore this feature.

This is for the iPhone and Android

Dilbert and Giants
Copyright Scott Adams, Inc./Distributed by Universal Uclick for UFS

When You Unfollow Someone

Unfollowing someone on Instagram basically means unsubscribing from their profile updates. Instagram does not notify the user when you unfollow them.

Later, if you change your mind, you can always re-follow the unfollowed account. You can also remove people who follow you on Instagram.

Unfollow Using Mobile

On your iPhone or Android device, use the Instagram app to unfollow people.

First, launch the Instagram app on your phone. You can use the Spotlight Search (your first screen) to locate the app. Just enter Instagram in the search box and tap the resulting Instagram icon. Refer to the below image:

Following 1
Using Spotlight Search to find the Instagram app

Next, at the bottom of the app, tap the profile icon (the last icon in the bottom bar). See the below image:

Following 2
Selecting your profile icon

Now, at the top of your profile page, tap Following. This will display the users that you follow on Instagram. See the following image:

Following 3
Selecting the number of people you follow

Next, in the Following list, find the account you want to unfollow. Then, next to that account, tap Following. In our example, we are Following 92 people. Refer to the below image:

Following 4
Choosing a person to unfollow

Now, Instagram will remove your selected account from your Following list. The Following option is now turned into Follow, which means you have successfully unfollowed that account on Instagram and, in our example, the account changed to Following 91 persons.. See the below image:

Following 5
Unfollowing the person

Now, if you would like to unfollow someone from their profile, then on their profile, tap Following and select Unfollow from the menu that opens In our example, we tapped the profile icon for louicmoreno, selected the Following drop-down box, then chose Unfollow from the menu. See the following image:

Following 6
Unfollow a person from their profile

Quote For the Day

I have not failed. I’ve just found 10,000 ways that won’t work.

Thomas A Edison

That’s it. Please feel free to share this post! One way to share is via Twitter.

Just click the Tweet icon below. This will launch Twitter where you click its icon to post the Tweet.

Check out TechSavvy.Life for blog posts on smartphones, PCs, and Macs! You may email us at contact@techsavvy.life for comments or questions.

I Would Like to Hear From You

Please feel free to leave a comment. I would love hearing from you. Do you have a computer or smart device tech question? I will do my best to answer your inquiry. Just send an email to contact@techsavvy.life. Please mention the device, app, and version you are using. To help us out, you can send screenshots of your data related to your question.

The author’s Vietnam eBook on the Battle for Tra Bong Vietnam: Events and Aftermath

How to Make Messages Disappear in Instagram

Instagram is a popular outlet for spontaneous texts thanks to its variety of filters and options. These are also the kind of conversations you do not want others to save permanently.

RAYMOND OGLESBY @RaymondOglesby2
December 2, 2021

Instagram is a popular outlet for spontaneous texts thanks to its variety of filters and options. These may be the kind of conversations you do not want others to save permanently. Let’s explore how to make the messages disappear.

This is for iPhone and Android running Instagram

Dilbert and Alone
Copyright Scott Adams, Inc./Distributed by Universal Uclick for UFS

For creating self-destructing texts, Instagram offers a feature called Vanish Mode on its messaging service. An identical feature can be found in Facebook Messenger. Any text or media you send in Vanish Mode is automatically removed as soon as the recipient sees it.

First, make sure you have the latest version of the Instagram app on your Android or iPhone.

Next, open the Instagram app on your phone and swipe in from the left edge of the screen (or tap the text bubble button at the top right) to view a list of your messages. Refer to the below image:

Instagram 1
Selecting to view messages

Now, perform a swipe-up gesture above the text box to activate Vanish Mode. Once that’s successful, Instagram will update your chat background with a darker shade and throw in a few animations to let you know Vanish Mode is active. See the below image:

Instagram 2
Activating Vanish Mode by swiping up on a text box

Next, in Vanish Mode, you can continue to chat normally and send messages in all the usual formats, like direct stories, voice clips, and more. See the following image:

Instagram 3
You are in Vanish Mode

The difference is that once you swipe up again to leave Vanish Mode and the other person reads whatever you have sent, Instagram will delete those messages. Refer to the below image:

Instagram 4
Exiting Vanish Mode by swiping up

Now, while the recipient is free to take a screenshot of your messages in Vanish Mode, Instagram will notify you if and when they do.

Note! Instagram retains your Vanish Mode media and texts for up to an hour after they have been deleted. This is in case the recipient files a report for abuse and harassment and Instagram needs the Vanish Mode data to take action.

Quote For the Day

When you’re young, you look at television and think, there’s a conspiracy. The networks have conspired to dumb us down. But when you get a little older, you realize that’s not true. The networks are in business to give people exactly what they want.

Steve Jobs

That was easy. Please feel free to share this post! One way to share is via Twitter.

Just click the Tweet icon below. This will launch Twitter where you click its icon to post the Tweet.

Check out TechSavvy.Life for blog posts on smartphones, PCs, and Macs! You may email us at contact@techsavvy.life for comments or questions.

I Would Like to Hear From You

Please feel free to leave a comment. I would love hearing from you. Do you have a computer or smart device tech question? I will do my best to answer your inquiry. Just send an email to contact@techsavvy.life. Please mention the device, app, and version you are using. To help us out, you can send screenshots of your data related to your question.

The author’s Vietnam eBook on the Battle for Tra Bong Vietnam: Events and Aftermath

How to Change Your Instagram Profile Photo

Got a new photo and want to show it off to your Instagram followers? Instagram makes it easy to change your profile picture.

RAYMOND OGLESBY @RaymondOglesby2
November 18, 2021

Got a new photo and want to show it off to your Instagram followers? Instagram makes it easy to change your profile picture.

Unlike Facebook, you can change your profile picture without posting. There is no notification when you change your profile photo, it just changes. Let’s explore how this is done.

This is for. iPhone/iPad and Android using Instagram

Dilbert and Manager
Copyright Scott Adams, Inc./Distributed by Universal Uclick for UFS

On your iPhone/iPad or Android phone, use the Instagram app to update your profile picture.

First, launch the Instagram app on your phone. In the app, from the bar at the bottom, select the profile icon (which is the last icon in that row). Refer to the below image:

Accessing your profile

Next, on your profile screen, beneath your profile details, tap the Edit Profile option. See the below image:

Selecting Edit Profile option

Now, beneath your current profile picture, tap Change Profile Photo. See the following image:

Selecting to change profile photo

Next, from the bottom of your app, Instagram will open a Change Profile Photo or Synced Profile Photo menu.

Now, if you want to replace your profile picture with a picture saved on your phone, tap New Profile Photo in the menu. To add a photo from your Facebook profile, tap Import from Facebook.

Tip: Use the Remove Profile Photo option if you simply want to delete the current picture from your Instagram profile.

We will choose the Choose From Library option. Refer to the below image:

Selecting where to get your profile photo

Next, Instagram will open your phone’s gallery. Here, select the photo that you would like to make your profile picture on Instagram. When you select a photo, the app will display editing options that are optional. Tap Done to continue. See the below image:

Selecting your profile photo

Now, Instagram will take you to your profile page, and you will see your new profile picture there. Tap Done to continue. See the following image:

Your new profile photo

Next, if you have enabled Sync profile photo, (from Choose From Library screen above) your new photo will be synced to Facebook. Tap OK to continue. Refer to the below image:

Syncing enabled

Now, go back to the above screen and tap Manage Sync Settings. A confirmation dialog will be displayed regarding your profile photo sync between Facebook and Instagram. See the below image:

Your sync confirmation

Next, exit Instagram.

Quote For the Day

Older people sit down and ask, ‘What is it?’ but the boy asks, ‘What can I do with it?’.

Steve Jobs

That’s it. Please feel free to share this post! One way to share is via Twitter.

Just click the Tweet icon below. This will launch Twitter where you click its icon to post the Tweet.

Check out TechSavvy.Life blog posts on smartphones, PCs, and Macs! You may email us at contact@techsavvy.life for comments or questions.

I Would Like to Hear From You

Please feel free to leave a comment. I would love to hear from you. Do you have a computer or smart device tech question? I will do my best to answer your inquiry. Just send an email to contact@techsavvy.life. Please mention the device, app, and version you are using. To help us out, you can send screenshots of your data related to your question.

The author’s Vietnam eBook on the Battle for Tra Bong Vietnam: Events and Aftermath