If you want to take a screengrab on your iPhone you may be thinking you have to press the Up Volume and Side Button at the same time. This was the way ever since Apple introduced the iPhone X. But with iOS 14 and later, there’s a new way and it’s extremely handy.
You can now take a screenshot just by tapping its back, thanks to a new accessibility feature called Back Tap, Let’s explore how to set up this feature.
How Does This Work
Back Tap, first introduced in iOS 14, uses the accelerometer in an iPhone 8 or later to detect if you have tapped on the back side of your device. In Settings, you can configure two or three taps to launch certain actions. Apple considers this an accessibility feature, but it is for everyone. With this tip, a quick screenshot is only just two or three taps away.
Related
If inactive, coming soon!
How to Launch Actions by Tapping on Back ofiPhone in iOS 14

To Tweet about this post, click the Tweet icon below to launch Twitter, then click its Tweet icon to post.
Check out TechSavvy.Life for their blog posts on smartphone apps, PCs. and Macs!
Tweet
Setup Back Tap
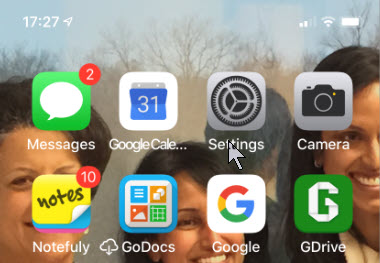
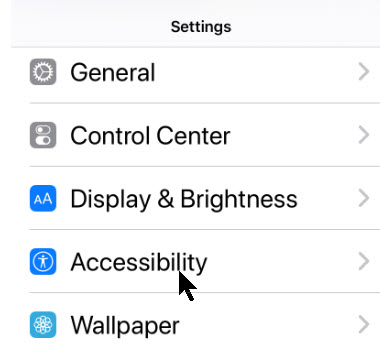
First, open Settings (the gear icon). Refer to below image:

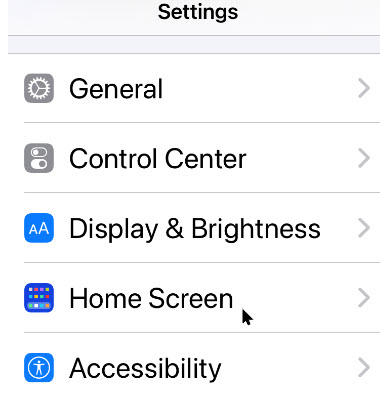
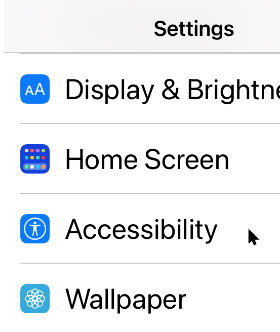
Now, scroll down and tap the Accessibility option. See below image:
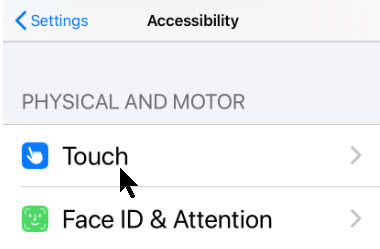
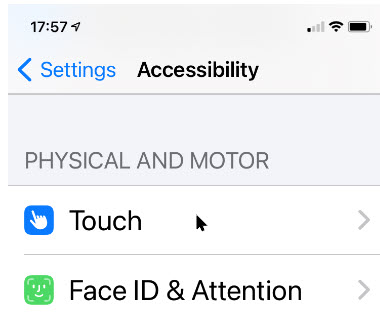
Under Accessibility option, scroll down and tap the Touch option. See following image:
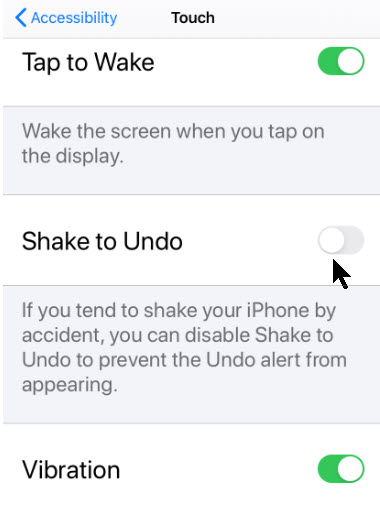
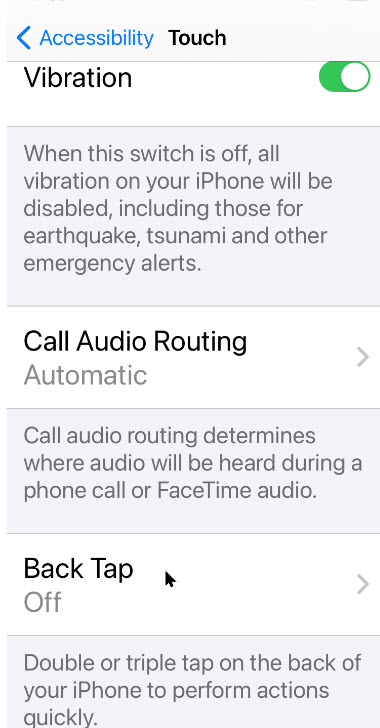
On the Touch Settings screen, scroll down until you see the Back Tap option, now tap it. Refer to below image:
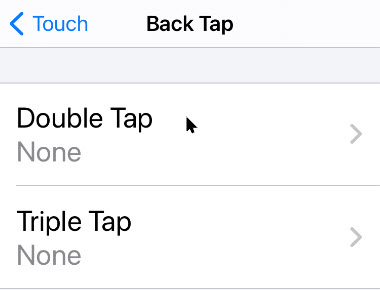
Next, in Back Tap settings, you can set the screenshot action to either Double Tap or Three Taps on back of the iPhone. See below image:
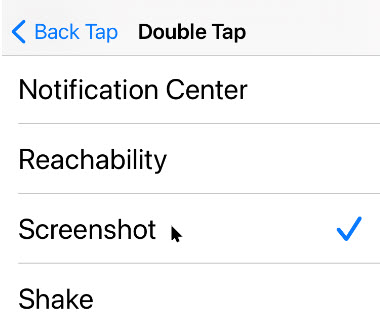
Now, scroll down the pop-up list that appears and select the Screenshot option. See following image:
Next, go back one menu level to make sure your selection is saved, then exit Settings.
Now, the next time you tap two or three times on the back of your iPhone (according to your selection), you will capture the current screen and save it to an image file. These images can be later viewed in your photo album.
That’s it. This feature is one of several you can setup for using the Back Tap.
I hope you have found this post helpful. If so, click the Tweet icon below. This will launch Twitter where you click its icon to post the Tweet.
I have found TechSavvy.Life blog posts extremely helpful. Check them out for posts on smart phone apps, Macs and PCs!
Tweet
I Would Like to Hear From You
Please feel free to leave a comment. I would love hearing from you. Do you have a computer or smart device tech question? I will do my best to answer your inquiry. Please mention the device, app and version that you are using. To help us out, you can send screenshots of your data related to your question.