LinkedIn software can be a dauting task to setup and maintain. You should update your LinkedIn profile regularly to attract recruiters, coworkers and friends. Of course, most of us don’t have the time, so we put off this task. If you want to take a little time, you should addrtess fives areas of your profile.
This feature is for your iOS (iPhone/iPad), Android device, Windows 10 or whatever smart device supports LinkedIn
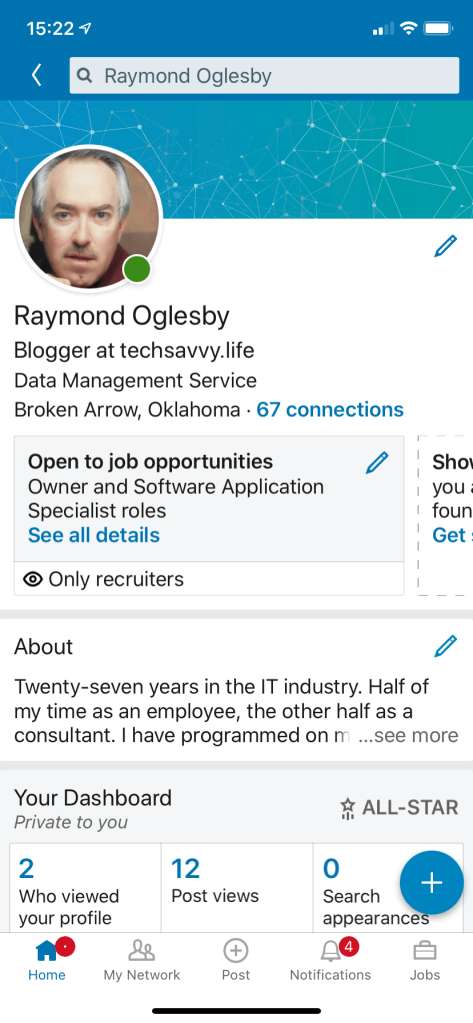
1. Your Heading Statement
This is the short statement that appears below your name. That Heading is what the recruiter’s search for. The Heading needs to say what you do or want to do. It should hit these points using keywords. People who haven’t updated their profile in a while might have their current job title followed by a comma and then their employer or department name. If so, I suggest changing the Heading to some keywords that match what you want to do.
See below image for my Heading as a Blogger: (Note! I used the tips in this post to update my LinkedIn profile for blogging purposes).
2. Updating your Photo
Does the photo reflect who you are today? It would be unwise to visit a recruiter looking completely different from your photo. Of course, you want a headshot photo of you smiling. Put on an appropriate shirt or blouse because it might show up in the photo. You want a photo that will impress recruiters, coworkers or friends.
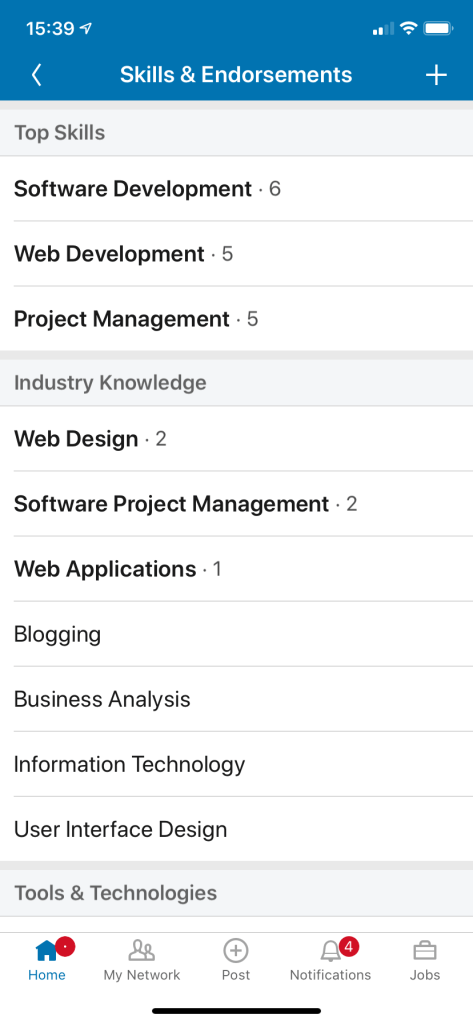
3. Using Keywords in your Profile
We have discussed using keywords in your Heading. Using keywords in your Skills & Endorsements is also very important. You can use a ton of keywords. Make sure you hit the top words that reflect your experience. Click the “plus” sign in upper right hand corner to add skill(s). Refer to following image:
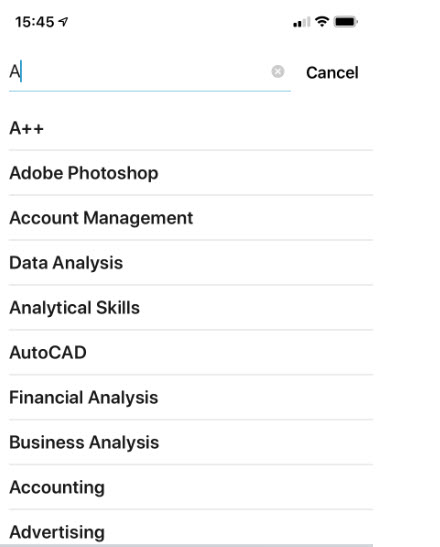
Tap in the Skill search box. Then go thru the aphabet, keying in one letter, ie, key in A, then select your keyword(s); then key in B, etc. through the alphabet to see which LinkedIn keywords to apply. See below image:
4. Using your Geography
If you are looking for work, it helps to provide a location. Its best to use a general location in a greater city areas, like Oklahoma City/Tulsa metro area instead of a just a single city. This will open up more possibilites for recruiters to locate a matching job.
5. How Open are you to Recruiters?
LinkedIn has a setting you can turn on which tells only recruiters that you are open to being contacted. When you turn on this setting, no one else can see it, only people who have recruiter accountgs. This setting is found in several places in your profile. The setting is labeled Only recuriters.
Go to your profile and look just below your Heading (refer to the first image in this post). When you tap Only recruiters, you are taken to the Job preferences screen. See below image:
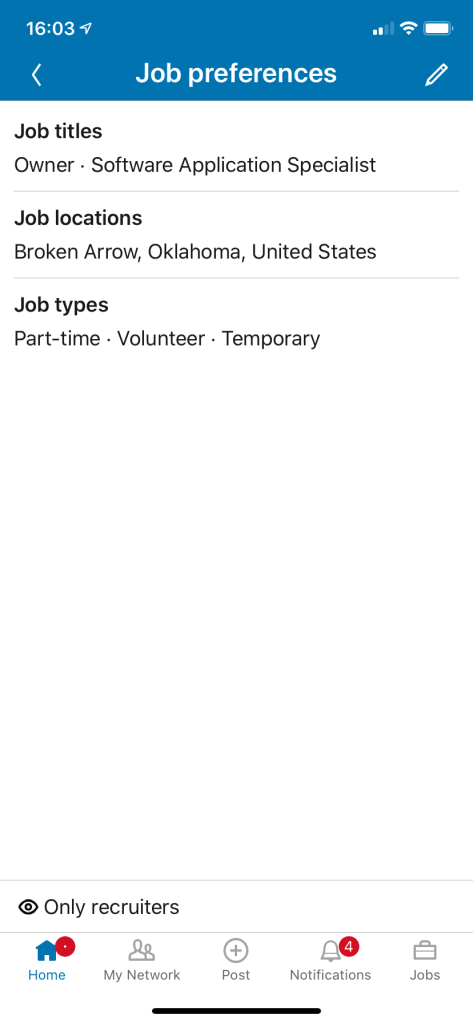
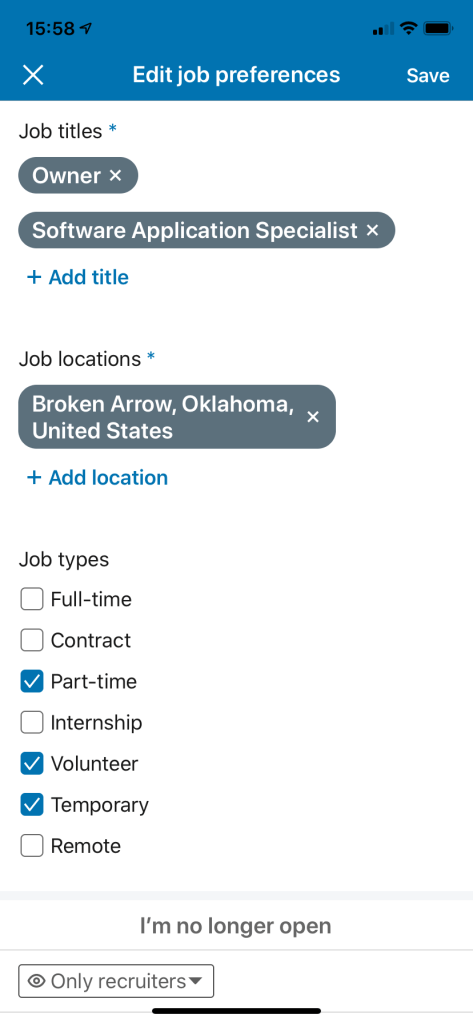
Tap the Edit icon (the pencil in upper right hand corner). Here you can add Job titles, Job locations and select Job types. Refer to below image:
- Tap the Only recruiters drop down arror to allow your job information to be shown to anyone using LinkedIn or just Recruiters.
Updating these five areas of your profile will open up more job opportunities and attract more recruiters.
I Would Like to Hear from You
Please feel free to leave a comment. I would love hearing from you. Do you have a computer or smart device tech question? I will do my best to answer your inquiry. Please mention the device, app and version that you are using. To help me out, you can send screenshots of your data related to your question.