How to Have a Hassle Free Running PC

Is your desktop or laptop unresponsive or sloooow? Tired of your PC crashing? Do you find yourself taking your PC to a geek repair shop to fix problems? Are you having your hard drive reformatted twice or more a year? There is a better way to resolve your PC erratic behavior. Let’s explore two free applications you can run at least monthly for a smooth running PC.

Is your desktop or laptop unresponsive or sloooow? Tired of your PC crashing? Do you find yourself taking your PC to a geek repair shop to fix problems? Are you having your hard drive reformatted twice or more a year? There is a better way to resolve your PC erratic behavior. Let’s explore two free applications you can run at least monthly for a smooth running PC.

This is for the PC and similar devices

Dilbert and Testing
Copyright Scott Adams, Inc./Distributed by Universal Uclick for UFS

Check out TechSavvy.Life for similar blog posts!

First Application

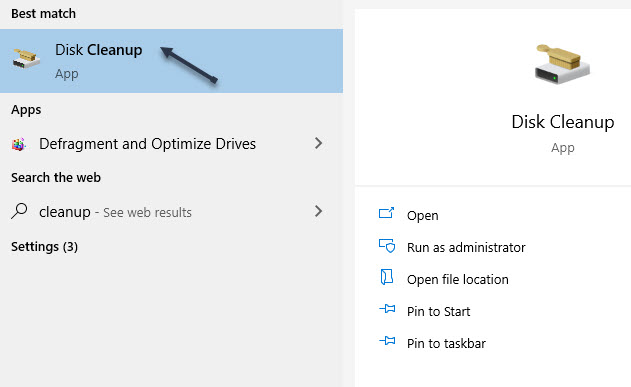
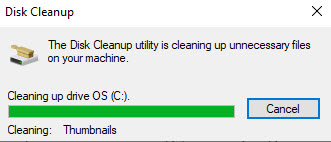
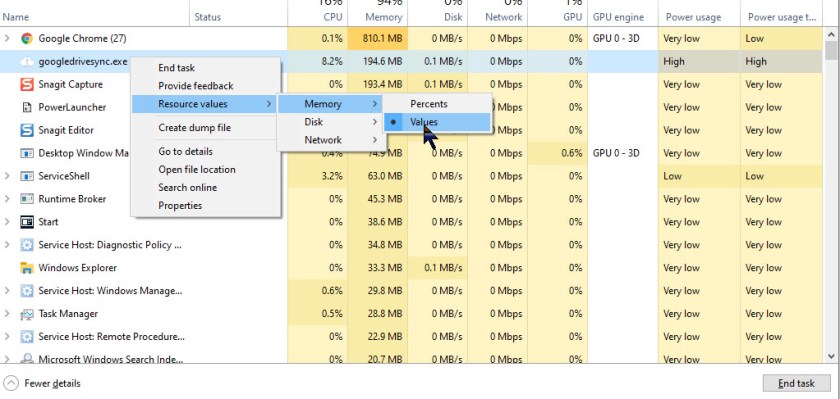
To clean up your PC cache, junk and temporary files, “lost” files, tracea of data, left over files after uninstalling programs and much more, you have a choice of two programs.

You may download, install and run either or both programs. I have successfully used both programs on branded and unbranded PCs in several countries and States.

CCLeaner – click her to download
Durig the download, it is best to decline any third party installs such as browsers or other applications from CCleaner; we only want to download the program.. The install will place a shortcut on your desktop and an icon in your System Tray.

AND/OR

Wise Disk Cleaner – click here to download
Durig the download, it is best to decline any third party installs such as browsers or other applications from Wise Disk Cleaner; we only want to download the program.. The install will place a shortcut on your desktop..

After downloading either or both free programs, install and run. It’s best to close any open programs before installing and running.

The paid version of CCLeaner has automatic scheduling. You can setup either program to run automatically through Windows Task Scheduler. Just follow the below blog post instructions substituting ccleaner<version number>.exe and wdcfree.<version number>.exe for the executable file name.

Second Application

Are you letting your PC run all the time? I recommend you not do this. Just like your car, your PC needs a rest. You probably don’t leave your car running all night, neither should your PC be running all night. By turning it off, your PC and it’s operating system is reset and given a fresh start.

Simply follow the below blog post on how to schedule a nightly automatic shutdown and restart of your PC.

How to Schedule an Auto Shutdown of Your PC

That’s it. Only running two applications periodically will make your PC faster, and a hassle free experience.

I have found TechSavvy.Life blog posts extremely helpful. Check them out for posts on smart phone apps, Macs and PCs!

I Would Like to Hear From You

Please feel free to leave a comment. I would love hearing from you. Do you have a computer or smart device tech question? I will do my best to answer your inquiry. Please mention the device, app and version that you are using. To help us out, you can send screenshots of your data related to your question.

The author’s Vietnam eBook on the Battle for Tra Bong: Events and Aftermath

How to Use the Windows 10 Assessment Tool

The Windows 10 Assessment Tool (WinSAT) tests the components of your computer (CPU, GPU, RAM, etc.) then measures their performance. But it can only be accessed from a Command Prompt or a PowerShell instance, and both must be opened with administrative rights.

The Windows 10 Assessment Tool (WinSAT) tests the components of your computer (CPU, GPU, RAM, etc.) then measures their performance. But it can only be accessed from a Command Prompt or a PowerShell instance, and both must be opened with administrative rights.

This post shows you how to access and use the Windows 10 Assessment Tool to measure your computer’s performance.

This is for Windows 10 operating system

Dilbert and Tests
Copyright Scott Adams, Inc./Distributed by Universal Uclick for UFS

Click to tweet on how you like TechSavvy.Life!

Measure Your Computer Performance

For this example, we will use PowerShell, but the process is similar for the Command Prompt. Right-click the Start Menu button on the Windows 10 desktop and select Windows PowerShell (Admin). If the option is missing, in the Cortana search bar, enter cmd, then click Run as administrator in the upper right of the screen. Refer to below image for the Powershell option:

Benchmark 1
Starting PowerShell

At the prompt, type in winsat formal. See following image:

Benchmark 2
The formal parameter

The system will run through an extensive series of tests. This may take a few minutes. When finished, it will display the measurements. See below image:

Benchmark 3
Results of the running the formal parameter

The formal parameter runs a full test of all your computer’s components and
saves the results in an XML file located in this folder:

Windows/Performance/Winsat/DataStore

If you have an XML file editor, you can view the file and see your computer’s performance, however, there are user friendly alternatives.

At the PowerShell (Admin) prompt, type in one of these commands:

get-wmiobject -class win32_winsat

or

Get-CimInstance Win32_WinSat

Refer to below images for running both parameters:

Benchmark 4
Results of running the wmiobject parameter
Benchmark 5
Results of running the cimInstancr parameter

The first command gives you a few more details about the testing, while the second command condenses the measurements down to a minimum of information. In my example, the overall performance of my Dell desktop is limited by my graphics card. Overall, for a 5 year old desktop, my scores are still impressive.

The maximum score for any component test is 9.9.

WinSAT Parameters

You may opt to run specific tests on specific components by modifying the winsat command with parameters. Here is a list of the standard command parameters (most important are the cpu, mem, disk and media parameters), which will display measurements using default configurations:

  • winsat -?–displays the help.
  • winsat formal–runs the full assessment.
  • winsat dwmformal–runs only the Desktop Windows Manager assessment which generates the graphics score.
  • winsat cpuformal–runs only the CPU assessment to generate the processor score.
  • winsat memformal–runs only the memory assessment to generate the memory (RAM) score.
  • winsat graphicsformal–runs the graphics assessment to generate the gaming graphics score.
  • winsat diskformal–runs the disk assessment to generate the primary hard disk score.
  • winsat cpu–tests the processor.
  • winsat mem–tests the memory.
  • winsat disk–tests connected storage devices.
  • winsat d3d–assesses the Direct 3D application abilities.
  • winsat media–tests media capabilities.
  • winsat mfmedia–Windows Media Foundation assessment.
  • winsat features–runs the features assessment.
  • winsat dwm–runs the Desktop Windows Manager assessment.
  • winsat prepop–pre-populate WinSAT assessment results.

Diving Deeper

Because the Windows 10 Assessment Tool produces XML files containing performance scores and measurements, APIs and scripting tools like PowerShell can be used to display and process data points.

Developers can use such tools to customize testing parameters and search for ways to improve performance. You should keep in mind that the Windows 10 Assessment Tool is not the only way to measure your computer’s performance. Other benchmarking measures will provide more detail, particularly when measuring graphical capabilities.

UserBenchmark Tool is a utility that will test your PC and compare the results to other users with the same components. You can quickly size up your PC, identify hardware problems and explore the best upgrades. Click here to download the software. After running, just Close the dialog. The results are displayed in a web page. See below image on completing the benchmarks on my PC:

Benchmark 6
The results of running UserBenchmark. After closing, the results are displayed in a web page.

Click to tweet if you find TechSavvy.Life blog posts extremely helpful. Check them out for posts on smart phone apps, Macs and PCs!

I Would Like to Hear From You

Please feel free to leave a comment. I would love hearing from you. Do you have a computer or smart device tech question? I will do my best to answer your inquiry. Please mention the device, app and version that you are using. To help us out, you can send screenshots of your data related to your question.

The author’s Vietnam eBook on the Battle for Tra Bong: Events and Aftermath

How to Recall an Email in Gmail

Oops! You just sent a Google Gmail message that you did not want to send. You realize for one reason or another that the message has a mistake or that it shouldn’t have been sent at all. Using Gmail, you have a small window of time in which to undo your mistake.

Oops! You just sent a Google Gmail message that you did not want to send. You realize for one reason or another that the message has a mistake or that it shouldn’t have been sent at all. Using Gmail, you have a small window of time in which to undo your mistake.

By default, Gmail only gives you a 5 second delay in which to recall an email after you hit the Send button. If this is too short, you’ll need to extend the length of time Gmail will keep emails pending before it sends them. Once an email(s) are sent, you are unable to recall them.

This is for Windows 10 PCs, Macs and other devices that support Google Gmail

Dilbert and Clothes
Copyright Scott Adams, Inc./Distributed by Universal Uclick for UFS

Check out TechSavvy.Life for similar blog posts!

Setting the Time Delay in Web Based Gmail

Unfortunately, you can’t change the length of this cancellation period in the Gmail app. You’ll need to do this in the Settings menu of Web based Gmail using your Windows 10 PC or Mac.

First, open Gmail using your browser and click Settings (the gear icon) in upper right-hand corner. Next, click the See all settings option. Refer to below image:

Gmail Recall 1
Open Web based Gmail Settings

In the General tab, you’ll see an option for Undo Send with a default 5 seconds delay. You can change this to periods of 10, 20, and 30 seconds from the drop-down list. It is recommended you set a 30 second delay. See below image:

Gmail Recall 2
Setting the Cancellation Period in Web based Gmail Settings

Scroll way down till you see the Save Changes button at the bottom of the screen. Press this button to save your change. The Settings window will then close.

The cancellation period you’ve selected will be applied to your Google account across all your devices.

How to Recall a Web Email in Gmail

If you want to recall a message sent by a Web based Gmail, you’ll need to do so within the cancellation period that applies to your account. This period begins from the moment you press the Send button. If you followed my recommendation, you have 30 seconds.

To recall an email, press the Undo button that appears in the black Message Sent pop-up. It is visible in the bottom-left corner of the Web based Gmail window. See following image:

Gmail Recall 3
Undo your email in Web based Gmail

This is your only chance to recall the email. If you miss it, or you click the “X” button to close the pop-up, you won’t be able to recall it. Once the cancellation period has passed, the Undo button will disappear and the email will be sent.

How to Recall a Mobile Device Email in Gmail

The process for recalling a mobile device email is similar to using the Web based Gmail. Your cancellation period you setup above for your Google account applies.

Go ahead an send an email using the Gmail app. A black pop-up box will appear at the bottom of your screen, telling you that the email has been sent.

The Undo button will appear on the right-hand side of this pop-up. If you want to stop the email, tap this button within the cancellation period or 30 seconds if following my recommendation. Refer to below image:

Gmail Recall 4
Undo your email using Gmail app

Pressing Undo will recall the email, returning you to the Compose draft screen in the Gmail app. At this point, you can then make changes to your email, save it as a draft or delete it.

RELATED

Note! Coming soon if inactive
How to Recall a Sent Microsoft Outlook Message

I have found TechSavvy.Life blog posts extremely helpful. Check them out for posts on smart phone apps, Macs and PCs!

I Would Like to Hear From You

Please feel free to leave a comment. I would love hearing from you. Do you have a computer or smart device tech question? I will do my best to answer your inquiry. Please mention the device, app and version that you are using. To help us out, you can send screenshots of your data related to your question.

The author’s Vietnam eBook on the Battle for Tra Bong: Events and Aftermath

How to Recall a Sent Microsoft Outlook Message

Oops! You just sent a Microsoft Outlook message that you did not want to send. You realize for one reason or another that the message has a mistake or that it shouldn’t have been sent at all. You can fix your mistake by recalling the message. Using the recall feature, under the right conditions, your email is deleted without the recipient ever seeing the message. You can also send the recipient a replacement email with the correct information.

Oops! You just sent a Microsoft Outlook message that you did not want to send. You realize for one reason or another that the message has a mistake or that it shouldn’t have been sent at all. You can fix your mistake by recalling the message. Using the recall feature, under the right conditions, your email is deleted without the recipient ever seeing the message. You can also send the recipient a replacement email with the correct information.

For a message to be recalled, both you and the recipient must have a Microsoft 365 Business Account or Microsoft Exchange email account in the same organization. The email must not not have been read by the recipient.

However, even if you and the recipient use different email accounts, the recall feature is useful. Though the initial email won’t be deleted, the recipient receives a follow-up message indicating that you want to recall the previous email. That tells them that your initial one is incorrect for some reason. You should then follow-up your initial email and recall message with another email that contains the right information or corrects the initial one.

To summarize, three emails are involved. The initial email with incorrect information, the recall message email, then the follow-up email with the correct information.

This is for Windows 10 PCs, Macs and other devices that support Microsoft Outlook

Dilbert and Ideas
Copyright Scott Adams, Inc./Distributed by Universal Uclick for UFS

Check out TechSavvy.Life for similar blog posts!

Recall a Message

Let’s send an email. Open Outlook, start new email and address to a recipient, then send the email. Refer to below image:

Recall 1
Initial Outlook email

Now, let’s say you notice an error in your email and want to recall it. In our example, the vacation dates are incorrect.

Open the email from your Sent Items folder. Select the Actions icon and click the option Recall This Message. See following image:

Recall 2
Recall initial Outlook email

The Recall This Message window opens to offer two options. Choosing Delete unread copies of this message tries to remove the message with no follow-up. Choosing Delete unread copies and replace with a new message provides the opportunity to send a follow-up message with the correct information. To learn of the recall’s success, ensure the box is checked for Tell me if the recall succeeds or fails for each recipient then click OK. Refer to below image:

Recall 3
Options for recalling initial Outlook email

If you chose the option to replace with a new message, a new email appears with the text from the initial email. You can fix any errors and send a corrected replacement message or a follow-up email with the corrected information. In my example, the recall message failed because I had already read the message. See following image:

Recall 4
Recall of initial Outlook email failed because recipent (me) had read the message

If you and the recipient use the same Microsoft 365 Business or Exchange, then the initial email should be deleted automatically. If so, you will receive an email saying the recall was successful for that recipient.

If you and the recipient use different email accounts, the initial emails remains in that person’s inbox. A follow-up email arrives that tells the recipient you would like to recall the message. You then have to rely on the recipient to delete or ignore the initial message. At this point, a third email could be sent with the corrected information. Refer to below image:

Recall 5
Corrected Outlook email

RELATED

Note! Coming soon if inactive
How to Recall an Email in Gmail

I have found TechSavvy.Life blog posts extremely helpful. Check them out for posts on smart phone apps, Macs and PCs!

I Would Like to Hear From You

Please feel free to leave a comment. I would love hearing from you. Do you have a computer or smart device tech question? I will do my best to answer your inquiry. Please mention the device, app and version that you are using. To help us out, you can send screenshots of your data related to your question.

The author’s Vietnam eBook on the Battle for Tra Bong: Events and Aftermath

How to Fix Windows 10 Thumbnail Problems

In Windows 10, sometimes thumbnail icons display improperly. This can be easily fixed by deleting the thumbnail cache files.

In Windows 10, sometimes thumbnail icons display improperly. This can be easily fixed by deleting the thumbnail cache files. Let’s explore how to do this.

This is for Windows 10 operating system

Dilbert and Video
Copyright Scott Adams, Inc./Distributed by Universal Uclick for UFS

Check out TechSavvy.Life for similar blog posts!

What Are Thumbnails?

By default, instead of using generic icons for documents, Windows 10 creates small pictures of image or document contents called thumbnails. These tiny images are stored in a special file called the thumbnail cache. By using this file, Windows does not have to recreate thumbnail images every time you open a folder.

If you are seeing incorrect thumbnails, it’s likely that the thumbnails stored in the cache for those particular files have been corrupted or are missing. This could be due to a bug in Windows or perhaps an intermittent hardware problem.

In that case, the best course of action is to delete your thumbnail cache and allow Windows to recreate the faulty thumbnails the next time you restart your machine.

Clear the Thumbnail Cache

First, open the Start menu and in the Cortana search bar, type Disk Cleanup. Click on the Disk Cleanup app that appears in the upper left hand corner. See below image:

Thumbnail 1
Accessomg Disk Cleanup app

In the Disk Cleanup window, locate the Files to Delete list. Uncheck all items except for Thumbmails. With Thumbnails checked, click OK to remove the thumbnail cache file. Refer to below image:

Thumbnail 2
Checkmark the Thumbnails option

A pop-up dialog box will ask, Are you sure you want to permanently delete these files? Just click Delete Files. See following image:

Thumbnail 3
Are you sure you want to delete prompt

Another pop-up will appear, this time showing you the progress of deleting your Windows thumbnails. Refer to below image:

Thumbnail 4
Progress of Disk Cleanup

After the thumbnail cache files have been deleted, restart your computer. Now, open File Explorer or look at the Desktop to see if this has fixed your problem. Hopefully, the thumbnails have been recreated and are now correct. If not, you may want to follow the guidelines below.

Disable Thumbnails

This is only recommended if the above guidelines fails to fix the problem.

Open the Start menu and type in File Explorer Options in the Cortana search bar. Next, click on the associated Control Panel app in the upper left hand corner. Refer to below image:

Thumbnail 5
Accessing File Explorer Options app

In the File Explorer Options window, click on the View tab. Then, in the Advanced Settings section, checkmark the option Always show icons, never thumbnails. Next, click OK to save your change. See below image:

Thumbnail 6
Setting the Icons instead of Thumbnails option

Now, close the File Explorer Options window and restart your machine. Windows will now only display standard icons for documents instead of thumbnails

If you find TechSavvy.Life blog posts extremely helpful check them out for posts on smart phone apps, Macs and PCs!

I Would Like to Hear From You

Please feel free to leave a comment. I would love hearing from you. Do you have a computer or smart device tech question? I will do my best to answer your inquiry. Please mention the device, app and version that you are using. To help us out, you can send screenshots of your data related to your question.

The author’s Vietnam eBook on the Battle for Tra Bong: Events and Aftermath

What Are the Processes Running on My PC?

If you spend any time examining the Task Manager, you will be amazed at the number of processes running on your PC. But what do they do and how can we find out? Is it safe to stop or disable them?

If you spend any time examining the Task Manager, you will be amazed at the number of processes running on your PC. But what do they do and how can we find out? Is it safe to stop or disable them?

This is for Windows operating system

Dilbert and Tested
Copyright Scott Adams, Inc./Distributed by Universal Uclick for UFS

Click to tweet on how you like TechSavvy.Life!

What is a Process

A process or running process refers to a set of instructions currently being processed by the computer processor.

Windows Processes are Windows Services and background programs you normally don’t see running on the computer. A process may be a printer program that runs in the background and monitors the ink levels and other printer settings while the computer is running.

A typical computer has dozens to hundreds of processes running all of the time to help manage the operating system, its hardware and the software running on the computer. Refer to below image of my running processes (I have over 150) with one open application (WordPress) under Google Chrome. The sort order is by the Memory column.

Processes 1
Running Processes on my PC

Also, note that Google Chrome has 32 instances of the program running. Just click the arrow next to the Name field to expand the list. See following image:

Processes 2
Instances of Googel Chrome processes

Start the Task Manager

There are a couple of ways to start the Task Manager.

  1. Press Ctrl + Alt + Del and click on the Task Manager option
  2. Right-click on the Start button then click on the Task Manager option. See below image;
Processes 3
Starting the Task Manager

Stop a Process

Next, highlight a running process, then right-click and select End Task. You would do this if you are unable to normally close a program/task or a program/ task is consuming a lot of memory and/or CPU. Refer to below image:

Processes 4
End a process

Search a Process

What is this process your machine is running? Highlight a process, right-click and select Search Online. Your Microsoft browser will open with the search results for your highlighted process. See below image:

Processes 5
Search online for the selected process definition

Other Features

You can sort any column by clicking on the column heading, just like in Excel.

You may highlight a process, then select Resource value, From here, select an option, then select how you want to view the process, Percents or Values. See following image:

Processes 6
Showing Percents or Values option

Click to tweet if you find TechSavvy.Life blog posts extremely helpful. Check them out for posts on smart phone apps, Macs and PCs!

I Would Like to Hear From You

Please feel free to leave a comment. I would love hearing from you. Do you have a computer or smart device tech question? I will do my best to answer your inquiry. Please mention the device, app and version that you are using. To help us out, you can send screenshots of your data related to your question.

The author’s Vietnam eBook on the Battle for Tra Bong: Events and Aftermath

Power Toys for Windows 10

Microsoft keeps updating its PowerToys. A set of slightly unusual free Windows tools has been a part of the Windows operating system landscape since Windows 95, but their availability has been noticeably absent for Windows 10–at least until September 2019.

Microsoft keeps updating its PowerToys. A set of slightly unusual free Windows tools has been a part of the Windows operating system landscape since Windows 95, but their availability has been noticeably absent for Windows 10–at least until September 2019.

The toolset is available from Github as a free download. Just download the MSI file here and install. An icon will be placed in the system tray; just right-click on its Settings to access the toys.

In 2019, Microsoft, in partnership with development company Janea Systems, released the first two PowerToys accompanied by a promise of more releases in the nrar future. Let’s explore each available tool or feature provided by Microsoft’s official Windows 10 PowerToys.

This is for the Windows 10 operating system

Dilbert and Data
Copyright Scott Adams, Inc./Distributed by Universal Uclick for UFS

Click to tweet on how you like TechSavvy.Life!

Main Menu

The tools allow users, whether they considered themselves “power” or not, to more easily make tweaks to the look and feel of Windows without a deep dive into configuration screens or the dreaded and dangerous edit of the Registry.

All Windows 10 PowerToys are now included as part of a free downloadable system that users can configure. After installation and running the application, you will see the following screen:

PowerToys main menu

The latest version is available on GitHub right now. The latest main release 0.19.0 includes bug fixes for over 100 quality and stability issues across all the featured PowerToys utilities. The development team is also stressing the need for constructive feedback on the PowerToys project. As of this writing, the latest release is 0.19.2.

These PowerToys are currently available:

  • FancyZones
  • File Explorer Preview
  • Image Resizer
  • Keyboard Manager
  • PowerRename
  • PowerToys Run
  • Shortcut Guide

FancyZones

This tool allows users to manage where and how each separate application window will open on a Windows 10 desktop.

For example, you can set up a Windows 10 desktop where Outlook always displays on the right-hand side of the desktop, Twitter to always display on the left-hand side of the desktop and Word always displays in the middle between the other two. There would be three distinct zones displayed at all times. Refer to below image for choosing a layout:

PowerToys 2
FancyZones layouts

File Explorer Preview

This tool expands on the Preview Pane feature already available in the standard File Explorer application by adding additional file types. Preview Pane allows users to preview the contents of a file after clicking it in File Explorer without actually opening the file. Refer to below image:

PowerToys 5
Selecting the File Preview option

Image Resizer

This adds additional functionality to File Explorer by allowing users to apply bulk image resizing. You select images in File Explorer and then select the new Resize pictures item on the context menu revealed with a right-click on any image. See below image:

PowerToys 6
Image Resizer options

Keyboard Manager

This application is a simple keyboard re-mapper. Run the application from the Its menu and either remap a single key on your keyboard or remap a shortcut keyboard combination. Whatever you remap will remain active as long as Keyboard Manager is enabled and PowerToys is running in the background. See following image:

PowerToys 8
Keyboard Manager menu

PowerRename

This tool provides users with advanced tools for bulk renaming of file names. The toy extends the Windows Shell Context Menu to add an entry for PowerRename to File Explorer. With this toy enabled, simple search and replace are added to your toolset. A preview area is displayed as you perform search and replace procedures so you can see how file names will change before initiating the action. See following image:

PowerToys 4
PowerRenam options

PowerToys Run

This toy acts as a quick launcher in Windows 10. It is an extension of the ALT+Tab concept and taps into the Windows 10 file indexing system. To activate the tool, first setup a keyboard combination, like CTRL+ALT+Space and start typing the name of your desired application. The Run will search the system and start listing possible applications, files and folders based on your search phrase. When the item you desire appears, click or tap to run. The old Window Walker toy has been merged into the Run toy. Refer to below image:

PowerToys 7
The Run dialog

Shortcut Guide

This tool will display all the available keyboard shortcuts for the current Windows 10 desktop. This PowerToy is activated by holding the Windows key down for the length of time specified in the tool’s configuration settings. The default is 900ms. Now users won’t have to remember all those Windows key-related shortcut combinations. See below image:

PowerToys 3
The Keyboard Shortcut list

Related

How to Use PowerToys Run Feature in Windows 10

Click to tweet if you find TechSavvy.Life blog posts extremely helpful. Check them out for posts on smart phone apps, Macs and PCs!

I Would Like To Hear From You

Please feel free to leave a comment. I would love hearing from you. Do you have a computer or smart device tech question? I will do my best to answer your inquiry. Please mention the device, app and version that you are using. To help us out, you can send screenshots of your data related to your question.

The author’s Vietnam eBook on the Battle for Tra Bong: Events and Aftermath

How to Use Checkboxes in Windows 10 File Explorer

Congratulations! You are reading my 100th WordPress blog post. Thank you for reading and even sharing. I started blogging after Thanksgiving 2019. It has been a fun learning experience about smart devices and Windows. Please keep reading and leaving comments and/or Tweets.

Congratulations! You are reading my 100th WordPress blog post. Thank you for reading and even sharing. I started blogging after Thanksgiving 2019. It has been a fun learning experience about smart devices and Windows. Please keep reading and leaving comments and/or Tweets.

By default, Windows 10 displays checkboxes whenever you select a file. This was designed for easy file management on a touch screen. You might prefer the classic approach without the checkboxes. Let’s explore how to enable/disable this feature using two methods.

When enabled, a small square appears beside each file icon, thumbnail or file name. They appear in every File Explorer layout mode.

This feature first appeared in Vista and became enabled by default in Windows 8.

This is for Windows 10 operating system

Copyright Scott Adams, Inc./Distributed by Universal Uclick for UFS

This is my 100th blog post. Click to tweet on how you like TechSavvy.Life!

Access File Explorer

First, open File Explorer by pressing Windows + E or click the pinned File Explorer folder icon in your Taskbar. You may also click Start to locate the File Explorer. Refer to below image:

Checkbox 1
The File Explorer

Method 1: Enable/Disable Checkboxes

Once there, in the ribbon tab, click the View tab. See below image:

Checkbox 2
Selecting the View tab

Locate the option Item check boxes. Toggle the box to show or hide checkboxes. Your change is immediately applied. Refer to below image:

Checkbox 3
Enable/Disable the checkbox option

Method 2: The Folder Options

Access the File Explorer as mentioned above and click on the View tab.

Next, click the Options button and select Change folder and search options to open the Folder options window. Now, select the View tab

Scroll down the list till you see Use check boxes to select items. Toggle the box to show or hide checkboxes. Click Apply to save your choice, then click OK. See following image:

Checkbox 4
Enable/Disable the checkbox option

This is my 100th blog post. Click to tweet if you find TechSavvy.Life blog posts extremely helpful. Check them out for posts on smart phone apps, Macs and PCs!

I Would Like to Hear From You

Please feel free to leave a comment. I would love hearing from you. Do you have a computer or smart device tech question? I will do my best to answer your inquiry. Please mention the device, app and version that you are using. To help us out, you can send screenshots of your data related to your question.

The author’s Vietnam eBook on the Battle for Tra Bong: Events and Aftermath

How to Use Power Toys Run Feature in Windows 10

Microsoft new Windows 10 Power Toys Run feature offers you a quick way to locate and launch programs, files, folders and other items by typing their names. Let’s explore this new feature.

Microsoft new Windows 10 Power Toys Run feature offers you a quick way to locate and launch programs, files, folders and other items by typing their names. Let’s explore this new feature.

This is for Windows 10 operating system

Dilbert and Safety
Copyright Scott Adams, Inc./Distributed by Universal Uclick for UFS

Click to tweet on how you like TechSavvy.Life!

PowerToys Features

New with PowerToys version .018 and above is a quick launch feature called PowerToys Run. After you trigger its keyboard shortcut, the program appears on your screen. Just simply start typing in the name of the program, file or folder you want to open. From the search results, simply click on your desired item. But there is more.

The Run feature also allows you to open windows and running processes, launch apps like the Control Panel or Task Manager and perform calculations.

Install PowerToys

You will find the latest version at Microsoft’s GitHub page for PowerToys. If you are upgrading or installing for the first time, the Microsoft’s Windows Desktop Runtime should be automatically installed as part of the feature.

After installation, click on the desktop shortcut you created in the install to launch the program. Now, click on the PowerToys icon in the System Tray. See below image:

Toys Run 1
PowerToys icon in System Tray

The Settings Menu

Right-click on the icon to access the the Settings option. In the PowerToys Settings screen, click on the entry for PowerToys Run. Next, click on the toggle switch to enable PowerToys Run.

By default, the feature shows you four search results. It is recommended that you increase this value to eight for a better result. Also, the default shortcut key is Alt + Spacebar, you can change this shortcut to your liking.

When you are finished, close the Settings screen. Refer to below image:

Toys Run 2
PowerToys Run menu

The Quick Laucher

Lets restart PowerToys Run by pressing the shortcut you defined. The quick launcher appears on the screen with an invitation for you to start typing. Start typing the name of the application, folder or file you wish to access. From the search results, click on the correct result to open it. At the upper right hand corner are two small icons. The first icon lets you open the application as an administrator; the second one opens the folder that contains the application’s executable file. The launcher window and its results are saved for other searches. See below image:

Toys Run 3
The Quick Launcher search results for programs, files or folders

Next, you can find and launch open windows and running processes. At the Run launcher, type the name of an open application, file, web page or other process, and then select the item you wish to bring to the foreground. Refer to below image:

Toys Run 4
The Quick Laucher search results for open windows or running processes

You can also open shell plugins built into Windows, which include such items as Control Panel, Task Manager and Command Prompt. To trigger such a plugin at the launcher, type > followed by the first few letters of the plugin, such as > control or > task and then select the item you want from the results. See following image:

Toys Run 5
The Quick Launcher search results for plugins

The Calculator Feature

You can perform simple calculations at the launcher, a handy alternative to the Windows Calculator. To do this at the launcher, type the first number, followed by the symbol for the calculation (+ for addition, – for subtraction, * for multiplication or / for division), followed by the second number. After you finish the equation, the launcher displays the results. You can then click the result to copy it to the Clipboard. Refer to below image:

Toyr Run 6
The Quick Launcher calculator

Click to tweet if you find TechSavvy.Life blog posts extremely helpful. Check them out for posts on smart phone apps, Macs and PCs!

I Would Like to Hear From You

Please feel free to leave a comment. I would love hearing from you. Do you have a computer or smart device tech question? I will do my best to answer your inquiry. Please mention the device, app and version that you are using. To help us out, you can send screenshots of your data related to your question.

The author’s Vietnam eBook on the Battle for Tra Bong: Events and Aftermath

How to Turn Off AutoFit Table Columns Feature in Word

Microsoft Word will auto adjust table column widths to fit the content you are entering. This is the default setting for a Word table. There are times you may not want this, instead, you want to control the column widths.

The default setting may push the table beyond the right margin or a column widens unnecessarily.

So, let’s see how to turn off AutoFit option and do table adjustments yourself.

This is for Office 365 Microsoft Word on PCs, Macs and similar platforms. Other versions of Word will be similar.

Dilbert and Security
Copyright Scott Adams, Inc./Distributed by Universal Uclick for UFS

Turn Off AutoFit Feature

To turn off this feature, first, place your cursor anywhere in the table you want to change.

Next, go to the Layout tab located in right hand side, not to be confused with the other Layout tab to the left side of the screen. Note! This option only appears when you are in a table. Refer to below image:

Word AutoFit 1

Now, click AutoFit and select the Fixed Column Width option. See below image:

Word AutoFit 2

You can now drag the column borders to your desired width. The column borders you set will stay that way even if you enter longer text into them. See following image:

Word AutoFit 3

Now, you can control Word’s table column widths. That’s it.

I Would Like to Hear From You

Please feel free to leave a comment. I would love hearing from you. Do you have a computer or smart device tech question? I will do my best to answer your inquiry. Please mention the device, app and version that you are using. To help us out, you can send screenshots of your data related to your question.

The author’s Vietnam eBook on the Battle for Tra Bong: Events and Aftermath