RAYMOND OGLESBY @RaymondOglesby2
February 11, 2025 – 3 minutes read time
Overview
Have you ever wished your iPad or iPhone would not only remind you of calendar events but also give a calendar alert when it’s time to depart? Well, now you can. Apple has just introduced the new Time to Leave feature, which automatically calculates when you need to leave your current location so you can arrive at your destination on time. Let’s explore how to use the Time to Leave feature.
Why You Will Like This Tip:
- Get notified when it’s time to get in your car and head to your appointment or meet-up.
- With built-in drive time reminders, you need never be late again!
System Requirements
The steps below will only work on an iPhone updated to iOS 18. The screenshots are from iPhone 14 Pro running iOS 18.3.
Click here to learn how to update your iPhone to the latest iOS version.
You will also need to be sure Location Services is enabled. Head to:
Settings > Privacy & Security > Location Services
and turn the toggle to the ON position.
Setup and Use Time to Leave Feature
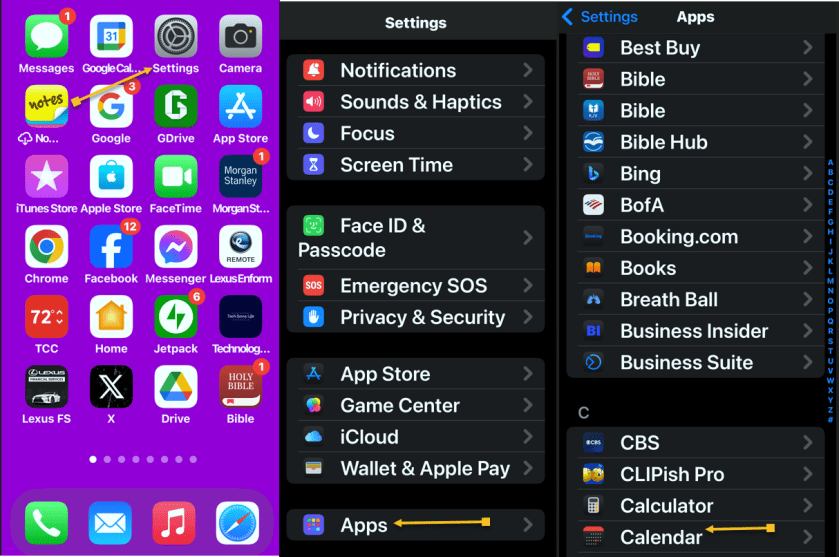
First, navigate to:
Settings > Apps > Calendar
Refer to the below image:
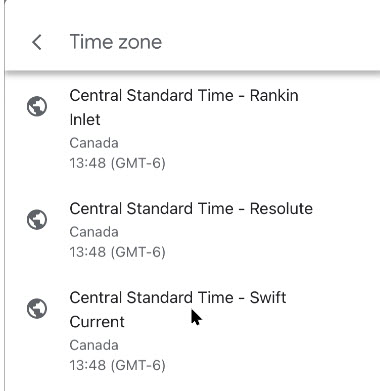
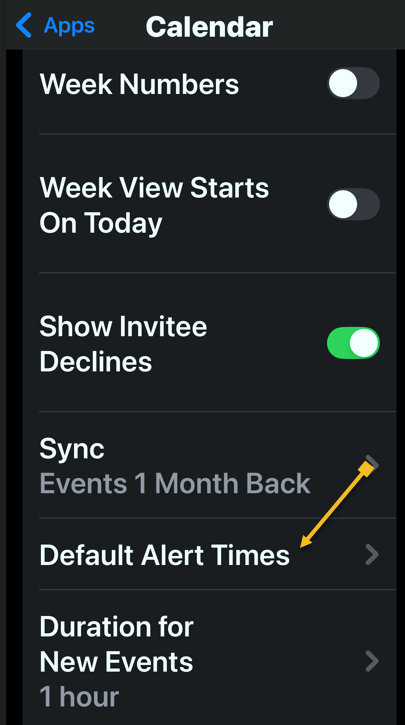
Next, tap the Default Alert Times option. See the below image:
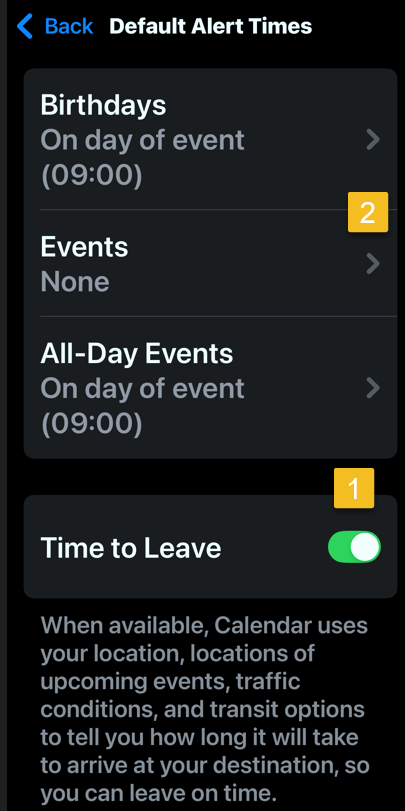
Now, toggle Time to Leave to the ON position.
Note! the Event must be set to None for this feature to work!
See the following image:
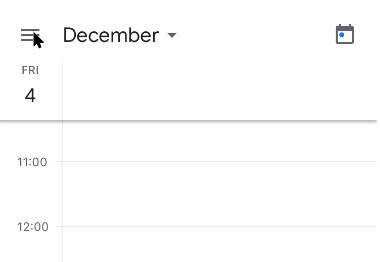
Next, open the Calendar app. Refer to the below image:
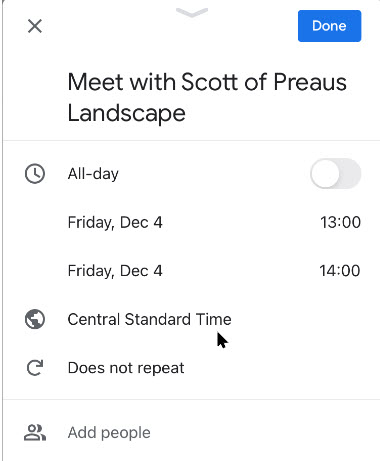
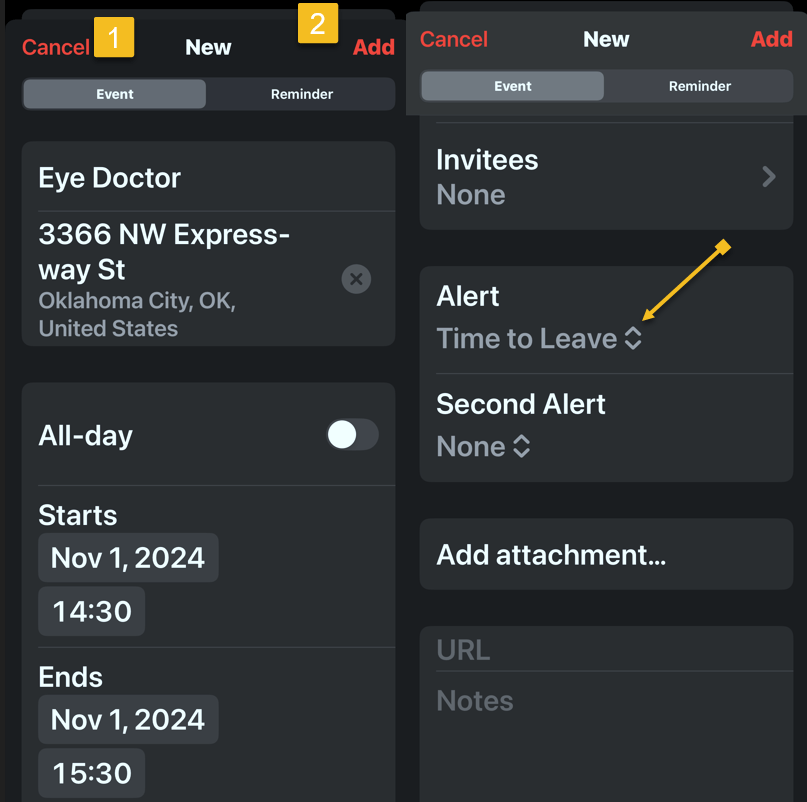
Now, create a calendar event as you normally would, then tap the Add icon. You will see that your Time to Leave alert has been automatically added to the event. See the below image:
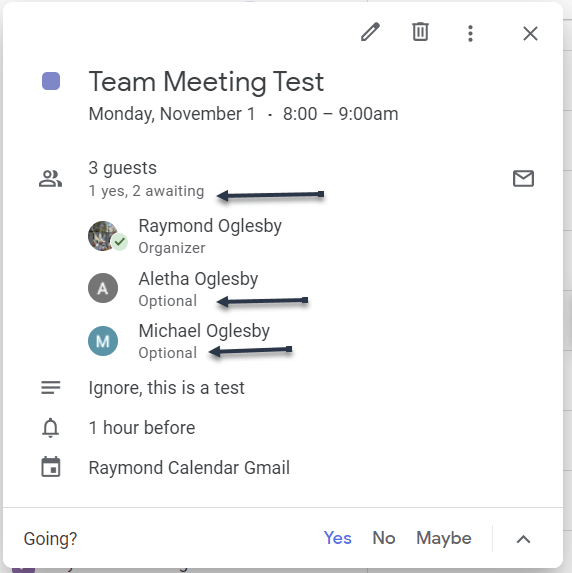
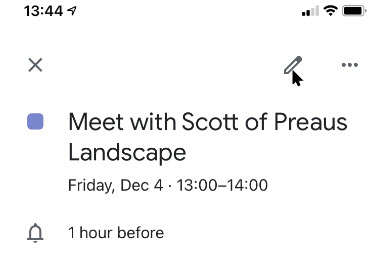
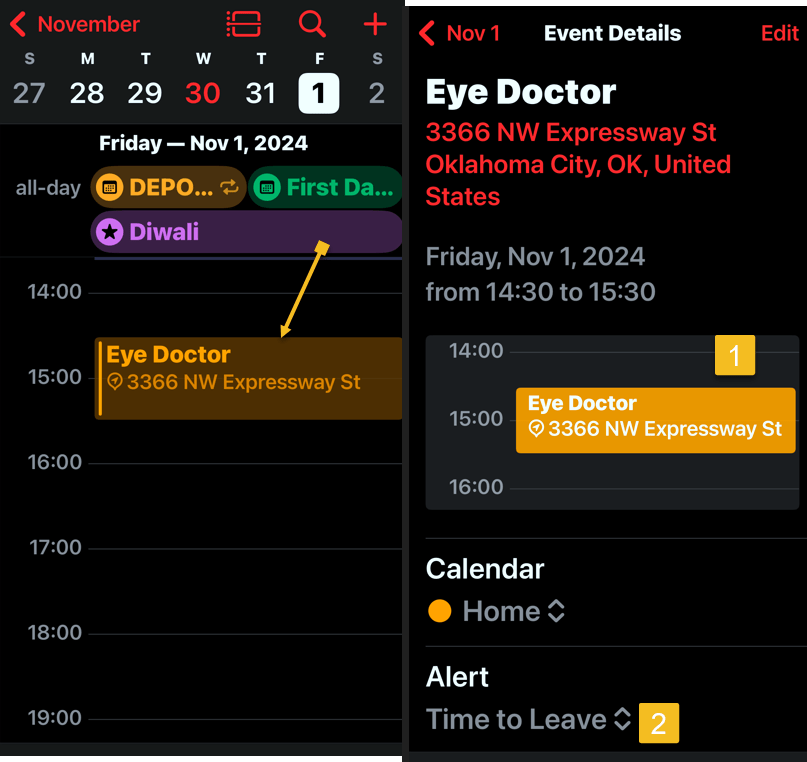
Next, open your Calendar and find your event. Tap the event to see its details. Notice the Time to Leave alert. See the following image:
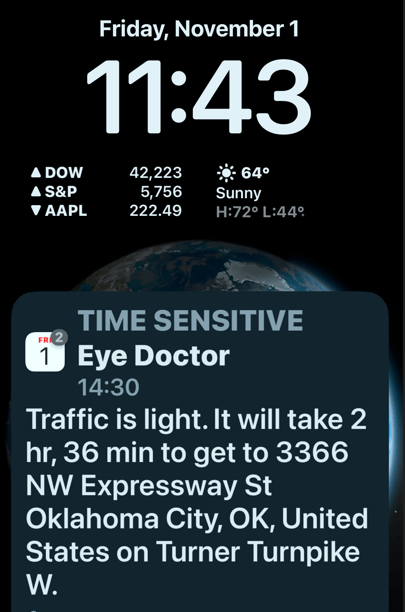
At the designated time, you will receive a Notification about the event that includes traffic conditions and travel time to reach your destination. Refer to the below image:
Now you know how to enable and use Time to Leave alerts in your iPad and iPhone Calendar settings
Disclaimer
Technology is always changing. Rarely is there static tech for smartphones and desktops. Thus, the contents of this post are only valid at the time of writing. Blog posts older than six months may have directions incompatible with your device or OS. Hopefully, older post content will continue to work as advertised. Thank you for reading TechSavvy.Life for Technology at Work For You.
Quote For the Day
The great myth of our times is that technology is communication.
Libby Larsen
X (Twitter) Info
That’s it. Please feel free to share this post! One way to share is via Twitter.
Just click the Tweet icon below. This will launch Twitter where you click its icon to post the Tweet.
Checkout TechSavvy.Life for blog posts on smartphones, PCs, and Macs! You may email us at contact@techsavvy.life for comments or questions.
Tweet
I Would Like to Hear From You
Was this post helpful? We would love to hear your comments. Do you have a computer or smart device tech question? I will do my best to answer your inquiry. Just send an email to contact@techsavvy.life. Please mention the device, app, and version you are using. To help us, you can send screenshots of the data related to your question.
The author’s Vietnam eBook on the “Battle for Tra Bong Vietnam: Events and Aftermath” can be accessed from a Kindle device or the Kindle App for a desktop or smartphone. The apps are free.