

In addition to the App Library feature, another prominent change in iOS 14, is the addition of Widgets that can be added to any page.
We have had Widgets on the Today View (the screen to the left of your first Home Screen) for years, but not a lot of people use that screen. And what’s the point of glanceable info if you have to swipe around to see it?
With iOS 14, Apple is replacing the old Widgets with all new ones that are more dynamic, can pull in more information, come in three sizes, and most importantly, can be placed anywhere on the Home Screen. Let’s explore how this is done.
This is for the iPhone running iOS 14

To Tweet about this post, click the Tweet icon below to launch Twitter, then click its Tweet icon to post.
Check out TechSavvy.Life for their blog posts on smartphone apps, PCs. and Macs!
Tweet
Add a Widget
To add a Widget:
Touch and hold an empty area on your screen until your apps jiggle and show minus (-) symbols. or tap Edit Home Screen. Refer to below image:

Tap the plus /+) sign in the upper-left corner. See below image:

You will bring up a menu of existing Widgets. See following image:
Tap on the Widget you want to add, or use the search bar to find one. Swipe left and right to choose the Widget’s size and shape.
Widgets can come in three sizes. Small Widgets are the same size as a 2 by 2 block of app icons. Medium Widgets are two icons high, but four icons wide (taking up the entire width of your Home Screen). Large Widgets are four icons wide and four icons tall.
Tap Add Widget. Refer to below image:

Once you have added the Widget, tap anywhere on the Home Screen to go out of edit (jiggle) mode.
Note! The first time you tap the new Widget, you may be asked to adjust its features (for example, to tell a weather Widget in what you want it to report).
You can even place multiple copies of the same Widget!
Move or Delete a Widget
To move the Widget around the screen or to another screen, just long-press it until it starts to shake and then move it where you want it.
If you want to get rid of the Widget, long-press to bring up a remove option or tap the little (-) button in the upper left corner of the Widget. See below image:

Create a Widget Stack
You can create a stack of Widgets if you want to save space or if there’s one Widget you will only want to use occasionally.
To create a stack:
Select a Widget for your Home Screen as described above and place it where you want it. Select the next Widget you want to stack (you can stack as many as 10) and save it to your Home Screen. See following image:

Long press the Widget so that you can move it around the screen, and place it on top of the first. Note that the Widget must be the same size and shape; you can not, say, place a small Widget on a medium-sized one. Refer to below image:

To see each Widget in your stack, swipe up or down on the top Widget and the next one will be revealed. In my example, I have stacked OneDrive on top of Google Search.
Tap Done when finished. See below image:

Move or Delete a Widget Stack
If you want to change the position of or remove any of the apps in the stack:
Long press the stack and select Edit Stack. See following image:

Press the three lines to the side of each app to change its position in the stack. Refer to below image:

In my example, I have stacked Google Drive on top, previously it was OneDrive. See below image :

To remove a Widget, swipe it to the left and tap Delete.
The Smart Rotate option, if On, will automatically rotate the Widget you use the most to the top. If Off, the Widgets are fixed.
Use the Smart Stack
Apple has also created a feature it calls a Smart Stack, which will automatically choose which Widget should be on top depending on your location, what time it is, or what you most often look at. It takes into account your usual app use, the time of day, and your location, and does all of this locally on your iPhone so no data is sent to Apple or anyone else.
iOS 14 comes with a pre-built Smart Stack made up of a group of selected apps. You add that stack the same way you would add any widget:
Long press on your Home Screen and tap the plus (+) icon in the upper-left corner.
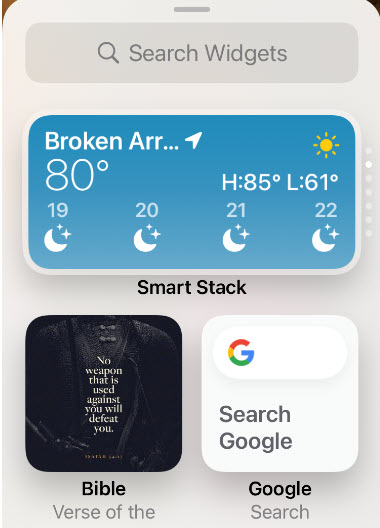
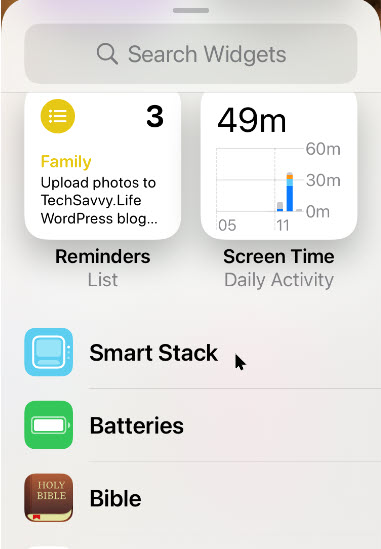
Scroll down until you see the Widget called Smart Stack. See following image:
As with the other Widgets, scroll sideways to choose the size you want, and then tap Add Widget.
Note! There is no way to determine at a glance if apps are stacked. You have to swipe or chose Edit Stack.
Create a Smart Stack
You can make your own Smart Stack by simply dragging Widgets on top of each other.
Just place Widgets how you normally would. Drag any two Widgets of the same size on top of each other, and you have got a new stack! It works just like making a folder with app icons.
Move or Delete Smart Stack
You can edit your stack the same way you do the Smart Stack. Turn Smart Rotate on or off, reorder the Widgets or remove the ones you no longer want.
Just long-press any stack you have created and select Edit Stack.
That’s it for the basics. There is much more on Widgets to explore, like third-party and the most popular ones.
I hope you have found this post helpful. If so, click the Tweet icon below. This will launch Twitter where you click its icon to post the Tweet.
I have found TechSavvy.Life blog posts extremely helpful. Check them out for posts on smart phone apps, Macs and PCs!
Tweet
The following is a previous Twitter feed so you can view how a Tweet will be displayed.
I Would Like to Hear From You
Please feel free to leave a comment. I would love hearing from you. Do you have a computer or smart device tech question? I will do my best to answer your inquiry. Please mention the device, app and version that you are using. To help us out, you can send screenshots of your data related to your question.
