How to Manage iPhone Always-On Display

The “always-on display” feature, exclusive to Pro versions of the iPhone 14 or 15 running iOS 17+, allows users to view important information without unlocking the device. The feature can be turned off in various situations, including when the phone is face down or connected to CarPlay, when low power mode is on, or through setting up a Sleep Focus. It can be turned off or adjusted through the Display & Brightness menu in Settings. Apple plans future updates to detail the feature’s battery consumption and introduce additional focus modes.

RAYMOND OGLESBY @RaymondOglesby2
December 19, 203

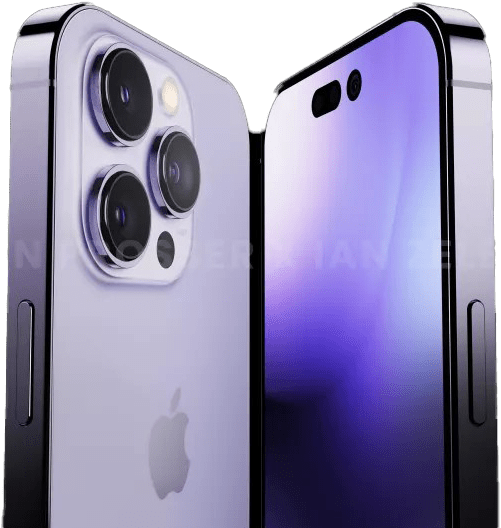
This is for the iPhone 14 or 15 Pro. Screenshots are from iPhone 14 Pro running iOS 17+

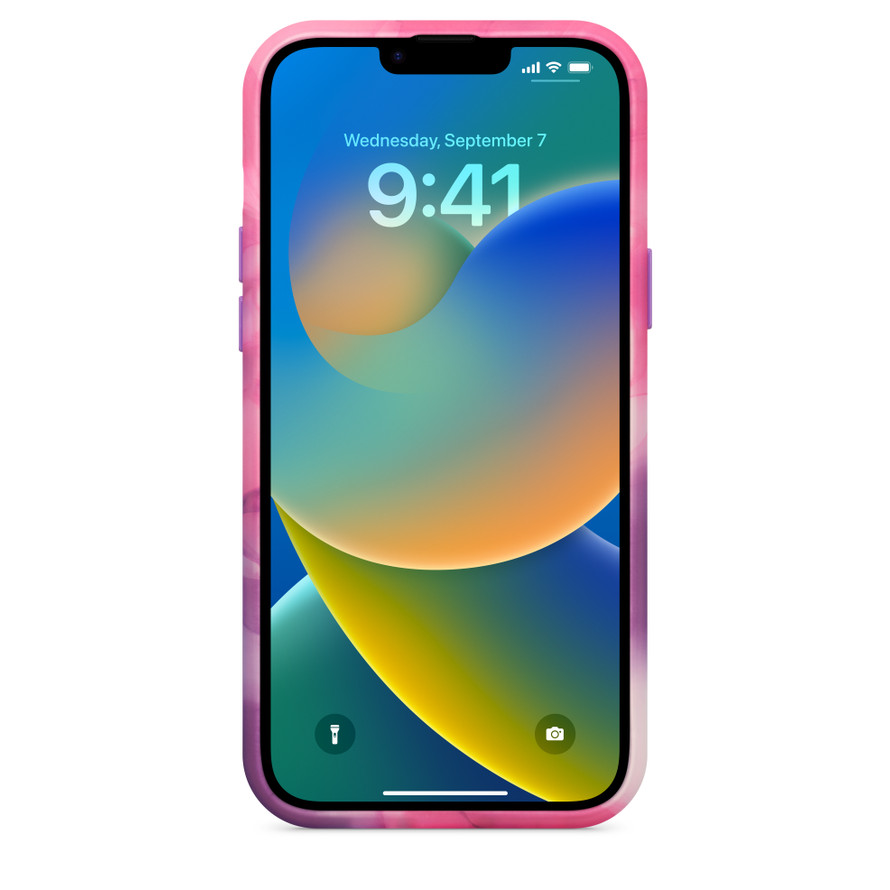
An “always-on display” lets you see important information at a glance. Those with a Pro version of the iPhone 14 or 15 have this feature. It’s exclusive to iPhone 14 Pro, iPhone 14 Pro Max, iPhone 15 Pro, and iPhone 15 Pro Max on iOS.

Those with older iPhones need to update their phones to see any information (or use the Rise to Wake feature), but “always-on” changes all that by dimming the Lock Screen so you can still see certain data without touching your phone. Let’s explore how to take control of the iPhone’s “always-only displays” (and even turn it off if it’s not your thing).

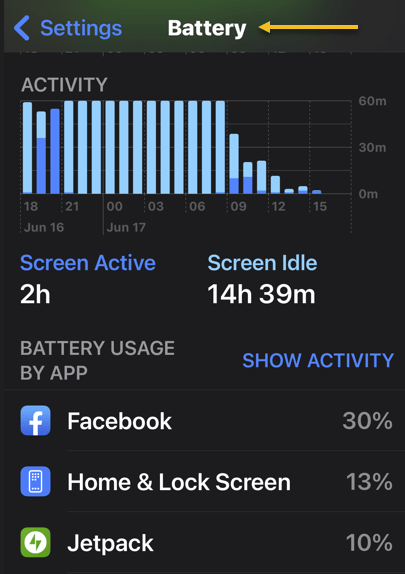
If you feel uneasy about a phone screen that never turns off, do not worry. Despite the name, Apple has done a few things to ensure the feature is not unnecessarily draining your battery (and a future iOS update may detail “always-on” battery consumption). If you do any of the following actions, the “always-on display” will turn off:

  • Place the phone face down, in your pocket, or in a bag. When charging your iPhone, we recommend placing your phone face down and when you are not using your iPhone. By doing this, your battery will last longer between charges.
  • Set up a Sleep Focus for certain times.
  • Connect to CarPlay.
  • Use the Continuity Camera feature.
  • Have low power mode turned on.

Additionally, if you have an Apple Watch connected to your iPhone, it will use your proximity to turn the screen on and off automatically. For example, if you leave your phone in the kitchen and walk upstairs, the display will turn black. When you return to the kitchen, the screen will light up.

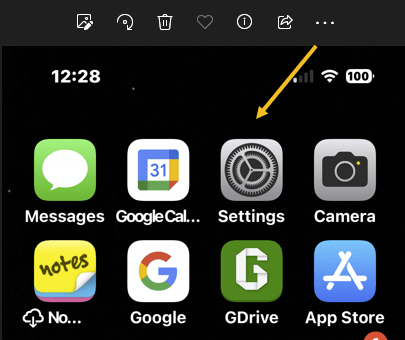
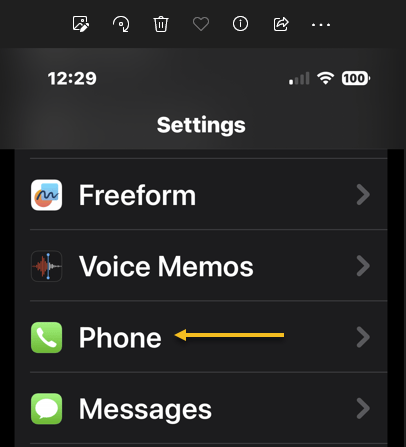
To disable the feature, head to:

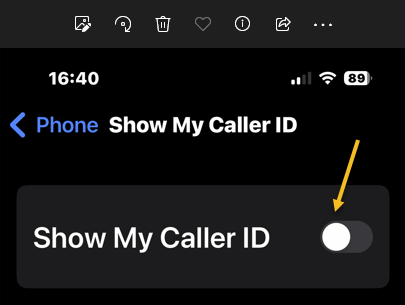
Settings > Display & Brightness > Always On Display

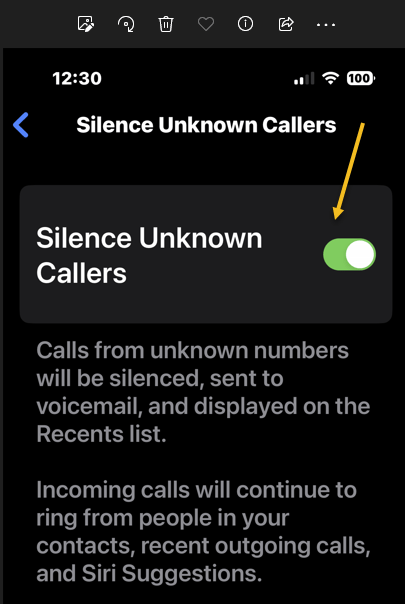
and toggle OFF the Always On Display option. Refer to the below image:

Always 1
Always On Display option

To enable the feature, toggle ON the Always On Display option.

If you are not ready to give up on the “always-on display” completely, there are a few options you can adjust. You can disable Show Wallpaper to prevent your phone’s wallpaper from appearing on the display. Or disable Notifications to make the screen less distracting.

Since iOS 16.4, Apple has let you schedule or automate when your iPhone’s “always-on display” is enabled using Focus modes. So you could add a filter to make the display stay on during working hours, for example, but turn it off in the evenings.

Other options coming to future updates include seeing how much battery life the “always-on display” consumes and controlling it with additional Focus modes.

Disclaimer

Technology is constantly changing; there is rarely static tech for smartphones and desktops. Thus, the contents of this post are only valid at the time of writing. Blog posts older than six months may have directions incompatible with your device or OS. Hopefully, older post content will continue to work as advertised. Thank you for reading TechSavvy.Life for Technology at Work For You.

. “Don’t worry about failure; you only have to be right once.”

Drew Houston

That’s it. Please feel free to share this post! One way to share is via Twitter.

Just click the Tweet icon below. This will launch Twitter where you click its icon to post the Tweet.

Checkout TechSavvy.Life for blog posts on smartphones, PCs, and Macs! You may email us at contact@techsavvy.life for comments or questions.

Please feel free to leave a comment. I would love to hear from you. Do you have a computer or smart device tech question? I will do my best to answer your inquiry. Just send an email to contact@techsavvy.life. Please mention the device, app, and version you are using. To help us out, you can send screenshots of your data related to your question.

You can access the e-book from a Kindle device, the Kindle App for the desktop or smartphone, which is a free app.

The author’s Vietnam eBook on the Battle for Tra Bong Vietnam: Events and Aftermath

Seven Hidden iPhone Message Features

The iPhone’s Messages app has numerous little-known features. Users can track live flights, unlock animations with secret codes, mark messages as unread, stop spam messages, and use Visual Lookup on sent messages. The recently released iOS 17 introduced features to quickly access photos and Check-In, which notifies contacts when the user arrives safely at a destination. The information shared via Check-In is end-to-end encrypted and can provide safety assurance.

RAYMOND OGLESBY @RaymondOglesby2
December 12, 2023

This is for the iPhone. Screenshots are from iPhone 14 Pro running iOS 17+

Even if you use the iPhone’s Messages app every day, there’s a chance you do not know everything it’s capable of. To fully appreciate the app, here are a few of the most hidden secrets Messages offers users. Let’s explore these features.

If you have a friend or family member flying, you can see exactly where they are as long as you know the flight number. Let’s say the flight is AA7262, and they just sent you the flight number. Long press the flight number, then tap on Preview Flight. You will see all the details about the flight. Refer to the below image:

Hidden 1
Track Live Flights

You can get custom animations depending on the phrase you sent on iMessage. While you can long press the Send button before sending a message to choose a proper animation, you can also trigger them depending on the message. Here are some examples:

  • Happy Birthday! – balloons will appear
  • Congratulations! – confetti rain
  • Happy New Year! – fireworks
  • Happy Chinese New Year! – red explosion
  • Pew pew – laser light show

See the below image:

Hidden 4
Unlock Animations

One of the best features available with the Messages app on your iPhone running iOS 16 or above is the ability to mark a message as unread. If you have already read it but do not have time to reply at the moment, you can leave a notification badge on it. To mark messages as unread, tap and hold a conversation in the app’s Inbox and select Mark as Unread. See the following image:

Hidden 1
Unread a Message

iMessage has a great feature that can split your Messages Inbox by different senders. Head to:

Settings > Messages > Filter Unknown Senders

and toggle to ON. Scroll up to:

Notifications > Customize Notifications > Unknown Senders

and toggle to OFF.

With that, you will not be notified about spam or messages from people you do not know. You just need to check the Unknown Senders tab every now and then. Refer to the below image:

Hidden 10
Stop Spam Messages

Visual LookUp works like Google Lens, which can tell you what’s in an image. An example, to view info about a plant:

  1. Take a photo of a plant
  2. Open Photos and find the image
  3. Swipe up on the image
  4. Tap Look Up

Now, view the results from Siri knowledge. See the below image:

Hidden 16
Visual Lookup of a plant

With iOS 17, there’s a new feature to access your Photos in your Messages. Just long press the “+” icon in the bottom left-hand corner and select a photo to place in your message. To access a new menu of options, just press the “+” sign. See the following image:

Hidden 12
Open Photos in Messages

To access a new menu of options, just press the “+” sign. Refer to the below image:

Hidden 15
Photos Options

This is a new iOS 17 feature. It works when a user wants to notify a family member or friend that they have safely made it to their destination. After a user initiates a Check In, their friend or family member will automatically be notified when the user arrives. If they are not making progress toward their destination, useful information will be temporarily shared with the selected contact, such as the device’s location, battery level, and cell service status.

One of the primary benefits of Check In is the safety assurance it provides. Personal safety is paramount, whether navigating the streets late at night, venturing into unfamiliar territory, or heading home, Check In serves as a digital guardian. It offers security, letting your contacts know you’ve safely arrived at your intended destination. Any information shared is end-to-end encrypted. Both the recipient and sender must have iOS 17 or higher installed.

To use this feature:

  1. Open the Messages app. Tap on the conversation where you want to use Check In.
  2. Next, tap the plus (+) button, choose More, and select Check In.
  3. If it’s your first time, follow the on-screen instructions. You must decide between Limited or Full data-sharing access. These options give you control over the level of location access.
  4. Tap the Continue button as you read through the on-screen explanations until you see the Send a Check In button and tap it.

After that, if you do not reach your destination within the set time or place an Emergency SOS Call, your iPhone will prompt you to check if everything’s okay. If you do not respond within 15 minutes, Check In will alert your contact.

Disclaimer

Technology is always changing and rarely is there static tech for smartphones and desktops. Thus, the contents of this post are only valid at the time of writing. Blog posts older than six months may have directions incompatible with your device or OS. Hopefully, older post content will continue to work as advertised. Thank you for reading TechSavvy.Life for Technology at Work For You.

If you don’t ask, the answer is always no.

Nora Roberts

That’s it. Please feel free to share this post! One way to share is via Twitter.

Just click the Tweet icon below. This will launch Twitter where you click its icon to post the Tweet.

Checkout TechSavvy.Life for blog posts on smartphones, PCs, and Macs! You may email us at contact@techsavvy.life for comments or questions.

Please feel free to leave a comment. I would love to hear from you. Do you have a computer or smart device tech question? I will do my best to answer your inquiry. Just send an email to contact@techsavvy.life. Please mention the device, app, and version you are using. To help us out, you can send screenshots of your data related to your question.

You can access the e-book from a Kindle device, the Kindle App for the desktop or smartphone, which is a free app.

The author’s Vietnam eBook on the Battle for Tra Bong Vietnam: Events and Aftermath

How to Find Kaleidoscope Wallpapers on iPhone

Apple’s iOS 17+ introduces new customization features for iPhones, including kaleidoscopic wallpapers that change appearance throughout the day. Users can explore these options in the Wallpaper menu within the Settings app and select images for Lock and Home screens. There are two categories of images to choose from: Jewels and Flowers. Widgets can also be added to the Kaleidoscope screen for further customization. Unfortunately, one can’t set up two different kaleidoscopic images for Lock and Home screens.

RAYMOND OGLESBY @RaymondOglesby2
December 5, 2023

This is for iPhones running iOS 17+. Screenshots are from iPhone 14 Pro.

The iPhone is boring, some people often say. As if Apple had to come up with a new design every year. As if it could significantly and regularly update the external appearance at this particular point in smartphone history, where nearly every device features an all-screen display. But you can make the iPhone a lot more fun by customizing the look of the software. You can change the icons to custom images, set wallpapers for each Focus mode, and then rotate them regularly.

Apple has plenty of good options in the Wallpapers gallery. And it so happens that iOS 17 brings over new kaleidoscopic wallpapers to iPhone that you can start using right away. Let’s find out about the Kaleidoscope wallpapers.

The new wallpapers might not be immediately visible, as you might need to do a bit of scrolling to find them. But they are there, and we will tell you exactly where to go.

What’s so special about the Kaleidoscope wallpapers, you ask? Well, there’s an algorithm at work here that will apply changes to them as the day passes.

First of all, since iOS 16, you have two ways of customizing the wallpaper on your iPhone. One involves pressing and holding your finger against the Lock Screen wallpaper until the customization menu pops up. The other is the one you might have been using since the early days of the iPhone. It involves going to the Settings app and looking for the Wallpaper menu.

Whatever the route, you will get to an Add New Wallpaper menu to select new images for your Lock and Home screens.

Once there, scroll until you find the Kaleidoscope category to select one of the new wallpapers. You might see the category in the Featured section, so you might not need to scroll. Refer to the below image:

Kai 1
Add a Kaleidoscope wallpaper

You will discover six Jewels kaleidoscope images and eight Flower ones. The Jewels will also feature Dark and Light modes, which means they will change appearance depending on how you have set up your iPhone. Unfortunately, the Flowers kaleidoscopes do not. But we would say the color palette is even better for the Flowers options.

Once you have selected the one you like best, you can set it as a Wallpaper Pair for both the Lock and Home screens. Or you can customize the Home screen with a separate image. You can always select a kaleidoscope for the Lock Screen and a different image for the Home Screen. Sadly, you can not set up two different kaleidoscopes, one for each screen.

Just like other Apple wallpapers, you can add widget(s) to your Kaleidoscope screen. See the below image:

Kai 2
Add Widgets

Related

We have TechSavvy.Life stats and Google Lens widgets for our wallpaper. Your new wallpaper will look similar to the one below. See the following image:

Kai 3
Your added Widgets

That’s all you have to do to take advantage of the new Kaleidoscope wallpapers on iPhone after updating to iOS 17 or higher.

Disclaimer

Technology is always changing and rarely is there static tech for smartphones and desktops. Thus, the contents of this post are only valid at the time of writing. Blog posts older than six months may have directions incompatible with your device or OS. Hopefully, older post content will continue to work as advertised. Thank you for reading TechSavvy.Life for Technology at Work For You.

If you are not willing to risk the unusual, you will have to settle for the ordinary.

Jim Rohn

That’s it. Please feel free to share this post! One way to share is via Twitter.

Just click the Tweet icon below. This will launch Twitter where you click its icon to post the Tweet.

Checkout TechSavvy.Life for blog posts on smartphones, PCs, and Macs! You may email us at contact@techsavvy.life for comments or questions.

Please feel free to leave a comment. I would love to hear from you. Do you have a computer or smart device tech question? I will do my best to answer your inquiry. Just send an email to contact@techsavvy.life. Please mention the device, app, and version you are using. To help us out, you can send screenshots of your data related to your question.

You can access the e-book from a Kindle device, the Kindle App for the desktop or smartphone, which is a free app.

The author’s Vietnam eBook on the Battle for Tra Bong Vietnam: Events and Aftermath

How to Invert the Colors on Your iPhone

The post provides a guide on how to invert colors on an iPhone running iOS 17+, which can assist color-blind individuals or those who find phone screens hard to read. However, if this function results in ghostly blue screenshots, the post advises heading to Accessibility in the Settings app and turning off both Smart Invert and Classic Invert.

RAYMOND OGLESBY @RaymondOglesby2
November 28, 2023

This is for the iPhone running iOS 17+. Screenshots are from iPhone 14 Pro.

Are you considering inverting the colors on your iPhone? It can be a useful feature; especially for those with color blindness or for those who find phone screens difficult to read. The process of inverting your iPhone’s display colors is simple and can be done in no time. Let’s explore using the side button to toggle inverted colors on or off.

But first, what if you take a photo like the one below?

Invert 2
Your photo

Next, you take a screenshot of your photo and it turns out ghostly blue as displayed below.

Invert 1
Your ghostly blue screenshot

Yikes! How did this happen? We spent hours searching on Google how to fix this to no avail. Then we chatted with two Apple Support specialists before we got an answer on how to resolve this. This issue goes back to iOS 11.

To fix this problem:

  1. Open the Settings app on your iPhone and go to Accessibility.
  2. Select Display and Text Size.
  3. Scroll down to Smart Invert and Classic Invert.
    • Smart Invert will only invert the colors within the app you are currently using. 
    • Classic Invert will invert all the colors on your iPhone, including photos and videos. 
  4. Turn both options to the OFF position.

This will make the screenshot resemble your photo. Refer to the below image:

Invert 3
Turn OFF both options

Note! When you update your iOS, the Smart Invert option is reset to the ON position. If your iPhone is still displaying ghostly images from your Camera Roll or the Photos app while using Dark Mode, turn the Smart Invert and Classic Invert to the OFF position.

In Settings > Display & Brightness resetting the Options, True Tone and Night Shift options has no effect in eliminating the ghostly images as noted in various help articles..Only the steps described in this blog post fixes the problem.

To quickly turn the inverted colors on or off on your iPhone, you can set up an Accessibility Shortcut. To do this, go to the Accessibility section of the Settings app then scroll down to select Accessibility Shortcut. Now, click either Smart Invert or Classic Invert. Once done, triple-click the power button on the side of your iPhone to toggle the inverted colors. To disable the shortcut, triple-click the power button again.

Inverting the display colors on your iPhone can be a helpful tool for those who struggle with bright screens or color blindness, as it creates more contrast and, for some, an easier-to-read display. It’s important to note that while inverted colors can be a useful feature, they are not for everyone, and it may take some time to get used to inverted colors. However, if you find inverted colors to be helpful or think they do improve your overall viewing experience on an iPhone, it’s definitely worth enabling.

Disclaimer

Technology is always changing and rarely is there static tech for smartphones and desktops. Thus, the contents of this post are only valid at the time of writing. Blog posts older than six months may have directions incompatible with your device or OS. Hopefully, older post content will continue to work as advertised. Thank you for reading TechSavvy.Life for Technology at Work For You.

The best vision is insight.

Malcolm Forbes

That’s it. Please feel free to share this post! One way to share is via Twitter.

Just click the Tweet icon below. This will launch Twitter where you click its icon to post the Tweet.

Checkout TechSavvy.Life for blog posts on smartphones, PCs, and Macs! You may email us at contact@techsavvy.life for comments or questions.

Please feel free to leave a comment. I would love to hear from you. Do you have a computer or smart device tech question? I will do my best to answer your inquiry. Just send an email to contact@techsavvy.life. Please mention the device, app, and version you are using. To help us out, you can send screenshots of your data related to your question.

You can access the e-book from a Kindle device, the Kindle App for the desktop or smartphone, which is a free app.

The author’s Vietnam eBook on the Battle for Tra Bong Vietnam: Events and Aftermath

How to Turn iPhone Live Photos to Videos

The iPhone allows users to convert Live Photos into videos through the Shortcuts app, creating high-quality clips. Users need to download a specific shortcut from Apple’s website, after which they can select the Convert Live Photos to Video shortcut and choose the photo they wish to convert. The shortcut only works with Live Photos, and for best results, users should select pictures that depict movement. Live Photos can be used with the Bounce, Loop, or Long Exposure effect.

RAYMOND OGLESBY @RaymondOglesby2
November 7, 2023

This is for the iPhone. Screenshots are from iPhone 14 Pro running iOS 16+

If you can not do something in the Apple Photos app on your iPhone, chances are there is a third-party photo-editing app that can. For instance, have you ever viewed a Live Photo and realized it would make a much better video? Get it done with the Shortcuts app. It only takes a few minutes to set up and a couple taps to perform. Let’s explore this feature.

First, Apple’s Shortcuts app should already be on your iPhone, but you can also download it from the App Store. Refer to the below image:

Live Photo 1
Get your Shortcuts app

While the app comes loaded with many different pre-existing shortcuts, you must download a specific one from Apple’s website to convert Live Photos to videos.

Next, head to the Convert LivePhotos to Video page and tap the Add Shortcut button. See the below image:

Live Photo 2
Add the Convert shortcut

Now, this will add it to your Shortcuts app. See the following image:

Live Photo 3
Your Shortcut added

Next, all you have to do is select the Convert Live Photos to Video shortcut and pick the Live Photo you wish to convert. That’s all it takes. The new video will automatically be added to your Camera Roll as if you captured the clip with your phone’s camera. Refer to the below image:

Live Photo 4
Message about the conversion

Now, if you have ever edited a Live Photo, you might notice that most of the photo outside the Key Photo can be quite blurry. However, your new video will retain the quality of the main photo throughout, giving you a crisp and clear clip. Click on the image to play the video:

Live Photo to Video example

This process is as simple as can be, but there are a few tricks to get the best results possible.

  • This might sound obvious, but the shortcut only works with Live Photos.
  • When selecting photos to convert, filter out all still images in Apple Photos by selecting Albums > Live Photos to make sure you are only viewing Live Photos.
  • For best results, select photos that depict movement. For example, fireworks, moving cars, grass blowing in the wind, ocean waves crashing, etc. These will make for a better video than a stationary moment.
  • You can use Live Photos with the Bounce, Loop, or Long Exposure effect.
  • While you can not make a Boomerang out of a Live Photo, or a photo with the Bounce effect, you can convert your Live Photo to a video and make a Boomerang.

Related

Convert a Live Photo to a Still Photo

Disclaimer

Technology is always changing and rarely is there static tech for smartphones and desktops. Thus, the contents of this post are only valid at the time of writing. Blog posts older than six months may have directions incompatible with your device or OS. Hopefully, older post content will continue to work as advertised. Thank you for reading TechSavvy.Life for Technology at Work For You.

So often people are working hard at the wrong thing. Working on the right thing is probably more important than working hard.

Caterina Fake

You are finished. Please feel free to share this post! One way to share is via Twitter.

Just click the Tweet icon below. This will launch Twitter where you click its icon to post the Tweet.

Just click the Tweet icon below. This will launch Twitter where you click its icon to post the Tweet.

Please feel free to leave a comment. I would love to hear from you. Do you have a computer or smart device tech question? I will do my best to answer your inquiry. Just send an email to contact@techsavvy.life. Please mention the device, app, and version you are using. To help us out, you can send screenshots of your data related to your question.

The author’s Vietnam eBook on the Battle for Tra Bong Vietnam: Events and Aftermath

How to Block or Hide Your Phone Number

This article outlines ways to hide your caller ID on Android and iPhone, preventing recipients from seeing your number. One method involves dialing a specific shortcode (*67 for US) before a number. Alternatively, you can permanently block your number via the phone’s operating system. However, this may lead to missed calls from contacts who may not pick up unidentified calls. It also mentions ways to deal with spammy no caller ID calls.

RAYMOND OGLESBY @RaymondOglesby2
October 24, 2023

This is for iPhone and Android. Screenshots are from iPhone 14 Pro running iOS 16+

Nobody likes receiving calls from No Caller ID numbers, as they are usually scams. But there might be cases where you will want your iPhone or Android to hide your phone number to protect your privacy. Whether the person at the other end of the line picks up or not, you can still block your phone number so it’s hidden when you call others.

There are two ways to hide your phone number. One involves using a specific shortcode before the phone number you want to dial. The other is having the operating system block your number permanently. We will show you both, and a tip that makes blocking your number a two-second process.

If you plan on blocking your number only for certain calls, there’s no reason to mess with the iPhone or Android phone’s settings. Instead, just add *67 before the number you are about to dial. When you do this, it tells your carrier not to show any Caller ID for that call.

An example of the phone number string to dial would be *67-555-555-5555.

Each country has different shortcodes to hide phone numbers. This is the US version. In the UK, you would need to dial 141 before the number.

If you want to hide your phone number routinely, you will need to go into the phone’s settings to enable it.

On iPhone, head to:

Settings > Phone > Show My Call ID

You might have to wait a short while until the toggle appears. Toggle the switch to OFF. Refer to the below image:

Block 1
Disable showing Caller ID

The feature can come in handy if you are using your personal phone number for work-related calls and do not want others to find out your number. But it can be a hassle if you forget to reenable it when calling family and friends. They will see No Caller ID appear on their devices and might not pick up.

The same warning applies to Android. You can block your phone number on Android phones just as easily as on iPhones. But you will have to remember to unblock it for your closest contacts to see your Caller ID.

To hide your phone number on Android, go to:

Phone > Setting > Calls and Additional Settings > Hide Number

and toggle the switch to OFF.

Repeat the steps to reenable the Caller ID on your Android phone when you are done blocking access to it.

While we are at it, we will remind you there are ways to deal with spammy No Caller IDs on iPhone and Android and ensure they are not too big a hassle for you. Check a related post below to avoid no Caller ID calls.

RELATED

Block No Caller ID

Disclaimer

Technology is always changing and rarely is there static tech for smartphones and desktops. Thus, the contents of this post are only valid at the time of writing. Blog posts older than six months may have directions incompatible with your device or OS. Hopefully, older post content will continue to work as advertised. Thank you for reading TechSavvy.Life for Technology at Work For You.

When you innovate, you’ve got to be prepared for people telling you that you are nuts.

Larry Ellison

That’s it. Please feel free to share this post! One way to share is via Twitter.

Just click the Tweet icon below. This will launch Twitter where you click its icon to post the Tweet.

Checkout TechSavvy.Life for blog posts on smartphones, PCs, and Macs! You may email us at contact@techsavvy.life for comments or questions.

Please feel free to leave a comment. I would love to hear from you. Do you have a computer or smart device tech question? I will do my best to answer your inquiry. Just send an email to contact@techsavvy.life. Please mention the device, app, and version you are using. To help us out, you can send screenshots of your data related to your question.

You can access the e-book from a Kindle device, the Kindle App for the desktop or smartphone, which is a free app.

The author’s Vietnam eBook on the Battle for Tra Bong Vietnam: Events and Aftermath

How to Block No Caller ID Calls on iPhone

The blog post by Raymond Oglesby offers tips for iPhone users on how to handle blocked or unknown calls. Among the suggestions are enabling the block unknown callers feature on iOS, which could also inadvertently block legitimate calls. Outgoing calls can be anonymized by dialing *67 before the number. A distinction is made between No Caller ID (intentionally blocked by the caller) and Unknown Caller (Caller ID was provided but not recognized). The post also answers FAQs about related subjects.

RAYMOND OGLESBY @RaymondOglesby2
October 17, 2023

This is for the iPhone with iOS 13 +. Screenshots are from iPhone 14 Pro running iOS 16+

When your phone rings and the Caller ID is blocked, or it’s an unknown caller, it’s pretty frustrating. Especially with repeat unknown calls. If you are ready to stop those annoying spam calls and unmask the Caller ID behind them, these are some of the best methods to reveal unknown numbers.

  • There are two important distinctions you should know. No Caller ID and Unknown Caller are two different things.
  • No Caller ID means that the caller intentionally blocked their ID from you. On the contrary, an Unknown Caller means the Caller ID was not recognized even though it was provided.
  • The best way to handle this is to turn on the option to block unknown callers on iOS. It sometimes blocks real callers, but it’s a good balance between being inundated with spam calls all day.

If you are looking to hide your phone number when making outbound calls, you do not need to even fiddle with your phone’s settings.

Simply dial *67 followed by the phone number you are trying to call. When you do this, it tells your carrier not to show any Caller ID for that call.

An example of the phone number string to dial would be *67-555-555-5555.

First, open the Settings app on your iPhone. Refer to the below image:

Block Call 1
Accessing Settings

Next, scroll down to the Phone option and tap on it. See the below image:

Block Call 2
Accessing Phone option

Now, scroll down to the Silence Unknown Callers option. See the following image:

Block Call 3
Accessing the Silence Unknown Callers option

Next, toggle its switch to the ON position. Refer to the below image:

Block Call 4
Turn the option ON

All calls without a Caller ID will be automatically blocked from your phone. Remember, real numbers and callers can also be affected by this, and customer service-based calls frequently are a target. We recommend you check your voicemails and missed calls list.

Can you find out a no Caller ID number?

If you receive a call without any Caller ID, the caller has deliberately blocked their phone number from showing up. There’s no way to find out the number if the call was purposely blocked.

What does *57 do on a phone?

The service code *57 activates malicious caller identification. This is an upcharged fee service offered by some phone company providers. *57 should be dialed immediately after receiving a call from a number with no Caller ID. When you do so, it records the metadata of the malicious call to aid law enforcement investigations.

How do you call a number with a blocked ID back?

You can not call back a number that calls you with a hidden ID. If you miss a call from these numbers, you must wait till they call you back. Their hidden Caller ID prevents you from calling back if you do not have their number.

Will my telephone provider reveal an Unknown Caller’s ID to me?

It is against the law for your mobile carrier to reveal information about another user to you. They can only do that if you can prove that you are in danger or feel threatened. If you are going to request details like that from your mobile carrier, you must have enough evidence to back up your claim and most likely a police report.

Disclaimer

Technology is always changing and rarely is there static tech for smartphones and desktops. Thus, the contents of this post are only valid at the time of writing. Blog posts older than six months may have directions incompatible with your device or OS. Hopefully, older post content will continue to work as advertised. Thank you for reading TechSavvy.Life for Technology at Work For You.

When I’m old and dying, I plan to look back on my life and say, ‘Wow, that was an adventure,’ not, “Wow, I sure felt safe”.

Tom Preston-Werner

That’s it. Please feel free to share this post! One way to share is via Twitter.

Just click the Tweet icon below. This will launch Twitter where you click its icon to post the Tweet.

Checkout TechSavvy.Life for blog posts on smartphones, PCs, and Macs! You may email us at contact@techsavvy.life for comments or questions.

Please feel free to leave a comment. I would love to hear from you. Do you have a computer or smart device tech question? I will do my best to answer your inquiry. Just send an email to contact@techsavvy.life. Please mention the device, app, and version you are using. To help us out, you can send screenshots of your data related to your question.

You can access the e-book from a Kindle device, the Kindle App for the desktop or smartphone, which is a free app.

The author’s Vietnam eBook on the Battle for Tra Bong Vietnam: Events and Aftermath

Six Best Shortcuts for iPhone

RAYMOND OGLESBY @RaymondOglesby2
October 3, 2023

This is for the iPhone. Screenshots are from iPhone 14 Pro running iOS 16+

Since the release of iOS 13, the Shortcuts app has come preinstalled on compatible devices, hosting useful automation and timesaving techniques ranging from automating texts to organizing your photos.

Making the most of these shortcuts can, however, feel a little foreign to first-time users. A lot of Apple device owners do not even know what the app is. It comes with a fairly extensive library of pre-existing shortcuts, but beyond this lies a world of user-generated shortcuts.

In principle, iOS Shortcuts are fairly simple, considering they are based on IFTTT (If This Then That) automation; trigger results in an action. However, in practice it is not always so simple; there are multitudes of triggers, and the debugging is entirely nonexistent.

The learning curve is staggeringly high. To help you get started, here are some of the most useful, easy-to-use Shortcuts you should have on your device, plus they are free.

Installing shortcuts has become simplified over the years. Previously, you had to go to the Settings app on your iPhone and allow to install shortcuts from third-party links. Now, there’s no such need. Just click on the download links we have provided and use the Add Shortcut button to add the shortcut to your library. You may be asked to set certain options for the Shortcuts to function, if so, just follow the shortcut instructions. Not mentioned in this post, is another favorite, Charge Time shortcut which can be opened in the link below.

Charge Time

If you do not want your iPhone or iPad to die at the most unfortunate times, Super-Low Battery v2.0 is the shortcut you should use. While the low-power mode on iOS devices does well enough job for normal days, sometimes you need that extra hour or two of usage off your iPhone, and the low-power mode does not cut it. Enter the Super-Low Battery v2.0 shortcut.

Using the Super-Low Battery v2.0 shortcut you can enable super low-power mode. When run, it not only stops background processes and activates native low-power mode, but also turns off WiFi, and Mobile Data. It also turns on Airplane Mode and sets both Brightness and Volume to 0.  It’s best to use when your iPhone’s battery falls below 10%. After running it, you should have a few hours left. If you want, you can make a call or send a text, deactivate it by running the shortcut, make that call or send a text, and run it again. Click this link to Download Super-Low Battery v2.0. Refer to the below image:

Best Shortcut 1
Super-Low Battery v2.0 shortcut

Another favorite to share is Dark Safari. Since the introduction of Dark Mode on iOS 13, it’s helpful at night. It reduces strain on your eyes and ensures you are not blinded by bright light when you open an app. That said, when reading articles on Safari, the dark mode fails. This shortcut will help you solve this problem.

It creates a black background with bold white text to make reading easier on the eyes. Unlike other similar shortcuts, it does not invert the colors, but rather actually changes the colors of a website. This will improve your late-night reading. Click this link to Download Dark Safari. See the below image:

Best Shortcut 2
Dark Safari shortcut

Another powerful shortcut created by Federico is Apple Frames. It allows you to apply frames to your iOS screenshots. I know most people will not need it, but if you are a writer, blogger, or content creator using screenshots, this is for you. (As for our blog posts, we use a subscription-based third-party screen capture program on the desktop). Click this link toDownload Apple Frames. See the following image:

Best Shortcut 3
Apple Frames shortcut

The iPhone has become water resistant since the iPhone 7, but your iPhone can get water damage. Sometimes water can get stuck inside the speakers and microphone grills of the iPhone, compromising the audio quality of the microphone speakers. You can solve this issue by using the Water Eject shortcut. When you tap the shortcut it plays a series of sounds that can eject water from the speaker grills. Click this link to Download Water Eject. Refer to the below image:

Best Shortcut 4
Water Eject shortcut

Calculating the tip on a bill is always harder than it should be, especially if you are in a hurry at the end of the meal. After running this shortcut, you simply enter the bill and choose the tip percent, such as 12%, 15%, 18%, or 20%. You will immediately see the tip amount and final bill total including the tip. Click this link to Download Calculate Tip. See the below image:

Best Shortcut 5
CalculatSe Tip shortcut

Ever since Apple integrated Shazam into iOS, it has been easy to find the name of whatever song is playing around you. But Shazam++ takes that a step further; this shortcut will use Shazam to identify the song and then offer you a menu of options that include sharing the song or playing it in your favorite music player such as Spotify or Apple Music.

Shazam++ presents a small yet significant addition to the tool, presenting you with various actions once it’s identified the song, including sharing the song or playing it directly in the music streaming service, from where you can easily add it to your playlists. Click this link to Download Shazam ++. See the following image:

Best Shortcut 6
Shazam ++ shortcut

Open your Shortcuts app and head to My Shortcuts gallery where your six shortcuts will be displayed as shown below:

Best Shortcut 7
Your shortcuts gallery

Disclaimer

Technology is always changing and rarely is there static tech for smartphones and desktops. Thus, the contents of this post are only valid at the time of writing. Blog posts older than six months may have directions incompatible with your device or OS. Hopefully, older post content will continue to work as advertised. Thank you for reading TechSavvy.Life for Technology at Work For You.

The only thing worse than starting something and failing is not starting something.

Seith Godin

You are finished. Please feel free to share this post! One way to share is via Twitter.

Just click the Tweet icon below. This will launch Twitter where you click its icon to post the Tweet.

Checkout TechSavvy.Life for blog posts on smartphones, PCs, and Macs! You may email us at contact@techsavvy.life for comments or questions.

Please feel free to leave a comment. I would love to hear from you. Do you have a computer or smart device tech question? I will do my best to answer your inquiry. Just send an email to contact@techsavvy.life. Please mention the device, app, and version you are using. To help us out, you can send screenshots of your data related to your question.

You can access the e-book from a Kindle device, the Kindle App for the desktop or smartphone, which is a free app.

The author’s Vietnam eBook on the Battle for Tra Bong Vietnam: Events and Aftermath

How to Hide and Unhide Spotify Songs

If you do not wish to listen to certain songs or hide those songs so they do not play when you are using Spotify, we will show you how. You can unhide your songs in the future if you change your mind.

RAYMOND OGLESBY @RaymondOglesby2
September 12, 2023

This is for iPhone and Android. Screenshots are from iPhone 14 Pro running iOS 16+ and Windows 10

If you do not wish to listen to certain songs or hide those songs so they do not play when you are using Spotify, we will show you how. You can unhide your songs in the future if you change your mind.

Note: You can not hide songs in your own playlists. If you do not want a specific song in your playlist, simply remove it from the list.

Hide Songs on Spotify

To hide a song so it does not play when you are listening to your music, use the following steps in the Spotify app on your iPhone or Android phone.

First, launch Spotify on your phone and find the music track to hide. Then, next to the song, tap the three dots (the Menu icon). Refer to the below image:

Spotify 1
Accessing the Menu of the song to Hide

Next, in the menu that opens, select Hide Song. See the below image:

Spotify 2
Selecting the option to Hide your song

Now, Spotify will immediately hide your song in your list. See the following image:

Spotify 3
Your hidden song is greyed out

Unhide Songs on Spotify

If you have changed your mind about a song and want to unhide that song, follow the following steps to see your hidden songs and unhide them.

First, open Spotify on your phone. Then, find the playlist or album where you hid your song.

Next, find your hidden song (which will be grayed out), and next to that song, tap the three dots (the Menu icon). Refer to the below image:

Spotify 4
Accessing the Menu to unhide a song

Now, in the open menu, select Hidden. See the below image:

Spotify 5
Selecting the option to unhide your song

Now, Spotify will unhide your song, allowing you to tap and play it. See the following image:

Spotify 6
Your hidden song is now visible


For Desktop Only

You can not hide songs on Spotify’s desktop and web versions. Only the platform’s mobile app allows you to hide and unhide songs, as of this writing.

If you have an unwanted song in your playlist (not a Spotify sample playlist), remove it from your list and the app will not play it. To do that, access your playlist and find that song. Next to the song, click the three dots (the Menu icon) and choose Remove from this playlist. See the following image:

Spotify 7
Selecting to remove your song on the desktop

Spotify will remove the selected song from your playlist, and you are all done.

Disclaimer

Technology is always changing and rarely is there static tech for smartphones and desktops. Thus, the contents of this post are only valid at the time of writing. Blog posts older than six months may have directions incompatible with your device or OS. Hopefully, older post content will continue to work as advertised. Thank you for reading TechSavvy.Life for Technology at Work For You.

Quote For the Day

“Motivation is what gets you started. Habit is what keeps you going.

Jim Rohn

Tweet Info

That’s it. Please feel free to share this post! One way to share is via Twitter.

Just click the Tweet icon below. This will launch Twitter where you click its icon to post the Tweet.

Checkout TechSavvy.Life for blog posts on smartphones, PCs, and Macs! You may email us at contact@techsavvy.life for comments or questions.

I Would Love to Hear From You

Please feel free to leave a comment. I would love to hear from you. Do you have a computer or smart device tech question? I will do my best to answer your inquiry. Just send an email to contact@techsavvy.life. Please mention the device, app, and version you are using. To help us out, you can send screenshots of your data related to your question.

Author’s E-Book

You can access the e-book from a Kindle device, the Kindle App for the desktop or smartphone, which is a free app.

The author’s Vietnam eBook on the Battle for Tra Bong Vietnam: Events and Aftermath

Five Ways to Tell if Your iPhone or Android is Being Tapped

To see if your phone is being tapped, look for apps using too much battery or data, listen for weird noises in phone calls, and watch for weird behavior like random mic activation or redirected websites. You can also use MMI or USSD codes to check your call forwarding status.

RAYMOND OGLESBY @RaymondOglesby2
August 15, 2023

This is for the iPhone and Android. Screenshots are from iPhone 14 Pro running iOS 16+

For better or worse, our smartphones are always with us, so if someone taps into the camera or mic, it’s a serious problem. But how can you tell if your phone is being tapped, and how do you protect yourself?

How to Tell

If someone gains access to your phone they can potentially send fake emails, read your personal messages, record your calls, and all sorts of other nefarious behavior. But can you even tell if someone’s hacked your phone? Let’s explore a few ways to find out.

1) Battery Life is Failing

If your phone constantly overheats seemingly for no reason and the battery drains quickly without any apparent cause, your phone might be hacked. Malicious software running in the background can drain your battery without any apps running and can be anything from malware that’s reading your email to call-recording spyware.

If you are already a heavy phone user, your battery probably gets hot anyway. Streaming video or playing games for long periods of time, for example, will cause your phone to heat up which is pretty normal. If you have not been using your phone a lot and the battery still heats up or can no longer hold a charge, you might want to check for malicious software.

To do that, check your battery settings. On either an Android or iPhone you can see which apps are using the most battery by going to:

Settings > Battery

where you will see which apps are using the most power. If there are apps on that list you do not remember installing, or a third-party app that should not be using much power, uninstall them immediately. Refer to the below image:

iPhone Tapped 1
Battery Settings

2) Weird Noises

A high-pitched hum or strange, pulsating static on the line could be a sign your calls are being recorded. If you hear static or other strange sounds like clicking or beeping even when you are not calling someone, that’s another sign, especially when your phone’s been tapped by the police.

Hearing these sounds once or twice at random is probably okay, but if it happens consistently, check your phone. You can try using a sound-bandwidth sensor app from another phone set to a low frequency. If it picks up several sounds over a minute, your phone may be compromised.

3) High Data Use

Spyware and malware will routinely use a lot of data; constantly sending information back to whoever hacked your device. If your location or data icons at the top of your screen regularly move or light up, that could be a sign someone is sending data from your phone or controlling it remotely. Higher than normal data use can also show up as a higher phone bill if you do not have an unlimited data plan.

iPhones and Android phones both let you check your data usage to see if your phone is (possibly) tapped. To do it on an iPhone, go to:

Settings > Cellular

See the below image:

iPhone Tapped 2
Cellular Settings

On Android, go to

Settings > Network & Internet

It may also be under:

Connections > Data usage or > Mobile data usage.

4) Unusual Activity

If your phone has trouble shutting down, that could be a sign it’s being tapped. Randomly shutting down on its own is another sign of trouble. When turning off your phone, check to see if the backlight stays on even when the phone is powered off or if the shutdown fails altogether.

Other strange behaviors your phone could exhibit if it’s been compromised include popup ads, the screen lighting up at random, and messages you do not recognize that push you to follow unfamiliar links. Also, performance often slows way down.

Watch out for your camera or mic turning on randomly. If you keep seeing the camera light go on when you did not open an app that uses the camera, it could be a sign your phone’s been hacked. Some malicious software lets hackers access your camera without turning the light on, so always dig deeper if you think something’s fishy.

5) Websites Look Strange

Some forms of malicious software can infiltrate your browser, showing you a fake web page that looks legitimate, then harvesting your login credentials when you type them in. If you are browsing on your phone and the web page you are looking at acts strange or does not look quite like it’s supposed to, close the browser and check your phone for malware by scanning it or taking it to a professional.

Protect Your Phone From Being Tapped

If you want to make sure your phone is never compromised, avoid downloading any apps that are not from the Google Play Store or Apple’s App Store. Even when using the mainstream app stores, though, do a Google search of the app and the developer to double-check that they are on the level before you download; bad apps can and do occasionally get past their vetting processes.

Download trusted anti-malware and antivirus apps and use them regularly. If you can afford a premium subscription, do it. If not, there are some great free options available.

Using a VPN to obscure your true IP address can make it harder for someone who’s trying to track you to pin down your location. If you can, try a few out and use one regularly when are in public or on an unsecured connection

.You can also check and see whether your calls and messages are being forwarded to other devices using Man-Machine Interface (MMI) codes. They will be different depending on the network but can allow you to discover and cut off any unauthorized forwarding. To use them, dial the desired MMI code with your keypad, then hit the call button.

If you are on a GSM network (like AT&T and T-Mobile):

  • *#002# — Lists all call and data forwarding settings
  • ##002# — Clears all call and data forwarding settings

If you’re on a CDMA network (like Verizon and US Cellular):

  • *72 — Lists all call and data forwarding settings
  • *73 — Clears all call and data forwarding settings

Unfortunately, MMI codes only work on Android devices, but you can use the USSD (Unstructured Supplementary Service Data) code *#21# on an iPhone to check your call forwarding status and see if your calls are being forwarded anywhere else.

If you are done your due diligence but you are still experiencing these symptoms, take your phone to a professional. Odds are they will have the tools to scan more deeply and remove any bad software that could be causing the problem.

Disclaimer

Technology is always changing and rarely is there static tech for smartphones and desktops. Thus, the contents of this post are only valid at the time of writing. Blog posts older than six months may have directions incompatible with your device or OS. Hopefully, older post content will continue to work as advertised. Thank you for reading TechSavvy.Life for Technology at Work For You.

Quote For the Day

Our inventions are wont to be pretty toys, which distract our attention from serious things. They are but improved means to an unimproved end.

David Thoreau

Tweet Info

That’s it. Please feel free to share this post! One way to share is via Twitter.

Just click the Tweet icon below. This will launch Twitter where you click its icon to post the Tweet.

Checkout TechSavvy.Life for blog posts on smartphones, PCs, and Macs! You may email us at contact@techsavvy.life for comments or questions.

I Would Like to Hear From You

Please feel free to leave a comment. I would love to hear from you. Do you have a computer or smart device tech question? I will do my best to answer your inquiry. Just send an email to contact@techsavvy.life. Please mention the device, app, and version you are using. To help us out, you can send screenshots of your data related to your question.

Author’s E-Book

You can access the e-book from a Kindle device, the Kindle App for the desktop or smartphone, which is a free app.

The author’s Vietnam eBook on the Battle for Tra Bong Vietnam: Events and Aftermath