RAYMOND OGLESBY @RaymondOglesby2
January 5, 2022
Instagram is primarily used on smartphones, but you can also use it in a desktop browser on Windows or Mac. For years that meant only viewing your feed and messages, but it can also be used to upload photos too.
As of October of 2021, Instagram added the long-awaited ability to post to Instagram from the website. You get nearly all of the same filters and editing tools that you can find in the iPhone and Android app, too. Let’s explore how this is done.
This is for Windows, PC, Mac, Linux, and Chromebook using Instagram

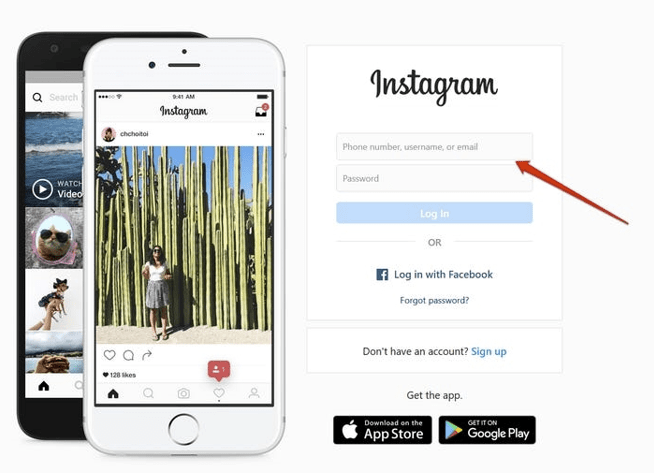
First, head on over to Instagram.com in a web browser such as Google Chrome or Safari. Sign in with your Instagram account if you are not already signed in. Refer to the below image:
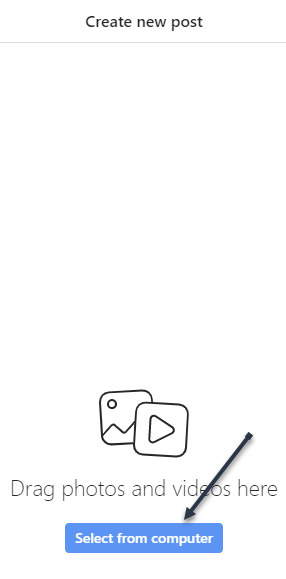
Next, click the plus “+” icon in the upper right-hand corner. See the below image:

Now, click Select From Computer and choose a photo from the file manager. See the following image:
Next, there are a couple of options where you can adjust the Aspect Ratio, Zoom in on the photo, or Add more photos to create a slideshow. In our example, we made no adjustments. Click Next when the photo is ready. Refer to the below image:

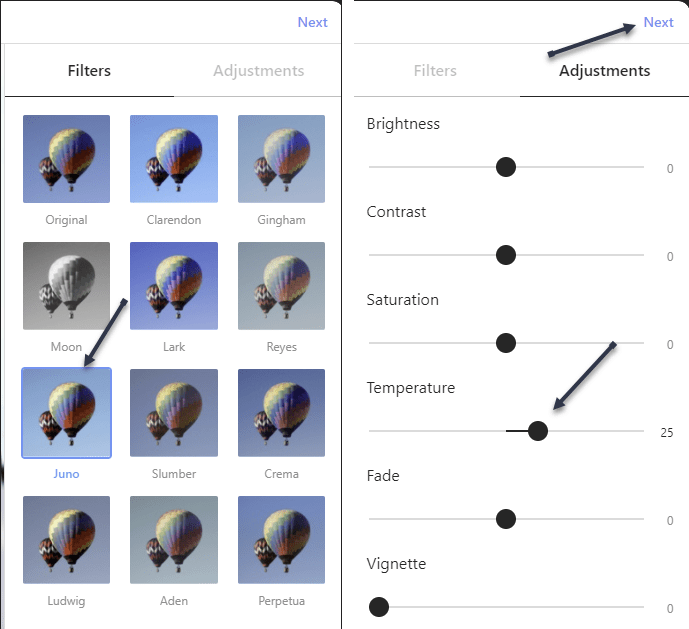
Now, you can choose a Filter or make some other adjustments to the photo. Click Next when the photo looks good. In our example, we set the Filter to Juno and increased the Temperature setting. See the below image:
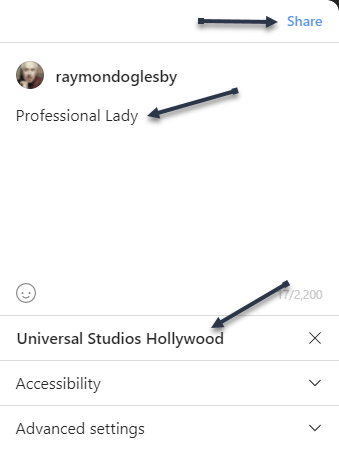
Next, write a Caption in the text box, add a Location if desired, and click Share. See the following image:
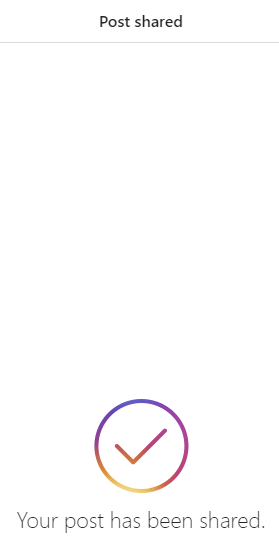
Now, you will be given a message about successfully sharing your Instagram post. Refer to the below image:
Your photo post will now be displayed on your Instagram account. Notice the warmer color and background from the original above. See the below image:

You can now post photos to your Instagram feed right from your Windows PC, Mac, Linux, or Chrome OS computer. This is especially useful for uploading photos that you have transferred onto your computer,
Quote For the Day
If we keep doing what we’re doing, we’re going to keep getting what we’re getting.
Stephen Covey
You are finished. Personally, I like this feature since I have most of my photos on my computer. Please feel free to share this post! One way to share is via Twitter.
Just click the Tweet icon below. This will launch Twitter where you click its icon to post the Tweet.
Check out TechSavvy.Life for blog posts on smartphones, PCs, and Macs! You may email us at contact@techsavvy.life for comments or questions.
Tweet
I Would Like to Hear From You
Please feel free to leave a comment. I would love to hear from you. Do you have a computer or smart device tech question? I will do my best to answer your inquiry. Just send an email to contact@techsavvy.life. Please mention the device, app, and version you are using. To help us out, you can send screenshots of your data related to your question.
Author’s E-book
You can access the e-book from a Kindle device, the Kindle App for the desktop or smartphone, which is a free app.