On Instagram, if you do not want someone’s updates to appear in your news feed anymore, you can unfollow them in your account. Let’s explore this feature.
This is for the iPhone and Android
Copyright Scott Adams, Inc./Distributed by Universal Uclick for UFS
When You Unfollow Someone
Unfollowing someone on Instagram basically means unsubscribing from their profile updates. Instagram does not notify the user when you unfollow them.
Later, if you change your mind, you can always re-follow the unfollowed account. You can also remove people who follow you on Instagram.
Unfollow Using Mobile
On your iPhone or Android device, use the Instagram app to unfollow people.
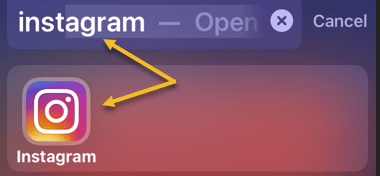
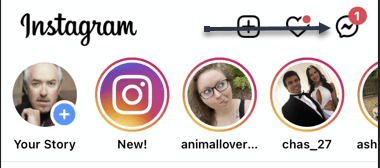
First, launch the Instagram app on your phone. You can use the Spotlight Search (your first screen) to locate the app. Just enter Instagram in the search box and tap the resulting Instagram icon. Refer to the below image:
Using Spotlight Search to find the Instagram app
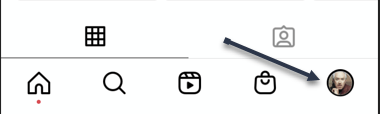
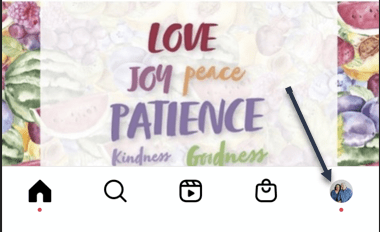
Next, at the bottom of the app, tap the profile icon (the last icon in the bottom bar). See the below image:
Selecting your profile icon
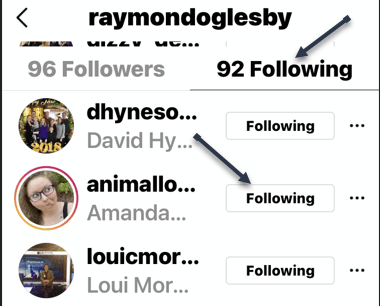
Now, at the top of your profile page, tap Following. This will display the users that you follow on Instagram. See the following image:
Selecting the number of people you follow
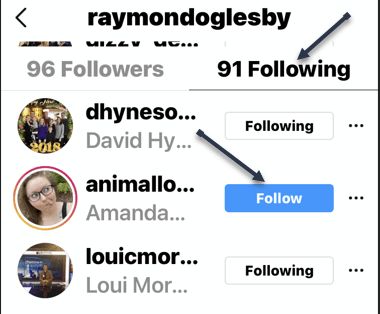
Next, in the Following list, find the account you want to unfollow. Then, next to that account, tap Following. In our example, we are Following 92 people. Refer to the below image:
Choosing a person to unfollow
Now, Instagram will remove your selected account from your Following list. The Following option is now turned into Follow, which means you have successfully unfollowed that account on Instagram and, in our example, the account changed to Following 91 persons.. See the below image:
Unfollowing the person
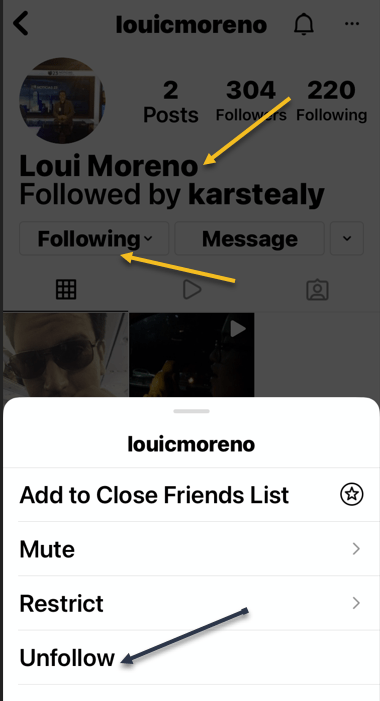
Now, if you would like to unfollow someone from their profile, then on their profile, tap Following and select Unfollow from the menu that opens In our example, we tapped the profile icon for louicmoreno, selected the Following drop-down box, then chose Unfollow from the menu. See the following image:
Unfollow a person from their profile
Quote For the Day
I have not failed. I’ve just found 10,000 ways that won’t work.
Thomas A Edison
That’s it. Please feel free to share this post! One way to share is via Twitter.
Just click the Tweet icon below. This will launch Twitter where you click its icon to post the Tweet.
Check out TechSavvy.Life for blog posts on smartphones, PCs, and Macs! You may email us at contact@techsavvy.life for comments or questions.
Please feel free to leave a comment. I would love hearing from you. Do you have a computer or smart device tech question? I will do my best to answer your inquiry. Just send an email to contact@techsavvy.life. Please mention the device, app, and version you are using. To help us out, you can send screenshots of your data related to your question.
The author’s Vietnam eBook on the Battle for Tra Bong Vietnam: Events and Aftermath
Instagram is a popular outlet for spontaneous texts thanks to its variety of filters and options. These are also the kind of conversations you do not want others to save permanently.
Instagram is a popular outlet for spontaneous texts thanks to its variety of filters and options. These may be the kind of conversations you do not want others to save permanently. Let’s explore how to make the messages disappear.
This is for iPhone and Android running Instagram
Copyright Scott Adams, Inc./Distributed by Universal Uclick for UFS
For creating self-destructing texts, Instagram offers a feature called Vanish Mode on its messaging service. An identical feature can be found in FacebookMessenger. Any text or media you send in Vanish Mode is automatically removed as soon as the recipient sees it.
First, make sure you have the latest version of the Instagram app on your Android or iPhone.
Next, open the Instagram app on your phone and swipe in from the left edge of the screen (or tap the text bubble button at the top right) to view a list of your messages. Refer to the below image:
Selecting to view messages
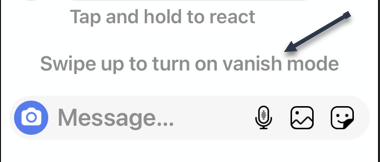
Now, perform a swipe-up gesture above the text box to activate Vanish Mode. Once that’s successful, Instagram will update your chat background with a darker shade and throw in a few animations to let you know Vanish Mode is active. See the below image:
Activating Vanish Mode by swiping up on a text box
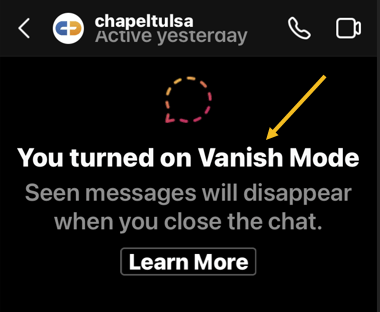
Next, in Vanish Mode, you can continue to chat normally and send messages in all the usual formats, like direct stories, voice clips, and more. See the following image:
You are in Vanish Mode
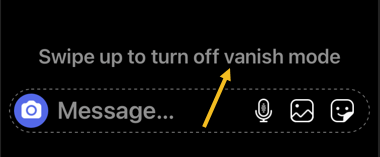
The difference is that once you swipe up again to leave Vanish Mode and the other person reads whatever you have sent, Instagram will delete those messages. Refer to the below image:
Exiting Vanish Mode by swiping up
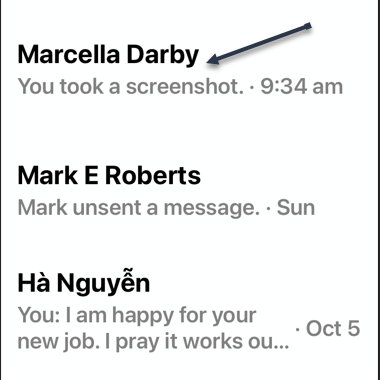
Now, while the recipient is free to take a screenshot of your messages in Vanish Mode, Instagram will notify you if and when they do.
Note! Instagram retains your Vanish Mode media and texts for up to an hour after they have been deleted. This is in case the recipient files a report for abuse and harassment and Instagram needs the Vanish Mode data to take action.
Quote For the Day
When you’re young, you look at television and think, there’s a conspiracy. The networks have conspired to dumb us down. But when you get a little older, you realize that’s not true. The networks are in business to give people exactly what they want.
Steve Jobs
That was easy. Please feel free to share this post! One way to share is via Twitter.
Just click the Tweet icon below. This will launch Twitter where you click its icon to post the Tweet.
Check out TechSavvy.Life for blog posts on smartphones, PCs, and Macs! You may email us at contact@techsavvy.life for comments or questions.
Please feel free to leave a comment. I would love hearing from you. Do you have a computer or smart device tech question? I will do my best to answer your inquiry. Just send an email to contact@techsavvy.life. Please mention the device, app, and version you are using. To help us out, you can send screenshots of your data related to your question.
The author’s Vietnam eBook on the Battle for Tra Bong Vietnam: Events and Aftermath
Privacy is an important thing to consider when putting all of your conversations into a messaging app. With Facebook Messenger’s Vanish Mode, you can make sensitive messages disappear after the recipient has read them. It’s a nice privacy trick.
Privacy is an important thing to consider when putting all of your conversations into a messaging app. With Facebook Messenger’s Vanish Mode, you can make sensitive messages disappear after the recipient has read them. It’s a nice privacy trick.
Vanish Mode is also available on Instagram and it works exactly the same as Facebook Messenger. The idea is you start Vanish Mode, say what you want to say, then leave Vanish Mode. After your messages have been seen, they disappear.
This is for iPhone, iPad, and Android using Messenger
Copyright Scott Adams, Inc./Distributed by Universal Uclick for UFS
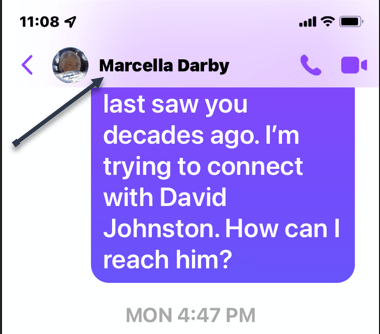
First, open Messenger and start a conversation with someone you are friends with. Refer to the below image:
Selecting a friend to start a conversation
Next, while in the conversation view, press down and hold while swiping up from the text box. You will see a little indicator to help you get into Vanish Mode. The tiny dot is barely visible. On the below screenshot, you will notice the top of the screen has changed color. See the below image:
Entering Vanish Mode
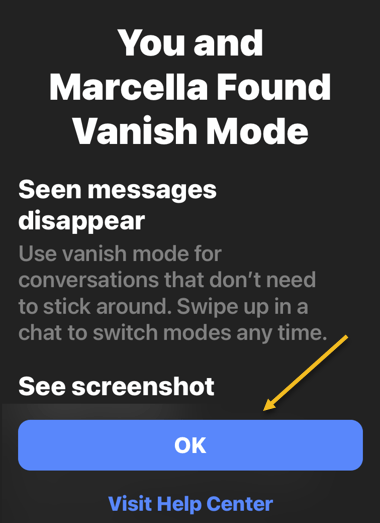
Now, on your first use of Vanish Mode, a confirmation screen will be displayed. Tap OK to continue. See the following image:
Vanish Mode confirmation
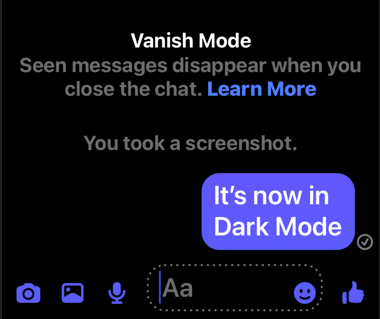
Next, in Vanish Mode, the background will be dark. You can now have a conversation like you normally would. Refer to the below image:
In Vanish Mode
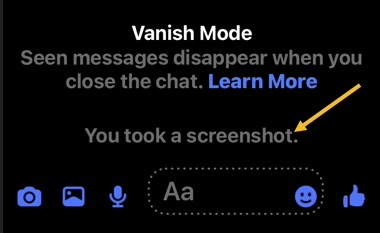
Now, if you or the recipient takes a screenshot while you are in Vanish Mode, you will be notified. See the below image:
Notification either you or the recipient has taken a screenshot
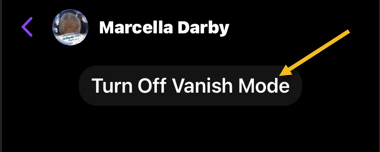
Next, when you are ready for everything to disappear, tap on Turn Off Vanish Mode. You can also do the swipe-up gesture again. See the following image:
Exiting Vanish Mode
Note!Messenger retains your Vanish Mode media and texts for up to an hour after they have been deleted. This is in case the recipient files a report for abuse and harassment and Messenger needs the Vanish Mode data to take action.
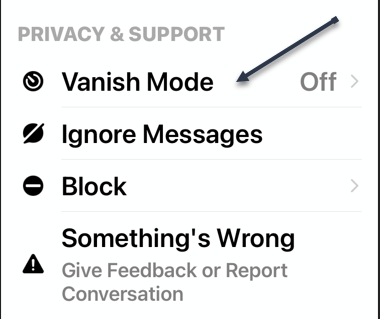
You can also turn on Vanish Mode via the recipient profile. Scroll down to the Privacy & Support section and toggle Vanish Mode to ON. Refer to the below image:
Entering Vanish Mode from recipient profile
Quote For the Day
The reason that Apple is able to create products like the iPad is because we’ve always tried to be at the intersection of technology and the liberal arts.
Steve Jobs
That’s all there is to it. Think of it like walking into a sound-proof room to have a secret conversation. You can enter Vanish Mode for a while and then leave when you are done.
Just click the Tweet icon below. This will launch Twitter where you click its icon to post the Tweet.
Check out TechSavvy.Life for blog posts on smartphones, PCs, and Macs! You may email us at contact@techsavvy.life for comments or questions.
Please feel free to leave a comment. I would love hearing from you. Do you have a computer or smart device tech question? I will do my best to answer your inquiry. Just send an email to contact@techsavvy.life. Please mention the device, app, and version you are using. To help us out, you can send screenshots of your data related to your question.
The author’s Vietnam eBook on the Battle for Tra Bong Vietnam: Events and Aftermath
Got a new photo and want to show it off to your Instagram followers? Instagram makes it easy to change your profile picture.
Unlike Facebook, you can change your profile picture without posting. There is no notification when you change your profile photo, it just changes. Let’s explore how this is done.
This is for. iPhone/iPad and Android using Instagram
Copyright Scott Adams, Inc./Distributed by Universal Uclick for UFS
On your iPhone/iPad or Android phone, use the Instagram app to update your profile picture.
First, launch the Instagram app on your phone. In the app, from the bar at the bottom, select the profile icon (which is the last icon in that row). Refer to the below image:
Accessing your profile
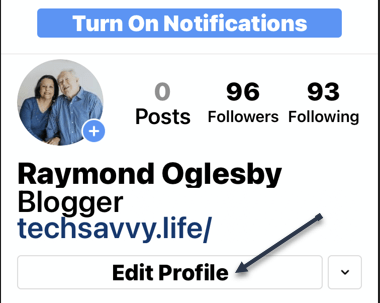
Next, on your profile screen, beneath your profile details, tap the Edit Profile option. See the below image:
Selecting Edit Profile option
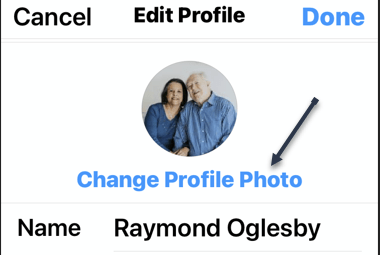
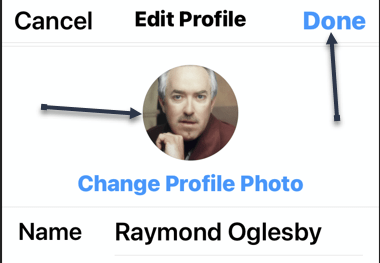
Now, beneath your current profile picture, tap Change Profile Photo. See the following image:
Selecting to change profile photo
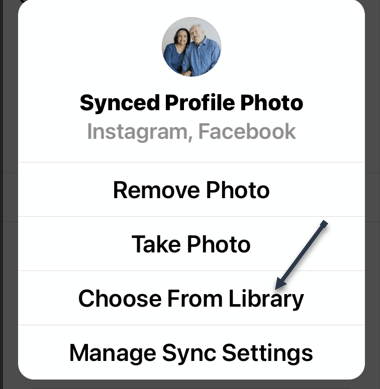
Next, from the bottom of your app, Instagram will open a Change Profile Photo or Synced Profile Photo menu.
Now, if you want to replace your profile picture with a picture saved on your phone, tap New Profile Photo in the menu. To add a photo from your Facebook profile, tap Import from Facebook.
Tip: Use the Remove Profile Photo option if you simply want to delete the current picture from your Instagram profile.
We will choose the Choose From Library option. Refer to the below image:
Selecting where to get your profile photo
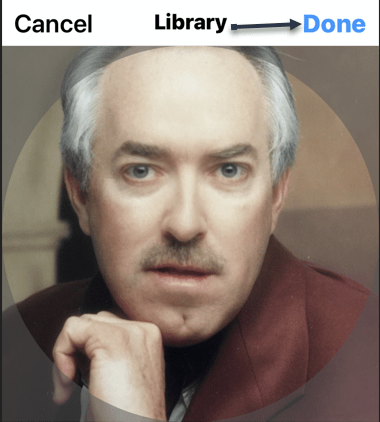
Next, Instagram will open your phone’s gallery. Here, select the photo that you would like to make your profile picture on Instagram. When you select a photo, the app will display editing options that are optional. Tap Done to continue. See the below image:
Selecting your profile photo
Now, Instagram will take you to your profile page, and you will see your new profile picture there. Tap Done to continue. See the following image:
Your new profile photo
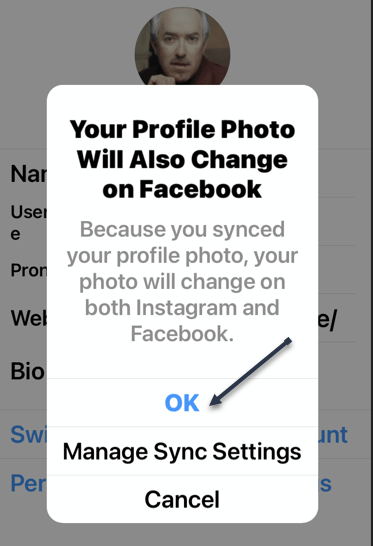
Next, if you have enabled Sync profile photo, (from Choose From Library screen above) your new photo will be synced to Facebook. Tap OK to continue. Refer to the below image:
Syncing enabled
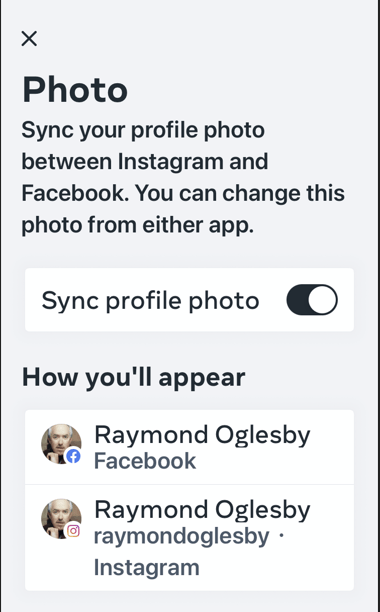
Now, go back to the above screen and tap Manage Sync Settings. A confirmation dialog will be displayed regarding your profile photo sync between Facebook and Instagram. See the below image:
Your sync confirmation
Next, exit Instagram.
Quote For the Day
Older people sit down and ask, ‘What is it?’ but the boy asks, ‘What can I do with it?’.
Steve Jobs
That’s it. Please feel free to share this post! One way to share is via Twitter.
Just click the Tweet icon below. This will launch Twitter where you click its icon to post the Tweet.
Check out TechSavvy.Life blog posts on smartphones, PCs, and Macs! You may email us at contact@techsavvy.life for comments or questions.
Please feel free to leave a comment. I would love to hear from you. Do you have a computer or smart device tech question? I will do my best to answer your inquiry. Just send an email to contact@techsavvy.life. Please mention the device, app, and version you are using. To help us out, you can send screenshots of your data related to your question.
The author’s Vietnam eBook on the Battle for Tra Bong Vietnam: Events and Aftermath
With so many devices and so many social media accounts, it can be hard to remember where you are logged in to which accounts. To protect yourself from potential hacks, it’s a good idea to log out of social media sites, like Facebook, once you are done with your session, especially if you are using someone else’s device.
With so many devices and so many social media accounts, it can be hard to remember where you are logged in to which accounts. To protect yourself from potential hacks, it’s a good idea to log out of social media sites, like Facebook, once you are done with your session, especially if you are using someone else’s device.
But, if you forgot to log out, or suspect an unauthorized third-party login, you can still log out of all devices at once from your Facebook’s account settings. Let’s explore how this is done.
This is for devices running Facebook
Copyright Scott Adams, Inc./Distributed by Universal Uclick for UFS
Use Mobile App
If you use an iPhone, iPad, or Android phone, you can use the official Facebook app to sign out from Facebook on all your devices at once.
First, launch the Facebook app on your smartphone.
In the Facebook app, tap the three horizontal lines menu. On an iPhone or iPad, this menu is at the bottom of the screen. On an Android phone, you will find this menu at the top-right corner of the display. Refer to below image:
Accessing the Menu
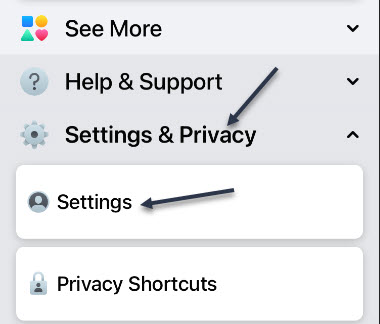
Next, scroll down the Menu screen that opens, and tap Settings & Privacy. See below image:
Accessing Settings & Privacy option
Now, select Settings. See following image:
Accessing Settings option
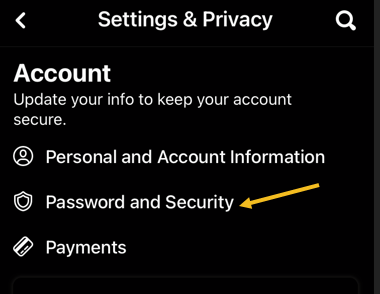
Next, scroll down to the Account section. Here, tap Password and Security. Refer to below image:
Accessing Password and Security option
Now, on the Where you’re logged In header, tap See All. (Note! My display text automatically changes size and the See All may be somewhat hidden depending on font size. See below image:
Accessing See All option
Facebook will display the list of devices where you use your account. At the bottom of this screen, tap Log Out of All Sessions. See following image:
Accessing Log Out Of All Sessions option
Next, select Log Out. Refer to below image:
Confirm your action by tapping Log Out
And Facebook will log you out from all your logged-in devices!
To use your Facebook account on those devices again, you will have to enter your Facebook username and password.
If you just want to log out of one session, tap the 3-dot icon to the right of a session, then tap Log Out and the session will be removed. See below image:
Log Out of one session
Use Facebook Site
If you are on a Windows, Mac, Linux, or Chromebook computer, use the Facebook site to sign yourself out from all your Facebook logged-in devices.
First, launch a web browser on your computer and open the Facebook site.
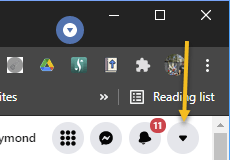
Next, at the top-right corner, click the down-arrow icon. See following image:
Accessing the Menu
Now, select Settings & Privacy. Refer to below image:
Accessing Settings & Privacy option
Next, choose Settings. See below image:
Accessing Settings option
Facebook will take you to your account’s settings page. Here, in the sidebar to the left, click Security and Login. See following image:
Accessing Security and Login option
Now, from the Where You’re Logged In section, click the See More option. Refer to below image:
Accessing See More option
Next, you will see a list of devices where you use your Facebook account. To sign out of all these devices, click Log Out Of All Sessions at the bottom-right corner of the Where You’re Logged In section. See below image:
Accessing Log Out Of All Sessions
Now, a Log Out of All Sessions prompt will appear. Next, click Log Out in the prompt to confirm your choice. See following image:
Confirm your action by tapping Log Out
And Facebook will log you out from all your logged-in devices!
To use your Facebook account on those devices again, you will have to enter your Facebook username and password.
If you just want to log out of one session, click the 3-dot icon to the right of the session, then click Log Out and the session will be removed. Refer to below image:
Log Out of one session
Quote For the Day
The thing that doesn’t fit is the thing that’s the most interesting: the part that doesn’t go according to what you expected.
Richard P Feynman
That’s it. Please feel free to share this post! One way to share is via Twitter.
Just click the Tweet icon below. This will launch Twitter where you click its icon to post the Tweet.
Check out TechSavvy.Life for blog posts on smartphones, PCs, and Macs! You may email us at contact@techsavvy.life for comments or questions.
Please feel free to leave a comment. I would love hearing from you. Do you have a computer or smart device tech question? I will do my best to answer your inquiry. Just send an email to contact@techsavvy.life. Please mention the device, app and version that you are using. To help us out, you can send screenshots of your data related to your question.
The author’s Vietnam eBook on the Battle for Tra Bong Vietnam: Events and Aftermath
What does it mean to pin a post on Facebook? A pinned post is a status update that you manually select to stay at the top of your page’s timeline, meaning it will not slip down as you continue to add other posts to your page.
What does it mean to pin a post on Facebook? A pinned post is a status update that you manually select to stay at the top of your page’s timeline, meaning it will not slip down as you continue to add other posts to your page. Let’s explore how to do this.
This is for devices running Facebook
Copyright Scott Adams, Inc./Distributed by Universal Uclick for UFS
You can only have one post pinned to your profile at a time. If you try to pin a second post, that second post gets pinned and the first post gets unpinned.
Pin to Your Profile
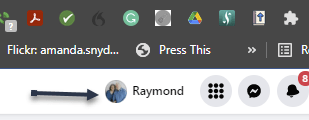
First, launch a web browser on your computer and access the Facebook site. Next, log in to your account and in the top right-hand corner of the site, click your profile icon. Refer to below image:
Accessing your Profile
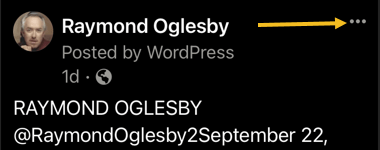
Now, on your profile page that opens, find the post you want to pin. At the top right-hand corner of the post, click the three dots menu. See below image:
Selecting the 3 dots menu
Next, from the three-dots menu, select Pin post. See following image:
Selecting to Pin your post
And immediately, Facebook will pin the selected post to the top of your profile page. Scroll up your profile and your pinned post will appear there. Refer to below image:
Your pinned post
To unpin a pinned post, from the top right-hand corner of the pinned post, select the three dots menu and click Unpin post in the menu. See below image:
Selecting to Unpin your post
Facebook will remove the post from the top of your profile page. It will continue to appear at its original location in your profile, though. Now, refresh the page or exit Facebook.
In addition to your personal profile, you can pin a post to your Facebook page, too.
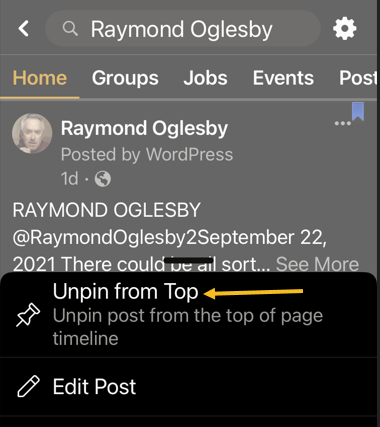
First, access your page and find a post to pin. (Note! I am doing this on my business page using my iPhone). Next, at the top right-hand corner of the post, click the three dots menu. See following image:
Selecting the 3 dots menu
Now, from the three-dots menu, select Pin to Top. Refer to below image:
Selecting to Pin your post
Next, Facebook will add your selected post to the top of the page.
To remove the post from the top of the page, from the top right-hand corner of the post, click the three dots menu. Next, from the menu that opens, select “Unpin from Top. See below image:
Selecting to Unpin your post
Quote For the Day
You can’t just ask customers what they want and then try to give that to them. By the time you get it built, they’ll want something new.
Steve Jobs
That’s it. You now know how to pin/unpin a Facebook post. Please feel free to share this post! One way to share is via Twitter.
Just click the Tweet icon below. This will launch Twitter where you click its icon to post the Tweet.
Check out TechSavvy.Life for blog posts on smartphones, PCs, and Macs! You may email us at contact@techsavvy.life for comments or questions.
Please feel free to leave a comment. I would love hearing from you. Do you have a computer or smart device tech question? I will do my best to answer your inquiry. Just send an email to contact@techsavvy.life. Please mention the device, app and version that you are using. To help us out, you can send screenshots of your data related to your question.
The author’s Vietnam eBook on the Battle for Tra Bong Vietnam: Events and Aftermath
The Privacy Checkup tool allows you to determine how much or how little information you reveal, and to whom.
Facebook has tons of privacy checks that it would take three or more blog posts to cover the topic. In this post we are going to tackle two topics. The Privacy Checkup is tedious and laborious, plus, there are way too many checks. In our opinion, Facebook is a giant bureaucracy, too big for its own good Regardless, you may be surprised at the kinds and amount of information you are sharing, I know I was. Just take the time to discover what you are sharing using Facebook’s Privacy Checkup tool.
The Privacy Checkup tool allows you to determine how much or how little information you reveal, and to whom. Let’s explore this Facebook tool.
This is for devices running Facebook. Screenshots are from Windows 10
Copyright Scott Adams, Inc./Distributed by Universal Uclick for UFS
Start Privacy Checkup
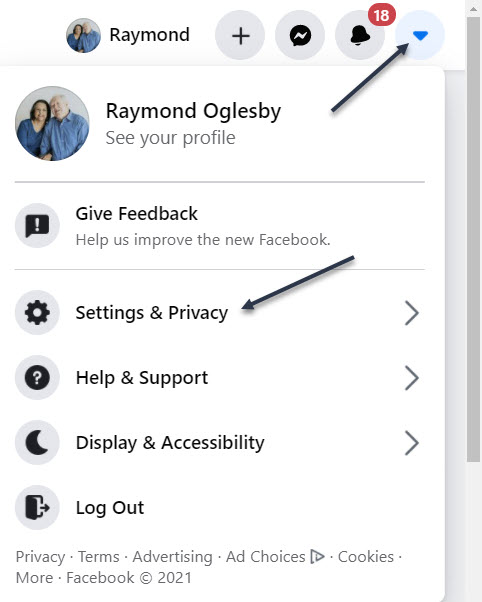
To run the latest version of Facebook’s Privacy Checkup tool, first, launch Facebook. Next, click the down arrow icon in the upper right-hand corner, then click on Settings& Privacy. Refer to below image:
Accessing Settings & Privacy
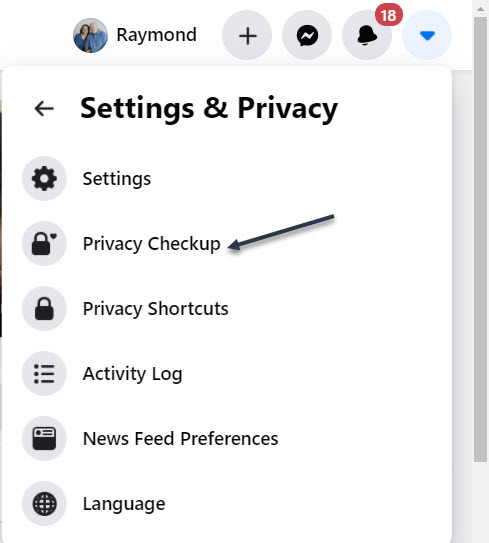
Now, select Privacy Checkup. See below image:
Accessing Privacy Checkup tool
Choose the First Topic
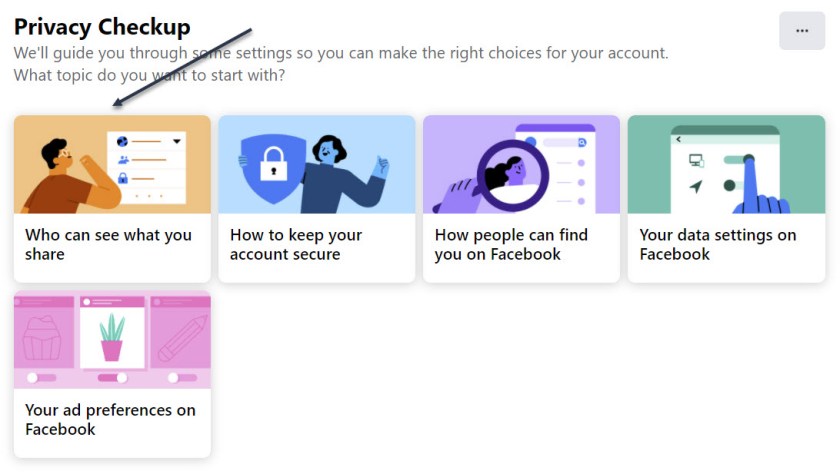
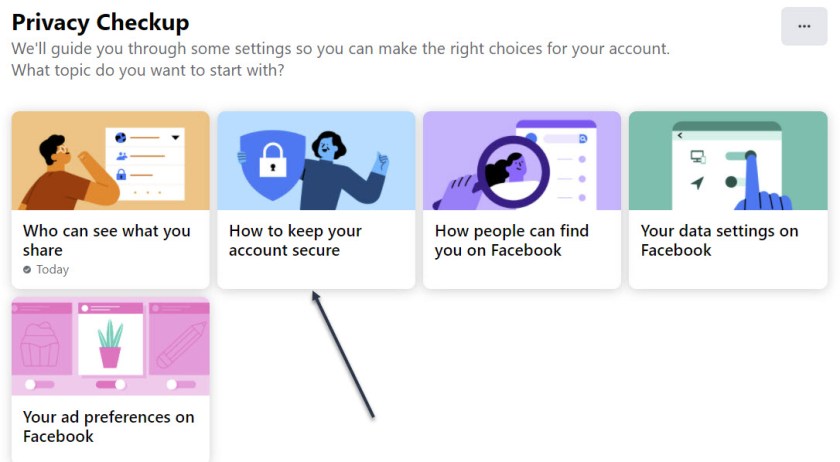
Next, in the Privacy Checkup window, click the first topic, Who can see what you share. See following image:
Selecting the first topic
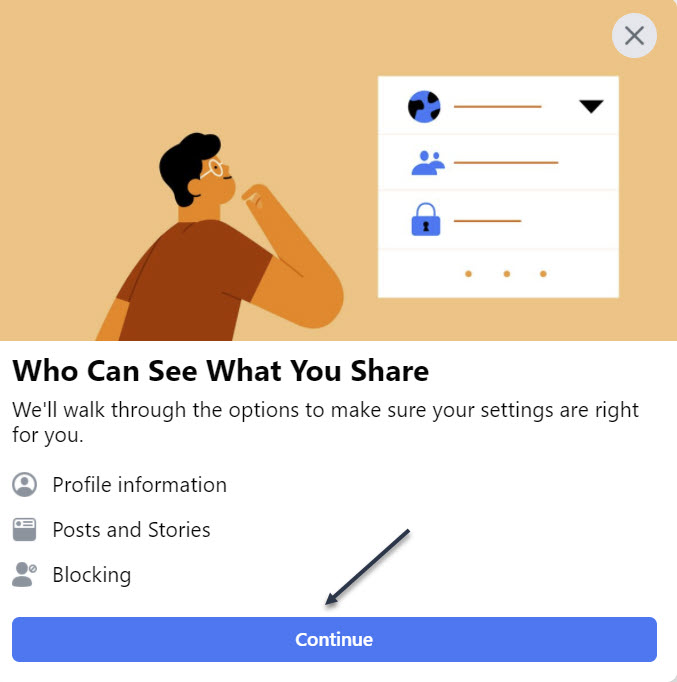
Now, click Continue. Refer to below image:
Verbiage about the topic, continue to next screen
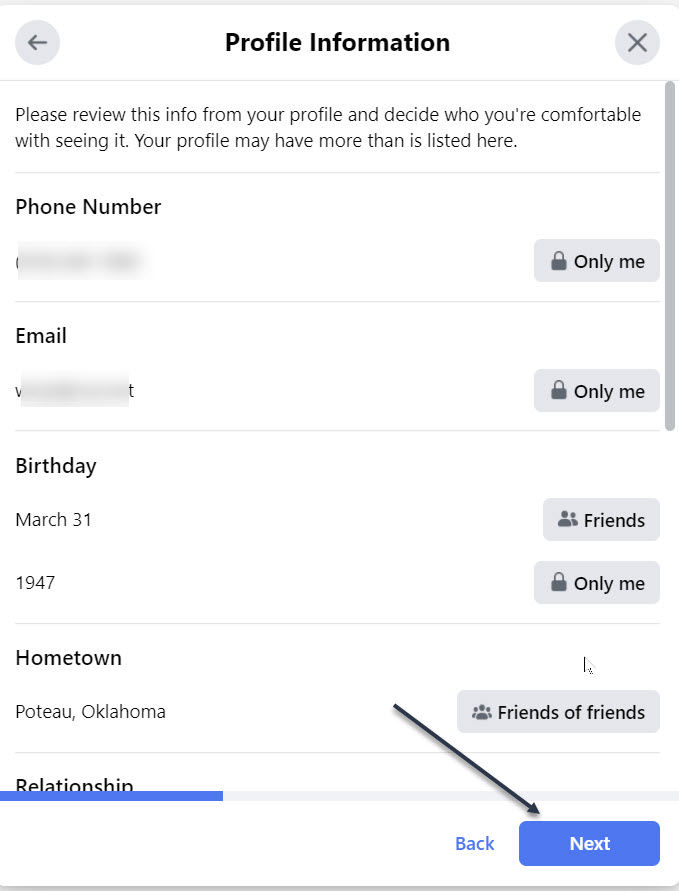
Your Profile Information
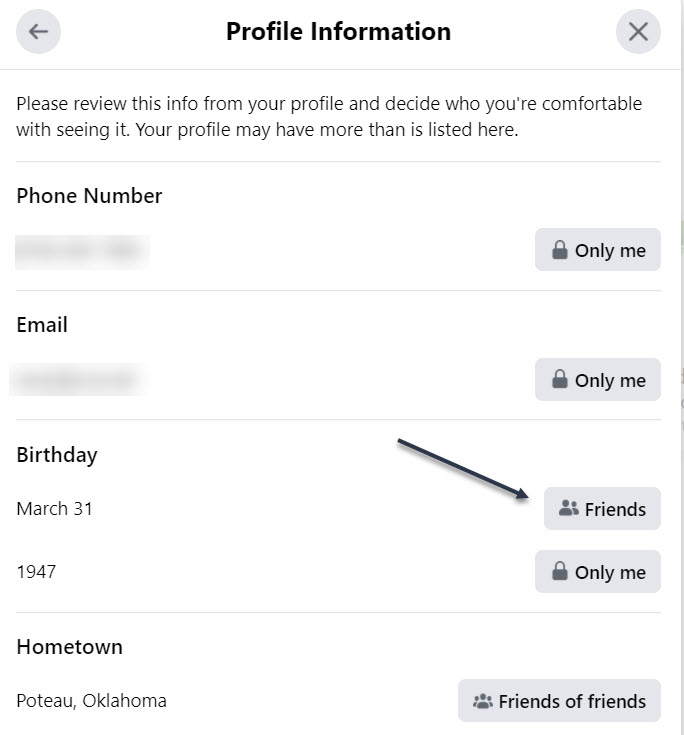
Next, at the Profile Information window, review the settings for your phone number, email addresses, and birthday. Click the button next to each one, and choose whether to change it to Public, Friends, Only Me, or a specific Facebook list. See below image:
What and who sees your Profile Information
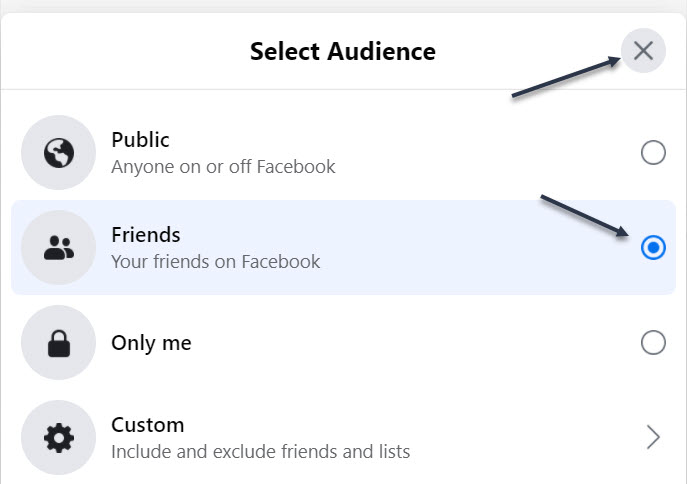
I changed my Birthday to Friends (it was already Friends, I kept it the same). To exit, click the “X” in upper right-hand corner. See following image:
Changing who sees your Birthday
You probably want this information to remain private or only visible to friends or a specific group. When done, click Next. Refer to below image:
Continue to the next screen
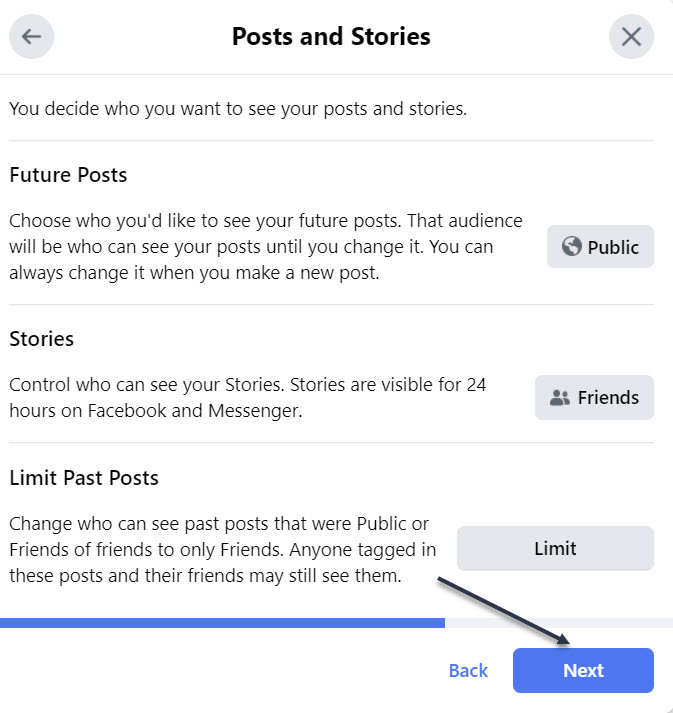
Your Posts
Now, at the Posts window, set the option for who should see future posts. You would likely want to set this to Friends. The Limit Past Posts option changes past posts that were seen by the Public or Friends of Friends to only Friends. Click Next to continue. See below image:
Who sees your Posts, continue to next screen
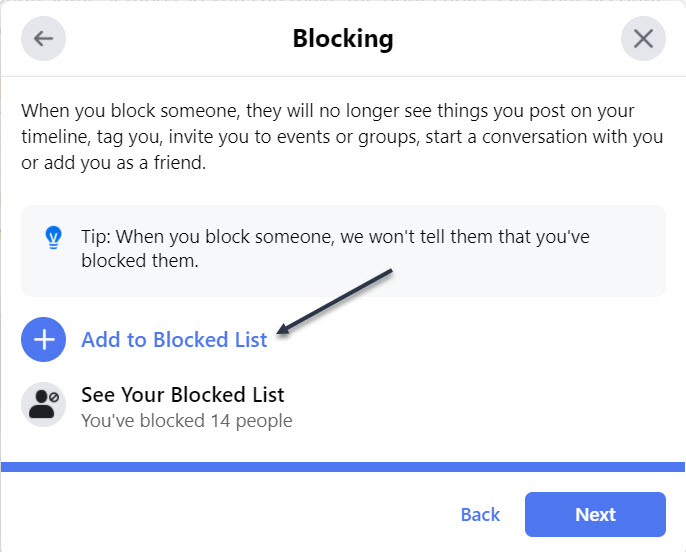
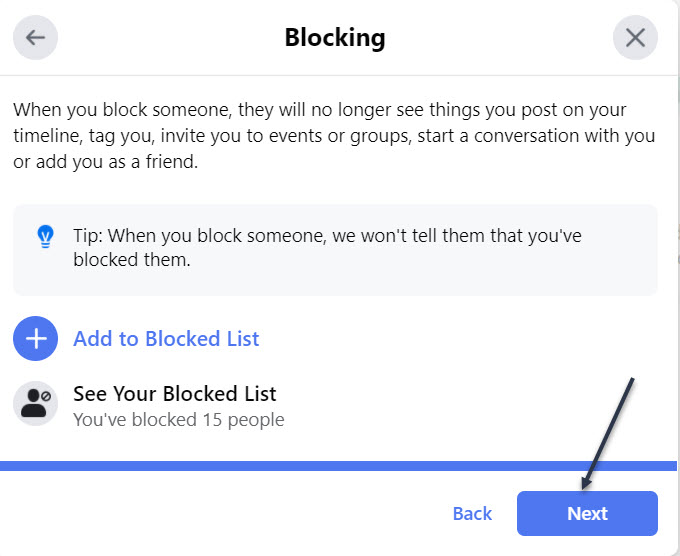
Your Blocked People
Next, at the Block screen, you can block specific people from seeing things you post, starting conversations with you, or trying to add you as a friend. To do this, click Add to Blocked list link. See following image:
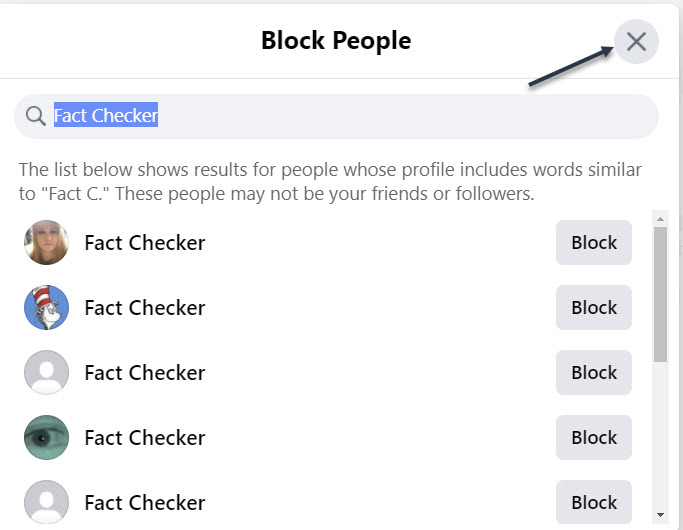
Now, type the name of the person or account you wish to block. From the list of suggestions, click the Block button for the correct person, then click Next. Refer to below image:
Entering a name to block
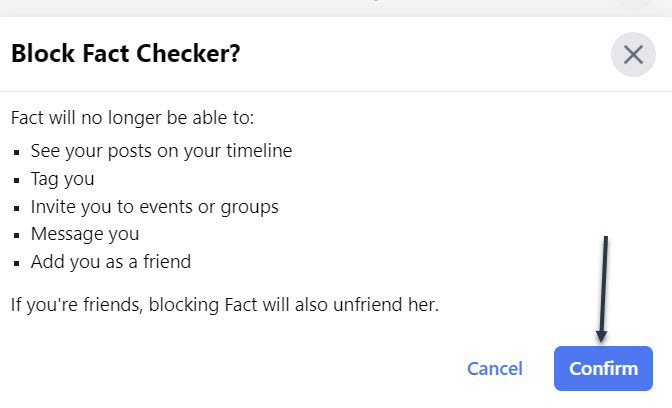
Next, click Confirm to block the person and continue. See below image:
Confirming a blocked person
Now, you will be taken back to the Block screen. You may select another person to block. When finished, click the “X” in upper right-hand corner. See following image:
Exiting the blocked persons screen
Next, to continue, click Next. Refer to below image:
Continue to the next screen
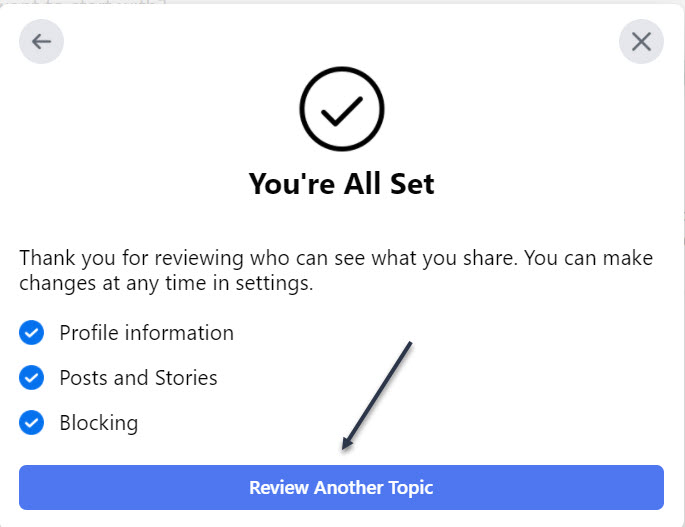
You Are Finished With First Topic
Now, the You’re All Set window will open indicating you are finished with the topic. To continue, click the Review Another Topic button. See below image:
You have finished this topic screen
Choose Your Second Topic
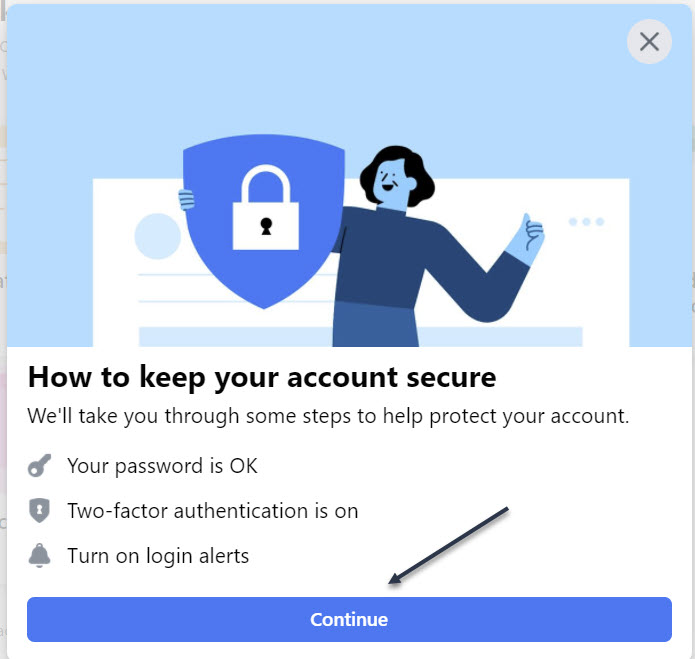
Next, select How to keep your account secure. See following image:
Select the second topic
Note! My Password is OK and Two-factor authentication is on. Now, click Continue. Refer to below image:
Verbiage about the topic, continue to next screen
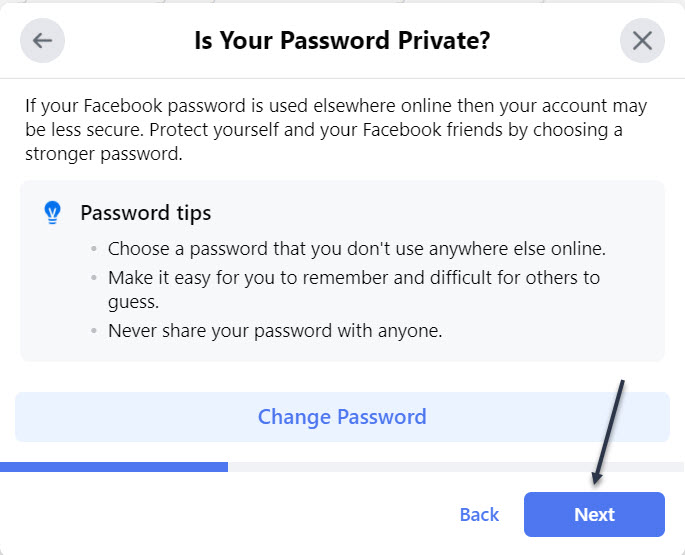
Check Your Password
Next, at the window for Is Your Password Private, click Change Password if you are concerned that it was compromised or you want to change it to something more secure then click Next. See below image:
Manage your password, continue to next screen
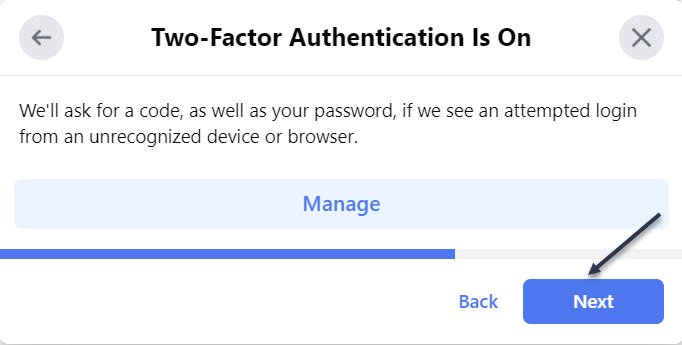
Check Your Two-Factor Authentication
If Two-factor authentication is off, click the Get Started button to add Two-Factor authentication to protect your Facebook account. You want to do this. Just, follow the steps to set this up. Now, click Next to continue. See following image:
Manage Two-Factor Authentication, continue to next screen
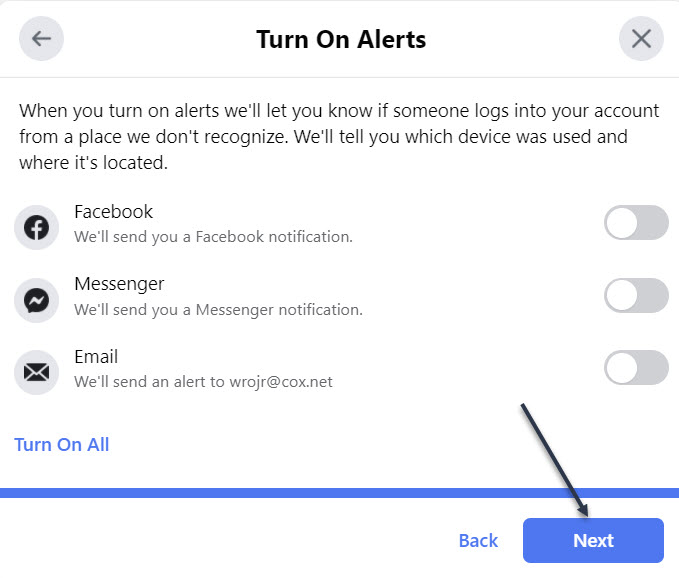
Check Your Alerts
Next, at the window for Turn On Alerts, turn on the switch for any alerts you wish to receive if you or someone else signs into your Facebook account from a new or different location, then click Next. Refer to below image:
Enable/Disable Alerts, continue to next screen
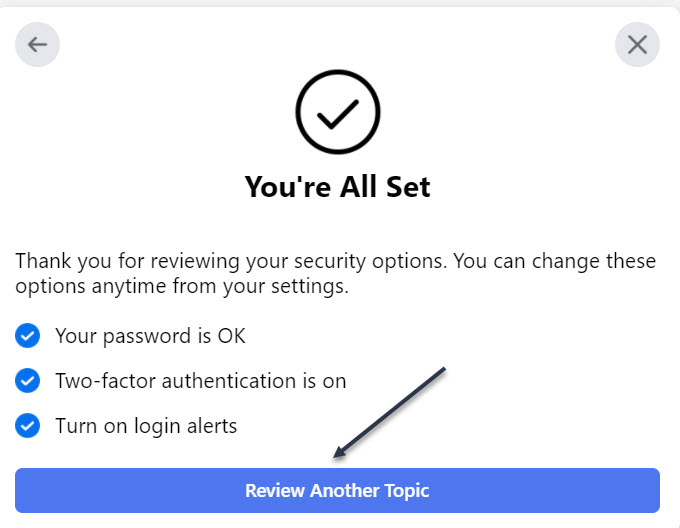
You Are Finished With Second Topic
Now, the You’re All Set window will open indicating you are finished with the topic. To continue, click the Review Another Topic button. See below image:
You have finished this topic
You may continue to one or more of the next three topics and follow its directions.
Quote For the Day
“Technology is a useful servant but a dangerous master”.
Christian Lous Lange
That’s it. You now have controlled your Privacy settings in Facebook. Please feel free to share this post! One way to share is via Twitter.
Just click the Tweet icon below. This will launch Twitter where you click its icon to post the Tweet.
Check out TechSavvy.Life for blog posts on smartphones, PCs, and Macs! You may email us at contact@techsavvy.life for comments or questions.
Please feel free to leave a comment. I would love hearing from you. Do you have a computer or smart device tech question? I will do my best to answer your inquiry. Just send an email to contact@techsavvy.life. Please mention the device, app and version that you are using. To help us out, you can send screenshots of your data related to your question.
The author’s Vietnam eBook on the Battle for Tra Bong: Events and Aftermath
Have you received the message “This post has been removed for misinformation… or deemed inappropriate….” on Facebook. Just who are these Facebook “Police”?
Who you goin to call, Fact Checkers? A ‘play on words’ from the movie ‘Ghostbusters’.
Have you received the message “This post has been removed for misinformation… or deemed inappropriate….” on Facebook. Just who are these Facebook “Police”?
You will be surprised at the number of people who use ‘fact checker’ or ‘gate keeper’ as their name
Facebook has partnered with independent third-party fact-checkers globally who are certified through the non-partisan International Fact-Checking Network (ICFN). This fact-checking program launched in 2016, and has continued to expand it since then to cover more languages and countries.
The focus of this program is to address viral misinformation; provably false claims, particularly those that have the potential to mislead or harm.
Fact-checking partners are able to review content across both Facebook and Instagram, including organicand boosted posts. They can also review videos, images, links or text-only posts.
There are a lot of guides on the Internet that tell you to block ‘fact checker’ from the Facebook block user function. However, all this does is block users and pages that call themselves ‘fact checker’. Facebook does not actually disclose who and where the ‘fact checker’ actually are, so blocking random pages named ‘fact checker’ won’t really do much. The same goes for ‘gate keeper’.
So, this post is just for fun and informational. You are unable to actually block a Facebook ‘fact checker’ or ‘gate keeper’. With that said, let’s explore how to block people who call themselves ‘fact checker’ or ‘gatekeeper’.
This is for devices running Facebook
Copyright Scott Adams, Inc./Distributed by Universal Uclick for UFS
Who Are Fact Checkers
Source: Facebook
Since we do not believe that a private company like Facebook should be the arbiters of truth, we rely on independent fact-checkers to identify and review potential misinformation, which enables us to take action.
Identify: We identify potential misinformation using a variety of signals, and our fact-checking partners can also proactively identify content on their own.
Review: Fact-checkers review and rate the accuracy of stories through original reporting, including interviewing primary sources, consulting public data, and conducting analyses of media, including photos and video.
Act: Once we have a rating from a fact-checking partner, we take action by ensuring that fewer people see that misinformation by surfacing fact-check articles to users across our platforms and showing labels on top of false stories.
Who Are Gate Keepers
Source: Slate
Facebook Oversight Board is their gatekeeper. A gatekeeper decides what is free speech or not. The board will act much like a court of appeals for the platform, and it will take on cases regarding how to handle controversial content on Facebook and Instagram. The board will also act in an advisory capacity, giving policy recommendations to the company.
Block a Fact Checker
First, launch Facebook and tap the Menu icon. Refer to below image:
Accessing Facebook menu
Now, scroll down and open the Settings and Privacy section and tap Settings. See below image:
Accessing Facebook settings
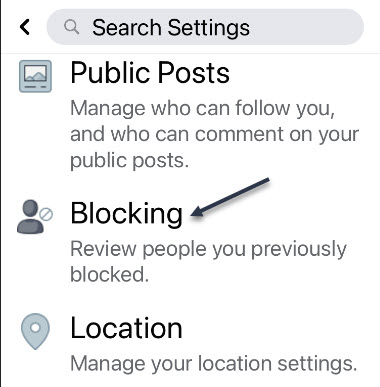
Next, scroll down to the Blocking section and tap it. See following image:
Accessing the Blocking section
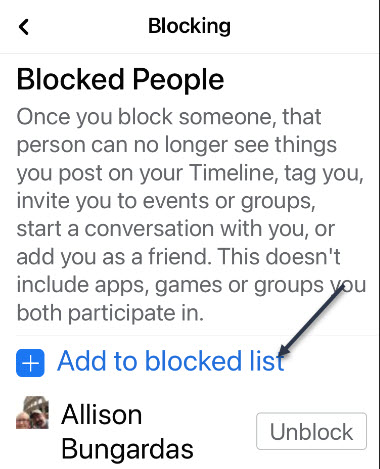
Next, tap the link Add to blocked list. Refer to below image:
Accessing the Add to blocked list link
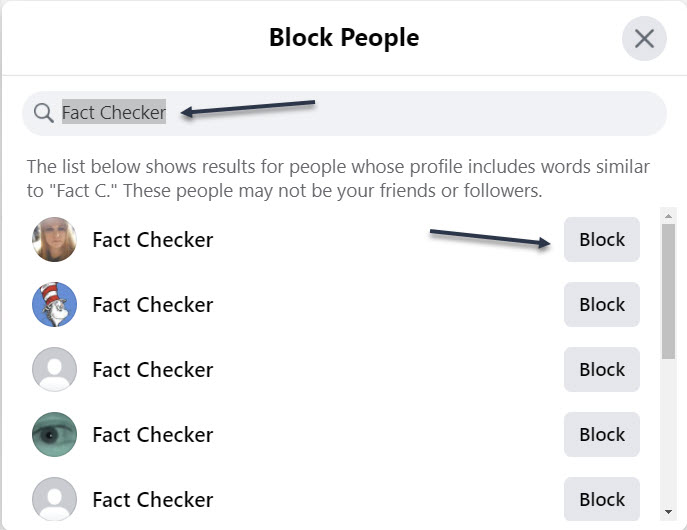
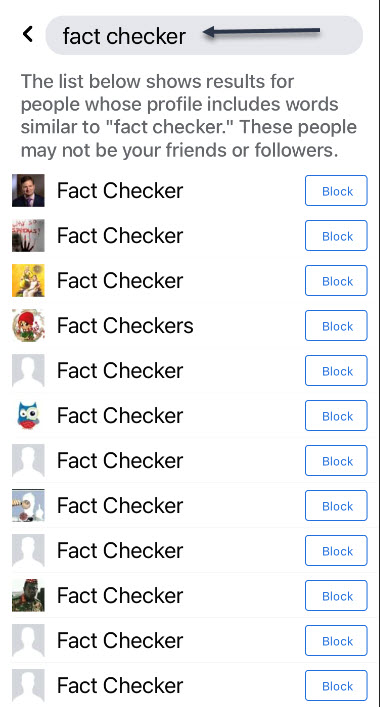
At the top of the page, in the Search box, type in: fact checker. Here you will see a long list of people using the name of ‘fact checker’. See below image:
Entering Fact Checker in the Search box
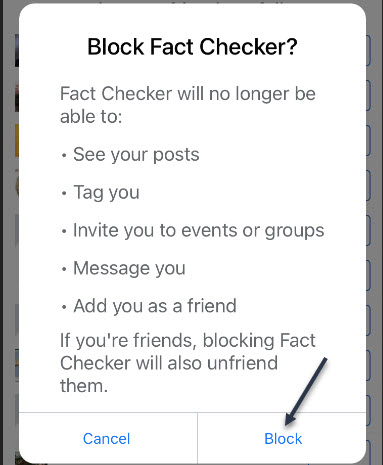
Next, tap a listing or the Block icon and you will be given a dialog box to Block or Cancel. Tap the Block icon. That person will be added to your Blocked People list. See following image:
Blocking a Fact Checker
Now, repeat the above for each ‘fact checker’ person you want to block. Next, in the Search box, type in: fact checkers. Here you will see another long list of people using the name of ‘fact checkers’. Next, tap a listing or the Block icon. Tap the Block icon and repeat for each person in the list as needed.
Block a Gate Keeper
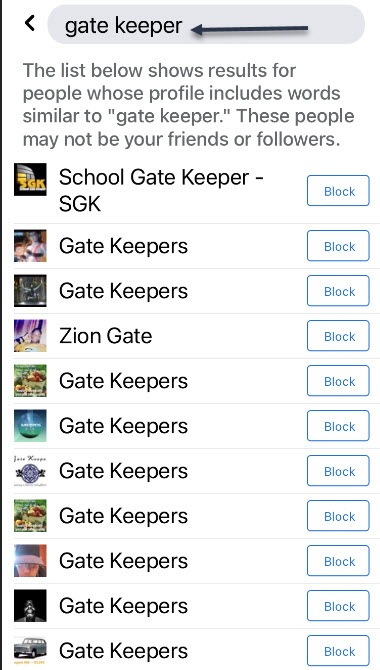
Go back to the Search box and type in: gate keeper. Here you will see a long list of people using the name of ‘gate keeper’. Refer to below image:
Entering Gate Keeper in the Search box
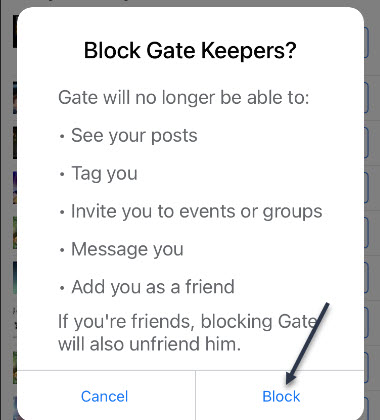
Next, tap a listing or the Block icon you will be given a dialog box to Block or Cancel. Tap the Block icon. See below image:
Blocking a Gate Keeper
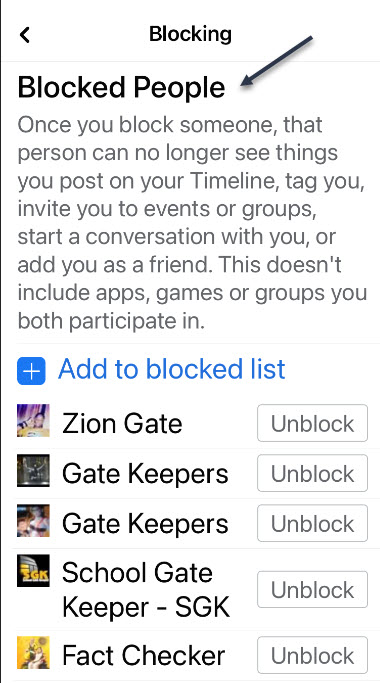
Repeat the above for a search of ‘gate keepers’ and block as needed. Next, tap the back button to see your BlockedPeople list that includes ‘fact checker’, ‘fact checkers’, ‘gate keeper’ and/or ‘gate keepers’. Why do people use such names? See following image:
Your Blocked People list
Now, tap all the way back using the Back button and exit Facebook.
I hope you learned something about the Facebook ‘Police’. We did. Well, that’s it. Please feel free to share this post! One way to share is via Twitter.
Just click the Tweet icon below. This will launch Twitter where you click its icon to post the Tweet.
Check out TechSavvy.Life for blog posts on smartphones, PCs or Macs! You may email us at contact@techsavvy.life for comments or questions.
Please feel free to leave a comment. I would love hearing from you. Do you have a computer or smart device tech question? I will do my best to answer your inquiry. Just send an email to contact@techsavvy.life. Please mention the device, app and version that you are using. To help us out, you can send screenshots of your data related to your question.
The author’s Vietnam eBook on the Battle for Tra Bong: Events and Aftermath
Facebook can feel a little overwhelming. What if you miss a post and you can not find it later? Thankfully, Facebook has a bookmarking feature to help you keep track of things and save them for later.
Facebook can feel a little overwhelming. What if you miss a post and you can not find it later? Thankfully, Facebook has a bookmarking feature to help you keep track of things and save them for later.
You can save shared links, posts, photos, videos, and even pages and events. These things can all be organized into Collections. Let’s explore how to do this.
This is for iPhone, iPad, and Android using Facebook
Copyright Scott Adams, Inc./Distributed by Universal Uclick for UFS
How to Save Facebook Posts
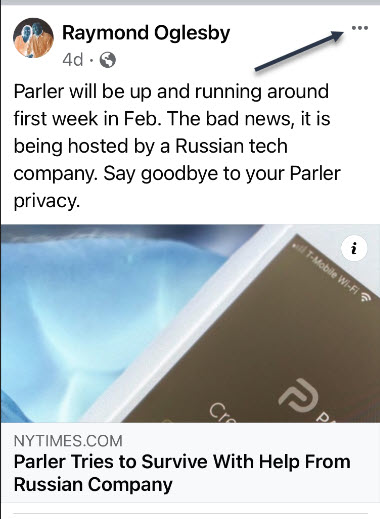
First, find any Facebook post you would like to save. Tap or click the three-dot hambuger icon in the upper right-hand corner of the post. Refer to below image:
Accessing the hamburger icon for a post
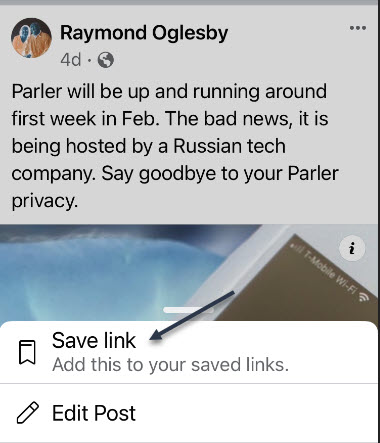
Next, select Save Post (or Save Event, Save Link, etc). In my example I am saving a link. See below image:
Accessing Save link option
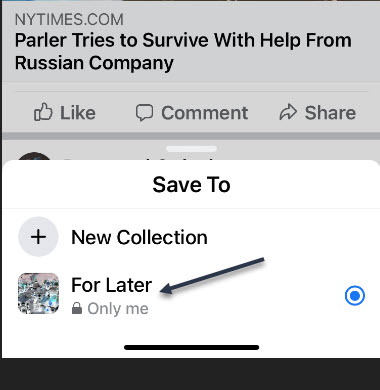
After you select Save Post or Link, etc, you will immediately get the choice to save it to a collection or create a new one. See following image:
Saving the link to collection For Later
How to Access Facebook Posts
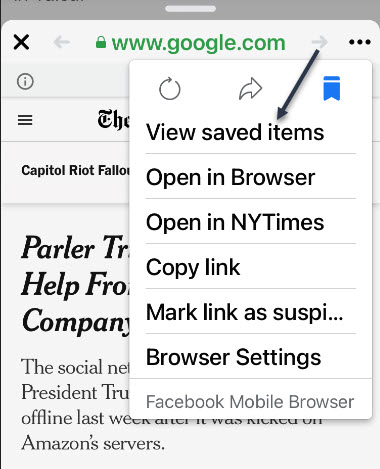
Now, you will need to open the post (if it is a link) and tap the hamburger icon. Next, select View Saved Items. Refer to below image:
Accessing View saved items option
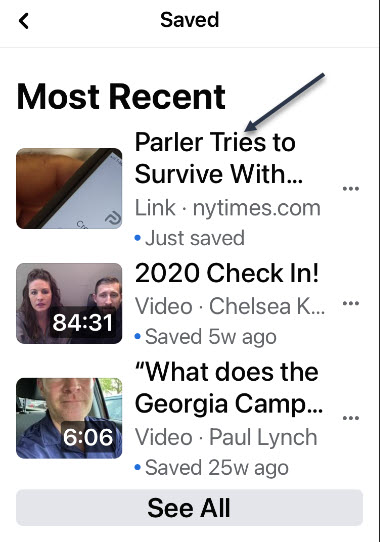
The most recent items will appear at the top, and Collections can be found underneath. See below image:
Listing of your most recent saves
Thje steps are similar for your desktop version of Facebook. That’s it! This is a nice little trick to save posts you enjoyed or to remember to read something later.
Just click the Tweet icon below. This will launch Twitter where you click its icon to post the Tweet.
Check out TechSavvy.Life for blog posts on smartphones, PCs, and Macs! You may email us at contact@techsavvy.life for comments or questions.
Please feel free to leave a comment. I would love hearing from you. Do you have a computer or smart device tech question? I will do my best to answer your inquiry. Just send an email to contact@techsavvy.life. Please mention the device, app and version that you are using. To help us out, you can send screenshots of your data related to your question.
The author’s Vietnam eBook on the Battle for Tra Bong: Events and Aftermath
A privacy policy update that subtly points out data can be shared with Facebook prompted a user exodus, so WhatsApp is now giving them until May 15 to agree to the changes.
A privacy policy update that subtly points out data can be shared with Facebook prompted a user exodus, so WhatsApp is now giving them until May 15, 2021 to agree to the changes.
This is for WhatsApp users
Copyright Scott Adams, Inc./Distributed by Universal Uclick for UFS
WhatsApp is hitting the brakes on a privacy policy update that has prompted users to flee the Facebook-owned platform for rival messaging apps like Signal.
Background
WhatsApp’s original plan required people to agree to the new privacy policy on February 8, 2021. If they did not, the app implied it would shut down their accounts. To make things more confusing, the update also said WhatsApp partnered with Facebook on new “integrations,” without specifically saying how the data sharing works.
But on Friday, WhatsApp said it was postponing the plan amid an apparent user exodus. “We’re now moving back the date on which people will be asked to review and accept the terms. No one will have their account suspended or deleted on February 8. We are also going to do a lot more to clear up the misinformation around how privacy and security works on WhatsApp,” the service said in a blog post.
The Problem
The heart of the problem is trust (or the lack of it). WhatsApp is owned by Facebook, which has a notorious tecord on digital privacy. The social network has repeatedly tried to clarify that the updated WhatsApp policy will not result in real changes for users when talking with friends or family. But many refuse to give Facebook the benefit of the doubt.
Users Fleeing
This became apparent last week when Telsa CEO Elon Musk urged his followers on Twitter to use competing messaging app Signal. Since then, Signal has seen a massive influx of new users, numbering in the tens of millions.
Company Response
On Friday, WhatsApp reiterated that it will continue to use end-to-end encryption, meaning no one—not even Facebook—will be able to read your messages. “We also can not see your shared location and we don’t share your contacts with Facebook,” the app added.
The company went on to say the policy update itself deals primarily with businesses using WhatsApp to send and store messages with consumers. “This update does not expand our ability to share data with Facebook,” it added.
Doubt Remains
Nevertheless, the updated privacy policy is still a reminder that WhatsApp does share some user data with Facebook. A FAQ outlines how the data from businesses messaging with you can be used for ad targeting over Facebook.
At the same time, the updated privacy policy itself uses broad, but abstract language concerning the data sharing, making it unclear what Facebook can collect from your WhatsApp usage and why.
We will have to wait and see if WhatsApp can clear up the confusion and win back users. In the meantime, the company is indicating it will not begin asking users to opt into the privacy policy until May 15. “We are going to do more over the coming weeks to make sure everyone knows how WhatsApp secures your messages,” added Will Cathcart, the head of WhatsApp.
This blog post is courtesy of PCMag.com updated January 15, 2021.
I hope you have found this post helpful. If so, click the Tweet icon below. This will launch Twitter where you click its icon to post the Tweet.
Check out TechSavvy.Life for blog posts on smartphones, PCs, and Macs! You may email us at contact@techsavvy.life for comments or questions.
Please feel free to leave a comment. I would love hearing from you. Do you have a computer or smart device tech question? I will do my best to answer your inquiry. Just send an email to contact@techsavvy.life. Please mention the device, app and version that you are using. To help us out, you can send screenshots of your data related to your question.
The author’s Vietnam eBook on the Battle for Tra Bong: Events and Aftermath