We are giving away one (1) $50.00 Amazon Gift Card to one of our followers in celebration of 300 blog posts. Its simple to enter. Just send an email to:
We are giving away one (1) $50.00 Amazon Gift Card to one of our followers in celebration of 300 blog posts. It’s simple to enter. Just send an email to:
wrojr@cox.net
with a Subject line of:
300 Posts Giveaway
and in the body text, enter:
I would like to enter the 300 blog posts giveaway.
My follower name is __________. (Optional)
Your email must be received by midnight September 23, 2021. The winner will be announced and notified in a random drawing on September 24, 2021. Only one entry per follower. Tell your friends and relatives to start following TechSavvy.Life.
That’s it. Thank you for being a follower and hope you enjoy the blog posts.
Over the past 14 years, Amazon has released a lot of slightly different Kindles. If you are wondering whether you have a Paperwhite 3, a Paperwhite 4, an original Kindle, or something else, we will show you how to fine the model.
Over the past 14 years, Amazon has released a lot of slightly different Kindles. If you are wondering whether you have a Paperwhite 3, a Paperwhite 4, an original Kindle, or something else, we will show you how to fine the model. Let’s explore how this is done in two different ways; on the Kindle, and by your Amazon account.
This is for the Kindle
Copyright Scott Adams, Inc./Distributed by Universal Uclick for UFS
Use Your Amazon Account
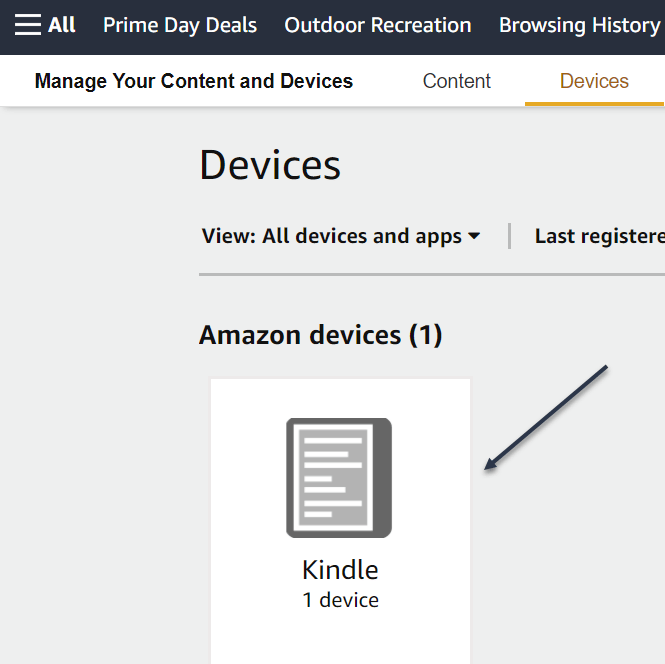
:First, log in to your Amazon account through a web browser and click here to your Manage Devices page. You can also use the Amazon menu system to get there. Go to
Account & Lists > Content & Devices > Devices
Refer to below image:
Your Kindle Device(s)
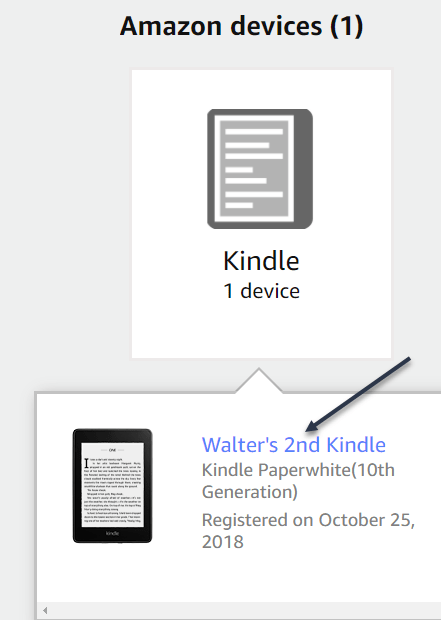
Next, click on a Kindle. Now, click the blue link of your Kindle that you want to find the serial number of. See below image
Your Kindle Device name
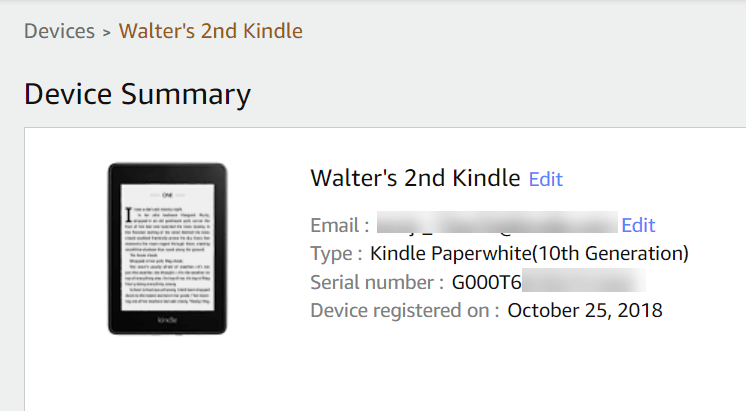
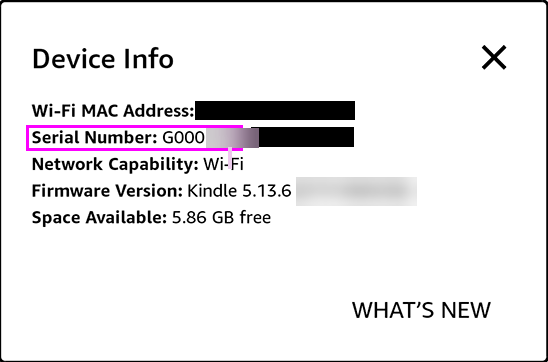
In the Device Summary screen, you will see it next to Serial Number. Each model has its own unique set of prefixes. (The prefix is the set of letters at the beginning of the serial number.). See following image:
Your Kindle Device Summary
You are looking for the first block of characters. You can see G000T6 in our example, which corresponds to a Kindle Paperwhite 4 (You will be able to compare your prefix in the table at the end).
Note! While the Type is listed as Kindle Paperwhite (10th Generation), we still need the serial number prefix in order to tell which specific model it is.
Use Your Kindle Device
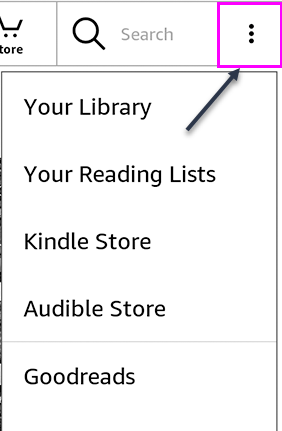
First, to check the serial number on the device itself, go to your Kindle’s home page and tap the three dots hamburger icon in the top right to open the menu. Refer to below image:
Accessing your Kindle menu
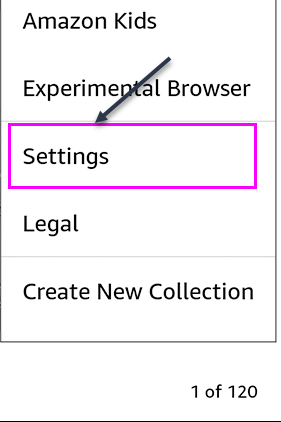
Next, tap Settings in the menu. See below image:
Accessing your Kindle Settings
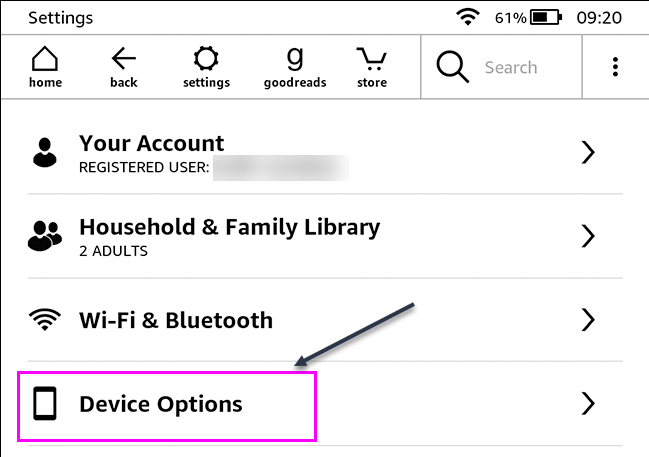
Now, on the Settings screen, tap Device Options. See following image:
Accessing your Kindle Device Options
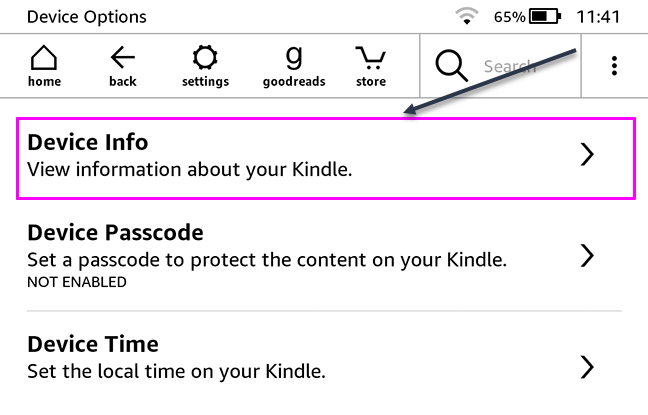
Next, tap Device Info. Refer to below image:
Accessing your Kindle Device Info
Now, next to Serial Number, you will see the serial number of the Kindle. See below image:
Your Kindle Device Info
Note! If you have an older Kindle (or are using an old version of the Kindle software), the menus might look a little different. You are still looking for Device Info.
How to Tell Which Kindle You Have
Once you have your serial number, you can compare its prefix to the options below. This will tell you exactly which device you have. Here’s a table summarizing the various models.
Please feel free to leave a comment. I would love hearing from you. Do you have a computer or smart device tech question? I will do my best to answer your inquiry. Just send an email to contact@techsavvy.life. Please mention the device, app and version that you are using. To help us out, you can send screenshots of your data related to your question.
The author’s Vietnam eBook on the Battle for Tra Bong: Events and Aftermath
Two-Factor authentication (2FA) adds an extra security layer to your accounts across the internet. 2FA means your accounts require information beyond user name and password to confirm you are who you say you are before you can get into the accounts. Let’s explore how to access 2FA.
Two-Factor authentication (2FA) adds an extra security layer to your accounts across the internet. 2FA means your accounts require information beyond user name and password to confirm you are who you say you are before you can get into the accounts. Let’s explore how to access 2FA.
This is for iPhone, iPad, PCs and Macs. Screenshots are from Windows 10 and iPhone XR
Copyright Scott Adams, Inc./Distributed by Universal Uclick for UFS
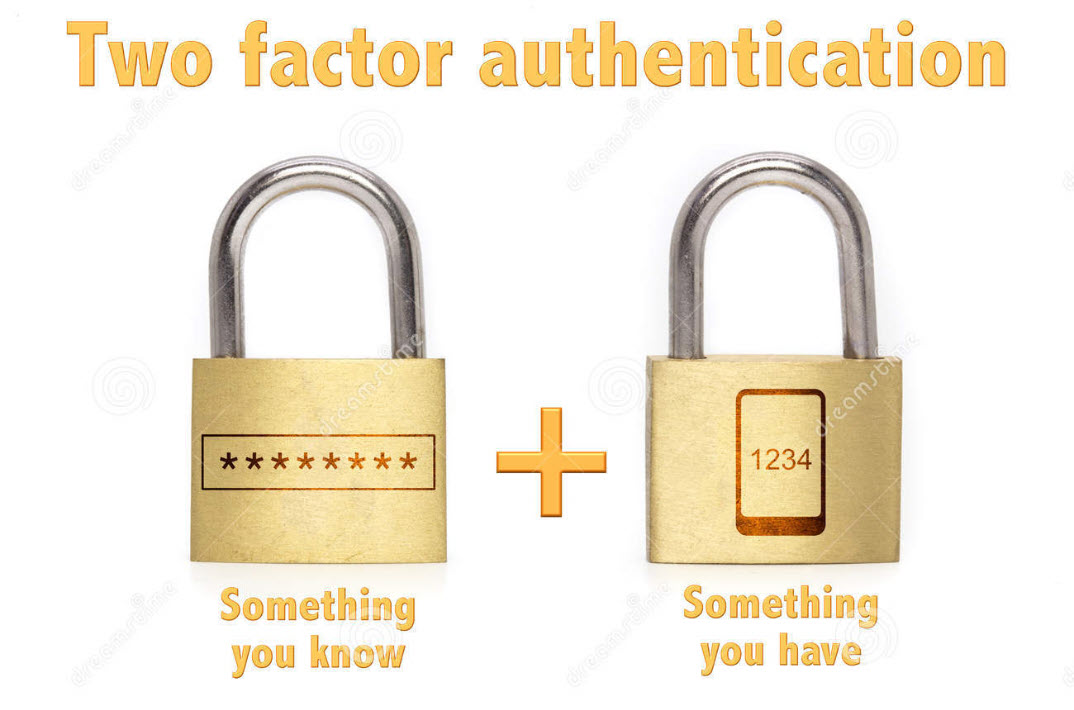
The “second factor” comes in after you enter your username and password, which are considered to be the “first factor.” 2FA can be used to confirm your identity by asking for an extra piece of information. The additional information can be:
Something you know, like an additional passcode.
Something you have, like your phone to receive a one time authorization code.
Something you are, like a fingerprint or voice print. This is also called biometric security.
The idea is to provide another piece of information a hacker would not have, making it harder for the bad guy to break into your account.
The following is not an exhaustive list of services with 2FA ability, but we cover the major services everyone tends to use, and walk you through how to access. We will cover Amazon, Apple, Facebook, Google, Instagram, LinkedIn, Microsoft, and Twitter. Activate 2FA on all of these and you will be more secure. Once you have found their 2FA screens you can can set it up for each app.
Amazon
First, launch Amazon.com on the desktop and login in to your account. Next, click the Menu icon in upper left-hand corner. Now, scroll down the drop-down menu to Your Account option.
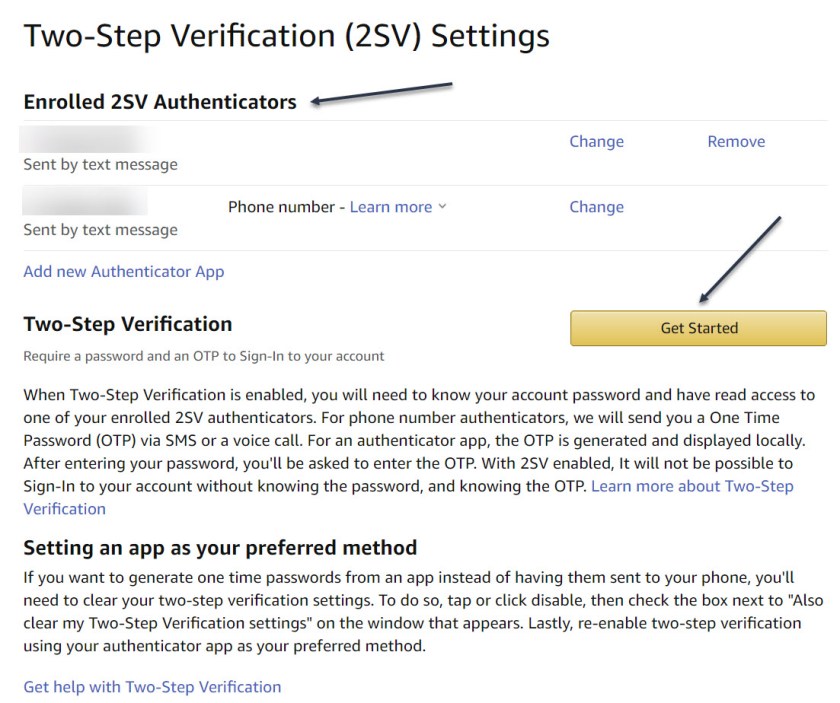
Next, click on the Login & Security big button. Now, on the next page, click Edit next to Two-Step Verification (2SV) Settings. The preferred method is an authentication app (scan the QR code); phone number(s) are the backup method. Refer to below image where I already have 2SV based on my phone number (which is dimmed out):
Amazon 2SV
If you think your account has been comprised, go back to Login & Security and click the Edit button next to Secure Your Account.
Apple
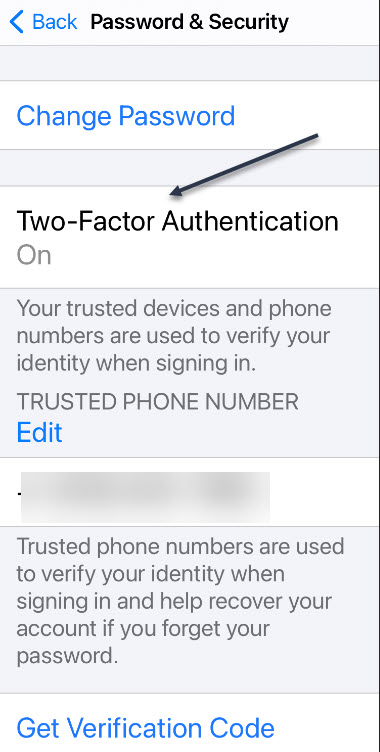
Following are the steps on how to access 2FA for Apple using either iOS or macOS.
On iOS go to:
Settings > [your name at the top] > Password & Security > Turn on Two-Factor Authentication.
On macOS go to:
System Preferences > iCloud, then sign in, click Account Details > Security > Turn on Two-Factor Authentication.
Note! once Apple 2FA is activated for two weeks, you can not turn it off. “Certain features in the latest versions of iOS and macOS require this extra level of security, which is designed to protect your information,” according to Apple. See below image for iOS:
Apple 2FA
Facebook
First, login to Facebook on your desktop. Next, click the Down arrow in upper right-hand corner. Now, from the drop-down menu that appears, click on the Settings & Privacy option. On the next screen, click the Privacy & Checkup option. From there, click on the topic How to keep your account secure. Under this topic, you can access 2FA for Facebook. See following image where 2FA is On with a backup method of sending a text message to a phone number.
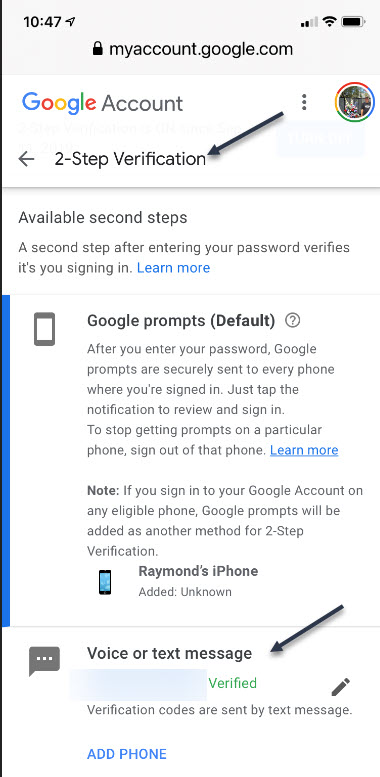
First, sign in to your Google account on your smart device. Next, at the top of the screen, locate the Security tab and tap it. Now, scroll down and tap the 2- Step Verification option. You can continuing scrolling to see more ways to verify you. Refer to below image where my 2SV is already turned On and I am using the backup method of Voice or text message:
Google 2SV
Google calls its system 2SV . It’s all about identifying you via phone. When you enter a password to access your Google account for almost any service, if 2SV is on, there are multiple options to get that second step. First among them now: the Google Prompt. You simply add your smartphone to your account, make sure the Google search app is on the phone, and at login, you can go to the phone and simply acknowledge with a tap that you are the one signing in.
Instagram
First, launch Instagram on your smart device. Next, go to your Profile in lower right-hand corner, then tap the menu (the hamburger icon) on the top-right. Tap Settings > Security > Two-Factor Authentication. There you can choose how you would like to get your authentication code by tapping the Get Started button. See below image:
Instagram 2FA
Linkedin
Business social network Linkedin makes it easy to set up verification, either by SMS texts or authentication app.
First, launch Linkedin on you smart device, then go to your Profile at upper left-hand screen. Next, go to Settings > Sign in & Security > Account > Two-step verification to activate it or deactivate. See following image:
Linkedin 2SV
Microsoft
First sign into your Microsoft account on your smart device. Now, tap your Profile. Next, scroll down and tap Security. 2FA is the second option, tap on it. Once again, tap Two -step verification > Manage. Microsoft will suggest you get app passwords as needed for older service or devices (like Xbox 360); go in later to generate one as needed. Refer to below image:
Microsoft 2SV
Twitter
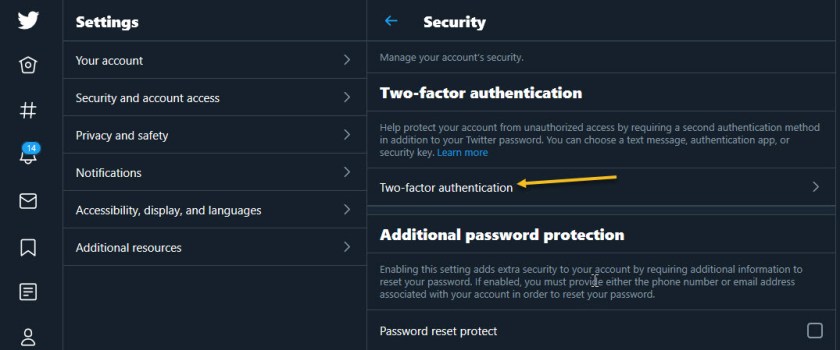
First, to activate Login Verification on Twitter.com on the desktop, login to Twitter, Click the More menu on the left (the three dots) and select Security & Account Access > Security > Two-Factor Authentication. See following image:
Twitter 2FA
Quote For the Day
Technology is a useful servant but a dangerous master.
Christian Louis Lange
That’s it. With 2FA activated on these apps you are more secure. Please feel free to share this post! One way to share is via Twitter.
Just click the Tweet icon below. This will launch Twitter where you click its icon to post the Tweet.
Check out TechSavvy.Life for blog posts on smartphones, PCs, and Macs! You may email us at contact@techsavvy.life for comments or questions.
Please feel free to leave a comment. I would love hearing from you. Do you have a computer or smart device tech question? I will do my best to answer your inquiry. Just send an email to contact@techsavvy.life. Please mention the device, app and version that you are using. To help us out, you can send screenshots of your data related to your question.
The author’s Vietnam eBook on the Battle for Tra Bong: Events and Aftermath
Dark Mode is a huge trend right now, with phones and laptops moving to offer dark mode over the past few years. That’s extended to apps and websites too; and the Kindle is no exception.
Dark Mode is a huge trend right now, with phones and laptops moving to offer dark mode over the past few years. That’s extended to apps and websites too; and the Kindle is no exception.
This is for the Kindle
Copyright Scott Adams, Inc./Distributed by Universal Uclick for UFS
The Amazon Kindle has, in fact, offered Inverted Mode for many years, only moving to offer Dark Mode on some devices more recently, and changing the name to “Dark Mode” in the process so people will know what it is.
Kindles That Support Dark Mode
First of all, you need to make sure you have a supported Kindle. Currently the list includes:
Kindle Paperwhite 4 (2018)
Kindle Oasis 3 (2019)
Kindle Oasis 2 (2017)
Checking Your Software
Dark Mode is really one of the accessibility features, but there’s a quick setting to turn it on.
First, make sure your Kindle is running the latest software (5.13.4 or higher). To view your software release number, select
Settings > Settings > Device options > Device info
Turning on Dark Mode
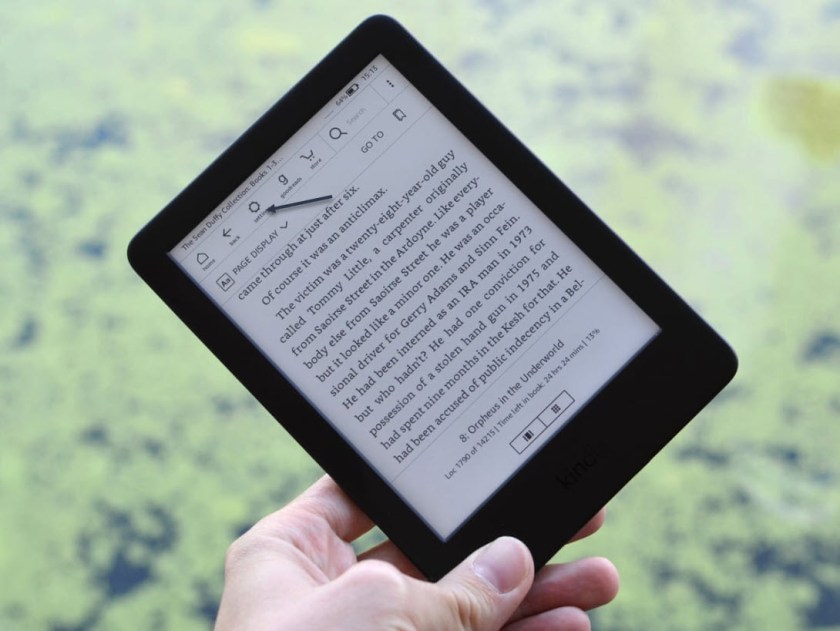
Now, from a book, tap at the top of the display and hit the Settings icon. Refer to below image:
Accessing Settings
If you are on the home screen, you will find it at the top of the page.
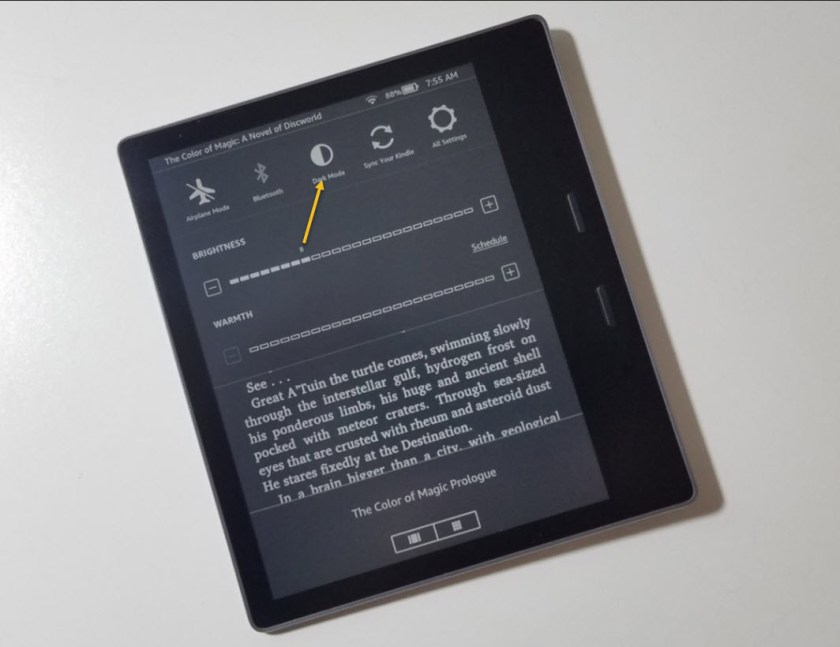
A selection of icons will appear including Dark Mode. Tap to turn it on or off. See below image:
Turn on/off Dark Mode
It’s that simple. Remember since the Kindle uses a front lighting system, you can still change the level of illumination or the color temperature (if you have those options) although with less white space on the page the effect of this is dramatically reduced.
You will also be able to find the Dark Mode option in
Settings > \Accessibility > Invert black and white
Please feel free to leave a comment. I would love hearing from you. Do you have a computer or smart device tech question? I will do my best to answer your inquiry. Just send an email to contact@techsavvy.life. Please mention the device, app and version that you are using. To help us out, you can send screenshots of your data related to your question.
The author’s Vietnam eBook on the Battle for Tra Bong: Events and Aftermath
Yes, you can now hear Podcasts on your Amazon Echo device. Apple Podcasts and others, like Spotify and iHeartRadio, are now options to choose from for your favorite podcasts.
We are going to link your Echo device to one of these podcast services. Our example is linking Apple Podcasts to the Amazon Echo. The ways this is done is somewhat clumsy. The Echo seems to be hard to program; it’s not straightforward. But follow along, it’s not time consuming and is worth it.
This is for iOS devices (iPhone and iPad) and the Amazon Echo
Starting Alexa
Open the Alexa app on your smart device. If you have yet to download the app, head to the Apple Store to download and install.
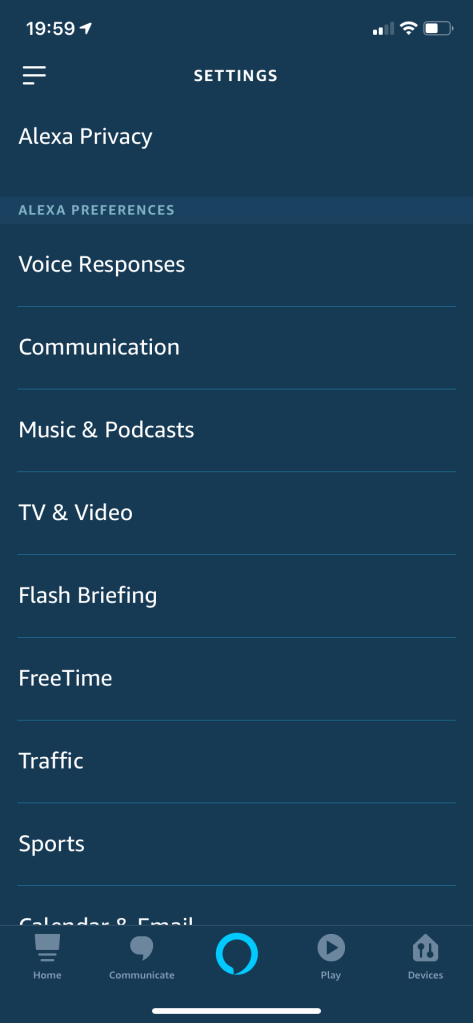
Tap the hamburger icon, the one with 3 dots in upper right hand corner or tap on the menu icon in upper left hand corner
Select Settings. You will see the following screen:
The Settings image
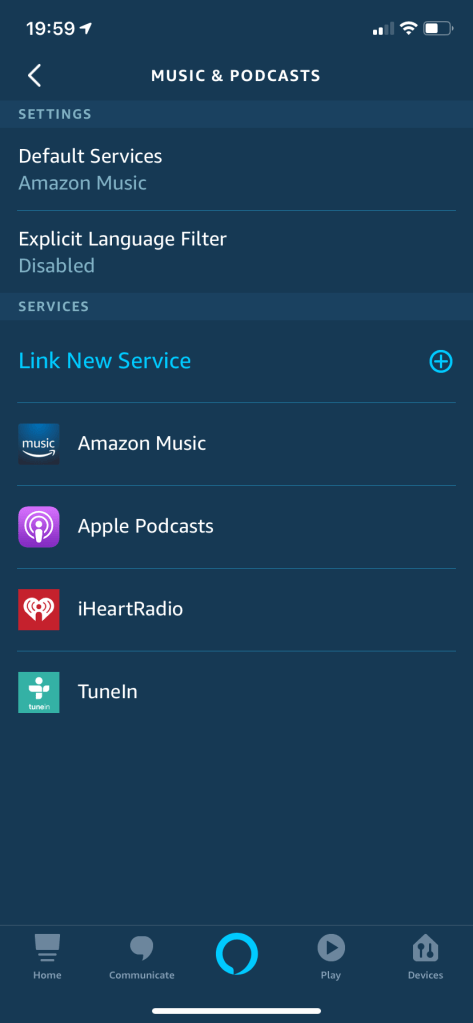
Select Music & Podcasts. Refer to following image:
The Music & Podcasts screen
Setting up the Link
Select Link New Service.
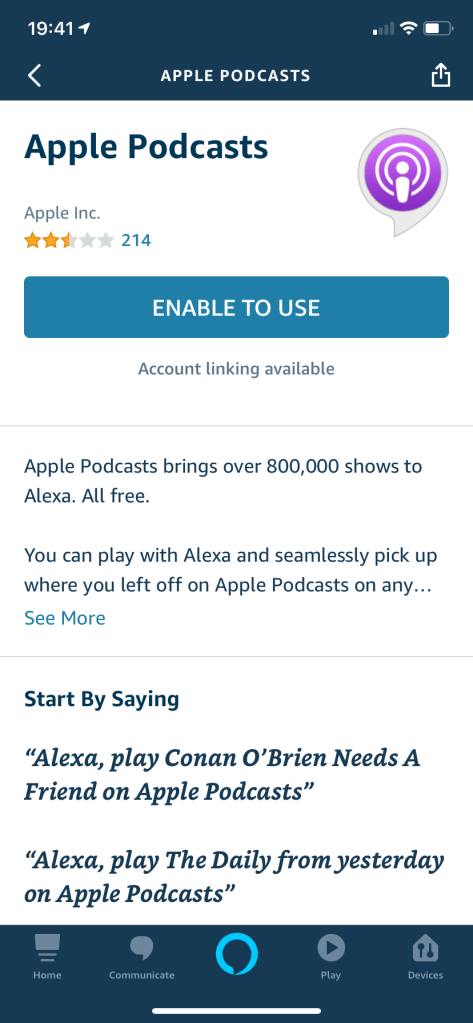
Select Apple Podcasts. Refer to following image:
Enabling the Apple Podcasts image
Tap ENABLE TO USE.
You will be asked to enter your Apple ID, Password and Passcode depending on your login procedure
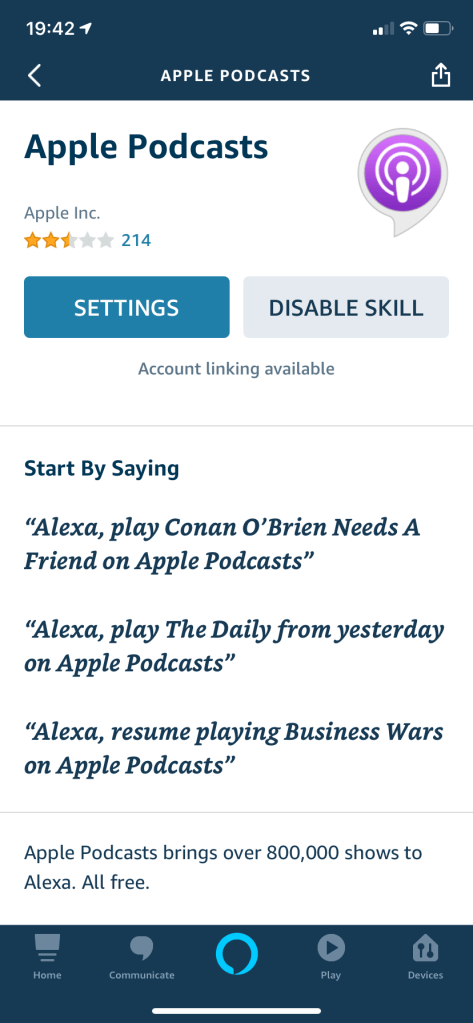
Tap SETTINGS. See following screen:
The Apple Podcasts settings screen.
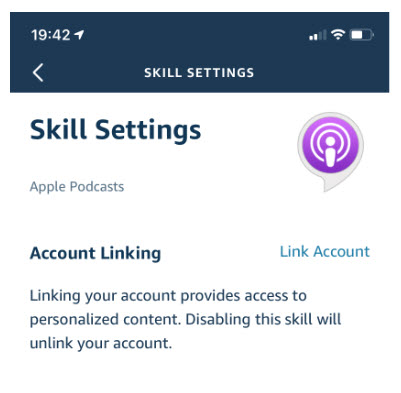
Linking the Service to Echo
On the Skill Settings screen, tap on the Link Account link. See below image:
The link screen for Apple Podcasts
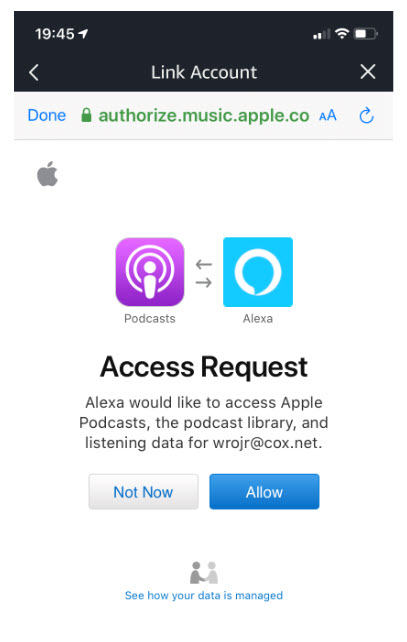
Allowing Access for the Link
Tap Allow on the AccessRequest screen. You may see a different screen depending on what service you are linking. Refer to below image for Apple Podcasts:
Allowing the link to Apple Podcasts image
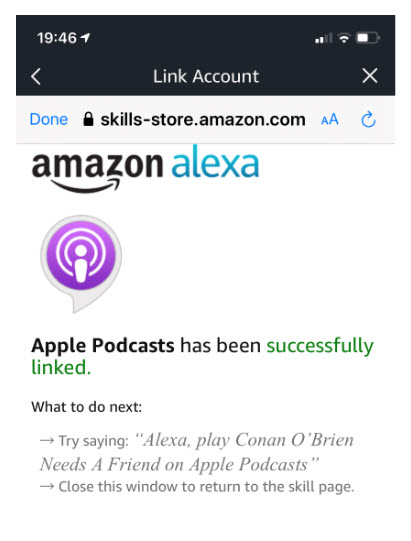
Linkage for the Podcast Service Completed
You will see that Apple Podcasts has been successfully linked. See following image:
Apple Podcasts now linked to Amazon Echo screen
Click Done
Now you can listen to your favorite Apple Podcasts. Just repeat the above steps to add other podcast service(s).
I Would Like to Hear from You
Please feel free to leave a comment. I would love hearing from you. Do you have a computer or smart device tech question? I will do my best to answer your inquiry. Please mention the device, app and version that you are using. To help me out, you can send screenshots of your data related to your question.
The author’s Vietnam eBook on the Battle for Tra Bong: Events and Aftermath