When you are browsing the web using Safari on your iPhone or iPad, sometimes it can be difficult to read small fonts on the screen. On the other hand, you might find a site that has huge fonts and it makes things equally difficult to read. If you are using Safari on your iPhone or iPad, here’s how to make the text size on a website larger or smaller.
When you are browsing the web using Safari on your iPhone or iPad, sometimes it can be difficult to read small fonts on the screen. On the other hand, you might find a site that has huge fonts and it makes things equally difficult to read. If you are using Safari on your iPhone or iPad, here’s how to make the text size on a website larger or smaller.
This is for iPhone and iPad running iOS 13+
Copyright Scott Adams, Inc./Distributed by Universal Uclick for UFS
You can use Safari’s built-in text zoom feature. This feature only changes the text size of the web page. It keeps everything else as it is. The images and other UI elements will stay the same. Once you have changed the text size of a website, Safari will remember it the next time you open the page.
First, open the Safari browser on your iPhone or iPad and visit the web page where you want to increase or decrease the text size.
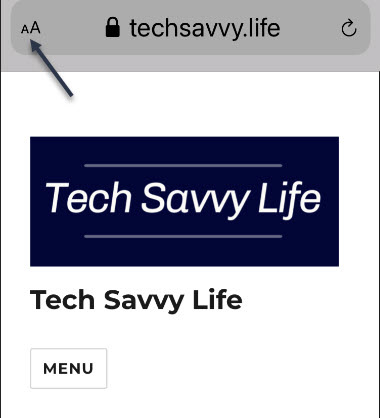
Next, tap the “aA” button on the top left-hand side. Refer to below image:
Selecting Text Size button
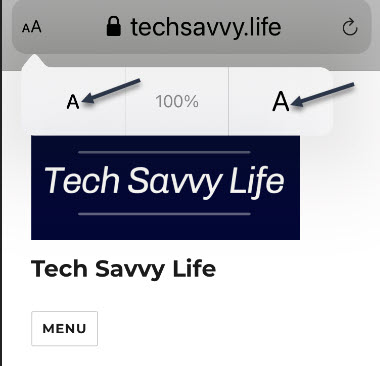
Now, tap the “a” button to reduce the text size, or tap the “A” button to increase the text size. See below image:
Decrease or increase Text Size
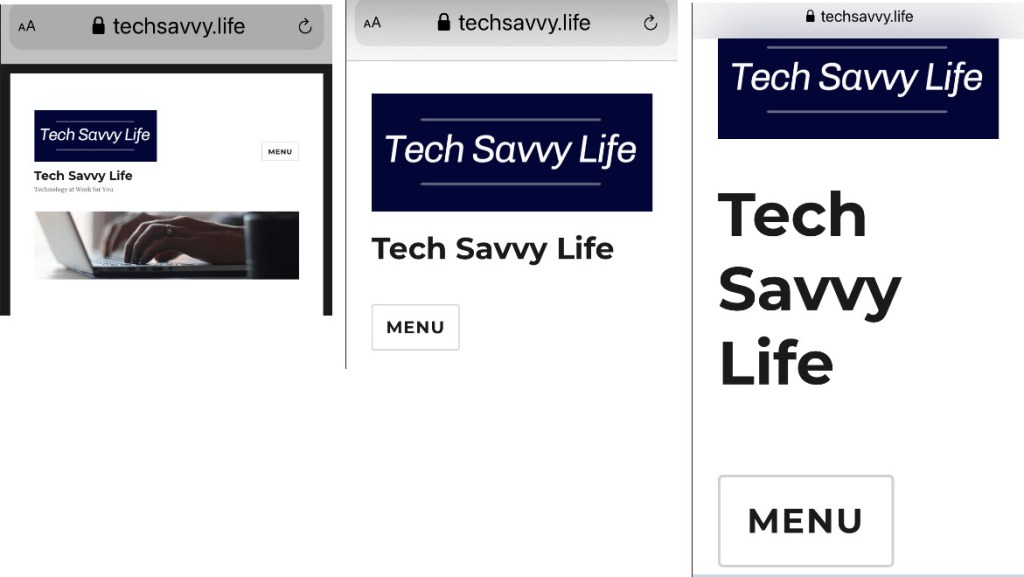
The default text zoom is set as 100%. You can reduce the text size to 50% or take it up all the way to 300%. See following image where the screen is displayed at 50%, 150%, and 300%:
Display of 50%, 150%, 300%
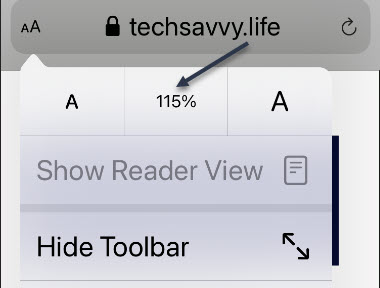
If you want to quickly reset the text size to the default, simply tap the percentage value in the middle. Refer to below image:
Reset Text Size
Safari’s text zoom feature works in the Reader Mode as well. If you would like to read a long article without the site elements in larger text size, we recommend that you use Reader View.
Now, after loading the page, tap and hold the “aA” button to enable the Reader View.
Note! Not all websites support Reader View.
See below image:
Enabling Reader View
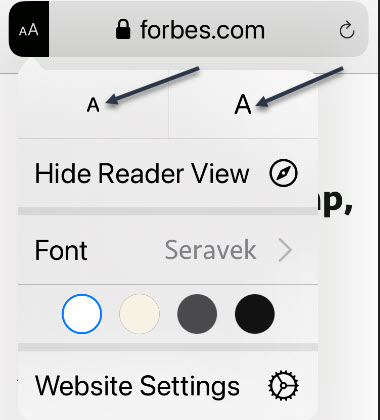
Next, tap the “aA” button again. From here, you can increase or decrease the text size. See following image:
Set Text Size in Reader View
Quote For the Day
One machine can do the work of fifty ordinary men. No machine can do the work of one extraordinary man.
Elbert Hubbard
That’s it. Please feel free to share this post! One way to share is via Twitter.
Just click the Tweet icon below. This will launch Twitter where you click its icon to post the Tweet.
Check out TechSavvy.Life for blog posts on smartphones, PCs, and Macs! You may email us at contact@techsavvy.life for comments or questions.
Please feel free to leave a comment. I would love hearing from you. Do you have a computer or smart device tech question? I will do my best to answer your inquiry. Just send an email to contact@techsavvy.life. Please mention the device, app and version that you are using. To help us out, you can send screenshots of your data related to your question.
The author’s Vietnam eBook on the Battle for Tra Bong: Events and Aftermath
While changing your browser’s font may not be a pressing issue, sometimes it is fun to make a change. We going to explore how to change the default fonts in Google Chrome.
While changing your browser’s font may not be a pressing issue, sometimes it is fun to make a change. We going to explore how to change the default fonts in Google Chrome.
This is for devices running Google Chrome
Copyright Scott Adams, Inc./Distributed by Universal Uclick for UFS
Changing Chrome’s Fonts
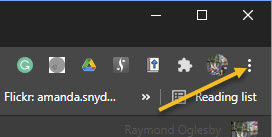
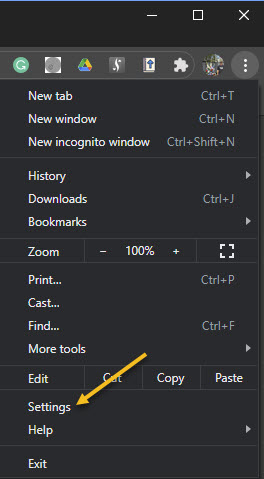
In order to change the fonts in Google Chrome, you will need to access your Customize Fonts section. First, open your Chrome browser. Next, click on the three 3-dot (hamburger icon) in the upper right-hand corner. Refer to below image:
Accessing your Chrome menu
Now, click on Settings. See below image:
Accessing Settings
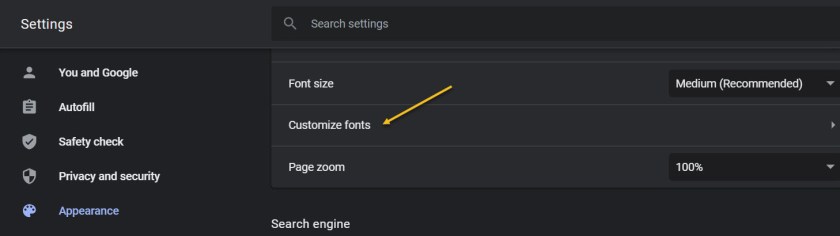
Next, click on the Appearance tab in the sidebar. Now, scroll down until you get to the Customize Fonts section and click on it. See following image:
Accessing your customize fonts section from the Appearance tab
Now, you can change all your font settings. Just click on each drop-down box and select a font from the listing. It is recommended you write down the default fonts in case you want to revert to the original ones. Refer to below image:
Accessing the drop-down boxes to change your fonts
When finished, exit Settings and restart your Chrome browser for the changes to take effect.
Quote for the Day
If future generations are to remember us more with gratitude than sorrow, we must achieve more than just the miracles of technology. We must also leave them a glimpse of the world as it was created, not just as it looked when we got through with it.
Lyndon B. Johnson, Former President of the United States of America
That’s it. Please feel free to share this post! One way to share is via Twitter.
Just click the Tweet icon below. This will launch Twitter where you click its icon to post the Tweet.
Check out TechSavvy.Life for blog posts on smartphones, PCs, and Macs! You may email us at contact@techsavvy.life for comments or questions.
Please feel free to leave a comment. I would love hearing from you. Do you have a computer or smart device tech question? I will do my best to answer your inquiry. Just send an email to contact@techsavvy.life. Please mention the device, app and version that you are using. To help us out, you can send screenshots of your data related to your question.
The author’s Vietnam eBook on the Battle for Tra Bong: Events and Aftermath
Visiting your favorite websites or just any website can be kind of frustrating when the on-screen text is hard to read. Fortunately, the Google Chrome web browser on the iPhone and iPad has a text-specific zoom feature. You can adjust the default text size on any website by using the Zoom Text function.
Visiting your favorite websites or just any website can be kind of frustrating when the on-screen text is hard to read. Fortunately, the Google Chrome web browser on the iPhone and iPad has a text-specific zoom feature. You can adjust the default text size on any website by using the Zoom Text function.
It’s easy to get confused as to which browser this applies to. This feature is for your Google Chrome browser, notthe default Safari web browser.
What’s neat is that Chrome remembers your preference and will show the designated text size going forward (no need to adjust the text every time).
Let’s explore how to change text size on websites in Chrome for iPhone and iPad.
This is for iPhone and iPad using Chrome
Copyright Scott Adams, Inc./Distributed by Universal Uclick for UFS
To begin, open your Chrome app on your iPhone or iPad. Next, visit the web page that you want to increase the text size. Refer to below image:
Selecting a website on Chrome
Now, from the bottom toolbar, tap the three-dot hamburger menu button. See below image:
Selecting the menu button
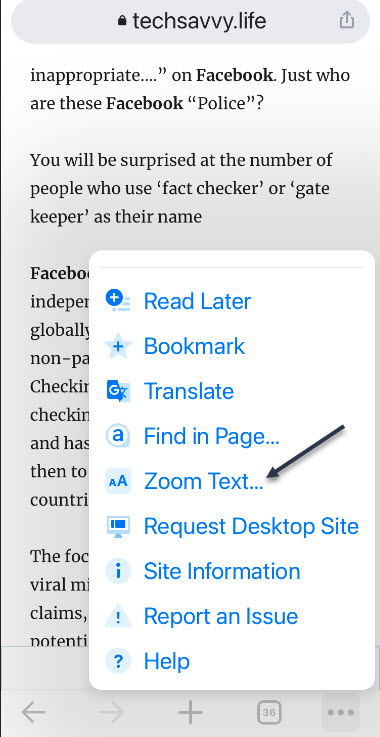
Next, from the drop-down menu that appears, scroll down and choose the Zoom Text option. See following image:
Selecting the Zoom Text option
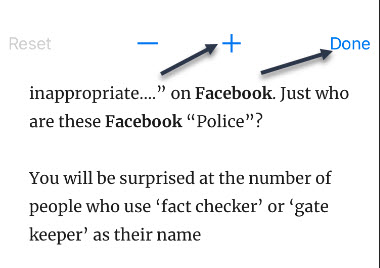
Now, you will now see a new toolbar at the top of your screen. Tap the “+” button to increase the text size or the “–” button to reduce the text size. You can select the Reset button to go back to the default text size. Once you are finished, tap the Done button. Refer to below image:
Selecting to increase the text size
A comparison between the default text size and zoomed text can be seen in the below image:
Default text size versus zoomed text
Quote For the Day
Getting information off the Internet is like taking a drink from a fire hydrant.
Mitch Kapor
You are finished. Please feel free to share this post! One way to share is via Twitter.
Just click the Tweet icon below. This will launch Twitter where you click its icon to post the Tweet.
Check out TechSavvy.Life for blog posts on smartphones, PCs, and Macs! You may email us at contact@techsavvy.life for comments or questions.
Please feel free to leave a comment. I would love hearing from you. Do you have a computer or smart device tech question? I will do my best to answer your inquiry. Just send an email to contact@techsavvy.life. Please mention the device, app and version that you are using. To help us out, you can send screenshots of your data related to your question.
The author’s Vietnam eBook on the Battle for Tra Bong: Events and Aftermath
With a software update that arrived recently, called iOS 14.5 and iPadOS 14.5, Apple is finally forcing apps to come clean about a kind of surveillance they have been conducting on us for the past decade. Behind the scenes, apps can probe your phone for personal information that helps them target you with ads or even sell data about you to others. Now. marketers and data brokers can not access a valuable way to identify your phone unless you explicitly say it’s okay.
With a software update that arrived recently, called iOS 14.5 and iPadOS 14.5, Apple is finally forcing apps to come clean about a kind of surveillance they have been conducting on us for the past decade. Behind the scenes, apps can probe your phone for personal information that helps them target you with ads or even sell data about you to others. Now. marketers and data brokers can not access a valuable way to identify your phone unless you explicitly say it’s okay.
This is for the iPhone and iPad running iOS or iPadOS 14.5 or higher
Copyright Scott Adams, Inc./Distributed by Universal Uclick for UFS
A feature on your iPhone or iPad called “App TrackingTransparency” allows you to ask apps not to track you across the internet for advertising and data brokering purposes.
Facebook, and its sister app Instagram, has begun asking permission and the company says it will roll out a screen arguing why you should allow it to track you.
Why Am I Tracked
To get the most out of their advertising budgets, advertisers want their ads to be seen by customers who will buy the product or service they are offering. That way, they do not spend money advertising to the wrong audience. To increase the effectiveness of ads, companies build advertising profiles on individuals, and these profiles can follow you across services run by different companies on the internet.
Apple began to fight back against this practice, building privacy controls. As of the 14.5 update, Apple requires app developers to ask your permission before adding information from that app or data from your iPhone or iPad to an advertising profile that would track you beyond its own app.
Facebook says by tapping “Ask App not to Track“, you are hurting small businesses and free apps that depend on its targeted advertising. In addition to targeting your interests, tracking also helps advertisers learn whether their ads work.
The decision to fight app tracking now is pretty self-serving on the part of Apple. The iPhone maker has a financial interest to push apps to make money from subscriptions rather than advertising, because it gets to take a percentage cut of any in-app purchases.
How Not to be Tracked
Whenever you use an iPhone or iPad app that wants to track you in iOS 14.5, iPadOS 14.5, or higher, you will see a pop-up message that reads “Allow [app name] to track your activity across other companies’ apps and websites?” Just below that, you will find a line about what exactly the app wants to do with your data, such as “deliver personalized ads” or “measure advertising efficiency“.
If you do not want data from this app to go toward building a tracking profile that goes beyond the company that makes the app, tap “Ask App Not to Track“. Refer to below image:
Disallow app to track you option
By clicking “Ask App Not to Track“, you’re trusting the app vendor to follow through and honor this request. You are also hoping that Apple’s pressure on these app developers; and its future app screening process; will hold.
How to See Which Apps Track You
If you would like to see which apps you have allowed to track you, first open Settings (the gear icon) app on your iPhone or iPad. See below image:
Accessing Settings
In the Settings menu, tap Privacy. See following image:
Accessing Privacy option
In Privacy settings, select Tracking. Refer to below image:
Accessing Tracking option
There, you will see a list of apps that have asked for permission to track you. To change an option for an individual app, tap the toggle beside it. See below image:
Disallow an app to track you
After that, exit Settings. Any time you need to revisit information on which apps you have allowed to track you, just visit:
Settings > Privacy > Tracking
How to Stop Apps From Asking Permission
If you are frequently seeing “Ask App Not to Track” pop-ups, you can disable them entirely in Settings. Doing this means that you decline all requests to track you by default, but it does not ensure that apps will not ever try to track you.
First, open the Settings app and navigate to:
Privacy > Tracking
See following image:
Accessing Tracking option
At the top of the Tracking page, toggle the switch beside “Allow Apps to Request to Track“to turn it Off. Refer to below image:
Disallow apps to track you
After this, exit Settings.
Quote For the Day
I believe the world is increasingly in danger of becoming split into groups which cannot communicate with each other, which no longer think of each other as members of the same species.
Carrie Snow
You are finished. Please feel free to share this post! One way to share is via Twitter.
Just click the Tweet icon below. This will launch Twitter where you click its icon to post the Tweet.
Check out TechSavvy.Life for blog posts on smartphones, PCs, and Macs! You may email us at contact@techsavvy.life for comments or questions.
Please feel free to leave a comment. I would love hearing from you. Do you have a computer or smart device tech question? I will do my best to answer your inquiry. Just send an email to contact@techsavvy.life. Please mention the device, app and version that you are using. To help us out, you can send screenshots of your data related to your question.
The author’s Vietnam eBook on the Battle for Tra Bong: Events and Aftermath
Google Chrome’s Reading List feature can help you save articles for later, so you never miss something good.
Google Chrome’s Reading List feature can help you save articles for later, so you never miss something good.
This is for the iPhone and iPad
Copyright Scott Adams, Inc./Distributed by Universal Uclick for UFS
What Is the Reading List
The Reading List is exactly what it sounds like; a list of things to read. It’s a similar concept to the bookmarks that we have used in web browsers, but with a more focused purpose.
Instead of saving an article or story to a folder in your bookmarks, you can put it in the Reading List. The list syncs to your Google account if you are logged into Chrome, so it’s available on your desktop and smartphone. That makes it a little easier to access than bookmarks.
The other benefit over bookmarks is the offline feature. Pages saved to your Reading List can be read without an internet connection at your convenience. You do need an internet connection to add to the list.
First Method
Chrome for iPhone and iPad offers two ways to add pages to your Reading List. It can be done from Chrome or from another app.
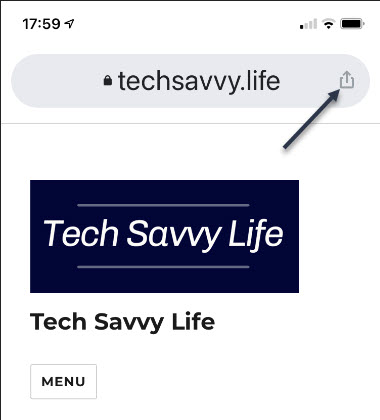
For the first method, first, open Chrome on your iPhone or iPad and find a page to save for later. Now, tap the Share icon in the upper right-hand corner. Refer to below image:
Accessing the Share icon
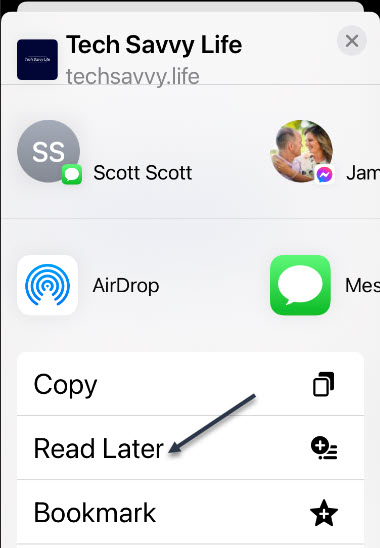
Next, select Read Later from the menu. See below image:
Selecting the Read Later option
That’s it! The page is in your Reading List.
Second Method
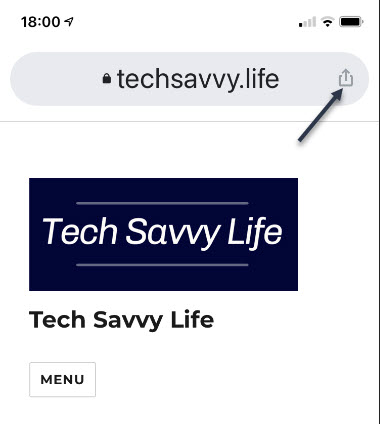
For the second method, find a web page or link that you would like to read later in any app. Now, tap the Share icon in upper right-hand corner. See following image:
Accessing the Share icon
Next, find Chrome in the app row and select it. Refer to below image:
Selecting the Chrome app
Now, from the Chrome menu, tap Read Later. See below image:
Selecting the Read Later option
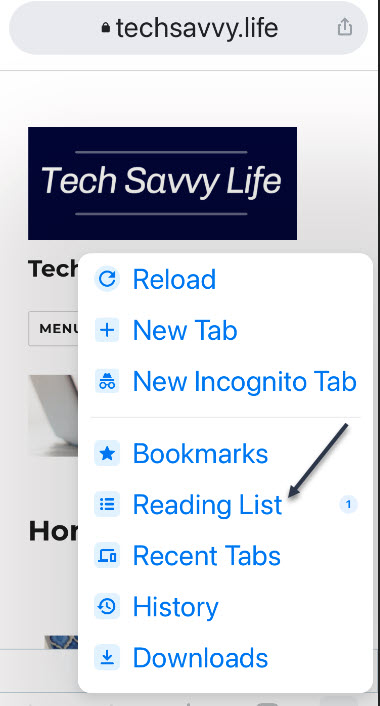
Next, to access the Reading List on your iPhone or iPad, open Chrome and tap the three-dot menu icon at the very bottom right-hand corner. See following image:
Accessing the menu icon
Accessing Your Reading List
Now, select the Reading List option from the menu. The number indicates unread pages. Refer to below image:
Selecting your Reading List option
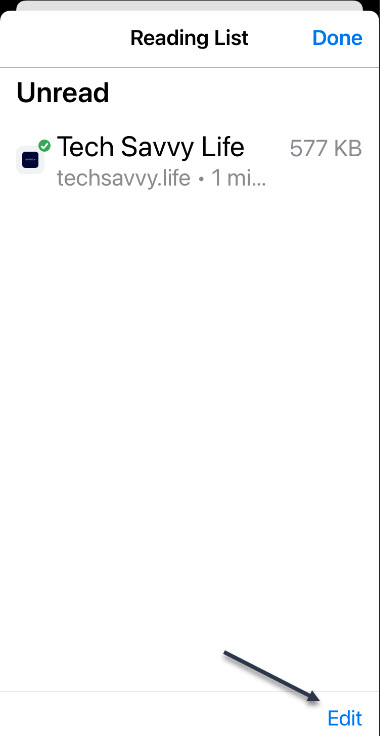
Next, the Reading List will open with Unread pages at the top and Pages You’ve Read (if any) at the bottom. Pages marked with a green check are ready to read offline. See below image where we have only one Unread page:
Viewing your Unread page(s)
Now, tap Edit in the bottom right-hand corner to manage the list. See following image:
Selecting the Edit link
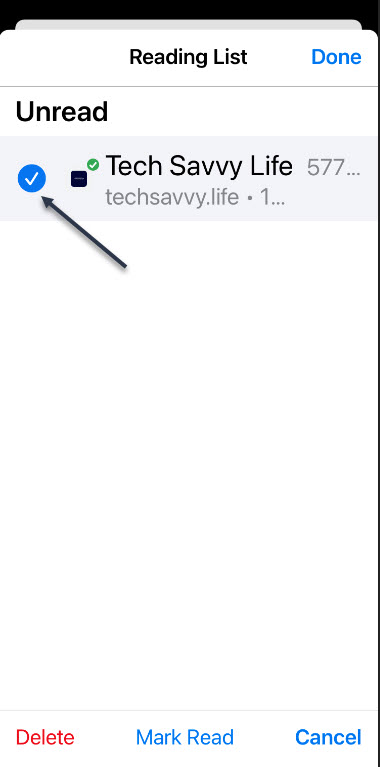
From here, you can select page(s) and delete or mark them as read. To mark them as read, checkmark an entry and tap the Mark Read blue link at the bottom of your screen. Refer to below image:
Marking page(s) as Read
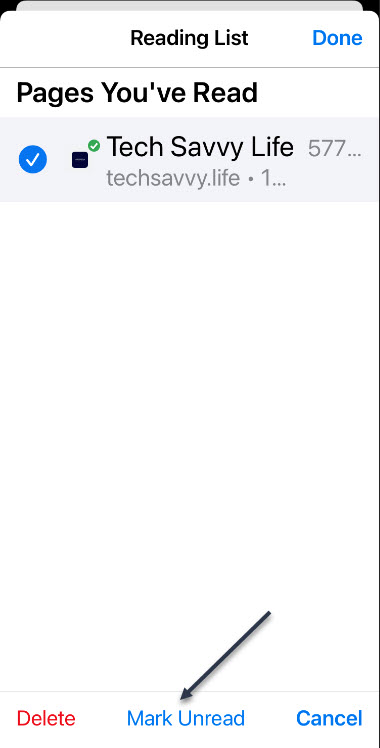
If you want to mark page(s) as Unread, checkmark an entry and tap the Mark Unread blue link at the bottom of your screen. See below image:
Marking page(s) as Unread
The Reading List is a great feature if you use Chrome on multiple devices. Rather than depending on a separate third-party app, you can save websites for later reading right inside the browser.
Quote For the Day
“The Web as I envisaged it, we have not seen it yet. The future is still so much bigger than the past.”
Tim Berners-Lee, Inventor of the World Wide Web
That’s it. Have fun with your Reading List. Please feel free to share this post! One way to share is via Twitter.
Just click the Tweet icon below. This will launch Twitter where you click its icon to post the Tweet.
Check out TechSavvy.Life for blog posts on smartphones, PCs, and Macs! You may email us at techsavvy.life for comments or questions.
Please feel free to leave a comment. I would love hearing from you. Do you have a computer or smart device tech question? I will do my best to answer your inquiry. Just send an email to contact@techsavvy.life. Please mention the device, app and version that you are using. To help us out, you can send screenshots of your data related to your question.
The author’s Vietnam eBook on the Battle for Tra Bong: Events and Aftermath
Tired of low-quality cell phone calls? Thanks to FaceTime, you can make audio-only calls with crystal-clear high-resolution sound using an iPhone, iPad, iPod Touch, or Mac.
Tired of low-quality cell phone calls? Thanks to FaceTime, you can make audio-only calls with crystal-clear high-resolution sound using an iPhone, iPad, iPod Touch, or Mac.
Facetime, the built-in video calling app on Apple devices, has an undisputed audience base. Besides its video calling services, users also count on it for making audio calls to their friends. Reason being, its seamless and error-free connectivity in a secured environment.
This is for the iPhone, iPad, iPod Touch, and Mac. Screenshots are from an iPhone
Copyright Scott Adams, Inc./Distributed by Universal Uclick for UFS
FaceTime Audio Explained
Most people think of FaceTime as a video chat service, but it also supports audio calls that operate like regular phone calls. Your device’s video camera is not used, and it stays off during the call.
FaceTime Audio is a great alternative to regular phone calls because it uses the Internet to place free calls with crystal-clear high-definition audio compared to a regular phone call. Since it’s an Internet call, your Apple device can take advantage of the extra bandwidth to make the call sound much better. The only requirement is that both ends of the call own Apple devices that support FaceTime, which includes iPhones, iPads, iPod Touches, and Macs.
Make a FaceTime Audio Call
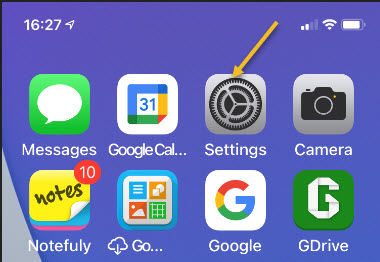
First, on your iPhone, iPad, or iPod Touch, launch Settings (the gear icon). Refer to below image:
Accessing Settings
Next, scroll down and tap the FaceTime option. See below image:
Accessing FaceTime option
In the FaceTime settings, toggle the switch beside the FaceTime option to turn it on. See following image:
Enabling FaceTime
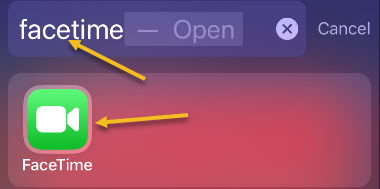
Now, search for the FaceTime app from your Search screen (your first or last screen) or locate the app on a Home screen. Refer to below image where we are searching for the app:
Accessing FaceTime app
Next, launch the FaceTime app. On the main FaceTime screen, tap the plus button (+). See below image:
Selecting the add button for a FaceTime Audio call
In the To: field, enter the name or number of the person you are trying to call. As you type, your Contacts list will be searched and any matching contacts will appear below. Just tap to select the person you want to call. See following image:
Entering and selecting a person to call
Next, tap the Audio button. If the Audio button is greyed out or does not appear, the contact you are trying to call does not have FaceTime enabled or has not set up a FaceTime account. Refer to below image:
Selecting the Audio button to make a call
Your call will be placed. You will see a message at the top of your screen denoting this is a FaceTime Audio call. During the call, you can switch to a video FaceTime call using the FaceTime icon, or you can disconnect by tapping the red phone receiver icon. See below image:
Disconnecting the FaceTime Audio call
Making a FaceTime Audio call on the Mac is similar to the above steps. One of the coolest things about FaceTime is that it works between all major Apple devices, so you can use your Mac to call iPhones, iPads, and iPod Touches.
You are finished. Please feel free to share this post! One way to share is via Twitter.
Just click the Tweet icon below. This will launch Twitter where you click its icon to post the Tweet.
Check out TechSavvy.Life for blog posts on smartphones, PCs, and Macs! You may email us at contact@techsavvy.life for comments or questions.
Please feel free to leave a comment. I would love hearing from you. Do you have a computer or smart device tech question? I will do my best to answer your inquiry. Just send an email to contact@techsavvy.life. Please mention the device, app and version that you are using. To help us out, you can send screenshots of your data related to your question.
The author’s Vietnam eBook on the Battle for Tra Bong: Events and Aftermath
In the USA, every iPhone and iPad comes with a one year warranty against manufacturing defects and hardware failures. Other jurisdictions, like the E.U. and Australia, come with two years. If you choose, you can also extend that warranty for two years with AppleCare+. Regardless of which warranty you have, you can easily find out whether or not your Apple device is currently covered.
In the USA, every iPhone and iPad comes with a one year warranty against manufacturing defects and hardware failures. Other jurisdictions, like the E.U. and Australia, come with two years. If you choose, you can also extend that warranty for two years with AppleCare+. Regardless of which warranty you have, you can easily find out whether or not your Apple device is currently covered. Let’s find out the warranty status for your iPhone and iPad.
This is for the iPhone and iPad
Copyright Scott Adams, Inc./Distributed by Universal Uclick for UFS
Check Your Warranty Status in Settings
You can check the warranty status of your iPhone and iPad using the Settings app. This will tell you whether you are covered by the basic one-year limited warranty, AppleCare+, or whether your coverage has expired.
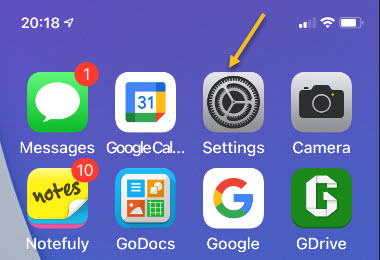
First, launch the Settings app. Refer to below image:
Accessing the Settings app
Next, tap the General option. See below image:
Accessing the General option
Now, tap the About option. See following image:
Accessing the About option
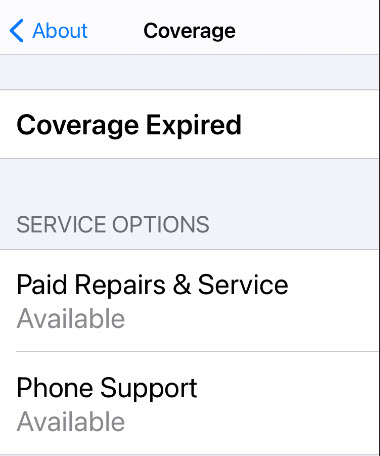
Below your Serial Number you should see a description of your your current warranty status. It will either say “Limited Warranty,” “AppleCare+,” or “Coverage Expired.” Refer to below image:
Your Coverage from iPhone or iPad
Now, tap it to see more information. See below image:
More information about your Coverage from your iPhone or iiPad
If your device is no longer covered, like mine, you may still be able to get repairs and phone support from Apple, which will be listed on the above screen. Also, you should be able to find a link to the Apple Support app for getting help.
Check Your Warranty Status From Apple’s Website
If you would like to check your coverage using Apple’s website, you can do so for virtually any Apple device at check coverage here. Open the website, then enter the Serial Number into the box, (you can find this number by following the above steps for an iPhone and iPad). See following image:
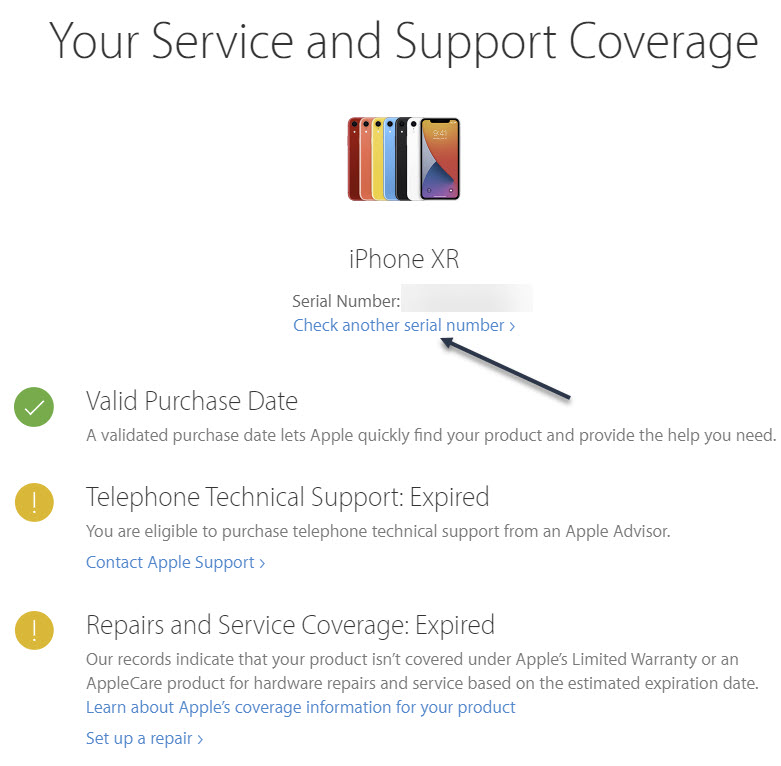
Checking your Coverage on the web
Also, you might want to check your other Apple devices. Just click the blue link labeled Check another serial number. Each device has its own Serial Number, which you would enter as mentioned above. Refer to below image:
Your Coverage from the web
What’s In Your Warranty
Apple’s limited one-year warranty covers manufacturer defects, including poor battery performance or faults that arise from regular use. It does not cover accidental damage, such as a cracked screen caused by a drop. Apple will check certain markers (like strips that detect moisture inside the chassis) to determine whether any damage has been caused by user error.
AppleCare+ plan covers you for two incidents of accidental damage over two years. If you break your screen, then you will have to pay a service fee of $29. For other damages, the fee goes up to $99.
Now you know about your warranty for an iPhone and iPad. That’s it. Please feel free to share this post! One way to share is via Twitter.
Just click the Tweet icon below. This will launch Twitter where you click its icon to post the Tweet.
Check out TechSavvy.Life for blog posts on smartphones, PCs, and Macs! You may email us at contact@techsavvy.life for comments or questions.
Please feel free to leave a comment. I would love hearing from you. Do you have a computer or smart device tech question? I will do my best to answer your inquiry. Just send an email to contact@techsavvy.life. Please mention the device, app and version that you are using. To help us out, you can send screenshots of your data related to your question.
The author’s Vietnam eBook on the Battle for Tra Bong: Events and Aftermath
How do you know which version you have? All you have to do is find the model number of your iPhone and iPad. But it’s a little tricky and hidden. Why, I do not know.
How do you know which version you have? All you have to do is find the model number of your iPhone and iPad. But it’s a little tricky and hidden. Why, I do not know. Let’s find out.
This is for the iPhone and iPad
Copyright Scott Adams, Inc./Distributed by Universal Uclick for UFS
You can find the model number of your iPhone or iPad using the hardware or the software. The fastest way is using the Settings app.
First, open the Settings (the gear icon) app. Refer to below image:
Accessing Settings app
Next, scroll down to the General option. See below image:
Accessing General option
Now, select the About option. See following image:
Accessing About option
Next, tap on the number next to the Model Number option. Refer to below image:
Accessing Model Number option. This is really the Part Number
The number will change to reveal the real model number for your iPhone and iPad. The first number displayed is the part number and the second number is the model number. Tricky by the Apple engineers. See below image:
Accessing the real Model Number
If your iPhone will not boot up, you can also check the model number from the device. If you are using an iPhone 8 or higher, remove the SIM tray. You will find the model number etched on top in very small letters.
If you are using an iPhone 7 or older, you will find the model number inscribed on the back of the case.
With your iPhone and iPad’s model number, you can determine the exact model name of your device, and the region it came from. Just perform a web search for the model number to find out which iPhone and iPad you have and where it came from.
That’s it. Please feel free to share this post! One way to share is via Twitter.
Just click the Tweet icon below. This will launch Twitter where you click its icon to post the Tweet.
Check out TechSavvy.Life for blog posts on smartphones, PCs, and Macs! You may email us at contact@techsavvy.life for comments or questions.
Please feel free to leave a comment. I would love hearing from you. Do you have a computer or smart device tech question? I will do my best to answer your inquiry. Just send an email to contact@techsavvy.life. Please mention the device, app and version that you are using. To help us out, you can send screenshots of your data related to your question.
The author’s Vietnam eBook on the Battle for Tra Bong: Events and Aftermath
Let’s say you are in the middle of a complex task in Chrome but you need to restart, log out, or Chrome has crashed. With one quick settings change, Chrome can remember all of your open tabs and reload them automatically the next time you start Chrome. Let’s explore how to setup this feature.
Let’s say you are in the middle of a complex task in Chrome but you need to restart, log out, or Chrome has crashed. With one quick settings change, Chrome can remember all of your open tabs and reload them automatically the next time you start Chrome. Let’s explore how to setup this feature.
This is for devices running Google Chrome. Screenshots are from Windows 10
Copyright Scott Adams, Inc./Distributed by Universal Uclick for UFS
First, launch Chrome. In any window, click the three vertical dots button (the hamburger icon) in the upper right-hand corner and select Settings from the menu. Refer to below image:
Accessing Settings
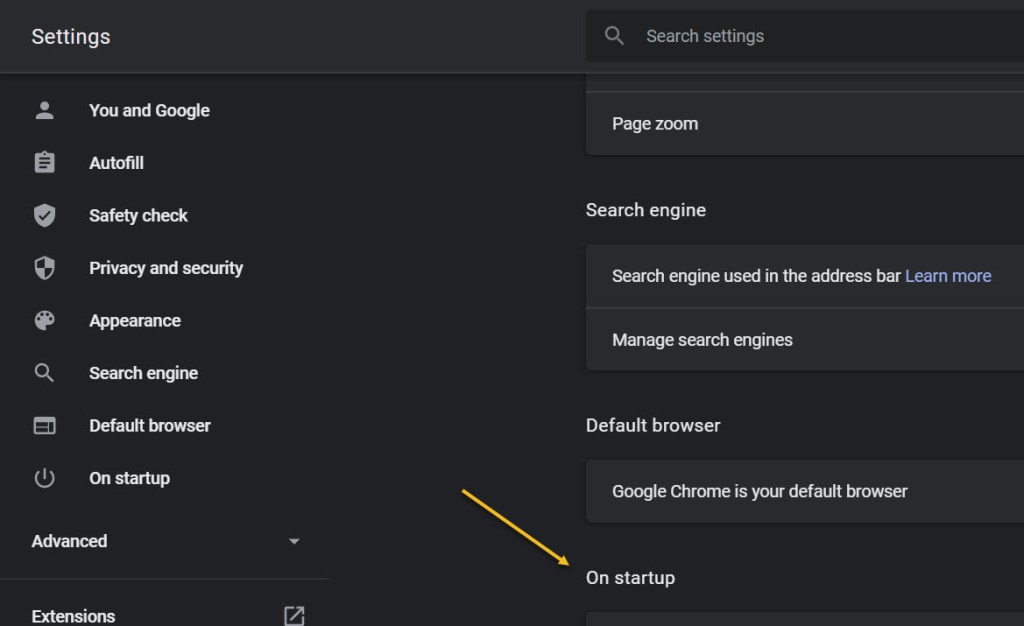
Next, select On startup option in the sidebar. See below image:
Selecting On startup option
Now, in the On startup section, select the radio button beside Continue where you left off. See following image:
Enabling opening your previous tabs
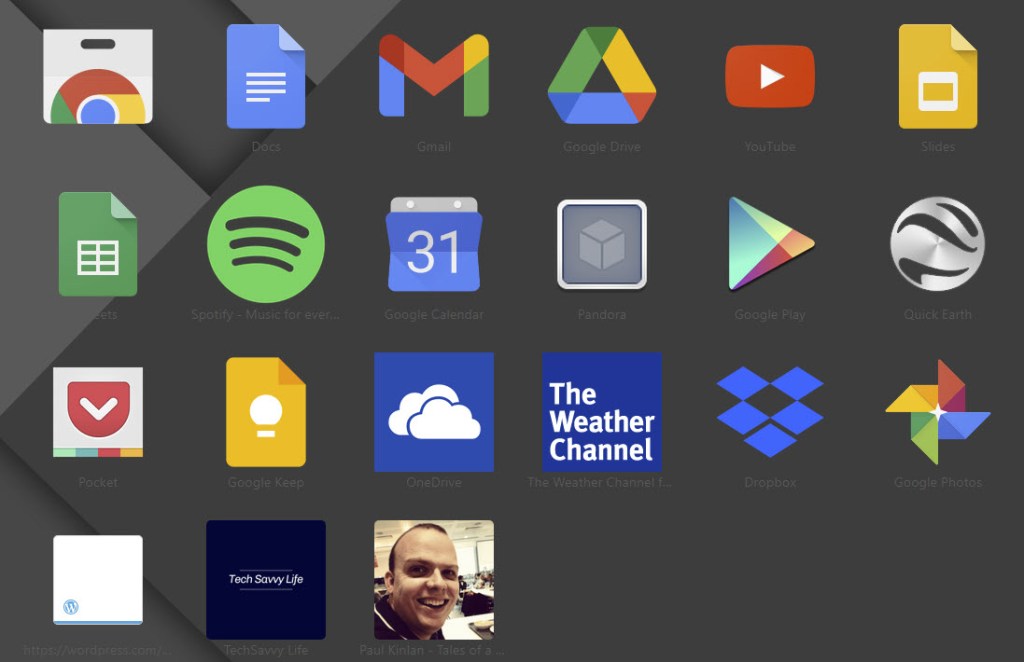
You can also force Chrome to launch with a set of your favorite pages. In the same On startup page in Chrome Settings just select Open a specificpage or set of pages instead. Refer to below image where you can open the browser to Chrome apps using the text of chrome://apps/.
Enabling open to a specific page
Here you will see your Google (and non Google) apps. Yes, you can add third party apps to your opening Chrome apps page. See below image:
Your Google apps screen
If you want Chrome to always open with a fresh, empty browser state, you can head back to this screen and select Open the New Tab page instead.
After that, close Settings, The next time you restart Chrome, all of your tabs will open again exactly where you left off.
Note! If you were browsing through Incognito (private mode) and you lose your tabs, Chrome will not remember them.
That’s it. Please feel free to share this post! One way to share is via Twitter.
Just click the Tweet icon below. This will launch Twitter where you click its icon to post the Tweet.
Check out TechSavvy.Life for blog posts on smartphones, PCs, and Macs! You may email us at contact@techsavvy.life for comments or questions.
Please feel free to leave a comment. I would love hearing from you. Do you have a computer or smart device tech question? I will do my best to answer your inquiry. Just send an email to contact@techsavvy.life. Please mention the device, app and version that you are using. To help us out, you can send screenshots of your data related to your question.
The author’s Vietnam eBook on the Battle for Tra Bong: Events and Aftermath
By default, Safari on iPhone and iPad displays a list of your Favorites when you open a new window or tab. We are going to choose another folder of bookmarks to display.
By default, Safari on iPhone and iPad displays a list of your Favorites when you open a new window or tab. We are going to choose another folder of bookmarks to display. Let’s explore how to do this.
This is for iPhone and iPad
Copyright Scott Adams, Inc./Distributed by Universal Uclick for UFS
First, open Settings (the gear icon) app. Refer to below image:
Accessing Settings app
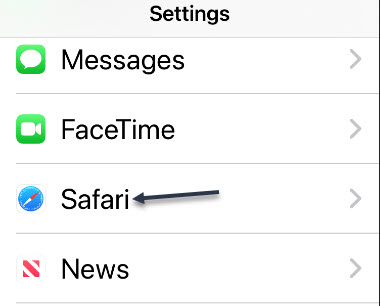
Next, scroll down and tap Safari. See below image:
Accessing Safari option
Now, tap Favorites. See following image:
Accessing Favorites option
Next, in the list that appears, choose another folder. (If no folders are present in the list, you can create a new folder in Safari by tapping the Bookmarks button, selecting Edit, then tapping the New Folder button.)
Note! Choosing a different folder here will also change your default Favorites folder. From now on, whenever you add a new bookmark to Favorites, it will appear in this folder. Refer to below image where we are choosing the Magazine folder for Favorites:
Selecting a bookmark folder
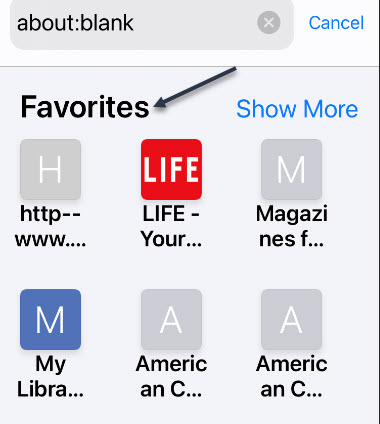
Now, tap back once, then exit Settings. The next time you open Safari to a New Tab page, you.will see a list of favorites pulled from the folder you just selected; in our case, the Magazine folder. See below image:
Your new Favorities folder
If you would prefer having nothing listed on your New Tab page, you can create an empty folder and select it instead. The next time you open a new tab, the page will be completely blank.
Please feel free to leave a comment. I would love hearing from you. Do you have a computer or smart device tech question? I will do my best to answer your inquiry. Just send an email to contact@techsavvy.life. Please mention the device, app and version that you are using. To help us out, you can send screenshots of your data related to your question.
The author’s Vietnam eBook on the Battle for Tra Bong: Events and Aftermath