RAYMOND OGLESBY @RaymondOglesby2
November 14, 2023
This is for devices using Text Messaging and Email.
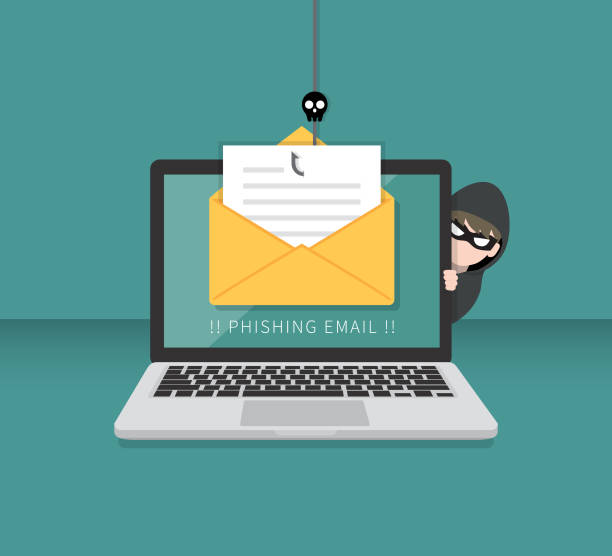
Phone and email scammers are running rampant. Here are some real-life phishing lures and how to stop scammers in their tracks.
Recently, Google warned that hackers were sending phishing emails to YouTube creators, offering antivirus software in exchange for a review on the channel. The antivirus was, in fact, malware designed to steal passwords and browser cookies, which can also hold login credentials.
Tips for Opening Cold Emails
Identifying legitimate contact is difficult in the age of frequent phishing attempts. Recently after helping a friend figure out whether an email purporting to be from Facebook was a phishing lure. In the end, that email turned out to be a real marketing message from Facebook, but he had to go through several steps to determine the message’s legitimacy. Even we have difficulty determining the authenticity of messages from Facebook and other companies.
Facebook keeps a list of verified correspondence in the account area of your profile, so it’s easy to match emails you receive in your inbox with the messages you see from Facebook in your account. But what if you want to verify that an email came from someone you know and contains safe links? The US Federal Trade Commission offers a few steps you can take to stay safe:
- Look at the From email address. If you do not recognize the address or the sender, think twice about opening any links contained within the email.
- Spot a generic greeting. A business email usually will not begin with a casual greeting such as, “Hi Dear.” An email from a friend usually will not spell your name wrong or address you with an honorific like “Mr., Mrs., or Miss.”
- Look at the link URLs. Mouse over links before you click on them. Your browser will reveal the web address for each one. If the link looks suspicious (for instance, a link purporting to be from Netflix takes you to an entirely different domain), do not click on it! Delete the email or report it as spam and move on.
- Be wary of any emails that invite you to click on a link, whether to update your payment details, update your account information, receive a coupon for free stuff, or examine an invoice you are not expecting.
Our son is a cyber severity expert. He says, “Don’t click that link”.
Combat Email Phishing Attempts
Even the most vigilant email user can be caught unaware of a malicious link in an email. Add extra layers of protection to your online life so you can mitigate the damage done by scammers:
- Use security software. The best antivirus and security suites have phishing protection built right in. Set the software to update automatically and run in the background to protect you from phishing attempts.
- Use multi-factor authentication everywhere you can online. Even if a scammer manages to get a hold of your username or password, if you set up multi-factor to be something you have (a hardware security key or an authenticator app passcode), or something you are (a scan of your fingerprint, retina, or face), it’s harder for the bad guys to log into your accounts.
- Back up your data. Copy your important documents and information regularly and store them on an external hard drive or with an online backup or storage service.
Phishing on Your Phone
Recently there have been SMS text messages using phishing attempts, also known as “smishing.” Here are some examples of smishing:

If you are not careful, these types of messages may fool you into giving up valuable information about yourself or downloading malware onto your phone.
Both messages came from an unknown phone number. Also, both requested action related to a finance-related problem, and both contained suspicious links. The first message is from an unknown company about a product we never purchased, and the use of the bit.ly link shortener is a common way for smishers to encourage their victims to click. The Citibank message is worrying because the link address is slightly off, featuring a dash instead of a period between “support” and “citi.”
For years, security researchers have noted that SMS spam could be curtailed by mobile carriers if they stopped offering unlimited texting plans. Until that happens, the best way to fight back against mobile spam in the United States is to forward the messages to short code SPAM (7726).
Phishing on Your Desktop
Here are a couple of email phishing attempts. The first one is an email from a company we do not use and with a weird link.

The second one has links that are way too long (only partially displayed) and a white dotted line at the top, and we did not request their help.

Disclaimer
Technology is always changing and rarely is there static tech for smartphones and desktops. Thus, the contents of this post are only valid at the time of writing. Blog posts older than six months may have directions incompatible with your device or OS. Hopefully, older post content will continue to work as advertised. Thank you for reading TechSavvy.Life for Technology at Work For You.
Quote For the Day
Failure is an option here. If things are not failing, you are not innovating enough.
Elon Musk
Tweet Info
That’s it. Please feel free to share this post! One way to share is via Twitter.
Just click the Tweet icon below. This will launch Twitter where you click its icon to post the Tweet.
Checkout TechSavvy.Life for blog posts on smartphones, PCs, and Macs! You may email us at contact@techsavvy.life for comments or questions.
Tweet
I Would Like to Hear From You
Please feel free to leave a comment. I would love to hear from you. Do you have a computer or smart device tech question? I will do my best to answer your inquiry. Just send an email to contact@techsavvy.life. Please mention the device, app, and version you are using. To help us out, you can send screenshots of your data related to your question.
Author’s E-Book
You can access the e-book from a Kindle device, the Kindle App for the desktop or smartphone, which is a free app.