

RAYMOND OGLESBY @RaymondOglesby2
December 8, 2022
The SendTo menu in Windows has been a useful feature for a long time. It may be buried in the right-click context menu in File Explorer, but you can use it to send files to a specific location, copy photos to a new device, or print your work in moments. It also comes with default entries you may never use and lack certain features you may want. Let’s explore tweaking what appears in the SendTo menu.
This is for Windows 11, 10, and 8.1. Screenshots are from Windows 10

Open the SendTo Menu
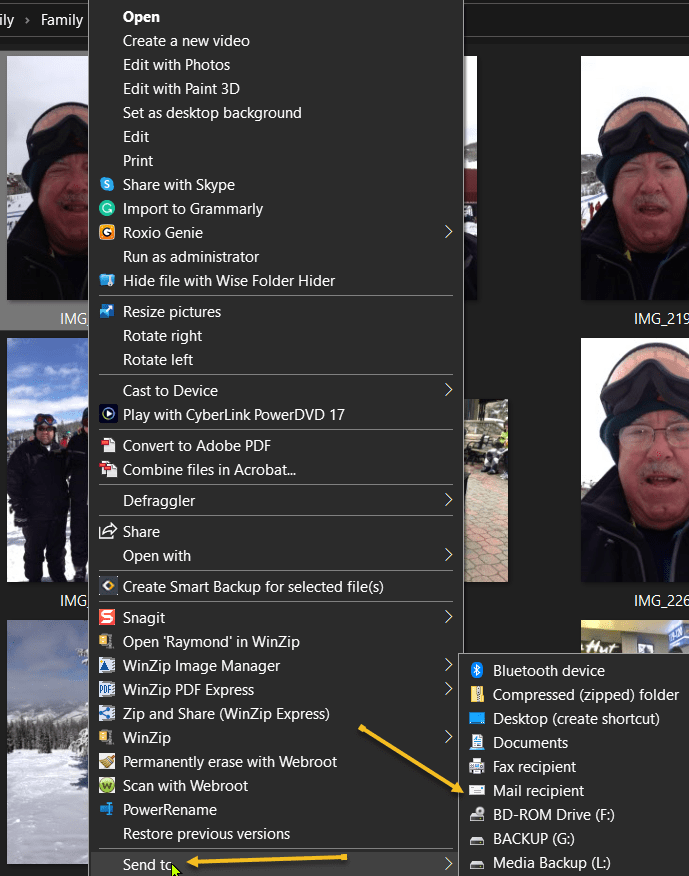
The SendTo function works the same in Windows 11, 10, and 8.1. First, open File Explorer and right-click on a file, such as a word processing document, spreadsheet, text file, or image file. From the pop-up menu, move your mouse to the SendTo command. menu.
The SendTo menu opens, revealing various locations and applications to which you can send the file. First, click a specific entry, such as a Bluetooth device, a compressed zip file, a Mail recipient, or your Documents folder. The file you selected is then sent to the chosen destination. Refer to the below image:
Remove Entries
Next, press the Windows Key + R to trigger the Run window. At the Open field in the window, type shell:SendTo and then click OK. See the below image:

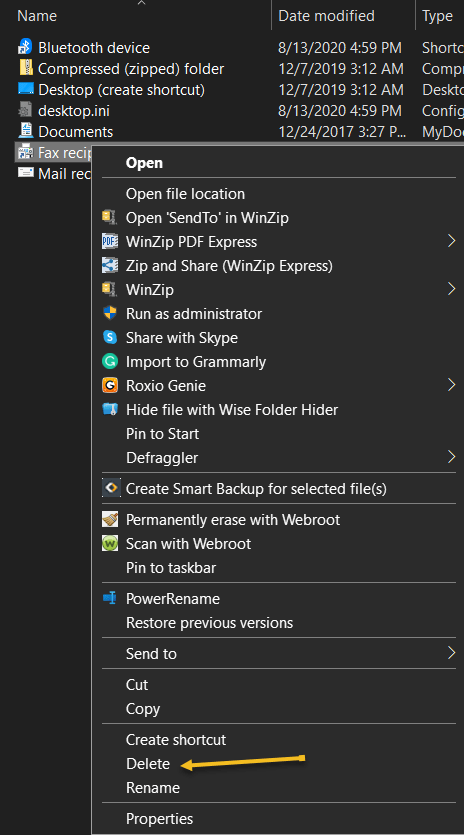
Now, the File Explorer opens to the SendTo folder for your user account. From here, you can delete any entries you would never use by right-clicking on them and selecting Delete from the pop-up menu. See the following image:
Add Entries
When adding new entries to the menu, you need to know the path of the executable file for the app you want to add. Let’s say you wish to play songs from Windows Media Player and want to add them to the SendTo menu. First, you would create a SendTo entry for it in the SendTo folder. To do so, open File Explorer, then right-click on any empty area of the folder.
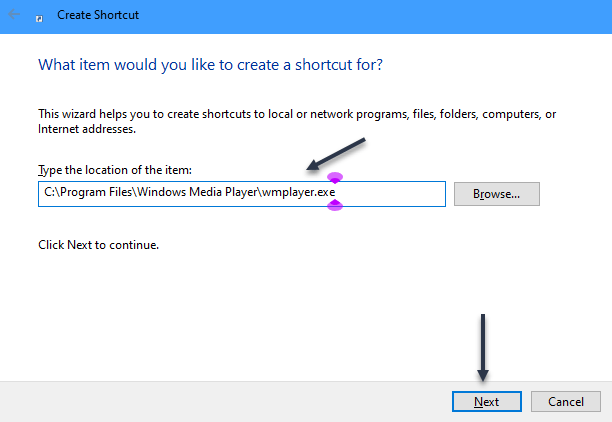
Next, select New > Shortcut. In the window that opens to create the shortcut. Refer to the below image:

Now, browse to or type the following path: C:\Program Files\Windows Media Player\wmplayer.exe, then click Next. See the below image:
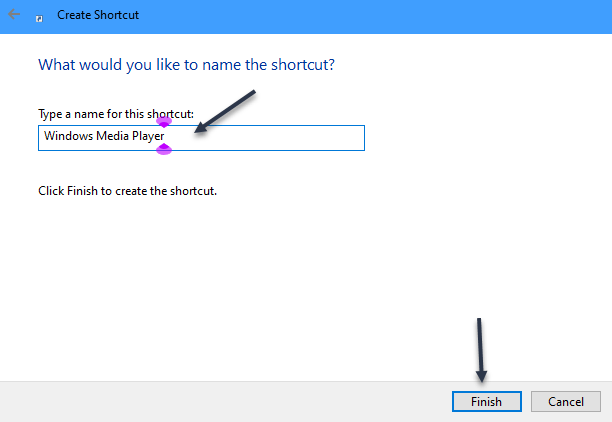
Next, you would then change the name for the shortcut to Windows Media Player and click Finish. See the following image:
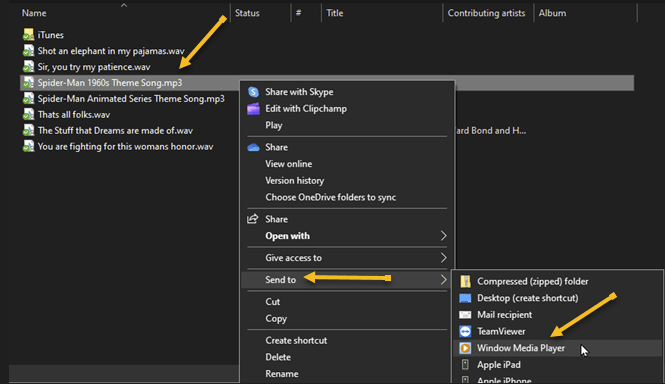
Now you can send any type of audio file to Windows Media Player if you right-click on it and open the SendTo menu. Refer to the below image:
Quote For the Day
To err is human, but to really foul things up you need a computer.
Paul Ehrlich
Tweet Info
That’s it. Please feel free to share this post! One way to share is via Twitter.
Just click the Tweet icon below. This will launch Twitter where you click its icon to post the Tweet.
Checkout TechSavvy.Life for blog posts on smartphones, PCs, and Macs! You may email us at contact@techsavvy.life for comments or questions.
Tweet
I Would Like to Hear From You
Please feel free to leave a comment. I would love to hear from you. Do you have a computer or smart device tech question? I will do my best to answer your inquiry. Just send an email to contact@techsavvy.life. Please mention the device, app, and version you are using. To help us out, you can send screenshots of your data related to your question.
Author’s E-Book
You can access the e-book from a Kindle device, the Kindle App for the desktop or smartphone, which is a free app.
