

Using Apple Notes is a fast way to capture thoughts and take notes on your iPhone or iPad. You can do more than just take plain text notes. Instead you can organize your notes by using formatting tools to make them stand out from plain text. Let’s explore how to do this.
This is for iPhone and iPad
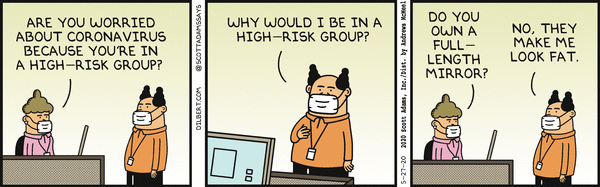
Copyright Scott Adams, Inc./Distributed by Universal Uclick for UFS
When you start a new note, Apple formats the first line into a Title format. You can change this by going to your Settings app, then navigate to:
Notes > New Notes > Starts With
and select your format. By default, the rest of your note is plain text.
As mentioned earlier, you can use formatting tools. These tools include headings, lists, indentations and more. These features are somewhat obscure for a new user.
The Formatting Toolbar
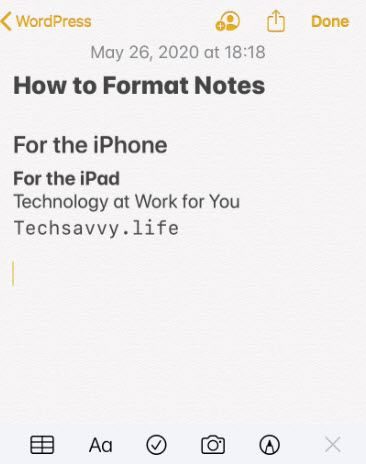
After opening a new note, tap on the screen to bring up the keyboard, if not already in view. Next, tap on the Aa button above the keyboard, the format row. You will see the text formatting tools that you can use. Refer to below image:

The keyboard is replaced by the formatting toolbar split into three rows. See below image:

From the first row, the Title Heading, Subheading and more are available to use. Monospaced is the only available font style to use in Notes. See following image:
When the toolbar is open, tap the X to close, tap the plus sign (+) to open, both to the left of the toolbar.
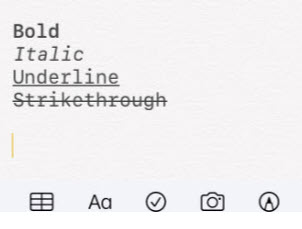
From the middle row, you can change selected text to Bold, Italic, Underline or Strikethrough formats. You may select multiple formats. Refer to below image:
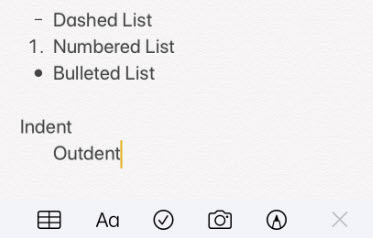
The last row has different bullet styles, indent and outdent formats. See below image:
The Checklist is separate from the formatting toolbar. To add a checklist, tap on the Checklist icon. Simply, start typing in your item. Tap the Enter key to add a new item. To stop the checklist, tap the Enter key on an empty line. Refer to below image:

To create a numbered list, start by typing 1 and then your first entry. To end your list, tap the Enter key on a blank line.
The Toolbar Examples
For a look at all our examples, see below image:

I Would Like to Hear From You
Please feel free to leave a comment. I would love hearing from you. Do you have a computer or smart device tech question? I will do my best to answer your inquiry. Please mention the device, app and version that you are using. To help us out, you can send screenshots of your data related to your question.
