Victims of accidental erasures have long relied on either old shareware programs or more comprehensive professional tools like Recuva, EaseUS Data Recovery, Disk Drill Data Recovery, Wise Data Recovery, among others, to recover deleted data.
Victims of accidental erasures have long relied on either old shareware programs or more comprehensive professional tools like Recuva, EaseUS Data Recovery, Disk Drill Data Recovery, Wise Data Recovery, among others, to recover deleted data.
This is for Windows 10 operating system
To Tweet about this post, click the Tweet icon below to launch Twitter, then click its Tweet icon to post.
Check out TechSavvy.Life for their blog posts on smartphone apps, PCs. and Macs!
Curiously, Windows never offered users its own version of an undelete utility. Until now. Why now? Who knows.
Microsoft is offering its new Windows 10 File Recovery Tool for free, online from the Microsoft App Store here.
Note! Make sure you sign in to your Microsoft Account FIRST before downloading.
Refer to below image:
Windows File Recovery app
It’s a command-line only tool, which means it doesn’t sport the attractive interface like most popular undelete utilities.
But it relies on the same principle more sophisticated shareware and professional undelete utilities have long used; deleted files are not actually immediately erased. Instead, the computer merely removes pointers to the locations of the “erased” data, notifying the system that the containers holding those data are available for use should they be needed to store newer files.
The new Windows File Recovery Tool offers three modes of recovery. The default setting is used mainly for NTFS file systems and is ideal for resurrecting recently deleted files.
A more aggressive Segment mode may do a better job retrieving older deleted files, though it will likely take longer.
The third mode, Signature. is the preferred option for retrieving files stored on external devices using FAT, exFAT and ReFS file systems.
The File Recovery Tool has only limited usefulness on solid state drives (SSDs). That is because those drives, unlike traditional hard disk drives, immediately wipe out deleted files.
Although it is not listed as such, the new tool appears to be a beta offering given its low version number or build. Users must have the Windows 10 update (May 2020) or later..
As always, users who need to retrieve an accidentally deleted file should act quickly. File segments remaining on a hard drive with address pointers removed will be overridden as new files are continually created. For the same reason, it is best to have the Windows File Recovery Tool already loaded before an emergency arises. Installing the program after a file is accidentally deleted increases the odds that deleted file fragments will be overridden by the new program.
That’s it. Please feel free to share this post! One way to share is via Twitter, as mentioned below.
I have found TechSavvy.Life blog posts extremely helpful. Check them out for posts on smart phone apps, Macs and PCs!
Please feel free to leave a comment. I would love hearing from you. Do you have a computer or smart device tech question? I will do my best to answer your inquiry. Please mention the device, app and version that you are using. To help us out, you can send screenshots of your data related to your question.
The author’s Vietnam eBook on the Battle for Tra Bong: Events and Aftermath
Yes, it is coming for your iPhone and Android smartphones. As a matter of fact, some of the features have already been available in iOS 13.5 and above for the iPhone that was released in May 2020. Google and Apple are working with public health organizations on contact-tracing apps.
Yes, it is coming for your iPhone and Android smartphones. As a matter of fact, some of the features have already been available in iOS 13.5 and above for the iPhone that was released in May 2020. Google and Apple are working with public health organizations on contact-tracing apps.
The piece that is missing, for now, is authorized apps from your health authorities. This is where you’ll report any sickness. Apple and Google are not releasing apps; they are collaborating to allow these apps to work across iOS and Android to collect data and send out alerts.
The following guidelines are for the iPhone. Android devices will be similar.
This is for iPhone and Android smartphones. Screenshots are from the iPhone
Copyright Scott Adams, Inc./Distributed by Universal Uclick for UFS
Conventional contact tracing is a technique used by public health authorities to measure and slow the spread of infectious diseases. It requires manually gathering information from infected individuals about the people they have previously been in contact with. These people can then be notified by public health authorities to take appropriate safety measures, such as undertaking self-quarantine and getting tested to break the chain of transmission. While this process will continue to be important to contact tracing efforts, systems that are being developed can alleviate some of the challenges with this process.
First there is a significant organizational burden from a manual process, as many public health workers are needed to perform these tasks. Second, the process can be slow as it requires finding and interviewing infected individuals and then reaching out and talking to their high risk contacts; all of whom may not be able to remember or know all of the people that they came in contact with in the past days to weeks.
The contact tracing is called “COVID-19 Exposure Logging” and is automatically turned off. When contact tracing apps are installed, you can enable the feature.
Setting Up On iPhone
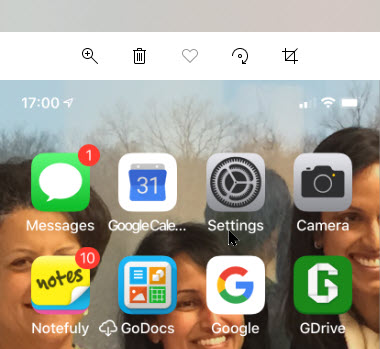
First, launch Settings. Refer to below image:
The Settings icon
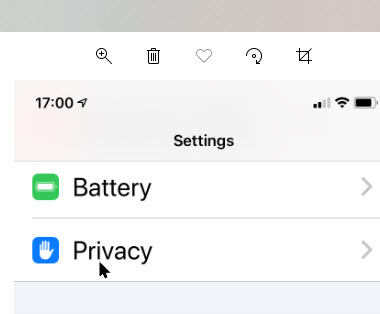
Next, scroll down to the Privacy option and tap it. See below image:
The Privacy option
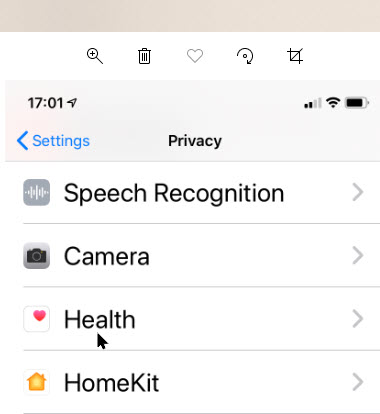
Now, tap the Health option. See following image:
The Health option
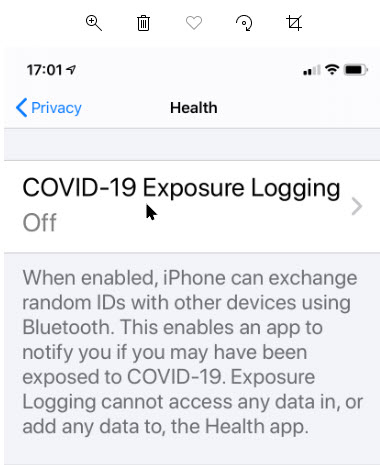
You wil see the COVID-19 Exposure Logging option; just tap it. Refer to below image:
COVID-19 Exposure Logging option
How It Works
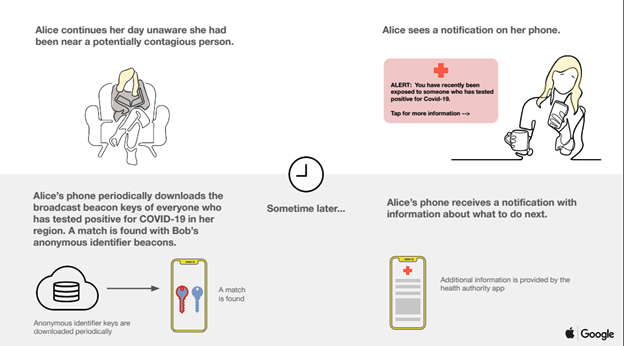
Once enabled, users’ devices will regularly send out a beacon via Bluetooth that includes a random Bluetooth identifier; basically, a string of random numbers (IDs) that are not tied to a user’s identity and change every 10-20 minutes for additional protection. Other phones will be listening for these beacons and broadcasting theirs as well. When each phone receives another beacon, it will record and securely store that beacon on the device. Refer to below diagram:
Contact Tracing Diagram
At least once per day, the system will download a list of the keys for the beacons that have been verified as belonging to people confirmed as positive for COVID-19. Each device will check the list of beacons it has recorded against the list downloaded from the server. If there is a match between the beacons stored on the device and the positive diagnosis list, the user may be notified and advised on steps to take next. See below diagram:
Contact Tracing Diagram
Active Apps
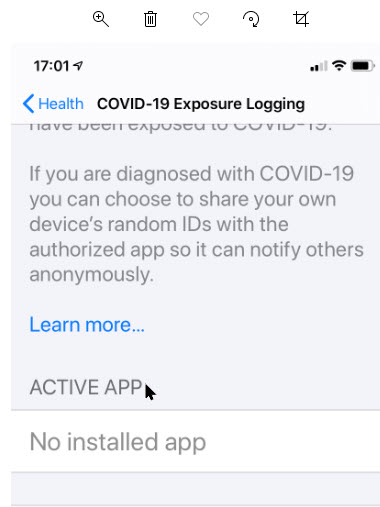
Now, scroll down to the Active App section. Here you will find your installed apps that works with contact tracing. Once available from local, state or federal authorities, you will need to install the apps then they will appear here. (As of this writing, there is one app available from Center for Disease Control; for a list of States that will participate or have an app available, click here . See below image:
Active Apps for contact tracing that are installed
For these apps to work, you will need your phone’s Bluetooth and location tracking features turned on, though your actual physical location is not tracked; the apps will not know where in the world you are or how many times you have left the house today. They’ll only know which random IDs your phone has come into contact with.
Check for Exposure
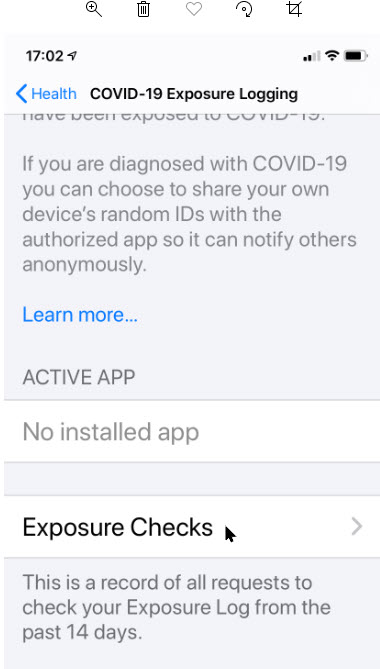
To see if the option is working, tap on Exposure Checks. See following image:
Accessing Exposure Checks option
Now, you will see the following image about any exposure within the last 14 days. Refer to below image:
Checking to see if you have been exposed
The Fine Print
Now, tap the Back button then tap on the Learn More blue link. See below image:
Accessing the Terms andConditions
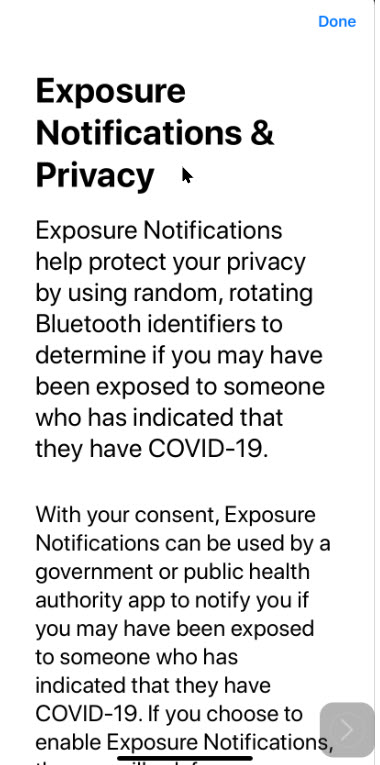
Information on Exposure Notifications & Privacy terms and conditions will be displayed. See following image:
The Terms and Conditions for contact tracing and exposure
I have found TechSavvy.Life blog posts extremely helpful. Check them out for posts on smart phone apps, Macs and PCs!<
Please feel free to leave a comment. I would love hearing from you. Do you have a computer or smart device tech question? I will do my best to answer your inquiry. Please mention the device, app and version that you are using. To help us out, you can send screenshots of your data related to your question.
The author’s Vietnam eBook on the Battle for Tra Bong: Events and Aftermath
At times you would like to “grab” a copy of a web page in Microsoft Edge without printing it out on paper. This is not obvious but easily to do on various devices.
At times you would like to “grab” a copy of a web page in Microsoft Edge without printing it out on paper. This is not obvious but easily to do on various devices.
This is for Windows 10 PCs, Macs and other devices that support Microsoft Edge
Copyright Scott Adams, Inc./Distributed by Universal Uclick for UFS
First, open Edge and navigate to a web page you would like to save as a PDF. In the upper right hand corner, click on the hamburger icon (the one with three dots). Refer to below image:
The Hamburger icon
In the pop-up menu, select Print. See below image:
The Edge Print option
The Print window will open that contains a preview of what the page will look like saved as a PDF file. Select Printer from the drop-down menu, then select Save as PDF. See following image:
Edge’s Save as PDF option
Use the Pages option to save certain pages (for example, only the first page like in my example or a range of pages). If you would like to change the orientation of the PDF file from portrait (the default) to landscape, click on the Layout option.
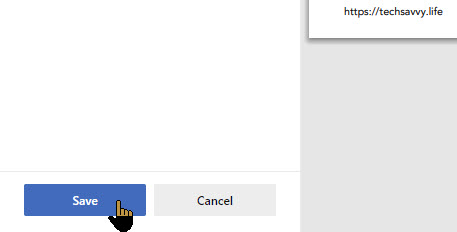
When you are done with your options, click on the Save button at the bottom of the page. Refer to below image:
Edge’s Save your changes option
The Save As dialog box will open. Enter the path where you want to save your PDF file and rename the file, if necessary. Click Save to save your file. See following image:
Edge’s Save the PDF file
Your web page(s) will be saved as a PDF file in the location you have chosen.
It’s possible to save documents to PDF files other than Edge. Whether its a Window 10 or a Mac computer, print-to-PDF functionally will be similar.
Please feel free to leave a comment. I would love hearing from you. Do you have a computer or smart device tech question? I will do my best to answer your inquiry. Please mention the device, app and version that you are using. To help us out, you can send screenshots of your data related to your question.
The author’s Vietnam eBook on the Battle for Tra Bong: Events and Aftermath
Most of the content you read on your iPhone is likely on the web. There are some hidden features that can make your reading a more enjoyable experience.
Most of the content you read on your iPhone is likely on the web. There are some hidden features that can make your reading a more enjoyable experience.
I am legally blind in one eye and have a hard time seeing the big E. I wear one contact to aid my sight. This post is of special interest to me and hope it’s of help to you.
This is for the iPhone running iOS 13+
Copyright Scott Adams, Inc./Distributed by Universal Uclick for UFS
We know that Safari is the default browser for the iPhone. It comes as a standard app and for a reason. The app has a Reader View, unlike third-party apps. This view reformats web pages making them easier to read. It removes all the distractions and just shows you the content.
Some browsers might offer Reader View but the popular browser Google Chrome doesn’t.
When you land on a web page or similar content, the address bar will display Reader View Available for 2-3 seconds. If you tap on the icon in upper left hand corner, you will enter Reader View immediately. Refer to below image:
Reader View available for this site
If you are fast, tap and hold “AA” for a second to jump straight to Reader View. If you miss it, you can tap the “AA” in the address bar and choose Show Reader View. See below image:
Shoe Reader View
While you’re in Reader View, you can tap “AA” again to see some options. Tap the smaller “A” to shrink the text, or the larger “A” to enlarge it.
For more options, tap the “AA” again. Refer to below image:
Reader Virw options
Here you can change the Font from the list that appears and change screen color from white to black. See following image for the font list:
Available fonts
Also, you can access the settings for the website by tapping Website Settings. Here, you can enable Use Reader Automatically. This forces Safari to enter Reader View whenever you visit any page on that domain in the future. Click Done when finished. See below image:
Available Website settings
When you change these settings, they’ll change for all the websites you view in Reader View. To get back to the original webpage, tap “AA” again, and then choose Hide Reader View (refer to third image above)..
Tap and hold “AA” to return to the originally formatted website. Safari will remember your choice for future visits. If the dialog box is still visible, just tap outside the box and it will disappear.
Safari Web Page to PDF or Print
You can save pages as readable PDF documents or print them. To save as PDF:
Enable Reader View
Tap Share
Tap Options on upper part of screen
Tap PDF
Tap Done
Select Save to Files from the Actions list
This also works to print via Share > Print.
Make Text Easier to Read
If you’d like to make text easier to read across your whole system, rather than having to rely on Reader View, your iPhone also includes a lot of accessibility options. For these options:
Go to Settings
Tap Accessibility
Tap Display and Text Size
See following image:
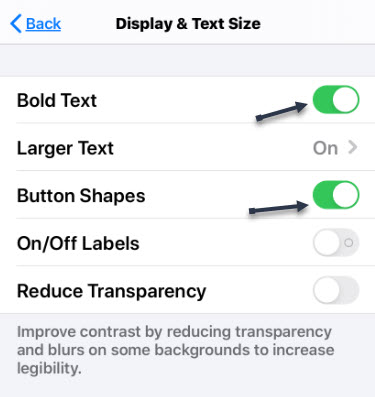
Setting the text
Bold Text option makes text easier to read without increasing its size. However, you can also tap Larger Text, and then slide the slider to increase text size. Any apps that use Dynamic Type (like most of the content on Facebook, Twitter and news stories) will apply this setting.
Button Shapes places the outline of a button beneath any text that is also a button. This can help with readability and navigation. Other options you might want to enable include:
Increase Contrast – Makes text easier to read by increasing the contrast between the foreground and background
Smart Invert – Inverts the color scheme (except on media, like photos and videos)
Classic Invert – The same as Smart Invert, except it also inverts the color scheme on media
Ensure that Auto Brightness is enabled to save battery and improve performance. Refer to below image:
Other settings
Let iPhone Read to You
Do you want to listen instead of reading? Apple’s phones and tablets include an accessibility option that will read the current screen, web page or copied text aloud. While this is an accessibility feature for the visually impaired, it has broader applications for handling written content.
To enable this feature:
Go to Settings
Tap Accessibility
Tap Spoken Content
Enable Speak Selection and Speak Screen
See following image:
Setting iPhone speech
Speak Selection toggle allows you to highlight text, and then tap Speak button to read the text . Speak Screen toggle will read the entire screen aloud whenever you swipe down from the top with two fingers. If this is proving to be probmatic as it is for me, see next paragraph for another method. Additionally, you will want to adjust SPEAKING RATE by moving the slider. See below image:
Setting the Speaking Rate
To have the Speak Screen playback controller visible, enable Speach Controller. Instead of swiping your fingers, just tap the playback button to read your content. You can drag and reposition this small box anywhere you want it. Tap it to see options to silence speech, skip backward or forward through an article, pause the speaking or increase/decrease the speed at which the text is being read. Refer to below image:
The speech playback controls
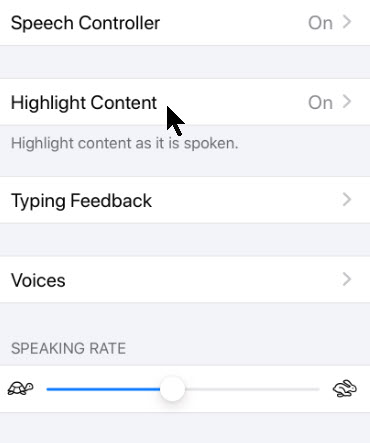
If you wish to highlight the content as it reads, enable the Highlight Content button and adjust its options. See below image:
Other options
Tap Voices to customize the voices you hear. Most voice selections require a download. The default, English, will mirror your current Siri settings. Refer to below image:
The Speak Screen feature works best when paired with Reader View. In regular view, your iPhone will also read descriptive image text, menu items, adverts, and other things that can be distracting. By triggering Reader View first, you can cut straight to the content.
Speak Screen works intuitively based on whatever is currently on the screen. For example, if you’re reading an article, and you are halfway through, triggering Speak Screen will begin reading based on how far down the page you are. The same is true for social feeds, like Facebook or Twitter.
Ask Siri for News
You can just say “give me the news” to Siri at any time to see and hear a list of headlines from the News app. You can also launch the News app (or your favorite alternative), and then have your iPhone read aloud with Speak Screen or Speak Selection. See below image:
Asking Siri for the news
Siri will give you an alternative news source to switch to, if available, and it will be remembered the next time you ask for an update.
Enable Different Modes
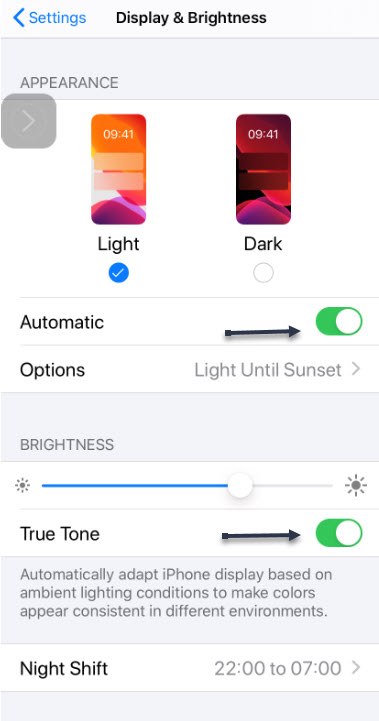
Using your iPhone at night in a dark room became a lot more pleasant with the arrival of Dark Mode on iOS 13+. To enable this feature:
Go to Settings
Tap Display and Brightness
Choose Automatic to enable when it gets dark outside
Set Options to your preference
Below the Dark Mode setting option is a toggle for True Tone. If you enable this setting, your iPhone will automatically adjust the white balance onscreen to reflect your ambient environment. This means the screen will look a lot more natural. True Tone makes reading less jarring, particularly under fluorescent or incandescent lighting.
Finally, Night Shift removes blue light from the screen to simulate the setting sun, which might help your body naturally switch off at the end of the day.
Its recommended you enable all five (Automatic, Options, Dark Mode, True Tone and Night Shift) options. Refer to below image:
Enable readable options
Keep in mind that Night Shift will also change how your photos and videos are displayed until you turn it off again, so we recommend no serious editing when it’s enabled.
Please feel free to leave a comment. I would love hearing from you. Do you have a computer or smart device tech question? I will do my best to answer your inquiry. Please mention the device, app and version that you are using. To help us out, you can send screenshots of your data related to your question.
The author’s Vietnam eBook on the Battle for Tra Bong: Events and Aftermath
At times you would like to “grab” a copy of a web page in Google Chrome without printing it out on paper. This is not obvious but easily to do on various devices.
At times you would like to “grab” a copy of a web page in Google Chrome without printing it out on paper. This is not obvious but easily to do on various devices.
This is for Windows 10 PCs, Macs and other devices that support Google Chrome
Copyright Scott Adams, Inc./Distributed by Universal Uclick for UFS
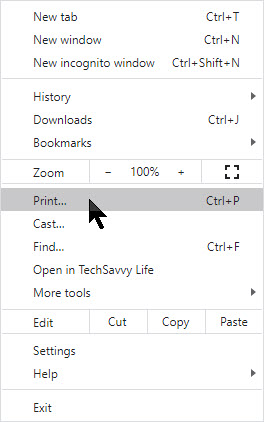
First, open Chrome and navigate to a web page you would like to save as a PDF. In the upper right hand corner, click on the hamburger icon (the one with three dots). Refer to below image:
The Hamburger icon
In the pop-up menu, select Print. See below image:
The Chrome Print option
The Print window will open. From here, select Destination, then click on Save as PDF. See following image:
Chrome’s Save as PDF option
Use the Pages option to save certain pages (for example, only the first page like in my example or a range of pages). If you would like to change the orientation of the PDF file from portrait (the default) to landscape, click on the Layout option.
When you are done with your options, click on the Save button at the bottom of the page. Refer to below image:
Chrome’s Save your changes option
The Save As dialog box will open. Enter the path where you want to save your PDF file and rename the file, if necessary. Click Save to save your file. See following image:
Chrome’s Save the PDF file
Your web page(s) will be saved as a PDF file in the location you have chosen.
It’s possible to save documents to PDF files other than Chrome. Whether its a Window 10 or a Mac computer, print-to-PDF functionally will be similar.
Please feel free to leave a comment. I would love hearing from you. Do you have a computer or smart device tech question? I will do my best to answer your inquiry. Please mention the device, app and version that you are using. To help us out, you can send screenshots of your data related to your question.
The author’s Vietnam eBook on the Battle for Tra Bong: Events and Aftermath


:no_upscale()/cdn.vox-cdn.com/uploads/chorus_asset/file/20058248/windowsfilerecovery.jpg)