

Windows 10, stores significant amounts of cache to make the system faster and more responsive. This is very efficient if you have tons of storage and free RAM to work with or a high performance CPU. Unless you have a considerable amount of RAM you will eventually run into problems that will slow down your PC, causing it to lag and maybe even hang if you load it with a lot of tasks.
Let’s explore how to clear your Windows 10 cache to keep your PC running smoothly.
This is for the Windows 10 operating system

Check out TechSavvy.Life for their blog posts on smartphone apps, PCs. and Macs!
Tweet
Using Wise Disk Cleanup Tool
To cleanup your temporary file cache, browser cache like Chrome and Edge, Windows and Application traces and much more, I recommend using the free Wise Disk Cleanup tool over the built-in Disk Cleanup app in Windows 10. Click here to see my post on the Wisk Disk Cleanup tool. In this post, are instructions on downloading, installating and running the application.
Clear Your Domain Name Server (DNS) Cache
To clear your DNS cache, we need to open the Command Prompt with admin privileges. First, enter Command Prompt in the Cortana search box located in lower left hand corner of the Task Bar. Refer to below image:
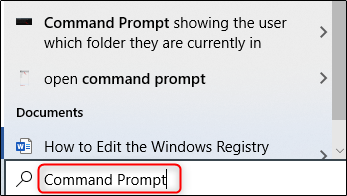
The Command Prompt app will appear in the search results in upper left hand corner. Now, click on Run as administrator from the menu on the right. See below image:

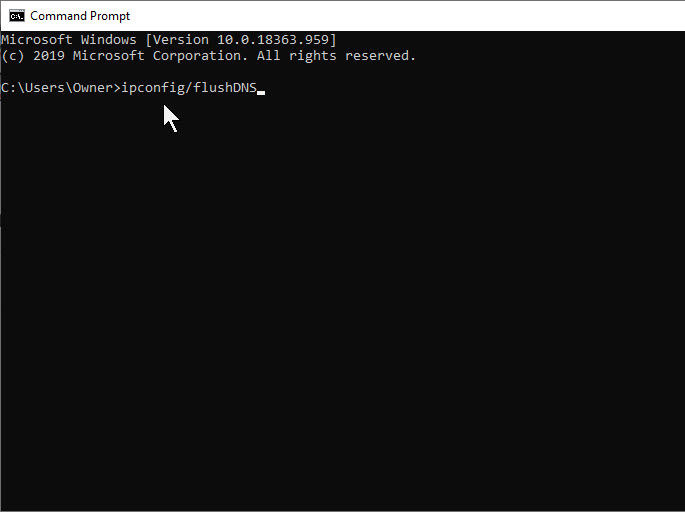
Next, enter the following command:
ipconfig/flushDNS
and press the Enter key. See following image:
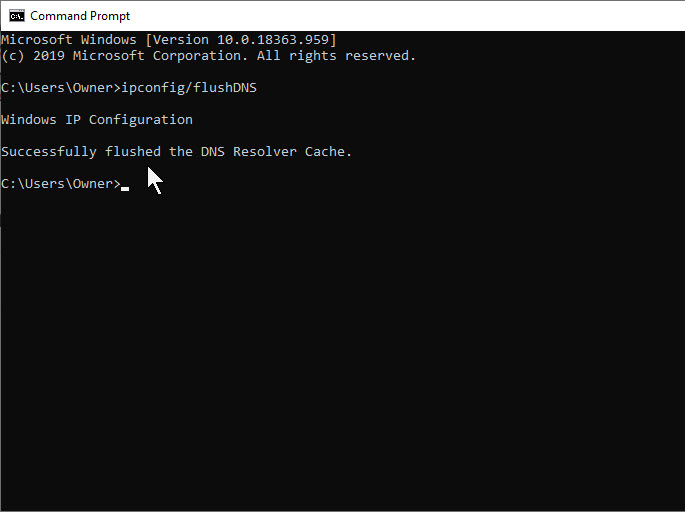
You will receive a message about the status of clearing the DNS cache. Refer to below image:
Clear Your Windows Store Cache
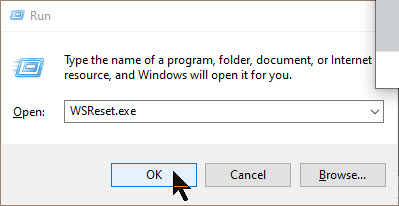
First, open the Run command by pressing the Windows+R command. Next, enter WSReset.exe in the Run box and click OK. Refer to below image:
A black window will appear for a few seconds. Don’t be alarmed, it is clearing the Windows Store cache. See below image:

Once it is finished, the black window will disappear and the Windows Store app will launch. Just close this application.
Clear Your Location Cache
First, enter Settings in the Cortana search box located in lower left hand corner of the Task Bar. The Settings app will appear in the search results in upper left hand corner. Click on the Settings app and select the Privacy option. See following image:

Now, in the App Permissions section, select the Location option. Refer to below image:

Next, scroll down till you see the Location History group. Here, select Clear under the Clear location history on this device heading. See below image:
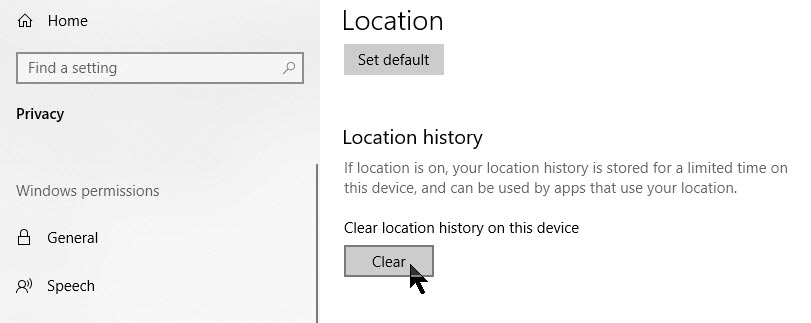
When finished, a small checkmark will appear beside the Clear button.
I hope you found this post helpful. Please feel free to comment or tweet out that you like TechSavvy.Life.
I have found TechSavvy.Life blog posts extremely helpful. Check them out for posts on smart phone apps, Macs and PCs!
Tweet
I Would Like to Hear From You
Please feel free to leave a comment. I would love hearing from you. Do you have a computer or smart device tech question? I will do my best to answer your inquiry. Please mention the device, app and version that you are using. To help us out, you can send screenshots of your data related to your question.
