
RAYMOND OGLESBY @RaymondOglesby2
January 27, 2026 – 3 minutes read time
Overview
Did you know that you can quickly turn off specific app notifications without having to dig deep in your notifications settings? Let’s learn how to turn notifications off on iPhone’s Lock Screen in just a few quick steps. This is an easy way to reduce declutter by turning off iPhone notifications as soon as they pop up.
You may already know how to turn off notifications on iPhone in the Notification Settings. However, it is even easier to turn off an unwanted app notification the moment it pops up, directly from your Lock Screen.
Key Takeaways
- Turn off specific app notifications the moment you get them.
- Avoid the hassle of navigating to Notification Settings and disable notifications directly from your Lock Screen.
System Requirements
This tip was performed on an iPhone 17 Pro running iOS 26.2.
Click here to learn how to update your iPhone to the latest iOS version.
Turning Off Notifications
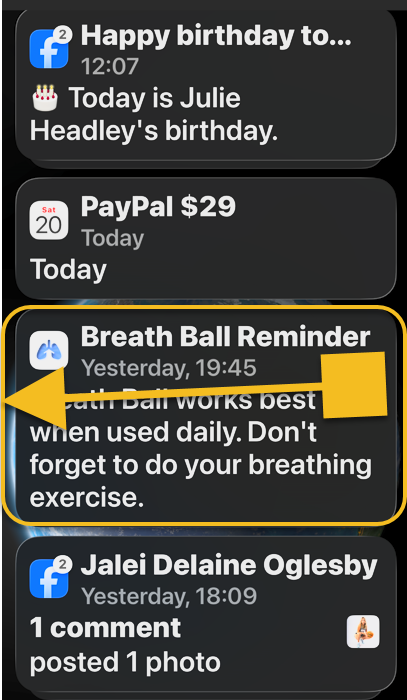
First, locate a notification from an app on your Lock Screen that you wish to silence. Refer to the image below:

Next, swipe slowly from right to left over the notification. See the below image:
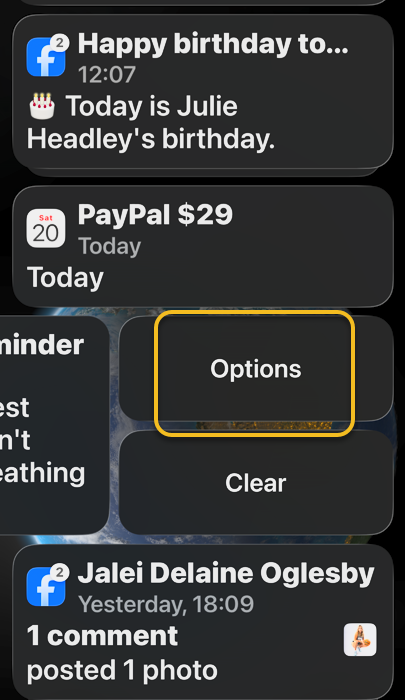
Now, tap Options. If you tap Clear, just this one notification will be removed. See the following image:
Next, select Turn Off. Refer to the image below:

Another trick is that instead of tapping Turn Off, you can tap View Settings which will take you to the page with all the settings for that particular app.
Note! There is no confirmation step once you tap Turn Off, so if you accidentally turn off the wrong app notifications, you will have to turn them back on via Settings
Also, for example if you turn off Best Buy app Deals notifications it will generally disable all alerts from the app, to include order and shipping uupdates, so be careful what you turn off.
Now you know how to turn off iPhone notifications directly from the Lock Screen!
Disclaimer
Technology is constantly evolving, and smartphone and desktop tech rarely remains static. Therefore, the information in this post is only accurate as of the date it was written. Blog posts that are older than six months may contain instructions that are no longer compatible with your device or operating system. We hope that the content from previous posts continues to function as intended. Thank you for reading TechSavvy.Life, where technology works for you.
Quote For the Day
The saddest aspect of life right now is that science gathers knowledge faster than society gathers wisdom.
– Isaac Asimov
(X) Twitter Info
That’s it. Please feel free to share this post! One way to share is via Twitter.
Just click the Tweet icon below. This will launch Twitter where you click its icon to post the Tweet.
Checkout TechSavvy.Life for blog posts on smartphones, PCs, and Macs! You may email us at contact@techsavvy.life for comments or questions.
Tweet
I Would Like to Hear From You
We value your feedback! Was this post helpful? Please share your comments with us. If you have a tech question related to your computer or smart device, feel free to reach out. Just send an email to contact@techsavvy.life, and be sure to include the device, app, and version you are using. To assist us further, you can also attach screenshots related to your inquiry.
The author’s Vietnam eBook on the “Battle for Tra Bong Vietnam: Events and Aftermath” can be accessed from a Kindle device or the Kindle App for a desktop or smartphone. The apps are free.

Hello Raymond!
I have a question (and perhaps a request). My friend asked me to ‘wipe’ a MacBook, but the OS is Catalina, which does NOT have the internal option to reset without needing the software to start from scratch.
Is this something you might be able to assist me, and then we’ll donate it to a ministry like the one that Robert Craig does with Bangladesh, etc.
Thanks so much!
Dave
LikeLike
I am not a Mac person but here is what I found.
To wipe a MacBook running macOS Catalina (10.15), back up your data, sign out of iCloud in System Preferences, and restart while holding Command + R to enter Recovery Mode. Select Disk Utility, erase the “Macintosh HD” volume group (using APFS format), and then choose “Reinstall macOS” from the main menu.
Step-by-Step Instructions:
Backup Data: Ensure all important files are backed up to an external drive or cloud service.
Sign Out of Accounts:
Sign out of iCloud: System Preferences > Apple ID > Overview > Sign Out.
Sign out of iMessage: Messages > Preferences > iMessage > Sign Out.
Enter Recovery Mode: Restart your Mac and immediately press and hold Command (⌘) + R until you see an Apple logo or spinning globe.
Erase Disk (Disk Utility):
Select Disk Utility and click Continue.
Select Macintosh HD in the left sidebar.
Click the Erase button in the toolbar.
If prompted, enter your Apple ID credentials.
Set Name to Macintosh HD and Format to APFS (or Mac OS Extended Journaled).
Click Erase Volume Group (or just Erase if that is not visible).
Once finished, quit Disk Utility to return to the utilities window.
Reinstall macOS:
Select Reinstall macOS from the utility menu.
Click Continue and follow the on-screen instructions.
If you don’t want ti reinstall, just turn off machine.
If your Mac is using Catalina, you can also try going to System Preferences in the menu bar and selecting Erase All Content and Settings to securely erase your data.
Note: The “Erase All Content and Settings” feature is officially for Monterey or later, but some versions of Catalina may support it via the menu bar in System Preferences, otherwise, the Recovery Mode method above is the standard approach.
LikeLike