RAYMOND OGLESBY @RaymondOglesby2
December 23, 2021
With Google Chrome’s built-in QR code option on your desktop, you can make QR codes for any sites and web pages you visit in the browser. When others scan them, they will be taken to the site. Let’s explore how this is done.
This is for Windows, Mac, Linux, or Chromebook running Chrome

There are many reasons to generate QR codes for websites. The main reason is to add a QR code to your documents, spreadsheets, presentations, emails, and more. Chrome lets you save the QR codes as images, so you can basically use them anywhere you want.
Since Chrome has a built-in QR code generator, you do not have to install any third-party extensions to get the job done.
First, launch Chrome on your Windows, Mac, Linux, or Chromebook computer. Then access the website you want to turn into a QR code.
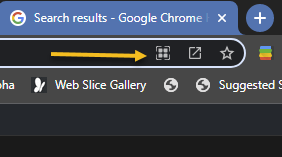
At the top of Chrome, click the address bar to reveal the QR code option. Refer to the below image:

Next, in the far right of the address bar, you will now see various icons. Click the Create QR Code For This Page icon (which is a partial square icon with four small squares). If the icon is missing, click the Zoom icon and click Reset. See the below image:
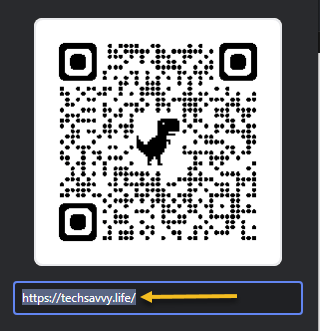
Now, Chrome will open a Scan QR Code pop-up with your generated QR code in it. You can now scan this QR code from your iPhone or Android phone. See the following image:
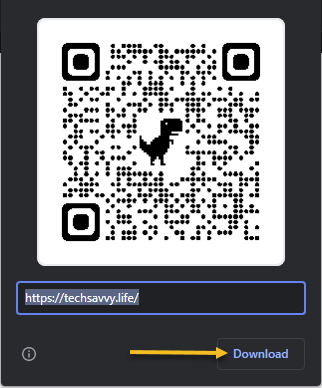
Next, to save this QR code as an image to your computer, at the bottom-right-hand corner of the Scan QR Code pop-up window, click Download. Refer to the below image:
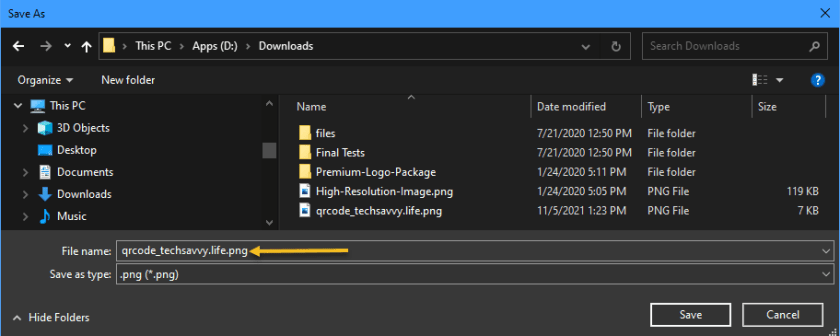
Now, you will see your computer’s standard Save As window. Select a folder to save your QR code image in, type a name for the image, and click Save. See the below image:
And that’s all there is to making QR codes in Chrome on the desktop. A nice feature of Chrome.
Quote For the Day
Risk comes from not knowing what you’re doing.
Warren Buffett
You are finished. Please feel free to share this post! One way to share is via Twitter.
Just click the Tweet icon below. This will launch Twitter where you click its icon to post the Tweet.
Check out TechSavvy.Life for blog posts on smartphones, PCs, and Macs! You may email us at contact@techsavvy.life for comments or questions.
Tweet
I Would Like to Hear From You
Please feel free to leave a comment. I would love to hear from you. Do you have a computer or smart device tech question? I will do my best to answer your inquiry. Just send an email to contact@techsavvy.life. Please mention the device, app, and version you are using. To help us out, you can send screenshots of your data related to your question.