RAYMOND OGLESBY @RaymondOglesby2
February 27, 2024
This is for devices running Windows 10. Screenshots are from Windows 10
Windows 11 is the latest and greatest operating system from Microsoft, but it will be a few years before it surpasses Windows 10 as the most popular desktop OS in the world. Despite the company’s desire to get us all to upgrade, Microsoft has made it difficult with high requirements many users can not meet with their current PCs.
If you are sticking with Windows 10 instead of buying a new computer, you have until 2025 before Microsoft begins to wind down official support. So there’s still plenty to learn to get the most out of your aging operating system. Personally, we do not like Windows 11. We will wait for Windows 12 before upgrading from Windows 10.
Whether you do not consider yourself a power user or made the jump from macOS, these tips will help you get more out of your Windows 10 experience. Some of these tricks originated from an older generation of Windows, while others are new to this iteration.
The Secret Start Menu
If you are a fan of that old-school (i.e. non-tiled) Start menu experience, you can still (sort of) have it. Right-click on the Windows icon in the bottom-left corner to prompt a textual jump menu with several familiar destinations, including Apps and Features, Search, and Run. All these options are available through the standard menu interface, but you can access them quickly here.
Note! In this post your can access Settings from the Start menu as noted below or in the Sortana type “Settings”, then click on the Settings app in the Search results.
Refer to the below image:

View Your Desktop Quickly
You do not have to minimize all your open windows just to look at the desktop. There’s a secret button in the bottom-right corner of the taskbar. If you do not see it, look all the way to the bottom and right, beyond the date and time. There, you will find a small sliver of an invisible button. Click it to minimize all your open windows at once; click it again to bring everything back. See the below image:

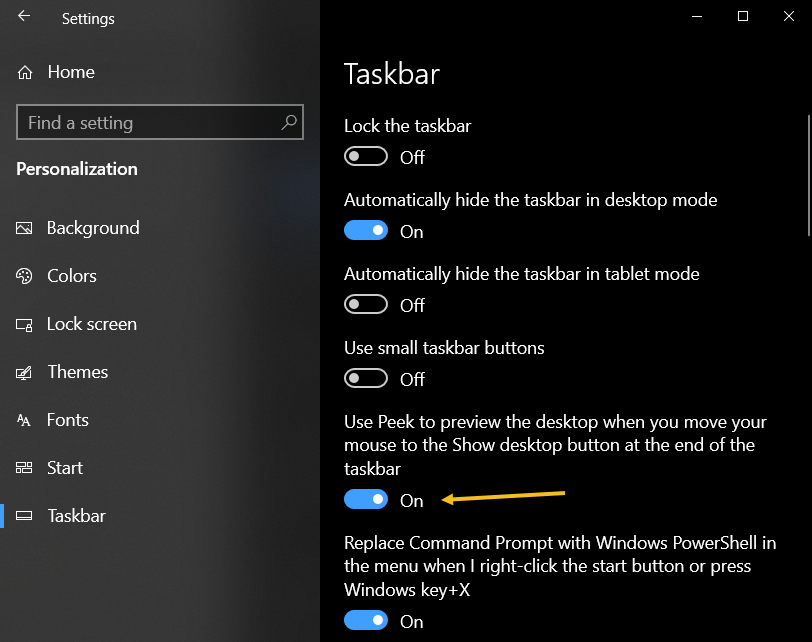
There’s also the option to minimize windows when you hover over the small silver button versus clicking. Select your preference in:
Settings > Personalization > Taskbar
then flip the switch to ON under Use Peek to preview the desktop… See the following image:
Change Windows Search Settings
If your PC searches are taking too long in Windows, narrow things down under:
Settings > Search > Searching Windows
Set search to Classic, which only applies searches to your libraries and desktop. The Enhanced option indexes your whole computer, which can take longer and uses more power. You can further narrow your search by marking certain folders as excluded. Refer to the below image:

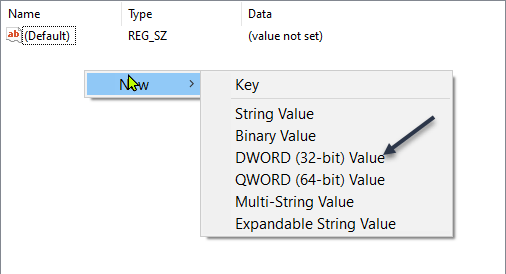
Enable God Mode
This may be a little too niche for most users, but if you are a power user or IT professional who wants access to all of Windows’ control panels from one folder, God Mode is for you. Right-click on the desktop and select:
New > Folder
.Re-name the new folder with this bit of code:
GodMode.{ED7BA470-8E54-465E-825C-99712043E01C}
To enter God Mode or the Windows Master Control Panel shortcut, as it is officially called, simply double-click the folder. See the below image:

Customize the Command Prompt
If you like to dig into the innards of Windows with the Command Prompt, you will be happy to know you can customize the tool. Open the Command Prompt from the Cortana search box, right-click on the window’s top bar, and select Properties to personalize your experience.
The Properties window allows you to change the controls, font, layout, colors, and cursor within the Command Prompt. You can also turn the window transparent by opening the Colors tab and moving the Opacity slider. This lets you code while simultaneously observing the desktop. See the following image for the color setting:

Dark and Light Mode
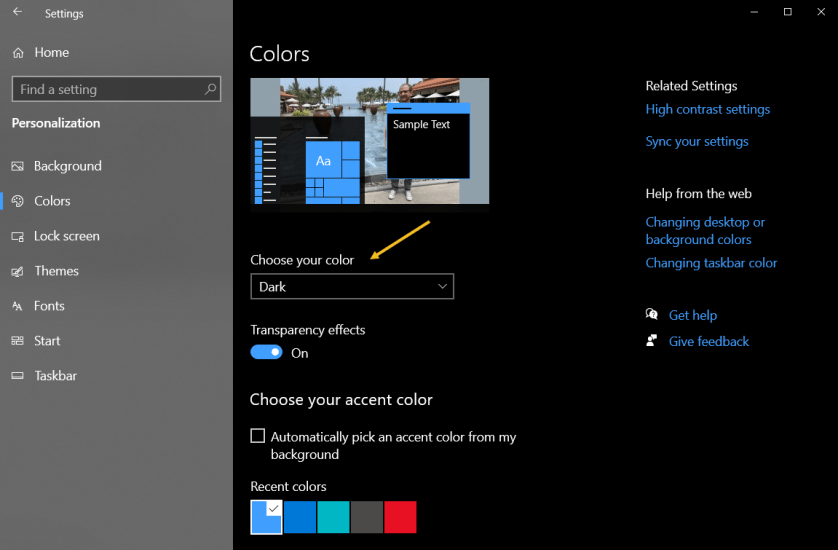
Windows 10 gives you a significant amount of control over color themes. Open:
Settings > Personalization > Colors
and you can set the operating system to either Dark mode or Light mode. These themes change the color of the Start menu, Taskbar, Action Center, File Explorer, Settings menus, and any other compatible programs. There is also a custom option that will let you set one theme for Windows menus and another for apps. Want a little more color? There are swatches of color themes available to choose from that can help your menus and taskbars really pop Refer to the below image:
We all use the Windows Clipboard to cut and paste, but did you know you can save multiple items at once and paste across devices? Use the command Win + V to view the last 25 clippings saved to the Clipboard. Go to:
Bulk Copy and Past
Settings > System > Clipboard
to control this feature and to sign into your Microsoft Account for cross-device usage. See the below image:

Use Sandbox to Test Files and Apps
Windows 10 Pro users have an extra asset to protect them against dangerous apps and files. If you enable Windows Sandbox inside the Control Panel, it will create a virtual instance of Windows inside Windows. In the Cortana search box, type in Control Panel then click the Control Panel app in the Search results. Now, click:
Programs > Programs and Features > Turn Windows features on or off link. > Windows Sandbox in the popup > Select a program
Note! If you receive a message about Sandbox virtualization support is disabled in the firmware, then click here on how to enable.
You can then safely open anything you are unsure about before introducing it to your Windows installation. Once you close out of Sandbox, everything inside it goes away without hurting your computer. See the following image:

Quickly Open Task Manager
Back in the day, Ctrl + Alt + Delete was the go-to command if your PC was acting up. If you are sick of having to select Task Manager from the menu that appears, there’s a quicker option. Use the keyboard shortcut Ctrl + Shift + Esc to immediately open the Task Manager and make things a little easier. Refer to the below image:

View File Extensions
By default, Windows hides file extensions in File Explorer, requiring you to dig into the file’s properties to see if it’s a .jpg or .png file. But you can set it so Windows shows you the file extension automatically. Open:
File Explorer >View > Options > View
Scroll down to the option for Hide extension for known file types and uncheck the box. Click Apply, and now file types will be listed at the end of all file names inside File Explorer. See the below image:

Set New Start Menu Shortcuts
Have you ever noticed the shortcut options that Windows offers when you open the Start menu? Just above the power button, you should have links to Settings, Documents, and Pictures. However, if you do not find those options useful, Windows lets you change them.
Head to:
Settings > Personalization > Start > Choose which folders appear on Start link
You can then add a shortcut for File Explorer, Downloads, and a few others. See the following image:

Disclaimer
Technology is always changing and rarely is there static tech for smartphones and desktops. Thus, the contents of this post are only valid at the time of writing. Blog posts older than six months may have directions incompatible with your device or OS. Hopefully, older post content will continue to work as advertised. Thank you for reading TechSavvy.Life for Technology at Work For You.
Quote For the Day
You will either step forward into growth or you will step back into safety.
Abraham Maslow
Tweet Info
That’s it. Please feel free to share this post! One way to share is via Twitter.
Just click the Tweet icon below. This will launch Twitter where you click its icon to post the Tweet.
Checkout TechSavvy.Life for blog posts on smartphones, PCs, and Macs! You may email us at contact@techsavvy.life for comments or questions.
Tweet
I Would Like to Hear From You
Please feel free to leave a comment. I would love to hear from you. Do you have a computer or smart device tech question? I will do my best to answer your inquiry. Just send an email to contact@techsavvy.life. Please mention the device, app, and version you are using. To help us out, you can send screenshots of your data related to your question.
Author’s E-Book
You can access the e-book from a Kindle device, the Kindle App for the desktop or smartphone, which is a free app.