RAYMOND OGLESBY @RaymondOglesby2
April 6, 2022
Are you overwhelming yourself with the number of tabs you have open in Safari? Using the Tab Groups that arrived with iOS 15 and iPadOS 15, you can organize them so your browser stays orderly. Let’s explore how this is done.
This is for iPhone and iPad using Safari and running iOS15 or iPadOS 15 or higher

Similar to how tab groups work in Google Chrome and Microsoft Edge, you can group several tabs together and give them a label. This allows you to easily find and pull up your tabs again when you need them without cluttering up your view.
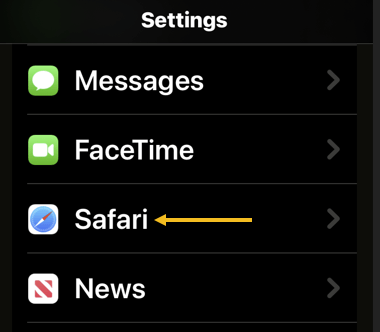
First, you will need to open a few tabs in Safari to use the Tabs Groups feature. After that, tap the Tabs button in the bottom left-hand corner. Refer to the below image:

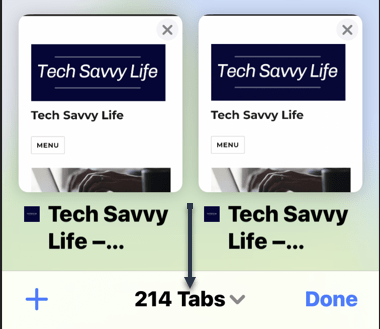
Next, the tab count of open tabs will appear on the bottom bar. Tap on the tab count to open the Tab Groups menu. See the below image:
Now, in the Tab Groups menu, you will get two options. The New Empty Tab Group means you will get to make a tab group first and then add the tabs to it. If you want to create a group from your open tabs, you will need to choose the New Tab Group from X Tabs option. See the following image:

Next, enter a name for your new tab group and hit the Save button. Refer to the below image:

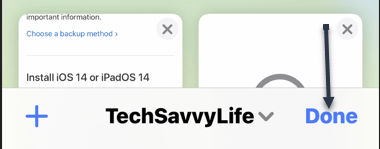
Now, Safari will switch you to a new tab group and show you the grid of open tabs. The name of the tab group will appear on the bottom bar. Tap Done to save the changes. See the below image:
Next, after creating a tab group in Safari, there are a few things you can do.
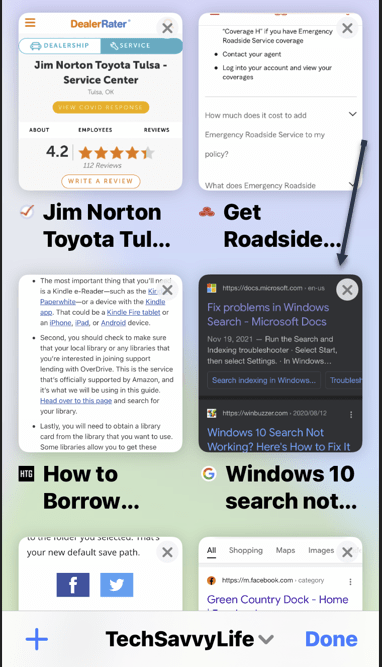
- Tap the “+” (plus) button to add a new tab to a tab group. See the following image:

- Hit the “x” cross sign in the top right-hand corner of the tab preview card to remove it from the group. Refer to the below image:

- Tap on an open tab and drag it around to reorder it. Notice that the upper right-hand corner preview on the previous screen has been moved to the middle left. See the below image:
Now, hard-press on a tab, select Arrange Tabs By from the long-press menu and choose to Arrange Tabs By Title or Arrange Tabs By Websites. See the following image:

You can copy the links from the open tabs in a tab group to save them before closing all the tabs at once.
Quote For the Day
Take time to be kind and to say ‘thank you.’
Zig Ziglar
That’s it. Please feel free to share this post! One way to share is via Twitter.
Just click the Tweet icon below. This will launch Twitter where you click its icon to post the Tweet.
Check out TechSavvy.Life for blog posts on smartphones, PCs, and Macs! You may email us at contact@techsavvy.life for comments or questions.
Tweet
I Would Like to Hear From You
Please feel free to leave a comment. I would love to hear from you. Do you have a computer or smart device tech question? I will do my best to answer your inquiry. Just send an email to contact@techsavvy.life. Please mention the device, app, and version you are using. To help us out, you can send screenshots of your data related to your question.
Author’s E-book
You can access the e-book from a Kindle device, the Kindle App for the desktop or smartphone, which is a free app.