Maximize Online Protection: The Power of Password Managers and Unique Access Codes

This post emphasizes the importance of strong, unique passwords and the use of password managers to enhance security. It highlights the risks of using common or personal information-based passwords and provides tips for creating and managing secure passwords.

RAYMOND OGLESBY @RaymondOglesby2
August 13, 2024 -9 minutes read time

This is for devices using passwords. Screenshots are from iPhone 14 Pro running iOS 17.5.1+

If you are still using “qwerty” or “starwars” as a password, you should stop doing this. Let’s find out what makes a bad password, why you should care, and how to make a good one.

Don’t have the password to get into your bank account? You are out of luck unless you can trick the bouncer into telling you the password is “kangaroo.” A simple password like that would be a terrible choice to protect your access to a bank site. And yet, chances are good you are using something just as bad, because stronger passwords are too hard to remember.

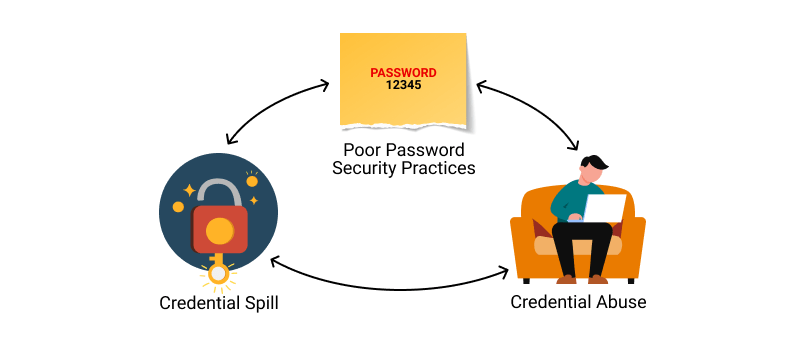
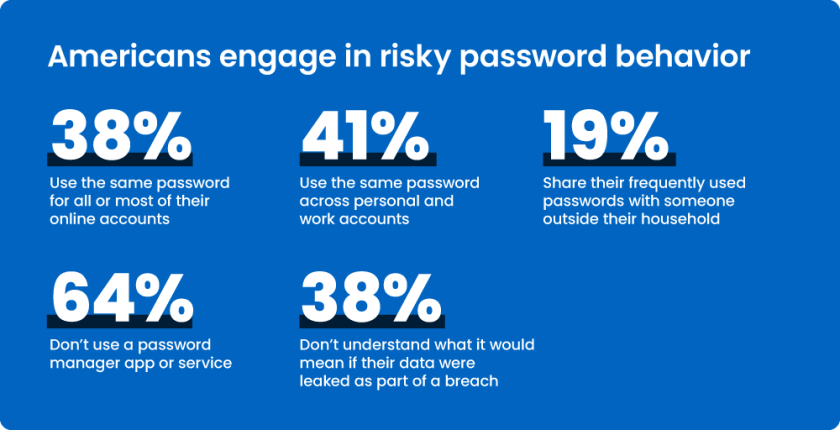
The only safe way to store proper passwords is in a password manager. If you are not using one, you probably rely on a highly crackable password like “baseball” or “12345”, or you have memorized one complex password, like “Jazz2day4Me!” and use it everywhere. Password security is no small matter. Given the enormous risk, you need to keep your passwords safe.

Even the best password manager does not guarantee the safety of your accounts; not if you use it to store the same old, tired passwords. You have to switch out your old and weak passwords for new and stronger ones.

Once you have replaced all your lame passwords with strong, unique ones, you can relax, at least until a data breach forces a change. The National Institute of Standards and Technology (NST) no longer recommends changing passwords every 90 days. NIST now recommends using long phrases like “Correct-Horse-Battery-Staple” and changing them only when necessary. If you have terrible passwords, “when necessary” means right now.

Passwords 1
Bad passwords

Just what makes a bad password? Let’s look at some of the attributes of terrible passwords, and then some pointers on improving them.

Every few months a news outlet posts a list of the worst passwords. We see a lot of easy-to-type options, like“12345” and “qwerty”. Easy for you to type? Sure. But also easy for hackers to crack. Other common (and poor) passwords consist of simple dictionary words, like “baseball”, “monkey”, and “starwars” in the list of worst passwords. These, too, are easy to crack.

A few of the best password managers (tap or click a button to view):

Some secure websites lock down after a given number of wrong password attempts, but many do not. For those with no bad guess lockout, hackers can cross a list of email addresses with a list of popular passwords and set up an automated process to keep trying combinations until they get in.

A properly secured website does not store your password anywhere. Instead, it runs the password through a hashing algorithm, a one-way encryption. The same input always produces the same output, but there’s no way to return to the original password from the resulting hash. If the password you type hashes to the same one that’s stored, you gain access. Even if hackers capture the site’s user data, they do not get passwords, just hashes.

But smart hackers can crack weak passwords if they know the site’s hashing function. They start by running a huge dictionary of common passwords through the hashing function. Then they look for the resulting hashes in the captured data. Each match is a cracked password. Sites with the best security enhance the hash function with password salting, which makes table-based cracking impossible, but why take the risk? Just stay out of the dictionary.

What about this perfect password: 1qaz2wsx3edc4rfv. You just “type” it by sliding a finger down four slanted columns of the keyboard. You think it’s so perfect, that you use it everywhere. And that is a big mistake.

Hardly a week goes by without news of a breach at some company or website, exposing thousands or millions of usernames and passwords. Smart victims change their passwords immediately. Those who ignore the problem may find themselves locked out of their accounts after the hackers have reset your passwords.

Those hackers know that all too many people recycle their passwords. Once they find a working username and password pair, they try the same credentials on other sites. You may not be so worried about losing access to your old Dropbox account, but if you used the same login on your bank’s website, you are in big trouble.

Passwords 2
Using the same credentials on websites

It gets worse. If someone else takes control of your email account, they can lock you out by changing the password. Then they can break into your other accounts by having a password reset link emailed to that account. Worried yet? You should be!!!!

Using personal information as the basis for your passwords is awfully tempting, but it’s a bad idea. Whether your dog’s name is Fifi or Khaleesi, that name probably appears in the dictionaries hackers use for brute-force attacks. Other possibilities such as the initials and birthdate of a family member probably will not fall to a brute-force attack. If someone wants to hack your account specifically, that personal data can fuel a trial-and-error guessing attack.

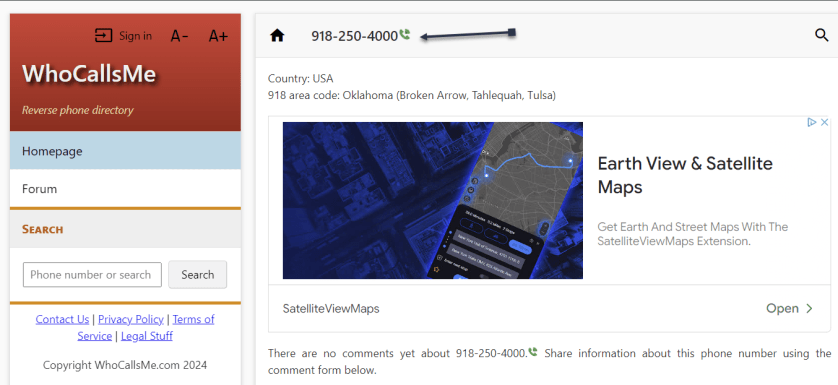
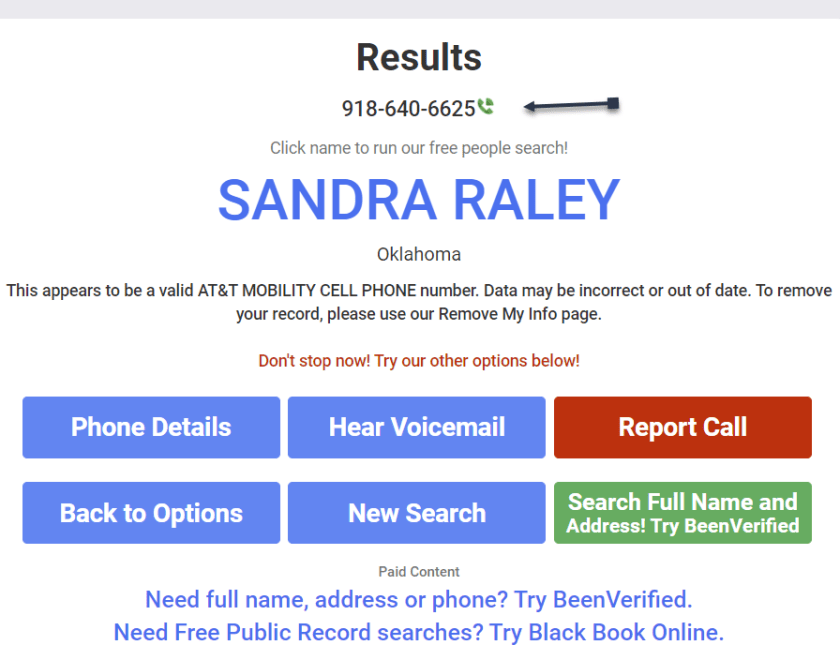
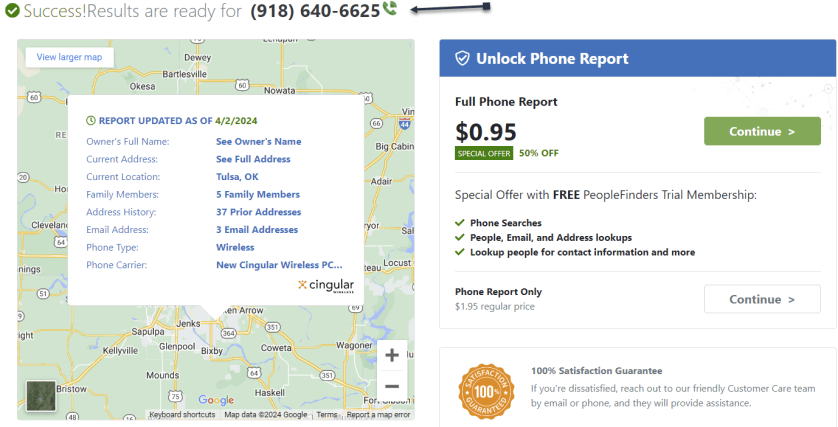
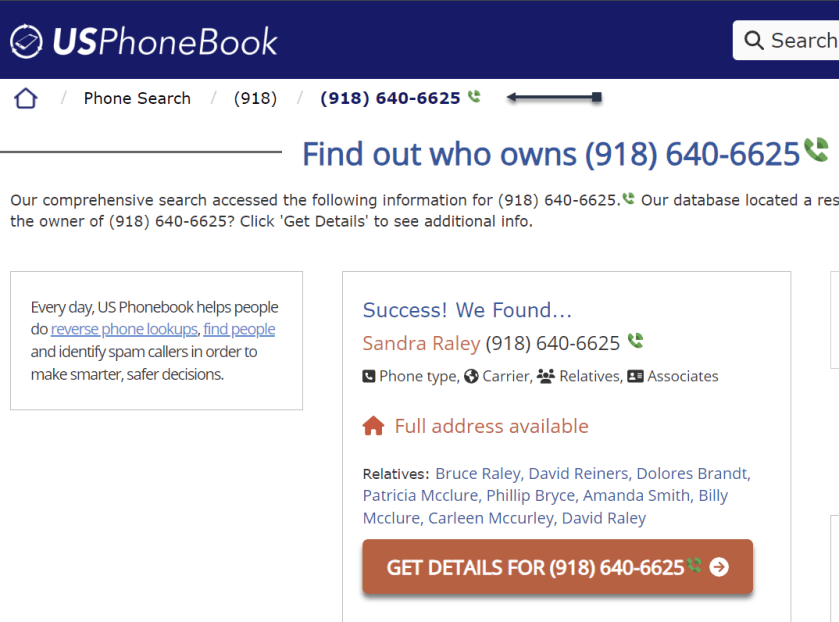
Do not think for a minute that your personal details are private. There are dozens of sites people can use to find details about anybody: address, birthdate, marital status, and more. Your social media posts can be another source of personal info, especially if you have not properly secured your accounts. A determined hacker (or a nosy neighbor) can probably guess any password you build based on your data.

If you are not using a password manager, you have surely experienced forgetting the password for a site. It’s all too common. That is why virtually every login page includes a “Forgot your password?” link. Some sites send a reset link to your email address, while others let you reset the password after answering your security questions. And that opens a back door to anyone wanting to hack your account.

Most sites offer abysmal options for security questions like:

  • What is your mother’s maiden name?
  • Where did you go to high school?
  • What was your first job?

As noted, your personal life is an open book to anyone with internet searching skills. When possible, ignore the preset questions. Create your own question, with a unique answer you will always remember but nobody else could guess.

It’s harder when the site does not let you define your own questions. In that case, your best bet is to use a memorable answer that’s a total LIE like:

  • My mother’s maiden name is Fauci.
  • I went to school at More Science High School.
  • For my first job, I was a linotype operator.

There is an element of risk since you might forget which lie you chose. We suggest storing these oddball answers in the iPhone Notes app or on Google Drive.

We hope we have convinced you that using common passwords is a rotten idea, as is building passwords from personal information. Even the best strong, random password becomes a liability if you use it everywhere. If you are ready to spring into action, here are some starting points:

  • Use a password manager
  • Switch to a better password manager
  • Remember an extremely secure master password for your password manager and keep it on another app. Better yet, just remember the master password.
  • Take advantage of a random password generator to upgrade your old, bad passwords
  • You could even create your own random password generator in Excel
  • Enable multi-factor authentication wherever available

If a secure site does not take care of security, you could still lose that site’s credentials to a data breach, but by making all your passwords long, strong, and unique, you can rest assured that you have done everything you can to protect your online accounts from password-based attacks.

Passwords 3
Risky password behavior

You may want to switch to using Passkeys or Passphrases.

Source: PC Mag

Disclaimer

Technology is always changing. Rarely is there static tech for smartphones and desktops. Thus, the contents of this post are only valid at the time of writing. Blog posts older than six months may have directions incompatible with your device or OS. Hopefully, older post content will continue to work as advertised. Thank you for reading TechSavvy.Life for Technology at Work For You.

“Try and keep on trying until that which seems difficult becomes possible and that which seems only possible becomes habit and a real part of you.”

Dieter F Uchtdorf

That’s it. Please feel free to share this post! One way to share is via Twitter.

Just click the Tweet icon below. This will launch Twitter where you click its icon to post the Tweet.

Checkout TechSavvy.Life for blog posts on smartphones, PCs, and Macs! You may email us at contact@techsavvy.life for comments or questions.

Was this post helpful? We would love to hear your comments. Do you have a computer or smart device tech question? I will do my best to answer your inquiry. Just send an email to contact@techsavvy.life. Please mention the device, app, and version you are using. To help us, you can send screenshots of the data related to your question.

You can access the E-book from a Kindle device, or the Kindle App for a desktop or smartphone. The apps are free.

The author’s Vietnam eBook on the Battle for Tra Bong Vietnam: Events and Aftermath

How to Enable Night Vision Mode on iPhone for Enhanced Visibility

The iPhone’s night vision mode turns the screen red to reduce eye strain. This feature is beneficial for low-light environments and can be enabled in the device’s settings. The red screen helps with quicker eye adaptation in the dark and can be useful for various activities such as stargazing and viewing smartphones discreetly in dark environments.

RAYMOND OGLESBY @RaymondOglesby2
July 30, 2024 – 3 minute read

This is for the iPhone. Screenshots are from iPhone 14 Pro running iOS 17.5.1+

The iPhone has a “night vision” feature that turns your screen red. More than giving a spy movie vibe, a red screen could help sharpen people’s night vision by reducing the harmful effect of the bright displays we stare at all day.

Night vision mode is helpful at night and when we first wake up, since the regular light the iPhone displays can cause fatigue and harm our eyes. Apple already offers some built-in options to protect our eyes, such as:

  • Warn that the iPhone is too close to your face.
  • Night Mode, which reduces blue light and reduces fatigue.
  • True Tone, which adjusts the display color based on your environment.
  • Dark Mode, which switches the bright whites to black or dark gray colors, puts less stress on your eyes.

Still, there are benefits to turning your iPhone screen red. The color is more difficult to see than other light frequencies, so it tricks our eyes into thinking it’s less bright than it actually is. In a dark room, for example, your pupils will not have to adjust as much to the light. Also, when you look away, your eyes adapt quicker to the darkness around you. Refer to the below image:

iPhone Red Screen
iPhone Red Screen for Night Vision

In addition, this iPhone feature can also help you use star map apps for astronomy, sneaking your phone at the theaters, eyesight animals, or when you check your phone in the middle of the night.

With that in mind, Apple has this Night Vision mode. Here’s how you can enable it.

  • On your iPhone, open Settings
  • In the Accessibility tab, search for Display & Text Size
  • Turn on Color Filters
  • Move Intensity to the far-right position for the full red-screen effect.
  • Select Color Tint

Now that you know how to turn on this iPhone’s feature, there are three options to make turning it on and off more straightforward.

Triple click: 

On Settings, Accessibility, Accessibility Shortcut, choose Color Filters to triple-click the side button and activate this setting.

Control Center:

On Settings, Control Center, and Accessibility Shortcuts, you can add this shortcut to your Control Center, so it’s just one tap away from changing your display from bright white to red.

Siri:

You can ask Siri to either enable or disable color filters.

Technology is always changing. Rarely is there static tech for smartphones and desktops. Thus, the contents of this post are only valid at the time of writing. Blog posts older than six months may have directions incompatible with your device or OS. Hopefully, older post content will continue to work as advertised. Thank you for reading TechSavvy.Life for Technology at Work For You.

An ounce of action is worth a ton of theory.

Friedrick Engels

That’s it. Please feel free to share this post! One way to share is via Twitter.

Just click the Tweet icon below. This will launch Twitter where you click its icon to post the Tweet.

Checkout TechSavvy.Life for blog posts on smartphones, PCs, and Macs! You may email us at contact@techsavvy.life for comments or questions.

Was this post helpful? We would love to hear your comments. Do you have a computer or smart device tech question? I will do my best to answer your inquiry. Just send an email to contact@techsavvy.life. Please mention the device, app, and version you are using. To help us out, you can send screenshots of your data related to your question.

The author’s Vietnam eBook on the “Battle for Tra Bong Vietnam: Events and Aftermath” can be accessed from a Kindle device or the Kindle App for a desktop or smartphone. The apps are free.

The author’s Vietnam eBook on the Battle for Tra Bong Vietnam: Events and Aftermath

Discover How to Use Apple Indoor Maps on iPhone and iPad

Apple Maps now offers indoor maps for certain malls and airports, accessible through the app on iPhone and iPad. This feature eliminates the need for physical maps, allowing users to easily navigate these indoor spaces. By following specific steps within the Maps app, users can view indoor locations and access additional details.

RAYMOND OGLESBY @RaymondOglesby2
July 23, 2024 – 5 minutes read

This is for the iPhone and iPad using Apple Maps. Screenshots are from iPhone 14 Pro running iOS 17.5.1

For certain malls and airport locations, Apple has indoor maps viewing directly from the Maps app. You will love this feature because it allows you to figure out where you are without locating a directory or physical map somewhere inside the location. Let’s explore this feature.

First, open Maps on your iPhone. Refer to the below page:

Indoor Maps 1
Accessing the Maps app

Next, tap the Search box and type in the name of the airport or mall. See the below image:

Indoor Maps 3
Selecting the Search box

Now, tap it or swipe up to access the menu options until you see the location you want and tap it. See the following image:

Indoor Maps 4
Selecting your search criteria

Next, depending on what map you are looking at, you will see options for various stores and/or locations within the building. Tap one of the options to see it plotted on the map. Refer to the below image:

Indoor Maps 5
Search menu options

Now, you will see all the gates, shops, or other type of location you selected. For example, we are accessing the Charlotte Douglas International Airport airport gates. See the below image:

Indoor Maps 5
Selecting Gates for the airport

Next, swipe up for a list of all locations. See the following image:

Indoor Maps 6
Selecting aGate from the listing

Now, when you tap a location, it will get larger on the map, making it easier to find. Refer to the below image:

Indoor Maps 7
Your highlighted gate

For a 2024 Apple Indoor Maps listing, tap here.

And that’s how you view indoor maps! Apple is constantly updating its inventory of indoor maps, so hopefully, we will have access to even more of them in the future.

Disclaimer

Technology is always changing. Rarely is there static tech for smartphones and desktops. Thus, the contents of this post are only valid at the time of writing. Blog posts older than six months may have directions incompatible with your device or OS. Hopefully, older post content will continue to work as advertised. Thank you for reading TechSavvy.Life for Technology at Work For You.

“You will either step forward into growth or you will step back into safety.”

Abraham Maslow

That’s it. Please feel free to share this post! One way to share is via Twitter.

Just click the Tweet icon below. This will launch Twitter where you can tap the Post icon to post the Tweet.

Checkout TechSavvy.Life for blog posts on smartphones, PCs, and Macs! You may email us at contact@techsavvy.life for comments or questions.

Was this post helpful? We would love to hear your comments. Do you have a computer or smart device tech question? I will do my best to answer your inquiry. Just send an email to contact@techsavvy.life. Please mention the device, app, and version you are using. To help us out, you can send screenshots of your data related to your question

You can access the E-book from a Kindle device, or the Kindle App for a desktop or smartphone. The apps are free.

The author’s Vietnam eBook on the Battle for Tra Bong Vietnam: Events and Aftermath

iPhone Camera Macro Mode: How to Enable and Disable the Flower Icon

The Flower icon in iPhone Pro indicates macro mode for close-up photography. To disable the macro lens, tap the Flower icon in the camera app. In settings, under Camera, toggle Macro Control to disable the Flower icon. The iPhone 15 Pro models support macro photography, while the standard model does not.

RAYMOND OGLESBY @RaymondOglesby2
July 16, 2024 = 4 minutes read

This is for the iPhone Pro. Screenshots are from iPhone 14 Pro running iOS 17.5.1

If you have a Pro iPhone, you have probably noticed the Flower icon while taking photos on your iPhone camera. This icon should only appear when your camera enters Macro mode for taking close-up pictures. Let’s explore how to use and disable the Macro mode Flower icon.

As you might have guessed, the icon indicates your iPhone’s macro camera is enabled. iPhone macro photography lets you take clear, extreme close-up shots of nearly any subject. If you do not need to use the iPhone’s macro lens, you can easily disable it from the camera by tapping the Flower icon.

If you are uninterested in iPhone macro photography, you can disable the macro lens.

First, when the camera is open, tap the yellow Flower icon. Refer to the below image:

Macro 1
Maco Mode is enabled

Next, when it is gray with a slash through it, that means it has been disabled. See the below image:

Macro 2
Macro Mode is disabled

That’s how to disable the macro photography lens. If you want to disable the icon itself, see the below section.

If you do not want the Flower icon to appear on your iPhone camera, you can disable that in the Settings app.

First, the Settings app, and tap Camera. See the following image:

Macro 3
Accessing your Camera option

Next, scroll to the bottom and tap the toggle next to Macro Control to disable or enable the Flower icon. Refer to the below image:

Macro 4
Disable or enable Macro Control

Note! This does not disable Macro mode, only the Flower icon. You will not be able to turn off Macro mode if you turn off the above toggle.

FAQ

What does Macro mode do?

Macro mode keeps the image clear while taking extreme close-up shots. This means you can take crisp photos of smaller subjects, like plants or animals.

Does the iPhone 15 have macro photography?

The standard iPhone 15 model does not have a Macro mode. However, all Pro models iPhones, including the iPhone 15 Pro and Pro Max, can capture macro photography images.

Disclaimer

Technology is always changing. Rarely is there static tech for smartphones and desktops. Thus, the contents of this post are only valid at the time of writing. Blog posts older than six months may have directions incompatible with your device or OS. Hopefully, older post content will continue to work as advertised. Thank you for reading TechSavvy.Life for Technology at Work For You.

“Don’t believe everything you hear: Real eyes, Realize, Real lies.”

Tupac Shakur

That’s it. Please feel free to share this post! One way to share is via Twitter.

Just click the Tweet icon below. This will launch Twitter where you click its icon to post the Tweet.

Checkout TechSavvy.Life for blog posts on smartphones, PCs, and Macs! You may email us at contact@techsavvy.life for comments or questions.

Was this post helpful? We would love to hear your comments. Do you have a computer or smart device tech question? I will do my best to answer your inquiry. Just send an email to contact@techsavvy.life. Please mention the device, app, and version you are using. To help us out, you can send screenshots of your data related to your question.

You can access the E-book from a Kindle device, or the Kindle App for a desktop or smartphone. The apps are free.

The author’s Vietnam eBook on the Battle for Tra Bong Vietnam: Events and Aftermath

How to Recover Deleted Photos from iPhone

This post provides detailed instructions on recovering deleted photos and videos on iPhone, emphasizing the 30-day recovery period and the importance of backups. It also suggests using Google Photos and mentions third-party solutions for permanent deletions.

RAYMOND OGLESBY @RaymondOglesby2
July 9, 2024 – 3 minute read

This is for the iPhone. Screenshots are from iPhone 14 Pro running iOS 17+

The first thing we used to do to free storage on my previous iPhones was to head to the Photos app and delete pictures and videos. We usually did this after a backup or AirDrop the files we wanted to keep to our PC. However, there were exceptions to the rule, and we sometimes accidentally deleted photos and videos we still needed.

If you accidentally delete files while cleaning up, you should not panic. The files are not actually lost. Go to the Albums section of your iPhone and look for the Recently Deleted folder. You must unlock it with Face ID, Touch ID, or PIN code. In there, tap the Select button and check the photos you deleted by mistake, tap the three dots menu button at the bottom, and then tap Recover. Refer to the below image:

Recover Photo 1
Selecting your photos to recover

If you have selected more than one photo, click the recover multiple photos button. See the below image:

Recover Photo 2
Recover your photos

We already knew how to rescue those files, as there’s a simple rule about deleting stuff on iPhone. The files do not get permanently removed. Instead, they sit for 30 days in the Trash folders of the various apps where you can delete content. The Photos app is one of them. And that’s how easy it is to recover those deleted photos and videos.

It gets even better if you do regular backups via iCloud or use a third-party alternative to Apple Photos. Google Photos easily comes to mind, as it’s a great app to store and back up photos.

Most iPhone users will use the default Photos app. That’s where to start when viewing photos and videos and managing the storage.

Another option is to bring a single photo into view and then look for the same Recover button. This method only lets you recover photos and videos one by one.

Once that’s done, the recovered files will be available in the Photos app.

You have to remember to recover your deleted photos within 30 days. That’s how long you have until the iPhone permanently removes them. We went to this folder on iPhones with lower storage than my current iPhone 14 Pro to permanently delete the files we did not need. That’s the only way to free storage immediately.

The best way to ensure your photos and videos are safe is to perform routine backups. Whether via iCloud or your PC, the backups will help you recover files. Another option is to manually transfer the photos to a computer and store them on external devices.

There are many Photo Recovery apps from the App Store you can install.

Google Photos is a handy tool for storing images and photos on your iPhone. But, like the default Apple Photos app, you can accidentally delete files in Google Photos.

The solution is similar to Apple Photos. Google does not delete the images directly, moving them to a Trash file in the Library tab. You have 30 days to recover the file if the photo or video was not backed up to the cloud. That goes up to 60 days if the files you deleted accidentally were backed up to the cloud.

Google Photos is also available on the web and other devices.

Whether you forget the 30-day recovery deadline or accidentally empty the trash, recovering permanently deleted files might be a big problem. Third-party software solutions might help you get those files back. 

But as Gizmodo points out, not all of them might work. The blog also mentions Stellar Data Recovery as a well-reviewed solution for recovering deleted files from iPads and iPhones.

The software is not free, starting at $49.99, and there are no guarantees it will work. But if you must try anything to recover a particularly dear deleted photo from your iPhone, you will want to look into third-party apps that claim they can do the job.

Disclaimer

Technology is always changing. Rarely is there static tech for smartphones and desktops. Thus, the contents of this post are only valid at the time of writing. Blog posts older than six months may have directions incompatible with your device or OS. Hopefully, older post content will continue to work as advertised. Thank you for reading TechSavvy.Life for Technology at Work For You.

Kites rise highest against the wind, not with it.

Winston Churchill

That’s it. Please feel free to share this post! One way to share is via Twitter.

Just click the Tweet icon below. This will launch Twitter where you click its icon to post the Tweet.

Checkout TechSavvy.Life for blog posts on smartphones, PCs, and Macs! You may email us at contact@techsavvy.life for comments or questions.

Was this post helpful? We would love to hear your comments. Do you have a computer or smart device tech question? I will do my best to answer your inquiry. Just send an email to contact@techsavvy.life. Please mention the device, app, and version you are using. To help us out, you can send screenshots of your data related to your question.

You can access the E-book from a Kindle device, or the Kindle App for a desktop or smartphone. The apps are free.

The author’s Vietnam eBook on the Battle for Tra Bong Vietnam: Events and Aftermath

How to Preserve Your Voice on iPhone

RAYMOND OGLESBY @RaymondOglesby2
July 2, 2024

This is for the iPhone running iOS 17+. Screenshots are from iPhone 14 Pro

The iPhone has a hidden feature that lets you preserve your voice forever. You just need to read a few inquiries for 15 minutes, and you will always be able to hear your voice the way it was at that moment. While this function could be fun for some tech people, some lose the ability to speak for various reasons.

With that in mind, Apple introduced Personal Voice. Apple says this feature was made to assist those at risk of losing their voice.

The company explains: “Users can create a Personal Voice by reading along with a randomized set of text prompts to record 15 minutes of audio on iPhone or iPad. This speech accessibility feature uses on-device machine learning to keep users’ information private and secure. It integrates seamlessly with Live Speech so users can speak with their Personal Voice when connecting with loved ones.”

Live Voice, for example, allows users to type what they want to say and then have that spoken for them on a phone or FaceTime call. If you use Personal Voice, the person on the other end of the call will hear your actual voice, even though you simply typed a response.

Here are the steps:

  1. Open the Settings > Accessibility > Personal Voice.
  2. Tap Create a Personal Voice.
  3. Follow the onscreen instructions to record your voice.

You must be in a quiet environment for your recording. We found it best to use pause after recording a phrase. Refer to the below image:

Personal Voice 1
Selecting to Create Your Personal Voice

Tap Done in the upper-left corner or close the Settings app to pause your recording session. Your progress will be saved.

To resume your recording session, follow these steps:

  1. Go to Settings > Accessibility > Personal Voice.
  2. Tap the Personal Voice that you want to continue creating.
  3. Tap Continue Recording, then follow the onscreen instructions.

See the below image:

Personal Voice 2
Selecting to Continue Recording

To use Live Voice, here are the steps:

  1. Open the Settings app > Accessibility > Live Speech.
  2. Toggle Live Speech to ON.
  3. Under the Voices section, tap your keyboard language, then select a voice to use. Samantha is the default voice. (You might need to tap the download a voice by tapping the Download button before you can select it.)
  4. Tap the Voice Settings button next to the voice to adjust a voice’s pitch or speed.

See the following image:

Personal Voice 3
Turning ON Live Speech and selecting your voice

Once you delete a recorded voice, you can not recover it.

  1. Open the Settings app > Accessibility > Personal Voice.
  2. Tap the Personal Voice that you want to delete.
  3. Authenticate with Face ID or Touch ID, or enter your passcode.
  4. Tap Delete Voice, then tap Delete Voice And Recordings to confirm.

Refer to the below image:

Personal Voice 4
Selecting to Delete Voice

Disclaimer

Technology is always changing. Rarely is there static tech for smartphones and desktops. Thus, the contents of this post are only valid at the time of writing. Blog posts older than six months may have directions incompatible with your device or OS. Hopefully, older post content will continue to work as advertised. Thank you for reading TechSavvy.Life for Technology at Work For You.

An ounce of action is worth a ton of theory.

Friedrick Engels

You are finished. Please feel free to share this post! One way to share is via Twitter.

Just click the Tweet icon below. This will launch Twitter where you click its icon to post the Tweet.

Checkout TechSavvy.Life for blog posts on smartphones, PCs, and Macs! You may email us at contact@techsavvy.life for comments or questions.

Was this post helpful? We would love to hear your comments. Do you have a computer or smart device tech question? I will do my best to answer your inquiry. Just send an email to contact@techsavvy.life. Please mention the device, app, and version you are using. To help us out, you can send screenshots of your data related to your question.

You can access the E-book from a Kindle device, or the Kindle App for a desktop or smartphone. The apps are free.

The author’s Vietnam eBook on the Battle for Tra Bong Vietnam: Events and Aftermath

How to Enable Screen Distance on iPhone/iPad

The iPhone/iPad now has a hidden feature called Screen Distance, found in iOS/iPadOS 17 or higher, designed to reduce eye strain by detecting when the device is held too close to your face.

RAYMOND OGLESBY @RaymondOglesby2
June 25, 2024 – 4 minutes read time

This is for the iPhone/iPad using iOS or iPadOS 17 or greater. Screenshots are from iPhone 14 Pro running iOS 17.5.1

The iPhone/iPad has a hidden display feature introduced in iOS/iPadOS 17 that everyone with an iPhone/iPad should start using. Screen Distance is designed to help reduce eye strain caused by holding your phone too close to your face. Let’s explore this feature.

Viewing something like a device or book too closely for an extended period can increase eye strain and the risk of myopia. The Screen Distance feature in Screen Time uses the TrueDepth camera to detect when you hold your iPhone/iPad closer than 12 inches for an extended period and encourages you to move it farther away. Screen Distance can help children engage in healthy viewing habits that can lower their risk of myopia and can give people of all ages the opportunity to reduce digital eyestrain.

First, open Settings. Refer to the below image:

Screen Distance 1
Accessing Settings

Next, tap the Screen Time option. See the below image:

Screen Distance 2
Selecting the Screen Time option

Now, tap the Screen Distance option. See the following image:

Screen Distance 3
Selecting the Screen Distance option

Next, an informational screen will be displayed about Screen Distance. Just tap the Continue button. Refer to the below image:

Screen Distance 4
Notification screen

Now, another informational screen about “How Screen Distance Works” will be shown. Once again, tap the Continue button. See the below image:

Screen Distance 5
Notification screen

Next, toggle the Screen Distance to ON. See the following image:

Screen Distance 6
ToggleScreen Distancer to ON

If you are too close to your iPhone/iPad, it will pop up a notification splash screen interrupting whatever you are doing at the moment. Refer to the below image:

Screen Distance 7
Screen Too Close notification

To readjust the Screen Distance feature, move your iPhone/iPad at least 12 inches from your face. A new notification splash screen will appear allowing you to proceed by tapping the Continue button. See the below image:

Screen Distance 8
Screen Distance notification screen

Once you activate this feature, your iPhone/iPad Face ID sensors take about five minutes to work.

Considering how easy it is to hold your phone up to your face without thinking about it, this feature can be really handy for people who want to help reduce the strain on their eyes. 

Of course, if you have trouble reading, you may find that Screen Distance is more annoying than helpful, especially if you prefer to keep your phone close to your face. If so, go back and toggle the Screen Distance feature to OFF.

Disclaimer

Technology is always changing. Rarely is there static tech for smartphones and desktops. Thus, the contents of this post are only valid at the time of writing. Blog posts older than six months may have directions incompatible with your device or OS. Hopefully, older post content will continue to work as advertised. Thank you for reading TechSavvy.Life for Technology at Work For You.

Being realistic is the most common path to mediocrity.

-Will Smith

Congratulations, you are finished. Please feel free to share this post! One way to share is via Twitter.

Just click the Tweet icon below. This will launch Twitter where you click its icon to post the Tweet.

Checkout TechSavvy.Life for blog posts on smartphones, PCs, and Macs! You may email us at contact@techsavvy.life for comments or questions.

Was this post helpful? We would love to hear your comments. Do you have a computer or smart device tech question? I will do my best to answer your inquiry. Just send an email to contact@techsavvy.life. Please mention the device, app, and version you are using. To help us out, you can send screenshots of your data related to your question.

You can access the E-book from a Kindle device, or the Kindle App for a desktop or smartphone. The apps are free.

The author’s Vietnam eBook on the Battle for Tra Bong Vietnam: Events and Aftermath

How to Route iPhone Calls to Your Speaker and Set Auto-Answer

This post provides guidance for iPhone users on enabling the speaker for all calls and setting up the Auto-Answer feature.

RAYMOND OGLESBY @RaymondOglesby2
June 18, 2024 -3 minutes read time

This is for the iPhone with iOS 17 or above. Screenshots are from iPhone 14 Pro running iOS 17+

If you like talking on the phone for long periods but do not love holding the iPhone to your face for hours, you may prefer to use the speaker. You can turn on a setting that automatically makes all calls through your speaker. Also, you can set the Auto-Answer feature to answer your phone within a certain time frame. This is useful for those working using a headset. Let’s explore these features.

First, head to

Settings > Accessibility > Touch

Refer to the below image:

Accessing the Touch option

Next, select Call Audio Routing. See the below image:

Selecting the Call Audio Routing option

Now, tap the Speaker option. See the following image:

Selecting the Speaker for all calls

Next, when you get a phone call, it will automatically use the speaker when you answer!

If you have paired your iPhone to your car audio system, we recommend leaving the Speaker setting to Automatic. This will send/receive your calls through your audio system speakers.

While you are here, you can set the Auto-Answer feature and the time to pick up a call.

First, tap the Auto-Answer Calls option. Refer to the below image:

Accessing the Auto-Answer Calls option

Next, tap the Auto-Answer Calls toggle to ON. See the below image:

Toggle the Auto-Answer Calls to ON

Now, set your time duration to auto-answer a call (default is 3 seconds). See the following image:

Setting time duration for Auto-Answer

Disclaimer

Technology is always changing. Rarely is there static tech for smartphones and desktops. Thus, the contents of this post are only valid at the time of writing. Blog posts older than six months may have directions incompatible with your device or OS. Hopefully, older post content will continue to work as advertised. Thank you for reading TechSavvy.Life for Technology at Work For You.

Logic will get you from A to B. Imagination will take you everywhere.

Albert Einstein

Just click the Tweet icon below. This will launch Twitter where you click its icon to post the Tweet.

Just click the Tweet icon below. This will launch Twitter where you click its icon to post the Tweet.

Checkout TechSavvy.Life for blog posts on smartphones, PCs, and Macs! You may email us at contact@techsavvy.life for comments or questions.

Was this post helpful? We would love to hear your comments. Do you have a computer or smart device tech question? I will do my best to answer your inquiry. Just send an email to contact@techsavvy.life. Please mention the device, app, and version you are using. To help us out, you can send screenshots of your data related to your question.

You can access the E-book from a Kindle device, or the Kindle App for a desktop or smartphone. The apps are free.

The author’s Vietnam eBook on the Battle for Tra Bong Vietnam: Events and Aftermath

How to Find Out Who Is Calling You

This post discusses how to identify legitimate calls and avoid scammers, addressing phone verification, spoofed numbers, and web searching. It provides options like reverse phone lookup websites and tools like WhoCallsMe, Spy Dialer, PeopleFinders, and USPhoneBook. It also suggests utilizing mobile carrier solutions, reporting to the FTC, and the National Do Not Call Registry to combat spam calls.

RAYMOND OGLESBY @RaymondOglesby2
June 11, 2024

This is for any browser on a desktop, laptop, or smartphone. Screenshots are from Google Chrome on Windows 10

The phone rings and it’s a number you do not recognize. Or perhaps an unknown number shows up in your missed calls. You are curious but do not want to pick up or call back if it’s a telemarketer or scammer. Instead of playing robocall roulette let’s explore five ways to see who is calling before you engage.

You may have noticed that America has a problem with scam calls. Scammers took $10 billion from unsuspecting victims in 2023, and it’s hard to see the problem going away anytime soon. If you get a call, there are a few ways to tell if it’s legit or not.

  • What does the phone say? When a call comes in, look for a displayed number and location. If your phone is not showing any information and says something like Unknown, chances are there’s a scammer on the other end. Anyone can hide their number, but it’s best to let this one go to voicemail and call back if it’s someone you know. If the phone says Scam Likely, it’s typically correct; just ignore the call.
  • Look for verification. Carriers have started verifying phone numbers when you receive a call. Google’s phone app also adds a badge on incoming calls that can be attached to a business. Unfortunately, this does not verify every call from a legitimate business or weed out legitimate businesses that use robocalls.
  • Watch out for spoofed numbers. Have you ever gotten a call from what looks to be your own phone number, only it’s a few numbers off? Do not pick those calls up; scammers like to spoof phone numbers and trick you into picking up. They think you are more likely to pick up if the call is from your area code or someone you know.

Note! We recommend ou not click or tap on any icon off the main screen. These buttons launch web sites that may introduce malware or be blocked by your browser security. Also, any screen that has flashing items, immediately exit the screen.

If you click or tap on a button that starts a scanning process for addresses,emails, public information, criminal records, etc., the process will take several minutes. On the desktop, you can stop the process by hitting Cntl-Alt-Del keys, then select Task Manger. Next, right=-click on your browser entry and select End Task. Your browser will exit stopping the scanning process.

If you want to quickly know whether a caller is legit or a scammer, do a quick web search. As a rule of thumb, if the search results are primarily reverse phone lookup websites, it’s safe to say other people have received unwarranted calls from that same number and are reporting it to warn others. Refer to the below image:

Calls You 1
Search the web

Speaking of reverse phone lookups, if you want to do some digging about a certain phone number, many websites can help you. You usually have to pay to get any worthwhile information, but there are a few tools that can help you for free. Even though they are free if you want additional information about the phone number, the sites charge for their service.

At WhoCallsMe, users can report their experiences with specific phone numbers. Enter a number and the website will tell you where the area code is from. You can then enter your own report or view what others say about it. See the below image:

Calls You 2
WhoCallsMe main screen

Spy Dialer allows you to search for phone numbers, names, addresses, and emails. Enter a phone number, then choose if you want to look up any linked names or photos, listen to the number’s outbound voicemail, or confirm if the number is spam or not. Spy Dialer can tell you with whom the number is registered, their general location, and whether or not the number has been reported as spam before.

For more information, click Phone Details to see how long the line has been in service and if the number is spoofed. Choose Hear Voicemail to get the caller’s outbound voicemail, if available. You can click Report Call to file a complaint with Spy Dialer.

We recommend this site over the others because it’s faster and offers more information. See the following image:

Calls You 3
Spy Dialer main screen

PeopleFinders allows you to look up a phone number, name, address, or email. Enter a phone number into the search bar to get the caller’s general location, carrier, and phone type. More revealing information, such as the caller’s full name and address, is hidden requiring a fee. Refer to the below image:

Calls You 4
PeopleFinders main screen

You can look up phone numbers, names, and addresses at USPhoneBook, though this works better for identifying individuals rather than businesses. Enter a number to find the person connected to it. The site will display a list of people who may be related to the person. You can then mark the number as safe or spam. Keep in mind that these listings can be outdated.

Click Get Details to view extra information about the person. This will include their age, current (and former) addresses, phone numbers associated with them, a list of relatives and associates, and even related email addresses. See the below image:

Calls You 5
USPhoneBook main screen

One option is to look at your mobile carrier’s anti-spam solutions for stopping spam calls and robo texts. Additionally, apps likeRoboKiller and Truecaller help keep the spam callers at bay. You can also report unwanted calls to the FTC and register your number with the National Do Not Call Registry, though those wishing to do you harm will undoubtedly ignore this. See the following image:

Calls You 6
National Do Not Call Registry main screen

Disclaimer

Technology is always changing. Rarely is there static tech for smartphones and desktops. Thus, the contents of this post are only valid at the time of writing. Blog posts older than six months may have directions incompatible with your device or OS. Hopefully, older post content will continue to work as advertised. Thank you for reading TechSavvy.Life for Technology at Work For You.

. Motivation is what gets you started. Habit is what keeps you going.

Jim Rohn

You are finished. Please feel free to share this post! One way to share is via Twitter.

Just click the Tweet icon below. This will launch Twitter where you click its icon to post the Tweet.

Checkout TechSavvy.Life for blog posts on smartphones, PCs, and Macs! You may email us at contact@techsavvy.life for comments or questions.

Was this post helpful? We would love to hear your comments. Do you have a computer or smart device tech question? I will do my best to answer your inquiry. Just send an email to contact@techsavvy.life. Please mention the device, app, and version you are using. To help us out, you can send screenshots of your data related to your question.

You can access the E-book from a Kindle device, or the Kindle App for a desktop or smartphone. The apps are free.

The author’s Vietnam eBook on the Battle for Tra Bong Vietnam: Events and Aftermath

How to Turn on iPhone Low Battery Mode

Low Power Mode on iPhone reduces features to save battery. To enable, go to Settings>Battery and toggle Low Power Mode on, or add it to Control Center for quick access.

RAYMOND OGLESBY @RaymondOglesby2
June 4, 2024

This is for the iPhone. Screenshots are from iPhone 14 Pro running iOS 17.5+

When Low Power Mode is enabled, the Battery icon at the top of your phone will appear yellow, and features like mail fetch, background app refresh, automatic downloads, and some visual effects will be reduced or disabled until it is turned off. There are two primary ways to turn on Low Power Mode.

First, open Settings and tap the Battery option. Refer to the below image:

Low Power 1
Selecting the Battery option

Now, toggle the Low Power Mode to ON. See the below image:

Low Power 2
Turning the Low Power Mode to ON

If you want quick and easy access to the Low Power Mode setting but do not want to go into your Settings and scroll to access it, let’s add it to your Control Center.

First, open Settings and tap the Control Center option. See the following image:

Low Power 3
Selecting the Control Center option

Next, tap Low Power Mode to add it to your Control Center. (If you see a red minus sign instead of a green plus side here, it means Low Power Mode is already in your Control Center.) Refer to the below image:

Low Power 4
Selecting to add Low Power Mode to Control Center

When added, the option will be in your Control Center. See the below image:

Low Power 5
Low Power Mode added to Control Center

Next, swipe down from the top right of the screen. See the following image:

Low Power 6
Accessing the Control Center by swiping down

Now, tap the Battery icon to toggle Low Power Mode ON or OFF. At the top of your screen, you will see the option status. Refer to the below image:

Low Power 7
Toggle on pr pff Low Power Mode from the Control Center

Your iPhone’s Low Power Mode does many things to save battery power. It automatically changes some settings to save battery power, like disabling the automatic fetching of new mail, reducing your screen brightness, and automatically locking the phone and powering off its display more quickly. Apps can detect low power mode is enabled and choose to disable animations and other battery-hungry features, too.

Motion effects and animated wallpapers are also disabled. Background activities and networking are paused to prevent unnecessary power drain in the background. Your iPhone even automatically reduces the performance of its CPU and GPU, which makes it perform a bit slower but saves battery life. Tests have found that this slows iPhones by about 40 percent when Low Power Mode is enabled.

By entering Low Power Mode you will save some battery life until you can get to your charger. 

Disclaimer

Technology is always changing. Rarely is there static tech for smartphones and desktops. Thus, the contents of this post are only valid at the time of writing. Blog posts older than six months may have directions incompatible with your device or OS. Hopefully, older post content will continue to work as advertised. Thank you for reading TechSavvy.Life for Technology at Work For You.

If you can’t do great things, do small things in a great way.

 Napoleon Hill

That’s it. Please feel free to share this post! One way to share is via Twitter.

Just click the Tweet icon below. This will launch Twitter where you click its icon to post the Tweet.

Checkout TechSavvy.Life for blog posts on smartphones, PCs, and Macs! You may email us at contact@techsavvy.life for comments or questions.

Was this post helpful? We would love to hear your comments. Do you have a computer or smart device tech question? I will do my best to answer your inquiry. Just send an email to contact@techsavvy.life. Please mention the device, app, and version you are using. To help us out, you can send screenshots of your data related to your question.

You can access the E-book from a Kindle device, or the Kindle App for a desktop or smartphone. The apps are free.

The author’s Vietnam eBook on the Battle for Tra Bong Vietnam: Events and Aftermath