It is easy to preview files without opening them in Windows 10, thanks to the Preview Pane feature in File Explorer. You can see thumbnails of most images, videos, audio files and some text-based documents. Lets see how to do this.
You may have heard about a security flaw in using the preview pane, but that was fixed in Windows 10 update released on April 14, 2020. If you have the latest updates, it’s safe to use.
This is for Windows 10 operating system

Opening File Explorer
There are at least three ways to access the File Explorer:
- Open File Explorer by pressing Windows+E
- Click the Explorer folder icon in your taskbar
- Click the Explorer option in your Start menu
Accessing the Preview Pane
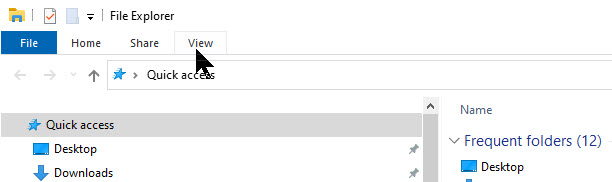
In the menu bar at the top of the File Explorer window, click View. See below image:
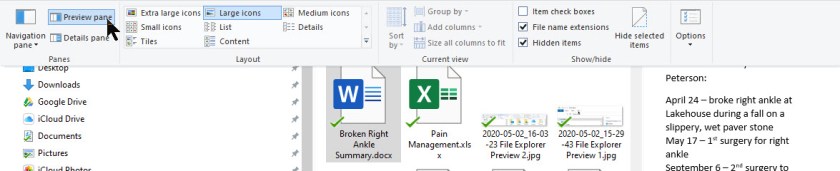
Find Preview pane option in the upper-left of the toolbar and click on it. Refer to below image:

The Preview pane will be highlighted and is now activated. Navigate the File Explorer to a folder that has documents you’d like to preview. When you select a file, you will see its preview thumbnail in the right side of the window. See following image:
Accessing the Details Pane
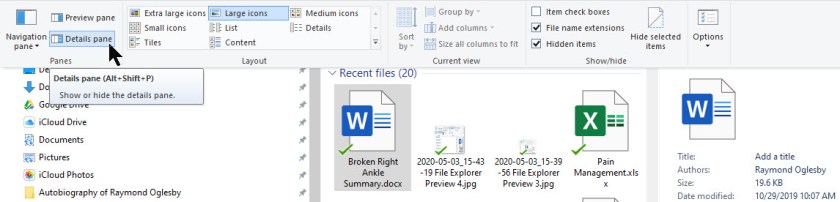
File Explorer also has a related feature called Details Pane. To turn it on, click View in the Explorer menu bar, then click the Details pane option in the toolbar (it’s right below the Preview pane option). Refer to below image:

When you highlight a file with Details pane turned on, you will see a tiny thumbnail (for applicable file types) and some details about the file, such as its size, date created, date modified, etc. in the right portion of the window. See following image:
To return to the normal view of File Explorer, first, you have to click on View, then, either click the Preview or Details pane option depending on which one is highlighted.
You also have other options under the View tab to see your contents; like the size of your icons; extra large, large, medium and small, as well as by list, details, tiles and content.
Keyboard Shortcuts
It’s also possible to quickly toggle the Preview and Details panes using keyboard shortcuts. First, open File Explorer, then use the below shortcuts:
- Press Alt+P to open or close the Preview pane
- Press Alt+Shift+P to open or close the Details pane
That its. You have successfully explored two seldom used options of the File Explorer in Windows 10.
I Would Like to Hear From You
Please feel free to leave a comment. I would love hearing from you. Do you have a computer or smart device tech question? I will do my best to answer your inquiry. Please mention the device, app and version that you are using. To help us out, you can send screenshots of your data related to your question.