RAYMOND OGLESBY @RaymondOglesby2
December 9, 2021
Not everyone you invite to a meeting may be a required guest. There might be someone that you want to give the choice to attend. Google Calendar provides the ability to make attendees optional, but it’s not obvious.
It could be your supervisor, a coworker who may not be available, or someone else with an interest in the meeting. By marking them optional, they can decide for themselves if they should or want to attend. And you can make guests optional at the time you create the Google Calendar event or afterward.
This is for devices using Google Calendar

When Creating the Event
First, launch Google Calendar and sign in if necessary. When you click to create a new event in Google Calendar, you see a small pop-up window to add all the details including your attendees. But you will not spot the optional feature for your guests immediately.
Next, hover your cursor over the attendee’s name or email address after you add it. To the right, you will see a gray contact (person) icon. Click that icon to mark your guest as optional. Refer to the below image:
Now, the icon will appear white indicating the Optional status. You can click it again to make the guest required. See the below image:
After Creating the Event
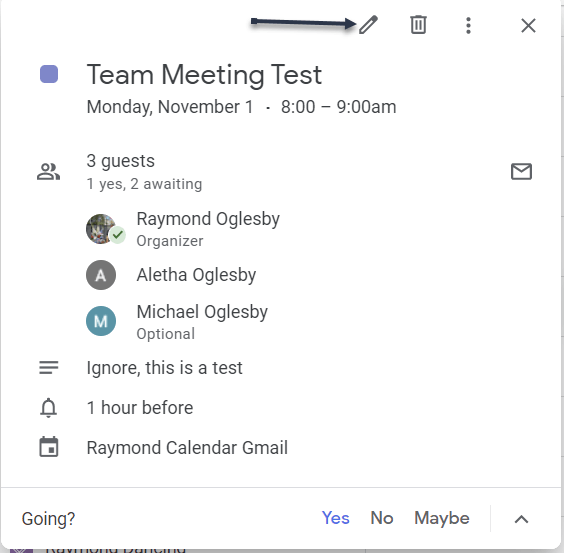
If you have already created the event, you can still make an attendee optional. Select the event on your Google Calendar to open the small detail window and then click the pencil icon to edit it. See the following image:
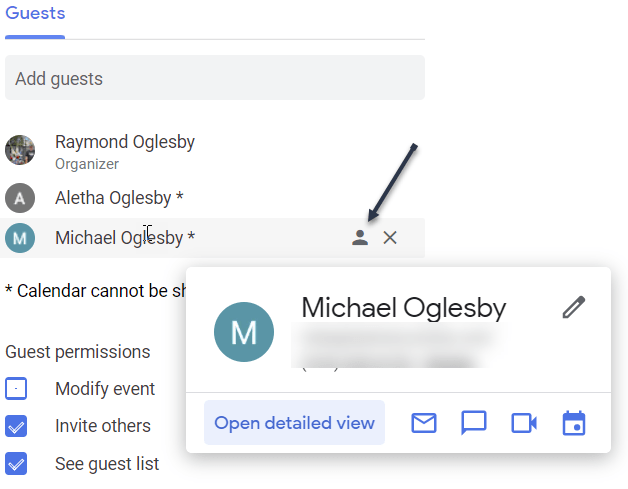
Next, on the event detail screen, hover your cursor over the attendee you want to make optional in the Guests section. To the right, click the gray contact icon. Refer to the below image:
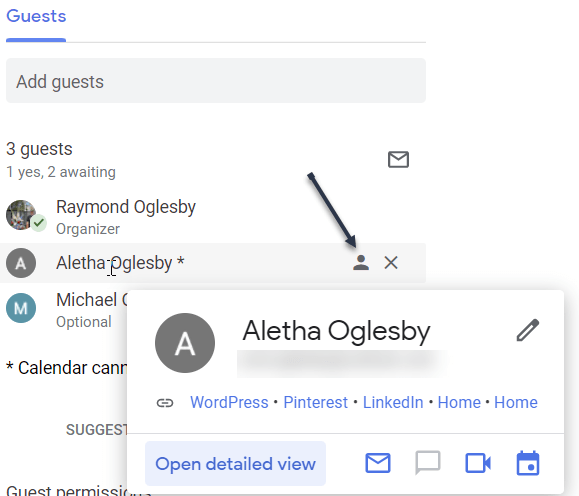
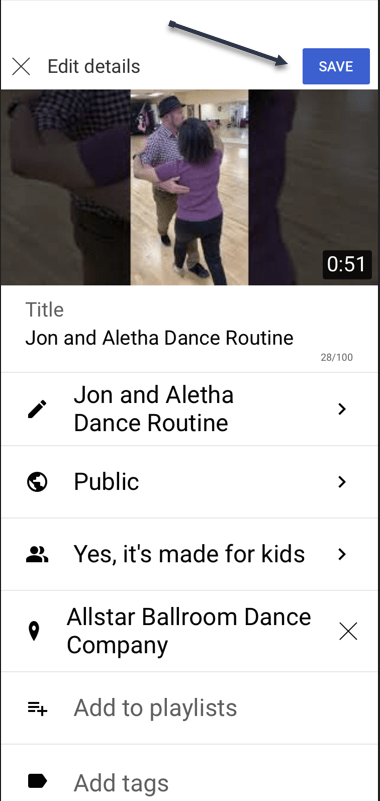
Now, click Save at the top to apply your change. See the below image:

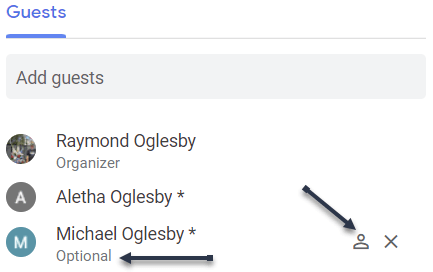
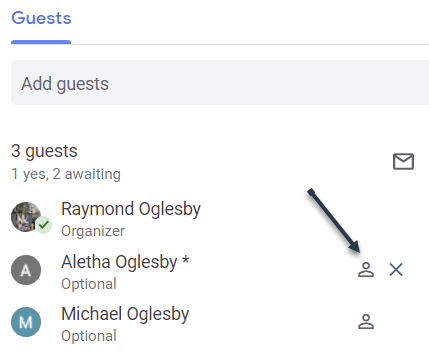
Next, the icon turns white and shows you the person is optional. If you want to make the attendee required again, just click that icon and hit Save. See the following image:
What Guest See
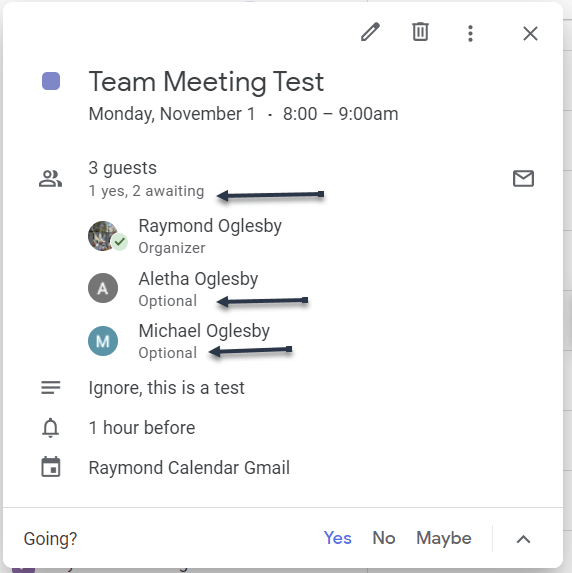
When you make an attendee optional for your event, the word Optional appears below their name. Anyone in the list of guests without the word Optional is required. Refer to the below image:
If you are setting up a meeting, conference call, or video call in Google Calendar and have certain guests that may want to attend but are not required to, you can easily use the Optional feature.
Quote For the Day
If we did all the things we are capable of, we would literally astound ourselves.
Thomas A Edison
That’s it. Now you know a seldom-used feature for making guests Optional in a Google Calendar event. Please feel free to share this post! One way to share is via Twitter.
Just click the Tweet icon below. This will launch Twitter where you click its icon to post the Tweet.
Check out TechSavvy.Life for blog posts on smartphones, PCs, and Macs! You may email us at contact@techsavvy.life for comments or questions.
Tweet
I Would Like to Hear From You
Please feel free to leave a comment. I would love hearing from you. Do you have a computer or smart device tech question? I will do my best to answer your inquiry. Just send an email to contact@techsavvy.life. Please mention the device, app, and version you are using. To help us out, you can send screenshots of your data related to your question.