RAYMOND OGLESBY @RaymondOglesby2
January 18, 2022
Facebook automatically adds alternative text (alt text) to images you upload, but the descriptions are not always accurate. You can make your images more accessible to visually impaired users by writing accurate alt text for your images. Let’s explore this feature.
This is for devices using Facebook. Screenshots are from iPhone XR.

Use the Mobile App
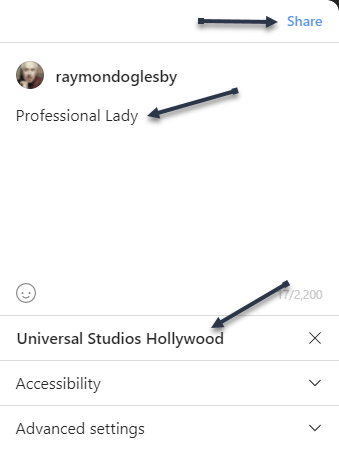
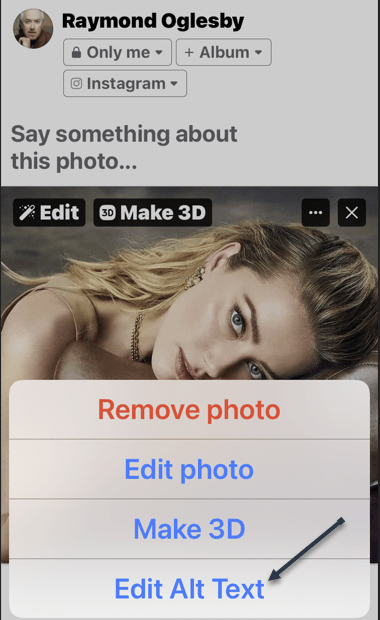
To add alt text to an image you are uploading using the Facebook mobile app, first, open the app on your smartphone, compose a new Facebook post, then select a photo from your device to upload. In the post preview, tap the three dots in the top right-hand corner of the image. Refer to the below image:

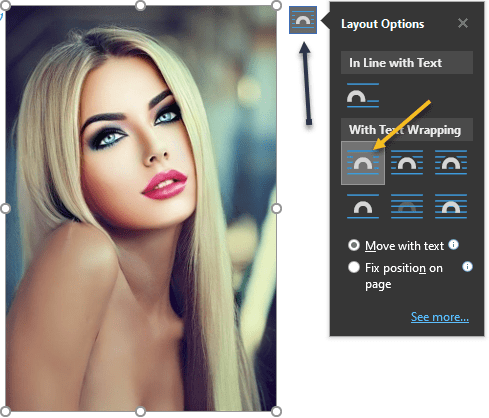
Next, a menu will appear at the bottom of your screen. Here, tap the Edit Alt Text option. See the below image:
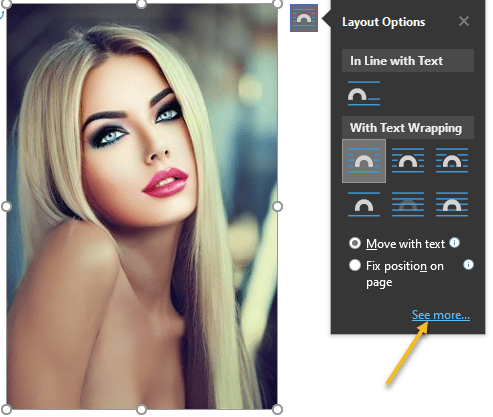
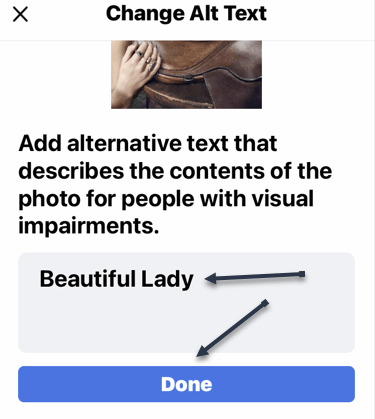
Now, you will be on the Change Alt Text screen. In the text box below your image, enter the text that accurately describes the image you are posting. Then, tap Done. See the following image:
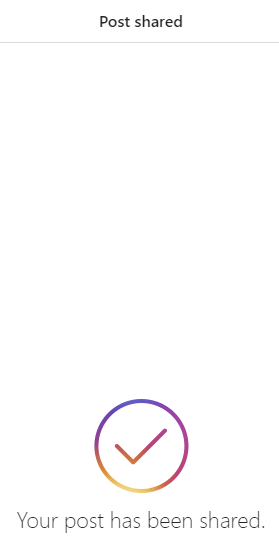
The alt text is now added to the photo. Refer to the below image for our final image:

Keep in mind that this alt text description can only be read if someone is using a Screen Reader to access Facebook; it will not be visible on the image.
Use the Desktop App
You can also add alt text to your images on Facebook from your computer. First, launch Facebook from any browser of your choice and then begin creating a new post with an image. Next, in the post preview, click Edit in the top left-hand corner of the image. Refer to the below image:

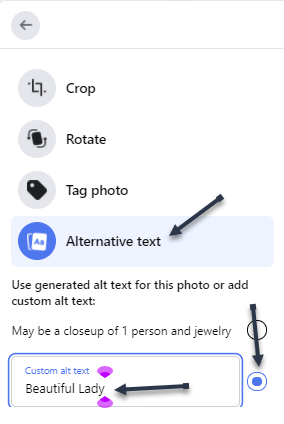
Now, the Photo Detail window will appear. Here, click Alternative text at the bottom of the menu in the left-hand pane. See the below image:

Next, the Alternative text menu will expand. Click the bubble next to the Custom Alt Text option to select it, and then enter the alt text for your image in the text box. See the following image:
Now, click the blue Save button at the bottom of the window. Refer to the below image:

The alt text is now added to the photo. Refer to the below image for our final image:

Keep in mind that this alt text description can only be read if someone is using a Screen Reader to access Facebook; it will not be visible on the image.
Quote For the Day
Management is efficiency in climbing the ladder of success; leadership determines whether the ladder is leaning against the right wall.
Stephen Covey
That’s it. Please feel free to share this post! One way to share is via Twitter.
Just click the Tweet icon below. This will launch Twitter where you click its icon to post the Tweet.
Check out TechSavvy.Life blog posts on smartphones, PCs, and Macs! You may email us at contact@techsavvy.life for comments or questions.
Tweet
I Would Like to Hear From You
Please feel free to leave a comment. I would love to hear from you. Do you have a computer or smart device tech question? I will do my best to answer your inquiry. Just send an email to contact@techsavvy.life. Please mention the device, app, and version you are using. To help us out, you can send screenshots of your data related to your question.
Author’s E-book
You can access the e-book from a Kindle device, the Kindle App for the desktop or smartphone, which is a free app.