Enable Advanced Data Protection for Your Apple Devices

Apple has disabled Advanced Data Protection (ADP) for iCloud in the UK due to government demands for law enforcement access. This compromises data security, as backdoor access could be exploited. In contrast, ADP offers end-to-end encryption unavailable to Apple, ensuring only users can access their data. Users outside the UK retain this protection.

Insert dRAYMOND OGLESBY @RaymondOglesby2
April 1, 2025 – 6 minutes read time
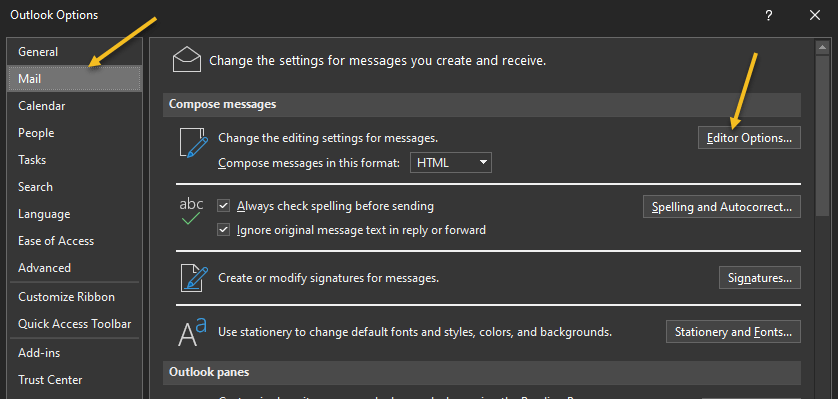
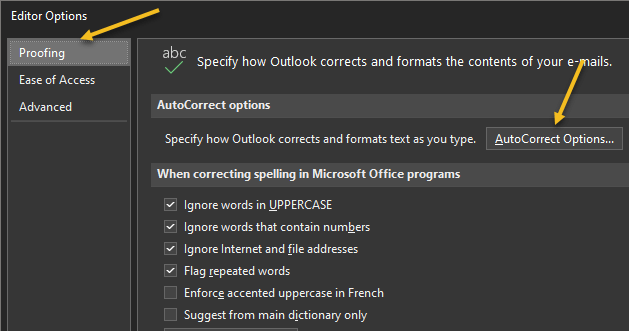
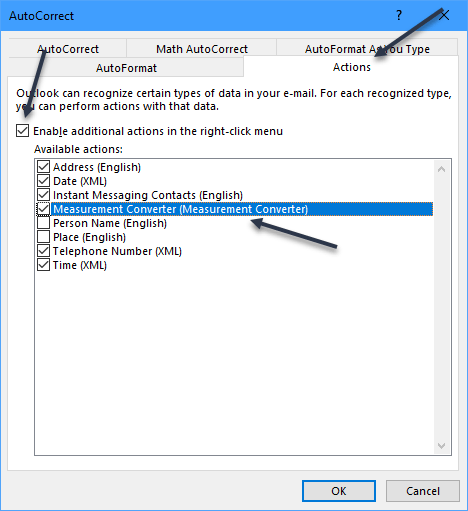
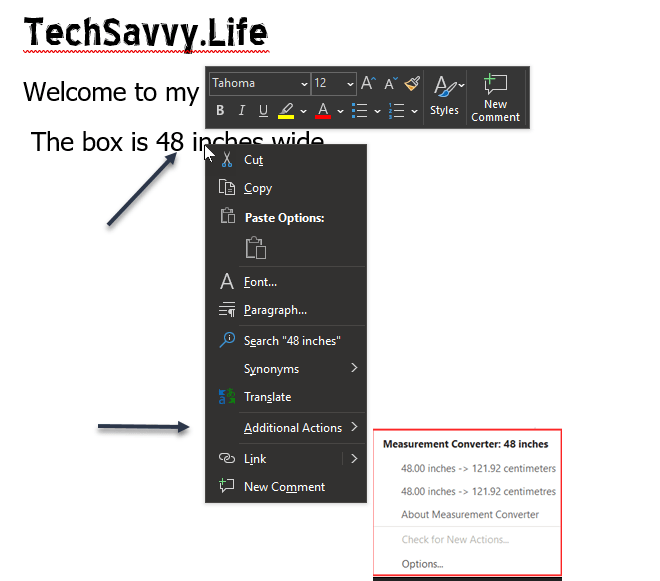
Recently. Apple took the unusual step of turning off its highest level of iCloud encryption, Advanced Data Protection (ADP) for customers in the UK. The British government has reportedly demanded that Apple provide a method for law enforcement to access encrypted data as part of criminal investigations. But that creates a serious security problem, because this type of backdoor access can also be exploited by criminals or untrustworthy governments.

  • Have the best encryption for your Apple devices.
  • Prevent hackers from accessing and viewing your data.

See below for the Apple software versions. These screenshots were captured using iOS 18.3.2 on iPhone 14 Pro.

Click here to learn how to update your iPhone to the latest iOS version.

For people in the UK, ADP can no longer be enabled. If you are currently using ADP, you will need to turn off the feature at a future date.

If you are outside the UK and concerned about who can see your data, ADP adds an extra layer of security by making it unreadable even by Apple. If ADP is disabled, your data could be at risk because it can still be unlocked by Apple, a legal request or a data breach. 

Let’s explore how to turn Advanced Data Protection on, and how it differs from the default iCloud encryption methods.

The key difference between ADP and how Apple encrypts data by default is how accessible your information is when stored on Apple’s servers.

In what Apple calls standard data protection, information sent between points, such as files stored on iCloud Drive and iCloud backups of your devices, is encrypted and transmitted securely. If someone intercepts that data between the two points, they will see only gibberish.

That data remains encrypted when it’s stored on Apple’s servers, so you can access it from other devices, for instance. However, Apple can still access the encryption keys to unscramble and read the data; and provide it to law enforcement following a legal request.

By contrast, when you enable Advanced Data Protection for iCloud, the data is end-to-end encrypted, meaning only your trusted devices possess the encryption keys to read it. The information remains encrypted on the servers, and not even Apple can access its contents. (Not all iCloud data can be end-to-end encrypted. Apple breaks out-which types of information, such as iCloud Mail messages, that remain covered by standard data protection even when ADP is turned on.)

The UK’s Investigatory Powers Act, the “Snooperd’s Charter”, makes that inaccessibility illegal, which is why Apple is turning the feature off for UK customers.

Some services are end-to-end encrypted regardless due to the sensitivity of the data, such as passwords, information stored in the Health app and payment information.

Note! Setting up ADP applies to all devices in your Apple account.

To set up ADP on your account, first make sure you have met all the prerequisites for the feature:

  • Your Apple Account must use two-factor authentication.
  • You must have a recovery method set up in case you lose access to your account. That can be a 28-character Recovery Key or a person you have designated as a Trusted Contact.
  • Every device connected with your Apple Account must be able to run at least
  • iOS 16.2, iPadOS 16.2, MacOS 13.1
  • WatchOS 9.2
  • TVOS 16.2
  • HomePod 16.0
  • For Windows computers, make sure iCloud for Windows is at version 14.1 or later.
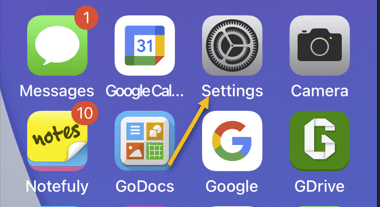
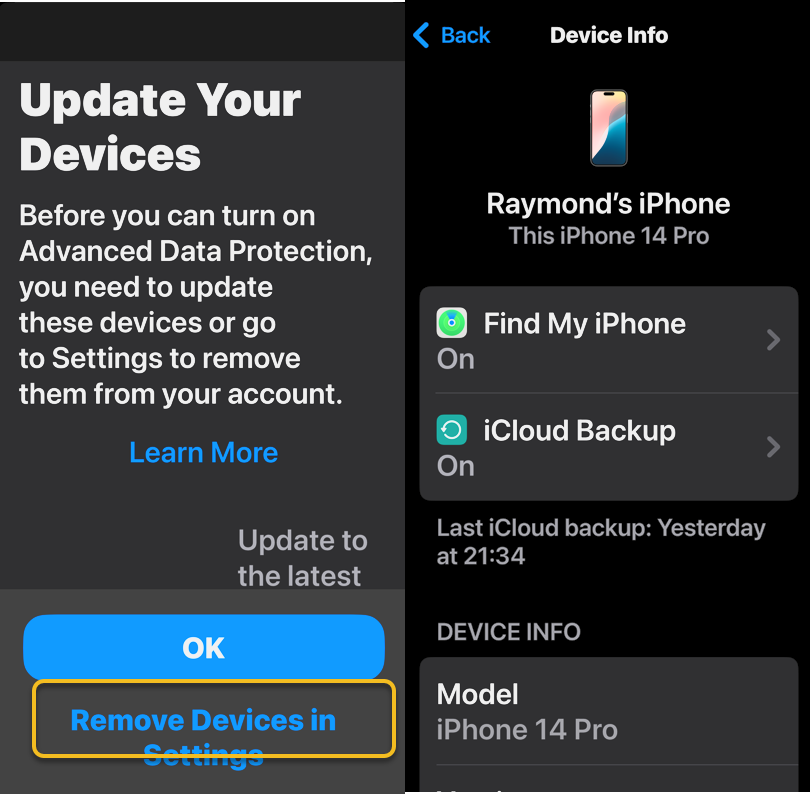
  • If any of your devices do not qualify, you will be warned during the ADP setup process. If any of those are too old or you no longer have access to them, head to:
  • Settings > Remove Devices and delete them from your list.

Refer to the below image:

adp 1_2
Update your Devices

To turn on ADP on an iPhone, iPad or Mac do the following:

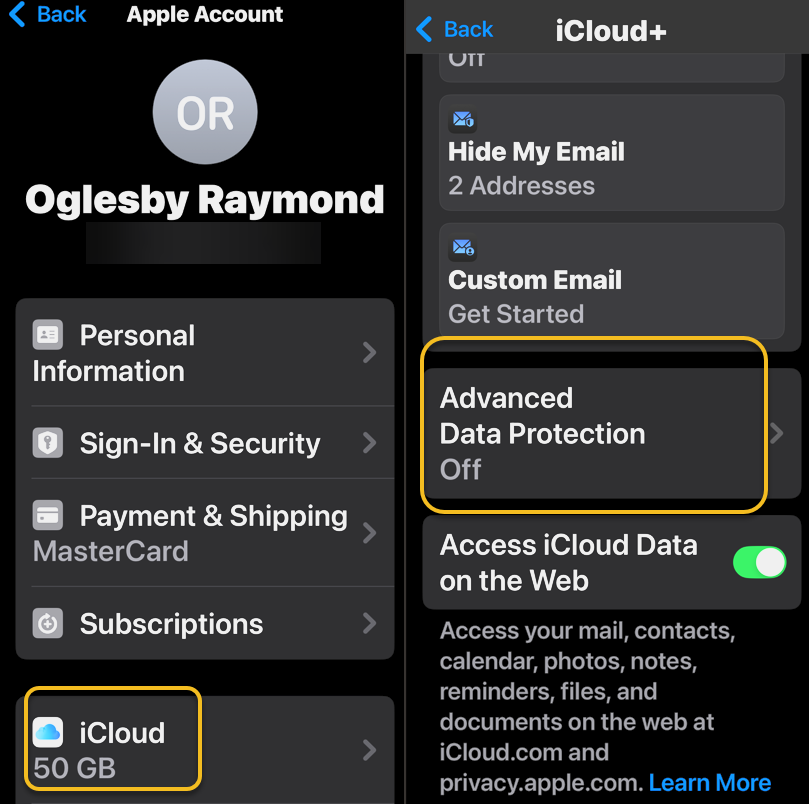
1. Go to Settings > [Your Name] > iCloud. On a Mac, open System Settings > [Your Name] > iCloud.

2. Scroll down to Advanced Data Protection, which likely says Off, and tap that to enable. This will take some time, and the screen will appear to be unresponsive; Just be patient. Later, if you want to disable ADP, repeat the above steps and select the Turn Off button.

See the below image:

adp 3_4
Turn on ADP

3, If there are any of the aforementioned impediments to setting up ADP, such as needing to update other devices on your account, you will review them on the next screen.

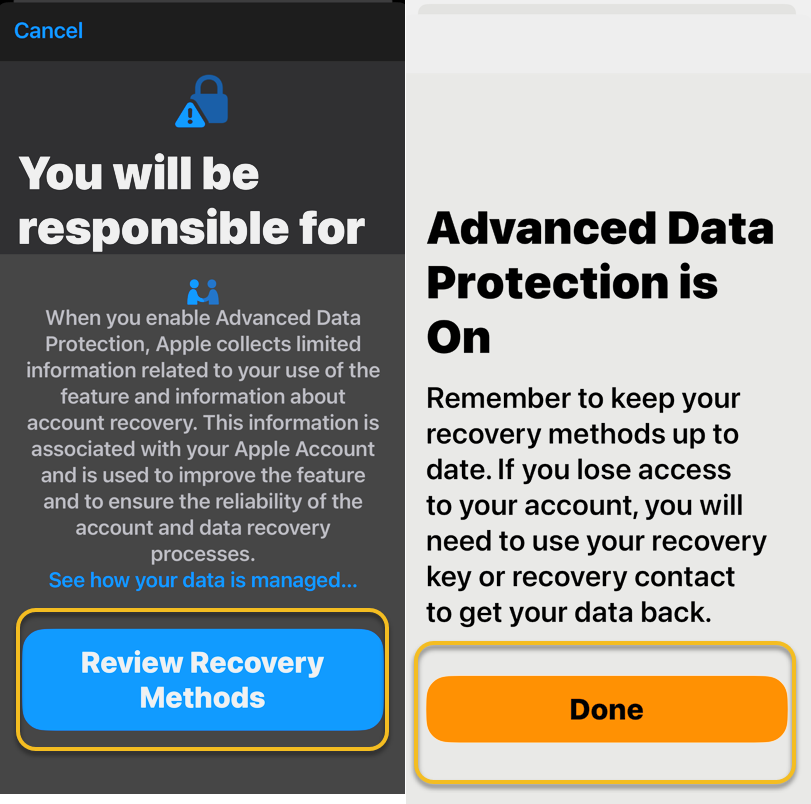
4. In the following screen, tap Review Recovery Options. You need to have a Recovery Key, Recovery Contact or both to ensure that you can get your data if you lose access to your iCloud account.

5. Enter your device’s passcode to finish.

See the following image:

adp 5_6
ADP is Enables

Activating ADP on one device means it’s on for all of your devices using the same Apple account, so you only need to set it up once.

Disclaimer

Technology is constantly evolving, and smartphone and desktop tech rarely remains static. Therefore, the information in this post is only accurate as of the date it was written. Blog posts that are older than six months may contain instructions that are no longer compatible with your device or operating system. We hope that the content from previous posts continues to function as intended. Thank you for reading TechSavvy.Life, where technology works for you.

. “Imagination is more important than knowledge. For knowledge is limited, whereas imagination embraces the entire world, stimulating progress, giving birth to evolution.”

-Albert Einstein

That’s it. Please feel free to share this post! One way to share is via Twitter.

Just click the Tweet icon below. This will launch Twitter where you click its icon to post the Tweet.

Checkout TechSavvy.Life for blog posts on smartphones, PCs, and Macs! You may email us at contact@techsavvy.life for comments or questions.

We value your feedback! Was this post helpful? Please share your comments with us. If you have a tech question related to your computer or smart device, feel free to reach out. Just send an email to contact@techsavvy.life, and be sure to include the device, app, and version you are using. To assist us further, you can also attach screenshots related to your inquiry.

Author’s eBook

The author’s Vietnam eBook on the “Battle for Tra Bong Vietnam: Events and Aftermath” can be accessed from a Kindle device or the Kindle App for a desktop or smartphone. The apps are free.

The author’s Vietnam eBook on the Battle for Tra Bong Vietnam: Events and Aftermath

How to Clean AirPods, AirPods Pro, and AirPods Max: Complete Guide

The post provides advice on cleaning Apple AirPods to prevent dirt and bacteria accumulation, which can affect performance and cause irritation or infection. It provides specific cleaning instructions for AirPods, AirPods Pro, and AirPods Max. Regular maintenance is emphasized to extend their life. Additionally, the post advises on cleaning the case.

RAYMOND OGLESBY @RaymondOglesby2
August 6, 2024 – 5 minutes read time

This is for Apple AirPod. AirPod Pro and AirPod Max.

AirPods, Pro, and Max can accumulate dirt and bacteria you do not want to introduce into your ear canal because they can cause irritation or infection. As for your AirPods, an accumulation of wax, sweat, and other substances can affect their performance. 

Cleaning those small white AirPods and AirPods Pro can seem pretty delicate. And even the bulky AirPods Max can be baffling because of the mix of materials they are made out of. Let’s explore how to clean your AirPods.

AirPods
AirPods
AirPods Pro
AirPods Pro
AirPods Max
AirPods Max

The first thing you can do is a bit of prevention. To keep AirPods and AirPods Pro out of dirt and water as much as possible, consider getting a third-party strap so they are attached to each other, making them less likely to fall. You can find many styles, from simple silicone to glitzy gold. When your AirPods Max are not in use, stash them in their case instead of leaving them out or letting them go loose in a bag.

The things to have on hand if you want to keep your AirPods clean are pretty simple: lint-free cloths, cotton swabs, and a bit of water will do the job in most instances. 

Apple used to only recommend water and lint-free cloths for cleaning most of its products before the pandemic. Now it says it’s okay to use 70% isopropyl alcohol wipes, 75% ethyl alcohol wipes, or Clorox Disinfecting Wipes on the exterior parts of AirPods, AirPods Pro, and AirPods Max. But you should avoid using such wipes on the knit mesh or ear cushion parts of the AirPods Max.

And you should not use bleach or anything with hydrogen peroxide to clean any AirPods.

Maintenance is key to extending the life of your AirPods. For maintenance, clean AirPods, AirPods Pro, and AirPods Max with a dry, lint-free cloth. It does not have to be expensive or fancy like the $19 Polishing Cloth Apple sells. You can clean any microphone and speaker meshes with a dry cotton swab.

If your AirPods have gotten something on them like lotion or food (it happens), or have stood up to a lot of sweat, you can take a lint-free cloth, dampen it with a bit of water, and give them a light rubdown. Dry them off with a lint-free cloth and then let them sit out a bit before you put them back in the case. If there’s earwax present, hold your AirPods with the mesh facing toward the ground and go over the mesh lightly with a dry cotton swab. If it’s still stuck, carefully try a toothpick or other small pointed object around the edges of the mesh but be aware that if you exert too much force, you can loosen or dislodge the mesh itself.

The AirPods Pro has an ear tip, so if you want a more thorough cleaning, remove the tips and rinse them with water. If there is earwax or anything else still stuck to them, use a dampened cotton swab to remove it. Dry the ear tips with a lint-free cloth and don’t put them back on until they’re thoroughly dry.

For the AirPods Max, a good cleaning involves wiping them down with a slightly dampened lint-free cloth and then a dry one after. Because the AirPods Max are headphones, there’s more surface area to attract dirt. If the cushions and headband look or feel grimy, you can give them a bit of a wash. Remove the ear cushions first to clean them separately. Then combine a teaspoon of mild detergent with a cup of water and use a lint-free cloth to wipe the band and cushions down with the solution. Follow that with a wipe of just water on a cloth and then dry all the components completely.

Since your AirPods are often in their case, you also want to keep that clean. You can use a clean, lint-free cloth slightly dampened with water or an alcohol wipe if the case really needs it. Ensure the case is completely dry before you put your AirPods back in. You would do well to turn the case upside down while it dries.

Disclaimer

Technology is always changing. Rarely is there static tech for smartphones and desktops. Thus, the contents of this post are only valid at the time of writing. Blog posts older than six months may have directions incompatible with your device or OS. Hopefully, older post content will continue to work as advertised. Thank you for reading TechSavvy.Life for Technology at Work For You.

Tell the world what you intend to do, but first show it.

Napoleon Hill

That’s it. Please feel free to share this post! One way to share is via Twitter.

Just click the Tweet icon below. This will launch Twitter where you click its icon to post the Tweet.

Checkout TechSavvy.Life for blog posts on smartphones, PCs, and Macs! You may email us at contact@techsavvy.life for comments or questions.

Was this post helpful? We would love to hear your comments. Do you have a computer or smart device tech question? I will do my best to answer your inquiry. Just send an email to contact@techsavvy.life. Please mention the device, app, and version you are using. To help us out, you can send screenshots of the data related to your question.

You can access the E-book from a Kindle device, or the Kindle App for a desktop or smartphone. The apps are free.

The author’s Vietnam eBook on the Battle for Tra Bong Vietnam: Events and Aftermath

How to Use “Shared with You” on iPhone/iPad

For years, Apple devices have made it easy to share nearly anything. Website links, videos, photos; you name it, chances are it’s easy to share via Messages, especially if you are sharing with other Apple users. Finding the media and links others share with you was not always easy until now.

RAYMOND OGLESBY @RaymondOglesby2
November 10, 2021

For years, Apple devices have made it easy to share nearly anything. Website links, videos, photos; you name it. Chances are it’s easy to share via Messages, especially if you are sharing with other Apple users. Finding the media and links others share with you was not always easy until now. Let’s explore this feature.

This is for iPhone and iPad running iOS or iPadOS 15 or higher

Dilbert and Wallet
Copyright Scott Adams, Inc./Distributed by Universal Uclick for UFS

What is Shared with You

Shared with You is a feature built into multiple apps on both iPhone and iPad that automatically gathers together any content your contacts have sent you. It works in Messages, but is also built into Apple Music, Apple TV, Podcasts, Photos, and Safari.

This feature works in two ways. First, you can easily view all the various media a contact has shared with you in Messages. Second, you can view all the Apple TV shows, for example, that all of your contacts have shared with you, directly inside that app.

Shared with You is a new feature as of iOS 15 and iPadOS 15 or higher, but it works with content sent from older iOS and iPadOS versions. It will even work automatically with some content sent from other devices.

How to Use in Messages

The easiest way to use Shared with You is not all that different from how you would find a friend’s recommendations. First, open the Messages app, then find a conversation with the person whose content you wish to see. Refer to below image:

Shared 1
A Contact to share with

Now, on this screen you will see some of the contact’s details as you would have before. At the bottom of the screen, you will now notice a new section with media that contact has shared with you. See below image for sharing of Links:

Shared 2
Sharing a link

How to Use in Safari

Shared with You makes it easy to see all the links to various websites and articles that contacts have sent you.

First, open Safari, then open a new tab to get to the Start Page. Now, scroll down until you see the Shared with You section. Tap any of the links here to open them in a new tab. See the following image:

Shared 3
Safari Shared with You section

If you do not see a Shared with You section, you might not have it enabled in the Start Page.

To enable the Shared with You section, next, scroll to the bottom of the Start Page and tap Edit. Refer to below image:

Shared 4
Accessing Edit to enable Shared with You

Now, find and enable the Shared with You toggle. See below image:

Shared 5
Enable/disable Shared with You

How to Use in Other Apps

While the Messages app provides the easiest way to see everything a given contact has shared, it’s not the only way to use Shared with You. You can also see content shared by your contacts in any supported app.

As of this writing, Shared With You is available for Apple TV, Messages, Photos, Podcasts, and Music.

Too Much Sharing

We all know people who seem to share everything they stumble across on social media. If you know more than one of that sort of person, they could quickly overwhelm you with notifications and content.

The good news is that if you are not interested in seeing some or all Shared with You content, you can turn it off. You can either disable Shared with You entirely or simply turn off the feature on a per-app basis.

First, to disable Shared with You features, open the Settings app. See following image:

Shared 6
Accessing Settings app

Now, go to Messages. Refer to below image:

Shared 7
Accessing Messages option

Next, tap Shared With You. See the below image:

Shared 8
Accessing Shared with You

Here you can customize whether you want to use Shared with You at all or only in certain apps. See following image:

Shared 9
Enable/disable Shared with You

Quote For the Day

As individuals, people are inherently good. I have a somewhat more pessimistic view of people in groups. And I remain extremely concerned when I see what’s happening in our country, which is in many ways the luckiest place in the world. We don’t seem to be excited about making our country a better place for our kids.

Steve Jobs

That’s it for a few examples on how to use Shared with You. Please feel free to share this post! One way to share is via Twitter.

Just click the Tweet icon below. This will launch Twitter where you click its icon to post the Tweet.

Check out TechSavvy.Life for blog posts on smartphones, PCs, and Macs! You may email us at techsavvy.life for comments or questions.

I Would Like to Hear From You

Please feel free to leave a comment. I would love to hear from you. Do you have a computer or smart device tech question? I will do my best to answer your inquiry. Just send an email to contact@techsavvy.life. Please mention the device, app, and version you are using. To help us out, you can send screenshots of your data related to your question.

The author’s Vietnam eBook on the Battle for Tra Bong Vietnam: Events and Aftermath

How to Turn on Captions in Siri on iPhone and iPad

The all-new compact Siri interface, available with iOS and iPadOS 14, renders just a small animated orb at the display bottom along with a compact, banner-style response that slides into view.

RAYMOND OGLESBY @RaymondOglesby2
October 13, 2021

The all-new compact Siri interface, available with iOS and iPadOS 14, renders just a small animated orb at the display bottom along with a compact, banner-style response that slides into view. Lets explore how this is done with a few simple steps.

This is for iPhone and iPad

Copyright Scott Adams, Inc./Distributed by Universal Uclick for UFS

That’s an improvement over Siri in earlier iOS version that would take up the whole display. To keep the interface as minimal as possible, Siri in iOS and iPadOS 14 does not show Caption for spoken text nor does it display a live transcription of what you have spoken.

Thankfully, you can easily enable Siri Captions on an iPhone, iPad or iPod Touch. Doing so will help you verify that you have heard Siri’s response correctly.

Enable Siri Captions

First, open Settings on your iPhone or iPad. Refer to below image:

Siri 1
Selecting the Settings app

Next, in Settings, tap Siri & Search. See below image:

Siri 2
Selecting Siri & Search option

Now, in Siri & Search, scroll down and tap Siri Responses. See following image:

Siri 3
Selecting Siri Responses option

Next, in Siri Responses, toggle the switch beside Always Show Siri Captions into the ON position.

Note! if you have trouble seeing toggle colors, you can turn on toggle labels in Settings as well. Refer to below image:

Siri 4
Toggle on Captions

Now, close Settings. Launch Siri and ask it a question. If your phone is not silenced, Siri will speak the response, and you will see the same response written on the screen in the form of a Caption. See below image:

Siri 5
Your Siri Caption

Disable Siri Captions

If you ever want to disable the Captions, revisit

Settings > Siri & Search > Siri Responses

and toggle Always Show Siri Captions to OFF.

Note! you will still see Siri’s responses as Captions if your device is set to silent mode and you have Spoken Responses in Settings > Siri & Search > Siri Responses set to When Silent Mode is OFF.

Quote For the Day

It has not yet become obvious to me that there’s no real problem. I cannot define the real problem; therefore, I suspect there’s no real problem, but I’m not sure there’s no real problem.

Richard Feynman

You are finished. Please feel free to share this post! One way to share is via Twitter.

Just click the Tweet icon below. This will launch Twitter where you click its icon to post the Tweet.

Check out TechSavvy.Life for blog posts on smartphones, PCs, and Macs! You may email us at contact@techsavvy.life for comments or questions.

I Would Like to Hear From You

Please feel free to leave a comment. I would love hearing from you. Do you have a computer or smart device tech question? I will do my best to answer your inquiry. Just send an email to contact@techsavvy.life. Please mention the device, app and version that you are using. To help us out, you can send screenshots of your data related to your question.

The author’s Vietnam eBook on the Battle for Tra Bong Vietnam: Events and Aftermath

How to Change Back to Old Safari on iPhone

iOS 15 introduced a redesigned Safari interface that puts the address bar at the bottom of the screen.

If you prefer to keep it at the top of the screen, like most web browsers, it can be easily swapped

RAYMOND OGLESBY @RaymondOglesby2
September 29, 2021

iOS 15 introduced a redesigned Safari interface that puts the address bar at the bottom of the screen. Refer to below image:

Safari 1
New Safari

If you prefer to keep it at the top of the screen, like most web browsers, it can be easily swapped. Let’s explore how this is done.

This is for the iPhone running iOS 15 or above

Dilbert and Project
Copyright Scott Adams, Inc./Distributed by Universal Uclick for UFS

There are a few advantages to having the address bar at the bottom. First, it’s easier to reach with one hand on a large screen. Second, it puts all the browser controls in one place. If you are still not convinced to give it a try, let’s switch it back. Personally, I like the old Safari.

First, open the Settings app from the home screen. See below image:

Safari 2
Accessing Settings

Now, scroll way down and tap Safari. See following image:

Safari 3
Accessing Safari

Next, go to the Tabs section and switch it to Single Tab. Refer to below image:

Safari 4
Toggle to Single Tab

Now, the address bar is back at the top of the screen and the other browser controls are still at the bottom. See below image:

Safari 5
The old Safari

Regardless of which interface you prefer, the same amount of content is visible, so it’s just a matter of what you like best.

Quote For the Day

Creativity is just connecting things. When you ask creative people how they did something, they feel a little guilty because they didn’t really do it, they just saw something. It seemed obvious to them after a while. That’s because they were able to connect experiences they’ve had and synthesize new things.

Steve Jobs

That’s it for getting back the old Safari interface. Please feel free to share this post! One way to share is via Twitter.

Just click the Tweet icon below. This will launch Twitter where you click its icon to post the Tweet.

Check out TechSavvy.Life for blog posts on smartphones, PCs, and Macs! You may email us at contact@techsavvy.life for comments or questions.

I Would Like to Hear From You

Please feel free to leave a comment. I would love hearing from you. Do you have a computer or smart device tech question? I will do my best to answer your inquiry. Just send an email to contact@techsavvy.life. Please mention the device, app and version that you are using. To help us out, you can send screenshots of your data related to your question.

The author’s Vietnam eBook on the Battle for Tra Bong Vietnam: Events and Aftermath

How to Add an iPhone Contact to Your Home Screen

iPhones are awesome communication devices. So it makes sense that you would want to put the people you talk to the front and center.

Surprisingly, Apple does not make it clear that it’s even possible to do this. The functionality is buried in the powerful Shortcuts app.

RAYMOND OGLESBY @RaymondOglesby2
September 8, 2021

iPhones are awesome communication devices. So it makes sense that you would want to put the people you talk to the front and center.

Surprisingly, Apple does not make it clear that it’s even possible to do this. The functionality is buried in the powerful Shortcuts app. Let’s explore how this is done.

This is for the iPhone and iPad

Dilbert and Talking
Copyright Scott Adams, Inc./Distributed by Universal Uclick for UFS

There are basically two different actions that can be associated with contact Shortcuts. You can have the Shortcut give you the option of how you want to contact the person; Message, Call, FaceTime; or it can jump straight into one of those. We will be covering the first option.

Create the Shortcut

First, open the Shortcuts app on your iPhone or iPad. Refer to below image:

Shortcuts 1
Accessing your Shortcuts app

Next, go to All Shortcuts See below image:

Shortcuts 2
Find All Shortcuts

Now, switch to the Gallery tab in the bottom bar. See following image:

Shortcuts 3
Open the Gallery of Shortcuts

Add the Contact

Next, do a search for Contact, and select the Contact on Home Screen shortcut. Refer to below image:

Shortcuts 4
Search for a contact

Now, tap the Add Shortcut button. See below image:

Shortcuts 5
Add contact Shortcut

On the next screen is where you will select a person for the Shortcut. Tap the “+” button. See following image.

Shortcuts 6
Selecting to add a contact

Now, find the person you want to use for the Shortcut in your contacts list. Refer to below image:

Shortcuts 7
Locate a contact

Next, tap Done to finish. See below image:

Shortcuts 8
Finish the setup

View the Newly Added Shortcut

Now, go back to the My Shortcuts tab, and you will see the newly added Shortcut. Touch and hold to bring up some options. See following image:

Shortcuts 9
View your Shortcut

Next, select Details from the menu. Refer to below image:

Shortcuts 10
Accessing Details for the Shortcut

Add to Home Screen and Customize

Now, select Add to Home Screen. See below image:

Shortcuts 11
Add contact Shortcut to your Home screend

Next, tap the text to enter the name that you would see under the icon on the Home screen. See following image:

Shortcuts 12
Label the Shortcut icon

Now, select the icon to choose a photo for it or the other two options. Refer to below image:

Shortcuts 13
Select a photo for the contact

Next, once you are done customizing the icon, tap Add in the top right-hand corner. See below image:

Shortcuts 14
Finish customizing

Now, the icon will be added to your Home screen. When you tap it, a menu with communication choices will appear. Simply do this for all of your favorite people! See following image:

Shortcuts 15
Your Shortcut in action

Quote For the Day

It doesn’t matter how beautiful your theory is, it doesn’t matter how smart you are. If it doesn’t agree with experiment, it’s wrong.

Richard P Feynman

Pretty nifty feature. It’s like having a person on speed dial. Please feel free to share this post! One way to share is via Twitter.

Just click the Tweet icon below. This will launch Twitter where you click its icon to post the Tweet.

Check out TechSavvy.Life for blog posts on smartphones, PCs, and Macs! You may email us at contact@techsavvy.life for comments or questions.

I Would Like to Hear From You

Please feel free to leave a comment. I would love hearing from you. Do you have a computer or smart device tech question? I will do my best to answer your inquiry. Just send an email to contact@techsavvy.life. Please mention the device, app and version that you are using. To help us out, you can send screenshots of your data related to your question.

The author’s Vietnam eBook on the Battle for Tra Bong Vietnam: Events and Aftermath

How to Listen to Background Sounds on iPhone

One of the upgrades to Accessibility in iOS and iPadOS 15 is a new Background Sounds feature that plays relaxing audio tracks to help you stay calm and focused, and to block out background distractions.

RAYMOND OGLESBY @RaymondOglesby2
September 1, 2021

One of the upgrades to Accessibility in iOS and iPadOS 15 is a new Background Sounds feature that plays relaxing audio tracks to help you stay calm and focused, and to block out background distractions.

This is for iPhone and iPad

Dilbert and Healing
Copyright Scott Adams, Inc./Distributed by Universal Uclick for UFS

What Are Background Sounds

Background Sounds are like having a sound machine from your bedroom in your iPhone and iPad. The sounds can also be played over Bluetooth to external devices.

With thenew Background Sounds feature, you can play balanced, bright, and dark noise, as well as ocean, rain, and stream sounds to help you concentrate and relax when using your iPhone or iPad.

The feature may negate the need to purchase or subscribe to third-party background noise apps. Its not a dedicated app, but rather hidden away inside your device’s Accessibility settings.

It’s worth noting that at the current time, there is no way to load your own background sound. Note as well that they do not have a time limit. They will only turn off when you disable them. This is a glaring omission by Microsoft. I would like to turn on sound at night as I fall asleep and have it automatically turn off at a certain time. Anyway. let’s explore how to use this feature.

Background Sounds in Accessibility

Apple sees Background Sounds as a way to diversify its array of accessibility features by being more inclusive.

The company says in its official announcement of the feature that it targets “support of neurodiversity” and aims to mitigate “distracting, discomforting, or overwhelming” everyday noises. In other words, the feature can help you focus and relax during the day and mitigate distracting sounds that are bothering you.

That being said, the feature has the ability to appeal to many different people, so it’s interesting that Apple decided to stick with the accessibility angle instead of a more generalized approach.

Enable Background Sounds

First, open the Settings app. Refer to below image:

Sounds 1
Accessing Settings app

Next, scroll down and tap Accessibility. See below image:

Sounds 2
Accessing Accessibility option

Now, under the Hearing section, tap Audio/Visual. See following image:

Sounds 3
Accessing Audio/Visual option

Next, tap Background Sounds. Refer to below image:

Sounds 4
Accessing Background Sounds option

Now, you can toggle Background Sounds On and Off and choose which sound you would like. You can also adjust the volume of the sound as it plays over other media. If you do not want the background sound to play while, for example, listening to music, uncheck Use When Media Is Playing. See below image.

Sounds 5
Selecting your sound

You are ready to listen to relaxing, distraction-free sound from your iPhone or iPad. If you want other particular sounds, consider trying out a third-party white noise app.

Quote For the Day

It’s not going to do any good to land on Mars if we’re stupid.

Ray Bradbury

That’s it. Please feel free to share this post! One way to share is via Twitter.

Just click the Tweet icon below. This will launch Twitter where you click its icon to post the Tweet.

Check out TechSavvy.Life for blog posts on smartphones, PCs, and Macs. You may email us at contact@techsavvy.life for comments or questions.

I Would Like to Hear From You

Please feel free to leave a comment. I would love hearing from you. Do you have a computer or smart device tech question? I will do my best to answer your inquiry. Just send an email to contact@techsavvy.life. Please mention the device, app and version that you are using. To help us out, you can send screenshots of your data related to your question.

The author’s Vietnam eBook on the Battle for Tra Bong Vietnam: Events and Aftermath

How to View Your Most Used Apps on iPhone

A big part of your daily time is spent using your iPhone. Whether you want to understand your app usage, change your lifestyle, or just know which apps you need to cut down on, its helpful to know about your most used apps.

RAYMOND OGLESBY @RaymondOglesby2
August 25, 2021

A big part of your daily time is spent using your iPhone. Whether you want to understand your app usage, change your lifestyle, or just know which apps you need to cut down on, its helpful to know about your most used apps. Let’s explore this feature, called Screen Time.

This is for the iPhone

Dilbert and Story
Copyright Scott Adams, Inc./Distributed by Universal Uclick for UFS

Enable Screen Time

Before you can find out which apps you use the most on your iPhone, you will need to turn on a free feature built into iOS called Screen Time. This feature helps you keep track of how you use your iPhone. It can also help you put limits on your app usage if you would like, although that’s optional.

First, open the Settings app, and then tap the Screen Time option. Refer to below image:

Apps 1
Accessing Screen Time option

Next, tap Turn on Screen Time and tap This is My iPhone or This is My Child’s iPhone. See below image:

Apps 2
Enable Screen Time

Now, you will see a Screen Time summary page with no data, but we will fix that problem. Note! Each time you enable Screen Time, you data is removed.

Check Screen Time Again

The catch with using Screen Time is that it needs to be enabled to start gathering data about which apps you use the most. If you just turned it on, you will not have a most-used app list to look at.

So, now that Screen Time has been enabled, use your iPhone as you normally would. After a while, you can check back in with Screen Time and see some statistics.

Next, open the Settings app and tap Screen Time again. See following image:

Apps 1
Accessing Screen Time option

Now, on the Screen Time summary page, you will see a chart that shows your average daily activity. Just under that chart, tap See All Activity. Refer to below image:

Apps 4
Selecting to See All Activity

Next, choose whether you want to see your most used apps over the period of a day, week, month, or year at the top of the screen. See below image:

Apps 5
Selecting your time period

Now, scroll down to the Most Used section, and you will see a list of apps sorted by which you used the most over the selected time period, with your most used apps listed at the top. Tap an app to see more details. See following image:

Apps 6
Selecting an app to view its details

Add a Limit

Next, while on the detailed-view screen, if you want to set a time limit to prevent you from using the app too much, scroll down and tap Add Limit. Refer to below image:

Apps 7
Selecting Add a Limit to control how much time you spend using the app

Now, you will see a screen where you can set a time limit for the app in hours or minutes. When you’re done, tap Add. See below image:

Apps 8
Setting the time limit

From now on, whenever your time is up, you will see an alert pop up, reminding you not to use the app anymore.

Quote For the Day

True terror is to wake up one morning and discover that your high school class is running the country.

Kurt Vonnegut

That’s it. Please feel free to share this post! One way to share is via Twitter.

Just click the Tweet icon below. This will launch Twitter where you click its icon to post the Tweet.

Check out TechSavvy.Life for blog posts on smartphones, PCs, and Macs! You may email us at contact@techsavvy.life for comments or questions.

I Would Like to Hear From You

Please feel free to leave a comment. I would love hearing from you. Do you have a computer or smart device tech question? I will do my best to answer your inquiry. Just send an email to contact@techsavvy.life. Please mention the device, app and version that you are using. To help us out, you can send screenshots of your data related to your question.

The author’s Vietnam eBook on the Battle for Tra Bong: Events and Aftermath

How to Use the Microsoft Measurement Converter

Microsoft Word, PowerPoint, and Outlook offer a hidden measurement converter to save you from doing measurement conversions manually. If you are working with a document, presentation, or email that contains measurements, you will find this time-saving feature useful.

RAYMOND OGLESBY @RaymondOglesby2
August 17, 2021

Microsoft Word, PowerPoint, and Outlook offer a hidden measurement converter to save you from doing measurement conversions manually. If you are working with a document, presentation, or email that contains measurements, you will find this time-saving feature useful. Lets explore this feature.

This is for Office 365. Screenshots are from Windows 10 PC.

Dilbert and Employee
Copyright Scott Adams, Inc./Distributed by Universal Uclick for UFS

Enable Converter in Word and PowerPoint

First, open a document in Microsoft Word or a presentation in PowerPoint. Next, click

File > Options

from the menu. Now, select Proofing on the left and click AutoCorrect Options on the right. Refer to below image:

Accessing AutoCorrect.Options

Next, select the Actions tab. Now, check the boxes for Enable Additional Actions in the right-click menu then Measurement Converter from the list. You will notice other actions you can enable. Just checkmark any additional ones you would like to use. See below image:

Enabling Measurement Converter option

Click OK, then OK once more to save and exit the options menu.

Enable Converter in Outlook

First, open Microsoft Outlook and click

File > Options

from your inbox or an email window.

Now, select Mail on the left and click Editor Options on the right. See following image:

Accessing Editor Options

On the next screen, choose Proofing on the left and AutoCorrect Options on the right. Refer to below image:

Accessing AutoCorrect Options

Next, select the Actions tab. Now, check the boxes for Enable Additional Actions in the right-click menu, and Measurement Converter in the list. Like with Word and PowerPoint you can checkmark the boxes for any other actions you would like to use. See below image:

Enabling Measurement Converter option

Next click OK on all screens to save and exit,

Use the Converter in Office

When you receive a document that includes unfamiliar measurements, such as those from a foreign country, this tool takes the work out of manual conversions. And if you are creating the document yourself, you can convert the measurement for your audience.

Just, select the text containing the measurement. You can do this by dragging your cursor through it.

Now, right-click and move your cursor down to Additional Actions in the menu. You will see the Measurement Converter in the pop-out window. Refer to below image:

Accessing Measurement Converter

This lets you view the conversion. Additionally, you can click to select a conversion from the list and it will replace the measurement in your document, presentation, or email. This is convenient when you are preparing an item for someone expecting a different unit of measurement.

Quote For the Day

The greatest mistake you can make in life is continually fearing that you’ll make one.

Elbert Hubbard

That’s it. Please feel free to share this post! One way to share is via Twitter.

Just click the Tweet icon below. This will launch Twitter where you click its icon to post the Tweet.

Check out TechSavvy.Life for blog posts on smartphones, PCs, and Macs! You may email us at contact@techsavvy.life for comments or questions.

I Would Like to Hear From You

Please feel free to leave a comment. I would love hearing from you. Do you have a computer or smart device tech question? I will do my best to answer your inquiry. Just send an email to contact@techsavvy.life. Please mention the device, app and version that you are using. To help us out, you can send screenshots of your data related to your question.

The author’s Vietnam eBook on the Battle for Tra Bong: Events and Aftermath

How to Change Chrome New Tab Background

It’s easy to get bored at Chrome’s single white image background. Can we change this background image when opening a new tab? Yes we can. Chrome allows you to automatically switch the new tab page’s wallpaper every day.

RAYMOND OGLESBY @RaymondOglesby2
August 12, 2021

It’s easy to get bored at Chrome’s single white image background. Can we change this background image when opening a new tab? Yes we can. Chrome allows you to automatically switch the new tab page’s wallpaper every day. Let’s explore how this is done.

This is for devices running Google Chrome

Dilbert and Zoom
Copyright Scott Adams, Inc./Distributed by Universal Uclick for UFS

First, launch the Google Chrome browser on your Windows 10, Mac, Chrome OS, or Linux computer. Next, open a new tab and click the Customize pencil icon in the bottom-right corner of your screen. Refer to below image:

Background 1
Accessing new tab Customize icon

Now, in the pop-up window that appears, make sure that you are in the Background section. See below image:

Background 2
The Background section

Next, on the Background page, you will find a number of preset collections of backdrops, such as “Textures,” “Seascapes,” “Art,” and “Earth.” Google Chrome can automatically apply a new wallpaper from any one of these collections every day on your new tab page.

Let’s say that you want Google Chrome to display a new wallpaper from the “Seascapes” collection on your new tab page.

To do this, first, click the collection’s thumbnail in the grid. See following image:

Background 3
Accessing the Seascapes collection

Now, on the next page, Google Chrome will list all of the collection’s wallpapers. Turn on the Refresh Daily switch in the top-right corner of the pop-up window. Refer to below image:

Background 4
Enabling daily switch

Now, click Done to save your preferences. See below image:

Background 5
Your Done

Next, the new tab page on your Google Chrome browser will show a fresh backdrop from the “Seascapes” collection (or whichever collection you have chosen) every day.

If you like one of the background images, you can see the name of the current background’s creator and its source in the bottom-left corner of the new tab page. See following image:

Background 6
Info about the backdrop

There are plenty of other ways that you can customize Google Chrome, such as edit more elements of the new tab page, or create your own browser theme.

Quote For the Day

Only two things are infinite, the universe and human stupidity, and I’m not sure about the former.

Albert Einstein

I like this little known feature of Chrome. Please feel free to share this post! One way to share is via Twitter.

Just click the Tweet icon below. This will launch Twitter where you click its icon to post the Tweet.

Check out TechSavvy.Life for blog posts on smartphones, PCs, and Macs! You may email us at contact@techsavvy.life for comments or questions.

I Would Like to Hear From You

Please feel free to leave a comment. I would love hearing from you. Do you have a computer or smart device tech question? I will do my best to answer your inquiry. Just send an email to contact@techsavvy.life. Please mention the device, app and version that you are using. To help us out, you can send screenshots of your data related to your question.

The author’s Vietnam eBook on the Battle for Tra Bong: Events and Aftermath