When you swipe right on your iPhone Lock or Home screen, you are presented with the Today View screen. On this screen are widgets from Apple main apps. If you want to customize this screen, you can add and customize widgets from Apple and/or third-party apps. Also, you can rearrange these widgets to your liking.
By default, Apple shows you the widgets from the Calendar, Siri App Suggestions, News, Weather and more. But that’s not all. When you go into the editing mode, you’ll discover that many of the apps that you have installed (whether they’re popular apps or not) include useful widgets.
You can add extra functionality to your iPhone using third-party app widgets. Here are a couple of recommendations:
- Dictionary.com for adding a word of the day.
- PCalc Lite for adding a calculator.
This is for iPhone and iPad devices. Text and screenshots are for the iPhone.
Accessing Your Widgets
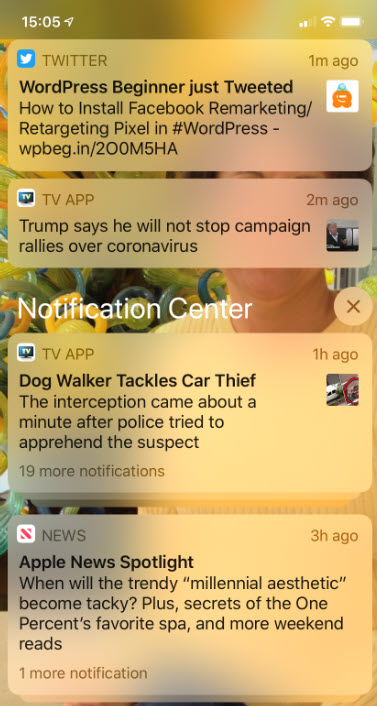
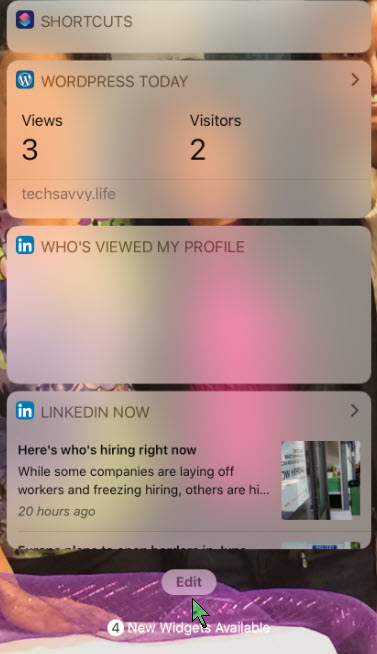
Lets get started. First, swipe right when you’re on your iPhone’s Lock or Home screen to access the Today View. Here, you can swipe up to view more widgets and tap on any of the arrow buttons (to the right of the widget name) to expand or contract a widget. Refer to below image:

Editing a Widget
If we want to edit a widget, swipe all the way down to the bottom of the widgets screen and tap on the Edit button. See below image:
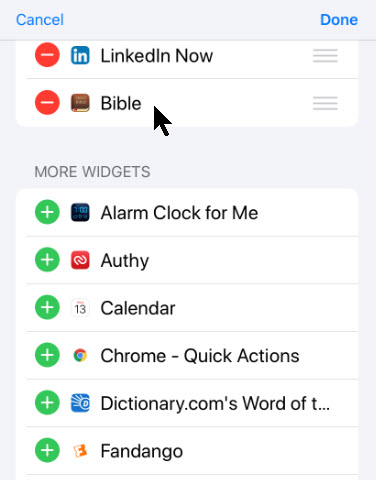
At the top of the list are the widgets installed on your iPhone, they have a “-“ sign next to the widget name. See following image:

Scroll down till you see the More Widgets listing, denoted by the “+” sign. Refer to below image:

Adding a Widget
When you see a widget you want to add, tap on that “+” sign next to the widget label. It will be added to the bottom of the enabled widgets list. Simply do this for each widget you want to add. In my example, I added the Bible widget. See following screen:
Remove a Widget
To remove a widget, navigate to the top of the list for the enabled widgets. Tap the “-“ sign left of the widget name, then tap the Remove option. Refer to below image for my removal of the Dropbox widget:

This does not delete the iPhone app, only the widget associated with it.
Reorder Widgets
To reorder widgets, tap on the Hamburger icon to the right of the widget name and drag each item to a new location. See following image where I moved Siri App Suggestions to the top of the list:

Saving Your Changes
To save all your changes, tap Done in upper right hand corner at the top of your enabled widgets list. Refer to below image:

Note: Your must tap the Done option, if not, all your changes will be lost.
You will be taken back to the Today View with your saved changes.
When you add new apps, you can go back to the Edit screen and add new widgets to the Today View by following the above steps.
Checking if an App Has a Widget
To see if a widget is available for an app, press and hold the app icon. If it supports widgets, you will see the Add Widget link. Tap on it to add the widget to the bottom of Today View screen. See following image where I added back the Dropbox widget:

As a confirmation, the Add Widget link will be replaced with a check mark. Refer to below image:

That’s it. You have learned how to add, remove and rearrange your iPhone widgets. The process is similar for an iPad.
Feel free to tweet me. Thanks for reading this post and others.
Tweet
I Would Like to Hear From You
Please feel free to leave a comment. I would love hearing from you. Do you have a computer or smart device tech question? I will do my best to answer your inquiry. Please mention the device, app and version that you are using. To help us out, you can send screenshots of your data related to your question.