What Is the Green Dot on Facebook and Messenger

Wondering why Facebook displays a green dot on someone’s profile picture, in the Messenger app, and next to the camera icon in Messenger? What the green dot means is context-dependent.

RAYMOND OGLESBY @RaymondOglesby2
September 19, 2023

This is for mobile devices and desktops using Facebook and Messenger. Screenshots are from Windows 10

Wondering why Facebook displays a green dot on someone’s profile picture, in the Messenger app, and next to the camera icon in Messenger? What the green dot means is context-dependent. Let’s decode this green dot.

Key Points

  •  The green dot on someone’s Facebook profile picture indicates that they are active on the Facebook platform, whether on the site, through the app, or on the Messenger app.
  •  In Facebook Messenger, the green dot next to people’s profile pictures confirms that they are currently active on Facebook, either through Messenger, the app, or the site.
  •  A green dot next to the camera icon in Messenger means that the user is available for a video call.
  • Disable the feature so others do not know you are active on Facebook or Messenger.

Green Dot on Facebook

On Facebook’s desktop site or mobile app, when you visit someone’s profile page, you might have seen a green dot. This green dot indicates that the user is active on the Facebook platform. Refer to the below image:

Green Dot 1
The user is active on the Facebook platform

The dot does not necessarily mean the user is active on the Facebook site. The user may be using the Facebook app or even the Messenger app. But if you see it, it means the user is active somewhere within the Facebook network and it can stand in as an online indicator.

Green Dot on Messenger

While scrolling chat lists in the Messenger app, you may have seen green dots appearing in the bottom-right corner of people’s profile pictures. These green dots indicate that those users are currently active on Facebook. See the below image:

Green Dot 2

Those users may be active on Messenger, the Facebook app, or the Facebook site. The dot just indicates that they are active somewhere on the Facebook platform.

Green Dot Next to Camera Icon on Messenger

When you see a green dot next to the camera icon in the Messenger app, it means that the user is available for a video call in the app. This indicator is separate from the profile picture indicator we discussed in the previous two sections and only references video call availability. See the following image:

Green Dot 3
The user is available for a video call

So when you see the camera-adjacent green dot you know the user has Messenger installed, and it’s possible for you to initiate a video call with them.

Disable Active Status on Desktop Facebook Website

  1. In a browser, log in to Facebook and then click the Messenger icon in the top-right corner of the page.
  2. Click the Menu icon (three dots)  at the top of the chats window.
  3. Click Active Status.
  4. Toggle off the switch next to Active Status: ON to disable it. The switch will be turned OFF.

You can enable the Active Status at any time. by toggling the switch to the ON position.

Note! A couple of additional options in the Active Status window allow you to appear active for some friends, but not others, and vice versa. Simply tap the edit button to select which friends you want to include in either list. Refer to the below image:

Green Dot 4
Active Status options

You can disable the feature on your mobile device but it’s more complicated.

Disclaimer

Technology is always changing and rarely is there static tech for smartphones and desktops. Thus, the contents of this post are only valid at the time of writing. Blog posts older than six months may have directions incompatible with your device or OS. Hopefully, older post content will continue to work as advertised. Thank you for reading TechSavvy.Life for Technology at Work For You.

Quote For the Day

When you find an idea that you just can’t stop thinking about, that’s probably a good one to pursue.

Josh James

Tweet Info

You are finished. Please feel free to share this post! One way to share is via Twitter.

Just click the Tweet icon below. This will launch Twitter where you click its icon to post the Tweet.

Checkout TechSavvy.Life for blog posts on smartphones, PCs, and Macs! You may email us at contact@techsavvy.life for comments or questions.

I Would Like to Hear From You

Please feel free to leave a comment. I would love to hear from you. Do you have a computer or smart device tech question? I will do my best to answer your inquiry. Just send an email to contact@techsavvy.life. Please mention the device, app, and version you are using. To help us out, you can send screenshots of your data related to your question.

Author’s E-Book

You can access the e-book from a Kindle device, the Kindle App for the desktop or smartphone, which is a free app.

The author’s Vietnam eBook on the Battle for Tra Bong Vietnam: Events and Aftermath

How to Hide and Unhide Spotify Songs

If you do not wish to listen to certain songs or hide those songs so they do not play when you are using Spotify, we will show you how. You can unhide your songs in the future if you change your mind.

RAYMOND OGLESBY @RaymondOglesby2
September 12, 2023

This is for iPhone and Android. Screenshots are from iPhone 14 Pro running iOS 16+ and Windows 10

If you do not wish to listen to certain songs or hide those songs so they do not play when you are using Spotify, we will show you how. You can unhide your songs in the future if you change your mind.

Note: You can not hide songs in your own playlists. If you do not want a specific song in your playlist, simply remove it from the list.

Hide Songs on Spotify

To hide a song so it does not play when you are listening to your music, use the following steps in the Spotify app on your iPhone or Android phone.

First, launch Spotify on your phone and find the music track to hide. Then, next to the song, tap the three dots (the Menu icon). Refer to the below image:

Spotify 1
Accessing the Menu of the song to Hide

Next, in the menu that opens, select Hide Song. See the below image:

Spotify 2
Selecting the option to Hide your song

Now, Spotify will immediately hide your song in your list. See the following image:

Spotify 3
Your hidden song is greyed out

Unhide Songs on Spotify

If you have changed your mind about a song and want to unhide that song, follow the following steps to see your hidden songs and unhide them.

First, open Spotify on your phone. Then, find the playlist or album where you hid your song.

Next, find your hidden song (which will be grayed out), and next to that song, tap the three dots (the Menu icon). Refer to the below image:

Spotify 4
Accessing the Menu to unhide a song

Now, in the open menu, select Hidden. See the below image:

Spotify 5
Selecting the option to unhide your song

Now, Spotify will unhide your song, allowing you to tap and play it. See the following image:

Spotify 6
Your hidden song is now visible


For Desktop Only

You can not hide songs on Spotify’s desktop and web versions. Only the platform’s mobile app allows you to hide and unhide songs, as of this writing.

If you have an unwanted song in your playlist (not a Spotify sample playlist), remove it from your list and the app will not play it. To do that, access your playlist and find that song. Next to the song, click the three dots (the Menu icon) and choose Remove from this playlist. See the following image:

Spotify 7
Selecting to remove your song on the desktop

Spotify will remove the selected song from your playlist, and you are all done.

Disclaimer

Technology is always changing and rarely is there static tech for smartphones and desktops. Thus, the contents of this post are only valid at the time of writing. Blog posts older than six months may have directions incompatible with your device or OS. Hopefully, older post content will continue to work as advertised. Thank you for reading TechSavvy.Life for Technology at Work For You.

Quote For the Day

“Motivation is what gets you started. Habit is what keeps you going.

Jim Rohn

Tweet Info

That’s it. Please feel free to share this post! One way to share is via Twitter.

Just click the Tweet icon below. This will launch Twitter where you click its icon to post the Tweet.

Checkout TechSavvy.Life for blog posts on smartphones, PCs, and Macs! You may email us at contact@techsavvy.life for comments or questions.

I Would Love to Hear From You

Please feel free to leave a comment. I would love to hear from you. Do you have a computer or smart device tech question? I will do my best to answer your inquiry. Just send an email to contact@techsavvy.life. Please mention the device, app, and version you are using. To help us out, you can send screenshots of your data related to your question.

Author’s E-Book

You can access the e-book from a Kindle device, the Kindle App for the desktop or smartphone, which is a free app.

The author’s Vietnam eBook on the Battle for Tra Bong Vietnam: Events and Aftermath

How to Scan a Document on iPhone and iPad

Scanners had their moment, but nowadays it’s not as necessary to own one. However, that does not mean you never need to scan a document or photo. Thankfully, you probably have some tools to do it without a scanner.

RAYMOND OGLESBY @RaymondOglesby2
September 5, 2023

This is for the iPhones and Tablets. Screenshots are from iPhone 14 Pro running iOS 16+

Scanners had their moment, but nowadays it’s not as necessary to own one. However, that does not mean you never need to scan a document or photo. Thankfully, you probably have some tools to do it without a scanner.

If you find yourself scanning a lot of documents and photos, it’s a good idea to invest in an actual scanner. Most people only need to scan a few things a year, so we will show you some good alternatives.

Scan Photos and Documents

A scanner is essentially just a camera that takes a photo of your document in a specific way. Well, you carry a camera with you every day, so why not use that as a scanner?

A smartphone camera is usually perfectly fine for getting the job done as a scanner. The results will not be as crisp and clear as an actual scanner, but it will get the point across. Here are some suggestions for taking photos of a document.

  • Lighting: Place the document on a flat surface with good lighting. Try to avoid casting a shadow on the document with your hand and phone.
  • Placement: Take the photo straight on to avoid any weird angles. This can be done directly above or at a right angle by propping up the document. Do whichever results in the best lighting with the fewest shadows.
  • Framing: Make sure to take the photo from far enough away so the entire document is in view. After you take the photo, crop it to the document so you do not see any of the surroundings.

The camera on your phone will suffice in many situations, but sometimes a more professional-looking scan is necessary. For that, you will want to turn to a document scanner app. You already have one installed on your iPhone, iPad, or Android phone.

Scan Using the Files App on iPhone

Phones and iPads have a built-in Document Scanner feature. This tool is not its own app, but you will find it both in Apple’s Files app and the Apple Notes app. Many websites suggest using the Notes app to scan a document, and that works fine; but you can also use the Files app, which is convenient if you just want to scan the document to a file.

To scan a document on an iPhone or iPad with the Files app, first, open the Files app and go to the location you want to save your scanned document to. For example, to keep it in your iCloud Drive, open the iCloud Drive location. To save it in your iPhone’s Downloads folder, open Downloads.

Next, tap the Menu button (it looks like a “”) at the top-right corner of the screen and tap Scan Documents to get started. Refer to the below image:

iPhone Scan 1
Selecting to scan from the Files app into the Downloads folder

Now, position the document in view of your iPhone or iPad’s camera and hold it still. Your device will automatically capture an image of the document, and you will see it flash on the screen. See the below image:

iPhone Scan 2
The scanned document in Files

Next, to scan a multi-page document, position the second page in view of your iPhone or iPad’s camera. Continue this process to capture as many pages as you like. When you are done, tap Save, and you will get a combined PDF file containing each page. See the following image:

iPhone Scan 3
The scanned document is in the Downloads folder

Scan Using the Notes App on iPhone

You can also use the Notes app to scan documents. First, open the Notes app on your iPhone or iPad, open an existing note or create a new note, tap the camera icon, and tap Scan Documents. The Notes app will then save your scanned documents as notes rather than files Refer to the below image:

iPhone Scan 4
Selecting to scan from the Notes app

Next, your saved document is in the Notes app. See the below image:

iPhone Scan 5
The scanned document in Notes
Disclaimer

Technology is always changing and rarely is there static tech for smartphones and desktops. Thus, the contents of this post are only valid at the time of writing. Blog posts older than six months may have directions incompatible with your device or OS. Hopefully, older post content will continue to work as advertised. Thank you for reading TechSavvy.Life for Technology at Work For You.

Quote For the Day

Whatever you’re thinking, think bigger.

Tony Hsieh

Tweet Info

That’s it. Please feel free to share this post! One way to share is via Twitter.

Just click the Tweet icon below. This will launch Twitter where you click its icon to post the Tweet.

Checkout TechSavvy.Life for blog posts on smartphones, PCs, and Macs! You may email us at contact@techsavvy.life for comments or questions.

I Would Like to Hear From You

Please feel free to leave a comment. I would love to hear from you. Do you have a computer or smart device tech question? I will do my best to answer your inquiry. Just send an email to contact@techsavvy.life. Please mention the device, app, and version you are using. To help us out, you can send screenshots of your data related to your question.

Author’s E-Book

You can access the e-book from a Kindle device, the Kindle App for the desktop or smartphone, which is a free app.

The author’s Vietnam eBook on the Battle for Tra Bong Vietnam: Events and Aftermath

How to Check Your Battery Charge Time for iPhone or iPad

Have you ever wanted to check how long it would take for your iPhone or iPad to charge completely? Maybe, you do not like to frequently check how much your device has charged? Well, this particular iOS shortcut intends to do just that. It’s pretty simple to set up and use on your device.

RAYMOND OGLESBY @RaymondOglesby2
August 29, 2023

This is for iPhone and iPad. Screenshots are from iPhone 14 Pro running iOS 16+

Have you ever wanted to check how long it would take for your iPhone or iPad to charge completely? Maybe, you do not like to frequently check how much your device has charged? Well, this particular iOS shortcut intends to do just that. It’s pretty simple to set up and use on your device.

Anyone could estimate that your iPhone can fully charge from 0 to 100% in roughly about 2-3 hours. But, this is a very rough estimation. The actual time it takes could vary anywhere between two and three hours, or sometimes even lower depending on whether you have enabled Airplane mode or not. The Charge Time iOS shortcut can make a far more approximate guess from the current battery percentage and tell you how long it’d take to fully charge if you plug it in.

For those unaware, the Shortcuts app is one of the stock apps for devices running iOS 13/iPadOS 13 or later. We will be using the Shortcuts app to determine the charging time for your device.

First, head to this Charge Time link and tap Get Shortcut to download the shortcut on your iPhone or iPad. This shortcut is not available on the App Store nor is it pre-loaded on your device. You can use the link above or perform a Google search to locate the shortcut.

There are other charging time shortcuts from various sources. This post is only for the Charge Time shortcut as mentioned above.

Note! You may receive a screen asking to enable cookies and other data. Select the items you wish to share.

Refer to the below image:

Charge Time 1
Get the shortcut

Next, the Shortcuts app will launch on your device and display the Charge Time shortcut. At the bottom, tap on Add Shortcut to proceed. See the below image:

Charge Time 2
Add the shortcut

Now, this will install the shortcut and add it to the All Shortcuts and My Shortcuts gallery. See the following image:

Charge Time 3
Added shortcut

Next, tap on the Charge Time shortcut to reveal its menu. From here, tap the Details option. Refer to the below image:

Charge Time 4
Accessing shortcut options

Now, tap the Add to Home Screen link. See the below image:

Charge Time 5
Add the shortcut to your Home screen

Next, a preview screen will display the Charge Time shortcut. At the top of this screen, tap Add. See the following image:

Charge Time 6
Shortcut preview screen

Now, the Charge Time shortcut will be added to your Home screen (the first empty space it finds). Refer to the below image:

Charge Time 7
Shortcut added to your Home screen

Next, simply tap on the Charge Time icon. You will get a pop-up message at the top of your screen stating how long it will take for your device to charge to 100%. Tap Done or Cancel (depending on if you have made any changes) to close the pop-up. See the below image:

Charge Time 8
Results of running your shortcut

Before closing the pop-up message, you have more options. Long press on the pop-up message. At the top of the screen, you will notice a down arrow next to the message.

If you say, “Hey Siri, Charge Time”; the shortcut will run but you are unable to use a long press on the pop-up message to view options.

See the following image:

Charge Time 9
Accessing the drop-down arrow

Now, tap on this down arrow to upload as a text document, save to Files or Print. Finally, to exit, tap Done. Refer to the following image:

Charge Time 10
Options for the shortcut

That’s pretty much all you have to do.

It’s important to note the result you get is just an approximate value and not completely accurate to the minute.

As useful as this shortcut is, we would like to point out that there’s one major downside to it. This might be a dealbreaker for a lot of users. The Charge Time shortcut only takes into account the standard charger that comes in the box with your iPhone. Nowadays, people use fast chargers, wireless chargers, or even MagSafe to charge their iPhones, and if you are one of them, this shortcut will not be helpful.

Having said that, there are still plenty of iPhone owners who did not purchase the optional fast charger and instead use the one that came in the box, so it’s not like the shortcut is useless at all. Hopefully, this shortcut was useful for you.

Disclaimer

Technology is always changing and rarely is there static tech for smartphones and desktops. Thus, the contents of this post are only valid at the time of writing. Blog posts older than six months may have directions incompatible with your device or OS. Hopefully, older post content will continue to work as advertised. Thank you for reading TechSavvy.Life for Technology at Work For You.

Customers don’t care about your solution. They care about their problems.

Dave McClure

That’s it. Please feel free to share this post! One way to share is via Twitter.

Just click the Tweet icon below. This will launch Twitter where you click its icon to post the Tweet.

Checkout TechSavvy.Life for blog posts on smartphones, PCs, and Macs! You may email us at contact@techsavvy.life for comments or questions.

Please feel free to leave a comment. I would love to hear from you. Do you have a computer or smart device tech question? I will do my best to answer your inquiry. Just send an email to contact@techsavvy.life. Please mention the device, app, and version you are using. To help us out, you can send screenshots of your data related to your question.

You can access the e-book from a Kindle device, the Kindle App for the desktop or smartphone, which is a free app.

The author’s Vietnam eBook on the Battle for Tra Bong Vietnam: Events and Aftermath

How to Use Google Lens

Google Lens is an image and text recognition app that uses Google Search to deliver results based on what it sees in photos.

RAYMOND OGLESBY @RaymondOglesby2
August 22, 2023

This is for iPhone, iPad, Android, and Desktop. Screenshots are from iPhone and Windows 10

Google Lens is an image and text recognition app that uses Google Search to deliver results based on what it sees in photos.

You have probably seen the colorful camera icon in the Google Search bar or the Google app. It’s an unassuming shortcut that leads to a variety of impressive abilities. This is Google Lens, and it’s a Google app you should know.

What is Google Lens

Google Lens is most easily described as the visual component of Google Search. You typically do Google Searches with HR text queries, but Google Lens uses images and your camera as input. It identifies things in images; such as QR codes, plants, text, and products; then delivers information or search results related to the object or text.

Long-time smartphone users may remember an app called “Google Goggles.” It was launched in 2010, and it was one of our first looks at what image recognition software could do with the cameras we were starting to carry around with us everywhere. Goggles was the precursor to Google Lens.

Google Lens was officially launched in 2017 and pre-installed on the Pixel 2 smartphone. Since then, Lens has slowly crept into more and more Google services: Google Assistant, Google Search, and Google Photos. Google Lens will also be integrated with the company’s AI chatbot, Google Bard.

What Does Google Lens Do

Google Lens essentially lets you do Google Searches by simply pointing your camera at things. What it can do with what it sees is pretty amazing. Google Lens can tell you a lot more than just what you’re looking at.

Got a math equation that you can not figure out? Do not bother typing the whole thing into your calculator point Google Lens at it. See some text in the real world that you do not feel like manually typing? Snap a photo and let Google Lens copy it for you. Find a weird bug in your backyard that you are not sure about? Google Lens can identify it for you.

These are just some of the simple things you can do with Google Lens. It can also read text from the real world out loud, translate text, search the web for an image you found, and tell you where to buy something you see out in the world.

How to Use

Google Lens is available in the Google app for iPhone, iPad, and Android; simply tap the colorful camera icon in the search bar. In a desktop browser such as Google Chrome or Microsoft Edge, you can use Lens by clicking the icon in the search bar on Google.com.

Using an iPhone, iPad, and Android

To use Google Lens on the iPhone, iPad, and Android, first, open the Google app and tap the colorful camera icon on the right side of the search bar. Refer to the below image:

Google Lens 1
Selecting Google Lens

Next, you can choose from different functions under the shutter button before pointing your camera at an object or text and snapping a photo. See the below image:

Google Lens 2
Accessing your search

Now, you can also use photos you already took from the section under the viewfinder for Lens searches. See the following image:

Google Lens 3
Choosing an image

That’s how easy it is to use Google Lens! If you have an Android phone, you may also be able to use Lens directly from one of the multiple modes in the camera app.

Using on the Desktop

To use Google Lens on the web, in a desktop browser such as Google Chrome or Microsoft Edge, first head to Google.com and tap the colorful camera icon on the right side of the search bar. Refer to the below image:

Google Lens 4
Selecting Google Lens

Next, you can either drag a photo into the box, browse for a photo on your device, or paste a link to a photo. See the below image:

Google Lens 5
Drag and Drop an image to search

Now you can select text in the image, see visually similar images, or click Find the Image Source to try and find where the image originated from. See the following image:

Google Lens 6
Your image search results
Disclaimer

Technology is always changing and rarely is there static tech for smartphones and desktops. Thus, the contents of this post are only valid at the time of writing. Blog posts older than six months may have directions incompatible with your device or OS. Hopefully, older post content will continue to work as advertised. Thank you for reading TechSavvy.Life for Technology at Work For You.

Quote For the Day

Tribalism is a social form which can exist at any level of technology. It’s a complete illusion to associate it with low levels of technology. It is probably, in fact, a form of social organization second only to the family in its ability to endure.

Terance McKenna

Tweet Info

That’s it. Please feel free to share this post! One way to share is via Twitter.

Just click the Tweet icon below. This will launch Twitter where you click its icon to post the Tweet.

Checkout TechSavvy.Life for blog posts on smartphones, PCs, and Macs! You may email us at contact@techsavvy.life for comments or questions.

I Would Like to Hear From You

Please feel free to leave a comment. I would love to hear from you. Do you have a computer or smart device tech question? I will do my best to answer your inquiry. Just send an email to contact@techsavvy.life. Please mention the device, app, and version you are using. To help us out, you can send screenshots of your data related to your question.

Author’s E-Book

You can access the e-book from a Kindle device, the Kindle App for the desktop or smartphone, which is a free app.

The author’s Vietnam eBook on the Battle for Tra Bong Vietnam: Events and Aftermath

Five Ways to Tell if Your iPhone or Android is Being Tapped

To see if your phone is being tapped, look for apps using too much battery or data, listen for weird noises in phone calls, and watch for weird behavior like random mic activation or redirected websites. You can also use MMI or USSD codes to check your call forwarding status.

RAYMOND OGLESBY @RaymondOglesby2
August 15, 2023

This is for the iPhone and Android. Screenshots are from iPhone 14 Pro running iOS 16+

For better or worse, our smartphones are always with us, so if someone taps into the camera or mic, it’s a serious problem. But how can you tell if your phone is being tapped, and how do you protect yourself?

How to Tell

If someone gains access to your phone they can potentially send fake emails, read your personal messages, record your calls, and all sorts of other nefarious behavior. But can you even tell if someone’s hacked your phone? Let’s explore a few ways to find out.

1) Battery Life is Failing

If your phone constantly overheats seemingly for no reason and the battery drains quickly without any apparent cause, your phone might be hacked. Malicious software running in the background can drain your battery without any apps running and can be anything from malware that’s reading your email to call-recording spyware.

If you are already a heavy phone user, your battery probably gets hot anyway. Streaming video or playing games for long periods of time, for example, will cause your phone to heat up which is pretty normal. If you have not been using your phone a lot and the battery still heats up or can no longer hold a charge, you might want to check for malicious software.

To do that, check your battery settings. On either an Android or iPhone you can see which apps are using the most battery by going to:

Settings > Battery

where you will see which apps are using the most power. If there are apps on that list you do not remember installing, or a third-party app that should not be using much power, uninstall them immediately. Refer to the below image:

iPhone Tapped 1
Battery Settings

2) Weird Noises

A high-pitched hum or strange, pulsating static on the line could be a sign your calls are being recorded. If you hear static or other strange sounds like clicking or beeping even when you are not calling someone, that’s another sign, especially when your phone’s been tapped by the police.

Hearing these sounds once or twice at random is probably okay, but if it happens consistently, check your phone. You can try using a sound-bandwidth sensor app from another phone set to a low frequency. If it picks up several sounds over a minute, your phone may be compromised.

3) High Data Use

Spyware and malware will routinely use a lot of data; constantly sending information back to whoever hacked your device. If your location or data icons at the top of your screen regularly move or light up, that could be a sign someone is sending data from your phone or controlling it remotely. Higher than normal data use can also show up as a higher phone bill if you do not have an unlimited data plan.

iPhones and Android phones both let you check your data usage to see if your phone is (possibly) tapped. To do it on an iPhone, go to:

Settings > Cellular

See the below image:

iPhone Tapped 2
Cellular Settings

On Android, go to

Settings > Network & Internet

It may also be under:

Connections > Data usage or > Mobile data usage.

4) Unusual Activity

If your phone has trouble shutting down, that could be a sign it’s being tapped. Randomly shutting down on its own is another sign of trouble. When turning off your phone, check to see if the backlight stays on even when the phone is powered off or if the shutdown fails altogether.

Other strange behaviors your phone could exhibit if it’s been compromised include popup ads, the screen lighting up at random, and messages you do not recognize that push you to follow unfamiliar links. Also, performance often slows way down.

Watch out for your camera or mic turning on randomly. If you keep seeing the camera light go on when you did not open an app that uses the camera, it could be a sign your phone’s been hacked. Some malicious software lets hackers access your camera without turning the light on, so always dig deeper if you think something’s fishy.

5) Websites Look Strange

Some forms of malicious software can infiltrate your browser, showing you a fake web page that looks legitimate, then harvesting your login credentials when you type them in. If you are browsing on your phone and the web page you are looking at acts strange or does not look quite like it’s supposed to, close the browser and check your phone for malware by scanning it or taking it to a professional.

Protect Your Phone From Being Tapped

If you want to make sure your phone is never compromised, avoid downloading any apps that are not from the Google Play Store or Apple’s App Store. Even when using the mainstream app stores, though, do a Google search of the app and the developer to double-check that they are on the level before you download; bad apps can and do occasionally get past their vetting processes.

Download trusted anti-malware and antivirus apps and use them regularly. If you can afford a premium subscription, do it. If not, there are some great free options available.

Using a VPN to obscure your true IP address can make it harder for someone who’s trying to track you to pin down your location. If you can, try a few out and use one regularly when are in public or on an unsecured connection

.You can also check and see whether your calls and messages are being forwarded to other devices using Man-Machine Interface (MMI) codes. They will be different depending on the network but can allow you to discover and cut off any unauthorized forwarding. To use them, dial the desired MMI code with your keypad, then hit the call button.

If you are on a GSM network (like AT&T and T-Mobile):

  • *#002# — Lists all call and data forwarding settings
  • ##002# — Clears all call and data forwarding settings

If you’re on a CDMA network (like Verizon and US Cellular):

  • *72 — Lists all call and data forwarding settings
  • *73 — Clears all call and data forwarding settings

Unfortunately, MMI codes only work on Android devices, but you can use the USSD (Unstructured Supplementary Service Data) code *#21# on an iPhone to check your call forwarding status and see if your calls are being forwarded anywhere else.

If you are done your due diligence but you are still experiencing these symptoms, take your phone to a professional. Odds are they will have the tools to scan more deeply and remove any bad software that could be causing the problem.

Disclaimer

Technology is always changing and rarely is there static tech for smartphones and desktops. Thus, the contents of this post are only valid at the time of writing. Blog posts older than six months may have directions incompatible with your device or OS. Hopefully, older post content will continue to work as advertised. Thank you for reading TechSavvy.Life for Technology at Work For You.

Quote For the Day

Our inventions are wont to be pretty toys, which distract our attention from serious things. They are but improved means to an unimproved end.

David Thoreau

Tweet Info

That’s it. Please feel free to share this post! One way to share is via Twitter.

Just click the Tweet icon below. This will launch Twitter where you click its icon to post the Tweet.

Checkout TechSavvy.Life for blog posts on smartphones, PCs, and Macs! You may email us at contact@techsavvy.life for comments or questions.

I Would Like to Hear From You

Please feel free to leave a comment. I would love to hear from you. Do you have a computer or smart device tech question? I will do my best to answer your inquiry. Just send an email to contact@techsavvy.life. Please mention the device, app, and version you are using. To help us out, you can send screenshots of your data related to your question.

Author’s E-Book

You can access the e-book from a Kindle device, the Kindle App for the desktop or smartphone, which is a free app.

The author’s Vietnam eBook on the Battle for Tra Bong Vietnam: Events and Aftermath

How to Create and Open Zip Files on iPhone or iPad

The days of pulling your hair out and trying to deal with zip files on your iPhone or iPad are behind us. Thanks to the Files app, it’s pretty easy to unzip files and create zip files.

RAYMOND OGLESBY @RaymondOglesby2
August 1, 2023

This is for the iPhone and iPad. Screenshots are from iPhone 14 Pro running iOS 16+
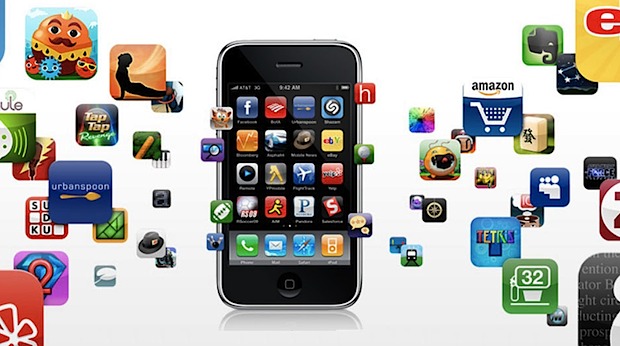
The days of pulling your hair out and trying to deal with zip files on your iPhone or iPad are behind us. Thanks to the Files app, it’s pretty easy to unzip files and create zip files. Let’s explore this feature.

Introduced in iOS 11, the Files app was a long-requested feature for both the iPhone and iPad. It drastically improved file management capabilities and made it easy to deal with zip files without additional apps or hacks.

Create a Zip File

First, open the Files app. Refer to the below image:

Zip 1
Open the Files app

Next, navigate to the files or folders you would like to zip. See the below image:

Zip 2
Locating Files or Folders to Zip

Now, tap the three-dot Menu icon and choose Select. The Select option is visible on an iPad in the top bar without the menu. See the following image:

Zip 3
Accessing the Select option

Next, select all the files or folders you would like to zip together. Refer to the below image:

Zip 4
Selecting Files or Folders to Zip

Now, with the files selected, tap the three-dot Menu icon in the bottom right and choose Compress. See the below image:

Zip 5
Selecting the Compress option

The zip file will be created. Press and hold the zip file to see the option to Rename it or Move it somewhere else. See the following image:

Zip 6
Choosing to Rename the Zip file

That’s all there is to it! Files management was a pain to deal with on the iPhone and iPad for a long time, but the Files app swiftly fixed that situation.

Open a Zip File

First, open the Files app. Refer to the below image:

Zip 7
Open the Files app

Next, navigate to the zip file’s location. If you downloaded it to your iPhone, it will likely be in the Download folder under On My iPhone.

Now, tap the file to unzip it. Your iPhone will extract the zip file’s contents to the current folder. See the below image:

Zip 8
Opening the Zip file

That’s really all there is to it. Apple just assumes that if you are selecting a zip file you probably want to open it. If you want to take a peek inside without unzipping the file, press, and hold, then select Quick Look from the menu (see the last image under Create a Zip File to see the option).

Disclaimer

Technology is always changing and rarely is there static tech for smartphones and desktops. Thus, the contents of this post are only valid at the time of writing. Blog posts older than six months may have directions incompatible with your device or OS. Hopefully, older post content will continue to work as advertised. Thank you for reading TechSavvy.Life for Technology at Work For You.

Quote For the Day

Most of the time spent wrestling with technologies that don’t quite work yet is just not worth it for end users, however much fun it is for nerds.

Douglas Adams

Tweet Info

That’s it. Please feel free to share this post! One way to share is via Twitter.

Just click the Tweet icon below. This will launch Twitter where you click its icon to post the Tweet.

Checkout TechSavvy.Life for blog posts on smartphones, PCs, and Macs! You may email us at contact@techsavvy.life for comments or questions.

I Would Like to Hear From You

Please feel free to leave a comment. I would love to hear from you. Do you have a computer or smart device tech question? I will do my best to answer your inquiry. Just send an email to contact@techsavvy.life. Please mention the device, app, and version you are using. To help us out, you can send screenshots of your data related to your question.

Author’s E-Book

You can access the e-book from a Kindle device, the Kindle App for the desktop or smartphone, which is a free app.

The author’s Vietnam eBook on the Battle for Tra Bong Vietnam: Events and Aftermath

How to Make a Slideshow on Google Photos

Using Google Photos‘ slideshow feature, you can have all or specific album photos play one after another automatically. You can make this slideshow on both your desktop and your mobile device.

RAYMOND OGLESBY @RaymondOglesby2
July 25, 2023

This is for the desktop and smartphones. Screenshots are from Windows 10 and iPhone 14 Pro running iOS 16+

Using Google Photos‘ slideshow feature, you can have all or specific album photos play one after another automatically. You can make this slideshow on both your desktop and your mobile device. Let’s explore how this is done.

On Your Desktop

To create a slideshow on your desktop computer, first, open a web browser and launch the Google Photos site. Sign in to your account on the site if you have not already.

Next, once you see your photos, if you want to include all your photos in the slideshow, then click the first photo on the main screen to open it in full screen.

Now, once the photo opens in full screen, at the top-right corner, click the three dots (the Menu icon). Refer to the below image:

Photos 1
Selecting the Menu icon

Next, in the menu that opens, click Slideshow. See the below image:

Photos 2
Selecting the Slideshow option

Now, your browser will go full screen and your slideshow will start playing. Sit back, relax, and enjoy recollecting your memories with your photos.

Next, you can stop the slideshow at any time by pressing the Esc key on your keyboard. See the following image:

Photos 3
Exiting the Slideshow

Now, if you would like to make a slideshow using photos from a specific album, then access that album on Google Photos. On the album page, in the top-right corner, click the three dots (the Menu icon). Refer to the below image:

Photos 4
Selecting the Menu icon

Next, from the three dots (the Menu icon), select Slideshow to start playing your photos. You can close the slideshow by pressing the Esc key. See the below image:

Photos 5
Selecting the Slideshow option

On Your Mobile

To play your photos slideshow on your phone, first, launch the Google Photos app on your phone.

Next, to include all your photos in the slideshow, then tap the first photo on the main screen.

Now, when your photo opens in full screen, in the top-right corner, tap the three dots (the Menu icon). See the following image:

Photos 6
Selecting the Menu icon

Next, from the three dots (the Menu icon), select Slideshow to start playing your photos. Refer to the below image:

Photos 7
Selecting the Slideshow option

Now, Google Photos will start playing a slideshow for all your photos. If you would like to stop this slideshow, tap anywhere on the screen then tap Done in the top-left corner. See the below image:

Photos 8
Exiting the Slideshow

To create a slideshow using photos from a particular album, first, tap Library and choose your photo album. Select the first photo in the album, then in the top-right corner, tap the three dots (the Menu icon). See the following image:

Photos 9
Selecting the Menu icon

Next, in the menu that opens, tap Slideshow. Refer to the below image:

Photos 10
Selecting the Slideshow option

Now, your slideshow containing photos only from the selected album will play. If you would like to stop this slideshow, tap anywhere on the screen then tap Done in the top-left corner. See the below image:

Photos 11
Exiting the Slideshow

Disclaimer

Technology is always changing; there is rarely static tech for smartphones and desktops. Thus, the contents of this post are only valid at the time of writing. Blog posts older than six months may have directions incompatible with your device or OS. Hopefully, older post content will continue to work as advertised. Thank you for reading TechSavvy.Life for Technology at Work For You.

Quote for the Day

My view is that if your philosophy is not unsettled daily then you are blind to all the universe has to offer.

Neil deGrasse Tyson

Tweet Info

That’s it. Please feel free to share this post! One way to share is via Twitter.

Just click the Tweet icon below. This will launch Twitter where you click its icon to post the Tweet.

Checkout TechSavvy.Life for blog posts on smartphones, PCs, and Macs! You may email us at contact@techsavvy.life for comments or questions.

Author’s E-Book

You can access the e-book from a Kindle device, the Kindle App for the desktop or smartphone, which is a free app.

The author’s Vietnam eBook on the Battle for Tra Bong Vietnam: Events and Aftermath

Threads the New Social Media App

Meta, formerly known as Facebook, has made a history of copying features from other platforms. This time, Meta has launched Threads, a social media app connected to Instagram that works more like Twitter and should eventually connect to Mastodon.

RAYMOND OGLESBY @RaymondOglesby2
July 18, 2023

As of this writing, We have reached 50,000 views in 487 posts!!!

This is for devices that use social media

Meta, formerly known as Facebook, has made a history of copying features from other platforms. This time, Meta has launched Threads, a social media app connected to Instagram that works more like Twitter and should eventually connect to Mastodon.

Meta, as the maker of Facebook, Instagram, and WhatsApp, has been after Twitter for many, many years. The company attempted to buy Twitter back in 2008, but that did not work out. Last year, Elon Musk acquired Twitter, and then promptly ran it into the ground. That has led to a surge in popularity for Twitter-like platforms, and now Meta’s app is live.

What Is Threads

Threads is a micro-blogging platform that looks and feels just like Twitter, letting you post texts up to 500 characters. This is almost twice Twitter’s 280-character standard limit, but still just enough for posts to not look like so much text. The platform itself is heavily linked to Instagram, and if you have an Instagram account, you can sign up for Threads with a couple of taps. All handles are pre-reserved; your username on Instagram will be your username on Threads. Refer to the below image of Threads:

Threads 2

Threads is actually seeing plenty of adoption, with the platform getting up to 20 million users within the first hours of launch. However, many of those accounts are brands instead of actual people. Instagram’s user base is in the billions, so we can only expect this number to keep increasing as time passes.

As it keeps growing, we can also expect a number of other changes, too. Threads is supposed to play nice with Mastodon and the Fediverse, and it will be getting ActivityPub support down the road. The exact degree to which Mastodon and Threads will be interoperable remains to be seen, but you will be able to follow and interact with Mastodon users from Threads. Likewise, Mastodon users will be able to follow Threads users by using their full username, such as “@john@threads.net.”

Pause Before You Download

Be aware of Threads Privacy Policy and the Dara the app collects. In our opinion, the app collects way too much data about you. This includes Data from your: Health/Fitness, Financial info, Contact info, User Content, Browsing history, Usage data, Diagnostics, Purchases, Location, Contacts, Search history, Identifiers, Sensitive data, and Other data.

In contrast, Facebook and Instagram only track Contact info, Identifiers, and Other data.

According to its Privacy Policy, you cannot delete your Threads account, until you delete your Instagram account. You can deactivate your Threads account at any time but you can not delete your Threads account without also deleting your Instagram account.

Our Summary

We recommend you wait until the Data collection and Privacy Policy issues are addressed.

If You Want to Download the App

If you want to give it a spin, Threads is now available from the Apple App Store and the Google Play Store. In the Apple App Store and Google Play Store, the app name is “Threads, an Instagram app”. There are other Threads apps, so ensure you download the correct one.

Disclaimer

Technology is always changing and rarely is there static tech for smartphones and desktops. Thus, the contents of this post are only valid at the time of writing. Blog posts older than six months may have directions incompatible with your device or OS. Hopefully, older post content will continue to work as advertised. Thank you for reading TechSavvy.Life for Technology at Work For You.

Quote For the Day

Always deliver more than expected.

Larry Page

Tweet Info

That’s it. Please feel free to share this post! One way to share is via Twitter.

Just click the Tweet icon below. This will launch Twitter where you click its icon to post the Tweet.

Just click the Tweet icon below. This will launch Twitter where you click its icon to post the Tweet.

I Would Like to Hear From You

Please feel free to leave a comment. I would love to hear from you. Do you have a computer or smart device tech question? I will do my best to answer your inquiry. Just send an email to contact@techsavvy.life. Please mention the device, app, and version you are using. To help us out, you can send screenshots of your data related to your question.

Author’s E-Book

You can access the e-book from a Kindle device, the Kindle App for the desktop or smartphone, which is a free app.

The author’s Vietnam eBook on the Battle for Tra Bong Vietnam: Events and Aftermath

How to Save iPhone Voicemails

The Visual Voicemail feature on iPhone makes it super easy to access and manage your voicemails, freeing you from the drudgery of dialing a number and doing it the old-fashioned way. Not only that, but it also lets you save important voicemails to your iPhone with just a few steps.

RAYMOND OGLESBY @RaymondOglesby2
July 4, 2023

This is for the iPhone. Screenshots from iPhone Pro 14 running iOS 16+

The Visual Voicemail feature on iPhone makes it super easy to access and manage your voicemails, freeing you from the drudgery of dialing a number and doing it the old-fashioned way. Not only that, but it also lets you save important voicemails to your iPhone with just a few steps. Let’s explore how this is done.

Save Voicemails on iPhone

First, open the Phone app and choose the Voicemail tab in the bottom right-hand corner. Refer to the below image:

Voicemail 1
Selecting the Voicemail tab

Next, you should see a list of your voicemails. Scroll to the message you want to save and tap it. This will bring up a pop-up window with several controls, including a play button, speaker icon, and phone button. On the top right, you will see a Share button that looks like a box with an arrow coming out of it. Tap it to bring up the share sheet and see all the possible ways you can save or share your voicemail. See the below image:

Voicemail 2
Selecting the Share button

Now, to save the voicemail locally on your iPhone,, select Save to Files and then On My iPhone. Choose a folder where you want to store the voicemail and hit Save.

Voicemails displayed here are stored on your cellular carrier’s servers until you download them.

You can also save the voicemail directly to a cloud storage service like iCloud. To do so, choose the Save to Files option (same as above) from the Share menu. See the following image:

Voicemail 3
Selecting the Save to Files option

Next, select iCloud Drive or Google Drive under the list of storage locations. Refer to the below image:

Voicemail 4
Choosing a location to save the voicemail

If you wish to export voicemails to your Mac or IPad, you can use AirDrop. From the Share menu, tap the AirDrop icon and choose your Mac or iPad. Ensure the receiving device has AirDrop set to receive from Contacts only. The file will be transferred instantly and saved to the Downloads folder on the receiving device. See the below image:

Voicemail 5
Selecting the Airdrop button

This approach only works if your carrier offers Visual Voicemails support. If you can see a list of voicemails when you open the Voicemail tab, your carrier supports the feature. On the other hand, if your carrier requires dialing in or other methods for accessing your messages, this method will not work.

Save Noicemails Without Visual Voicemail

You can also use Screen Recording to save and share voicemails. This is a great workaround if you do not have access to Visual Voicemail and thus can not save messages using the standard method discussed above. This method also comes in handy if you want to capture additional context along with the voicemail contents, such as caller ID and timestamps.

Tip: This will also let you save audio “voicemails” and video messages from apps that do not normally allow you to save or download those messages.

First, to screen record a voicemail, use the Screen Recorder. First, swipe down to reveal Control Center and tap the Screen Recording button. See the following image:

Voicemail 6
Selecting the Screen Recording button

If you do not see the button, go to:

Settings > Control Center > More Controls

and add the Screen Recording toggle by clicking the green + icon. Refer to the below image:

Voicemail 7
Finding the Screen Recording option

Also, make sure you have turned on the microphone in the Screen Recording settings, or your recording will have no audio. You can check this by holding the Screen Recording toggle. Lastly, head to the Phone app, play the voicemail through the speaker, and let Screen Recording do its job.

Next, tap the Screen Recording button when you are done to finish saving the recording. The screen recording will be saved to the Photos app.

After exporting your voicemails to your iPhone, it’ll be a good idea to back them up to a cloud storage service such as iCloud or Google Drive. This will allow you to easily access your messages from other devices, and you will not have to worry about losing them if you ever lose or reset your iPhone.

Disclaimer

Technology is always changing and rarely is there static tech for smartphones and desktops. Thus, the contents of this post are only valid at the time of writing. Blog posts older than six months may have directions incompatible with your device or OS. Hopefully, older post content will continue to work as advertised. Thank you for reading TechSavvy.Life for Technology at Work For You.

Quote For the Day

Even in such technical lines as engineering, about 15% of one’s financial success is due one’s technical knowledge and about 85% is due to skill in human engineering, to personality and the ability to lead people.

Dale Carnegie

Tweet Info

You are finished. Please feel free to share this post! One way to share is via Twitter.

Just click the Tweet icon below. This will launch Twitter where you click its icon to post the Tweet.

Checkout TechSavvy.Life for blog posts on smartphones, PCs, and Macs! You may email us at contact@techsavvy.life for comments or questions.

I Would Like to Hear From You

Please feel free to leave a comment. I would love to hear from you. Do you have a computer or smart device tech question? I will do my best to answer your inquiry. Just send an email to contact@techsavvy.life. Please mention the device, app, and version you are using. To help us out, you can send screenshots of your data related to your question.

Author’s E-Book

You can access the e-book from a Kindle device, the Kindle App for the desktop or smartphone, which is a free app.

The author’s Vietnam eBook on the Battle for Tra Bong Vietnam: Events and Aftermath