If you don’t want to see your own face during a Zoom video meeting, here’s how to hide, unhide and tweak your video settings.
A lot of us used to working in offices have found ourselves working at home due to the outbreak of the Coronavirus and that means a lot of virtual meetings. Users new to Zoom’s desktop app may find it a bit odd when their face appears while speaking. If you want to hide your own video, adjust it so you don’t take over the screen or bring it back once it’s hidden, then this post is for you.
There are several options for hiding and unhiding videos during a Zoom meeting, both for yourself and other. Lets get started.
This if for a PC, Macs, iPhone/iPad and Android devices that support Zoom
Accessing Zoom Settings
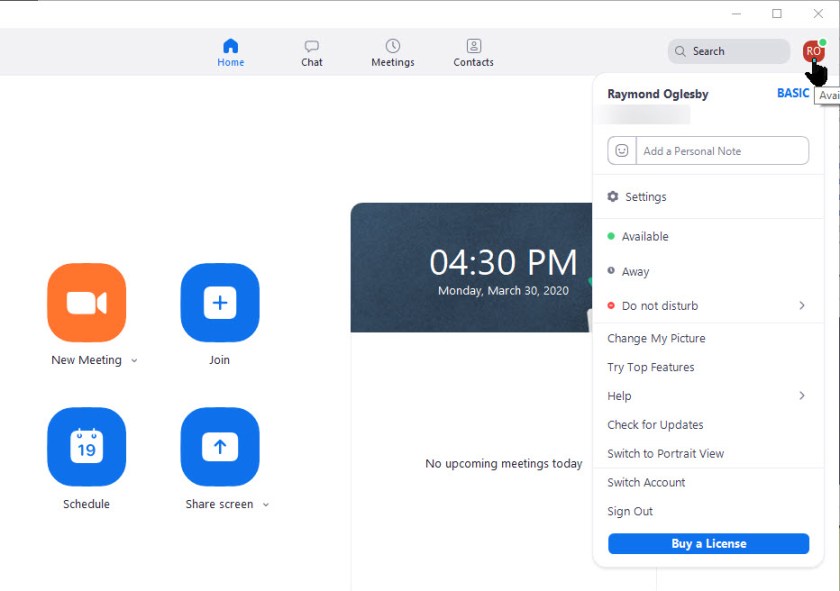
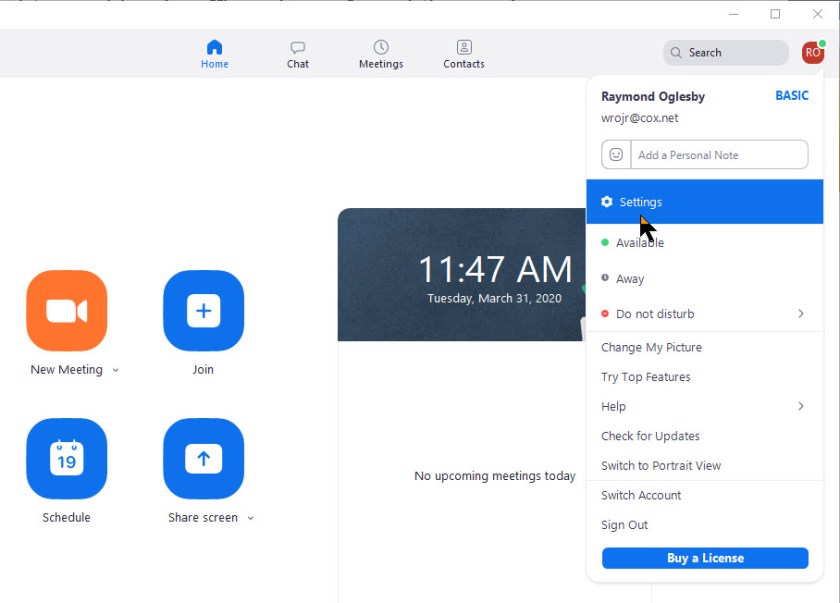
First, fire up Zoom and join an active meeting. Then click on your small profile photo in upper right-hand corner. This will open up the dialog options window. From here, click on the Settings option. See below image:
The Video Settings
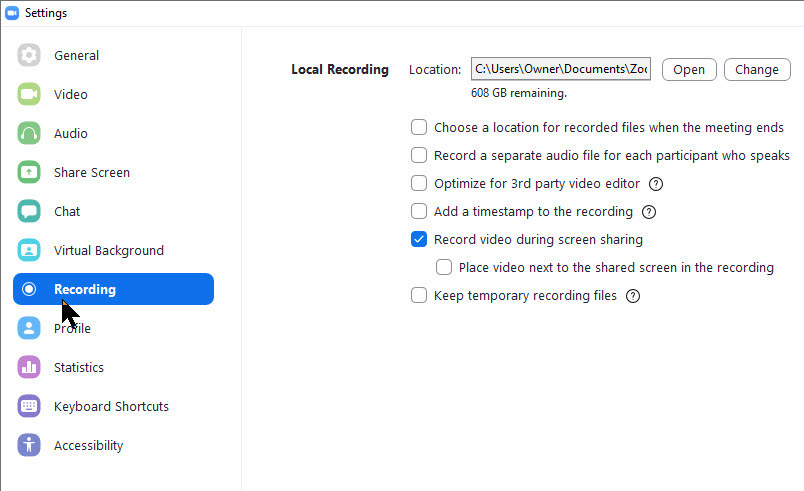
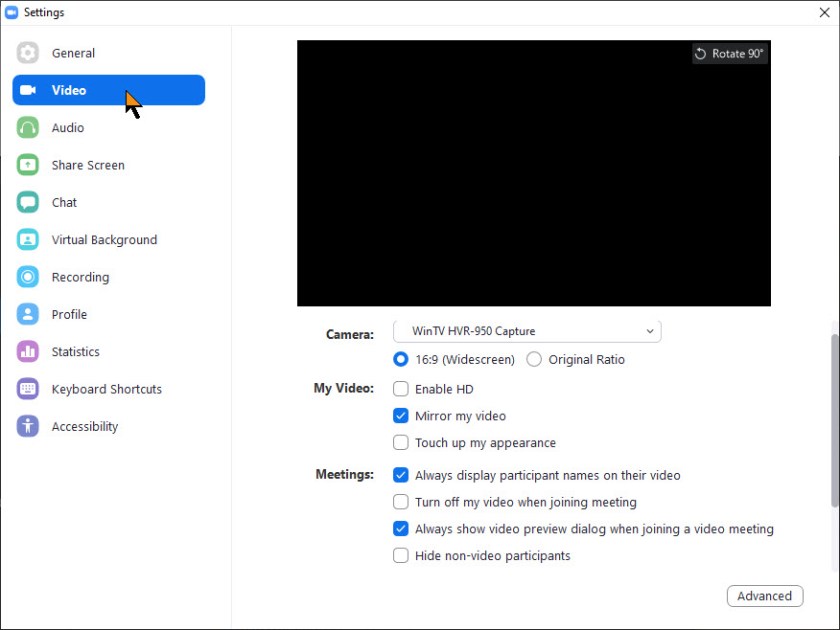
Once you click on the Settings option, the Settings dialog window will be revealed. Now, click on the Video tab. The below image only shows some of the settings.
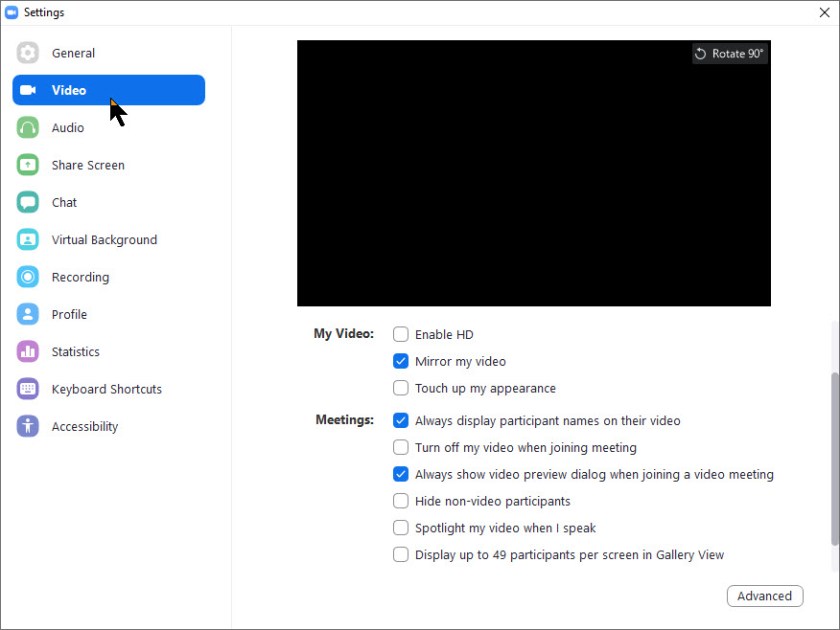
Note! The black area on the below screens would show your online video image.
The Video tab has numerous options for configuring video in meetings that will change the way Zoom handles all videos in a meeting. The below image shows the rest of the settings.
Hide/Unhide a Video
During a meeting, if you wish to hide your video from your own screen to make room for other participants, just right-click on your video and choose Hide Myself. If you want to bring your own video back onto your screen, just right-click on any other user and select Show Myself.
Note! This won’t disable your video from showing up for other participants; only from from your screen.
To disable your own video completely, you can select the checkbox in the Video Settings screen shown above that says Turn off my video when joining a meeting to disable it, or click the Stop Video button in a meeting to temporary turn it off for the video session.
I Would Like to Hear from You
Please feel free to leave a comment. I would love hearing from you. Do you have a computer or smart device tech question? I will do my best to answer your inquiry. Please mention the device, app and version that you are using. To help us out, you can send screenshots of your data related to your question.