RAYMOND OGLESBY @RaymondOglesby2
January 14, 2025 – 8 minutes read time
Overview
If your computer gets too hot, its performance will suffer and the CPU could get damaged.
Just as you do not want your phone to get too hot, an overheating computer is no joke. If your CPU goes over a certain temperature, it will start throttling performance in an effort to reduce excess heat. If your internal components get too hot for too long, it can decrease the lifespan of your PC, not to mention burn your thighs if you are using your laptop on bare legs, which, by the way, is not a good idea.
Unfortunately, most PCs do not have user-facing temperature-monitoring tools, so you can not easily check how hot your computer is getting at any given time. If you want to see how hot your computer is running, you will need to download some extra software. Let’s explore what you need to check your machine’s internal temperature.
Why You Will Like This Tip
- Ability to monitor the CPU core(s) temperature.
- Keep your PC running at peak performance with a cool CPU temperature.
System Requirements
Windows 7 or above with 32 or 64 bit OS.
Screenshots are from Dell XPS 8960 running Windows 11 Pro.
How to Monitor CPU Temperature in Windows
Use the BIOS Screen
Do not want to install third-party software? The only way to observe your PC’s internal temperature is from the BIOS screen. To access this menu, restart your computer and hit a button on the keyboard that will disrupt the normal boot process (it can be Delete, Esc, or Enter; it will say on the screen). Or Google your machine for the button to press to view its BIOS screen upon a restart. For our Dell XPS 8960 desktop, it is the F2 key.
Every BIOS screen is different, so we cannot tell you where to look for your specific manufacturer, but the machine’s internal temperature should be displayed on the main screen. Some may even show CPU and motherboard temperatures separately. Refer to the below image:
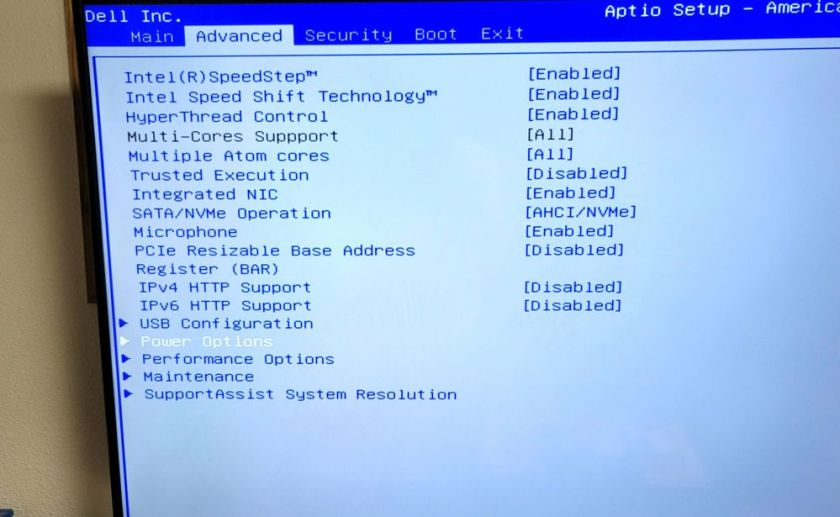
The CPU temperature is not displayed on our Dell XPS 8960 desktop, so we need to use a third-party app.
Use Core Temp App
Unfortunately, this is no way to consistently monitor your PC temperature, so you will want to use third-party software instead.
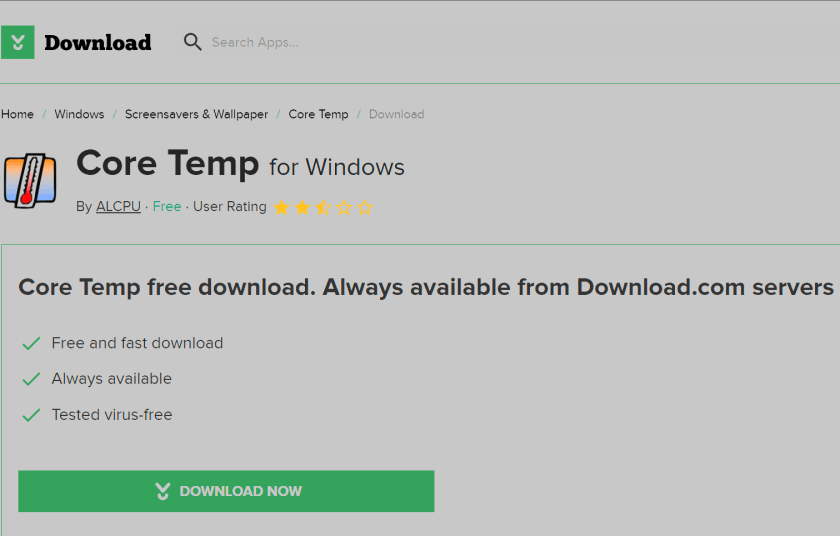
There are dozens of temperature-monitoring programs out there, but we recommend Core Temp for Windows for most users.
Note! We are downloading the app from the CNET website. We recommend only using this website. The CNET webpage will point to the ALCPU page, the app’s owner. Click the download button on the left of your screen. See the below image:
The Core Temp main webpage has too many download buttons to choose from is the reason for using CNET. Some of their download buttons will download blotware, browser extensions, etc., that you do not need.
Also, when installing the app, consider the install options as they want to install a game.
The app provides plenty of information without being as overwhelming as more thorough utilities, and it comes as an installer and EXE file. Plus, it allows you to monitor your temperature from the Windows taskbar, which is great if you want to keep an eye on it over time.
Our Dell XPS 8960 desktop has an Intel i9 processor with 24 cores. See the following image:
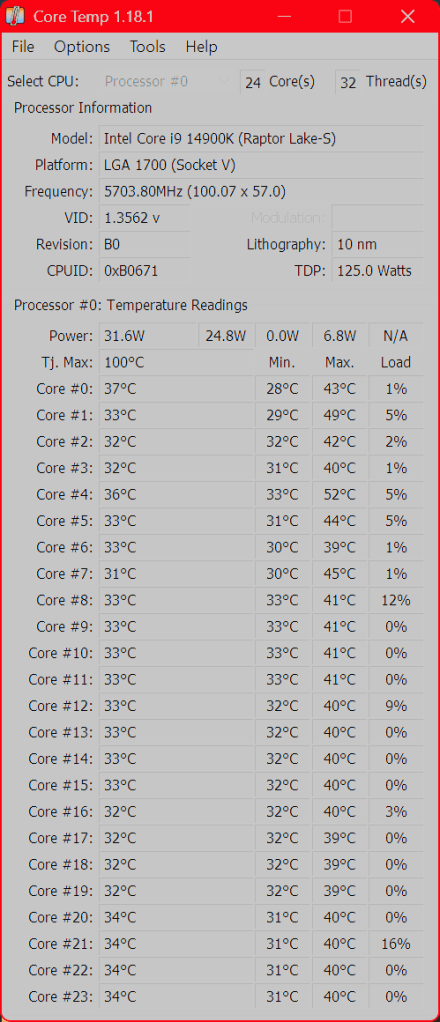
The top portion of the window lists your CPU, its current load, and a few other technical tidbits. The real meat is at the bottom, where it says Temperature Readings. You will see the current temperature in the left column, alongside the lowest and highest recorded temperatures since you last launched it. If you are using an AMD CPU, you will probably have one value here, while Intel CPUs will likely have one reading per CPU core; just watch the hottest core to keep things simple.
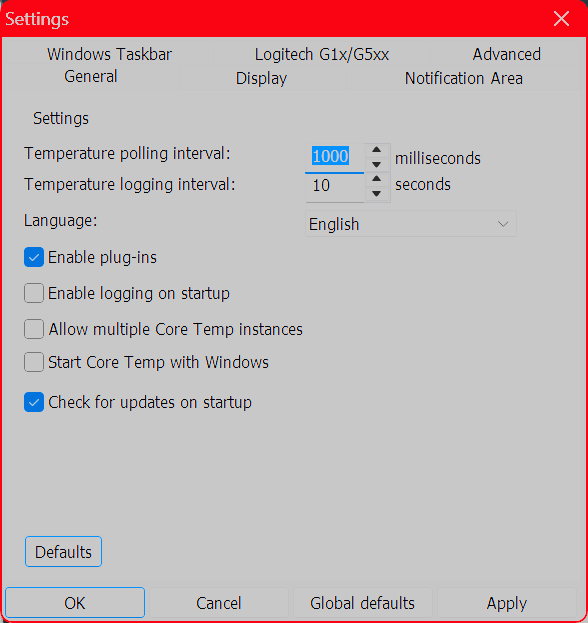
We highly recommend heading to:
Options > Settings
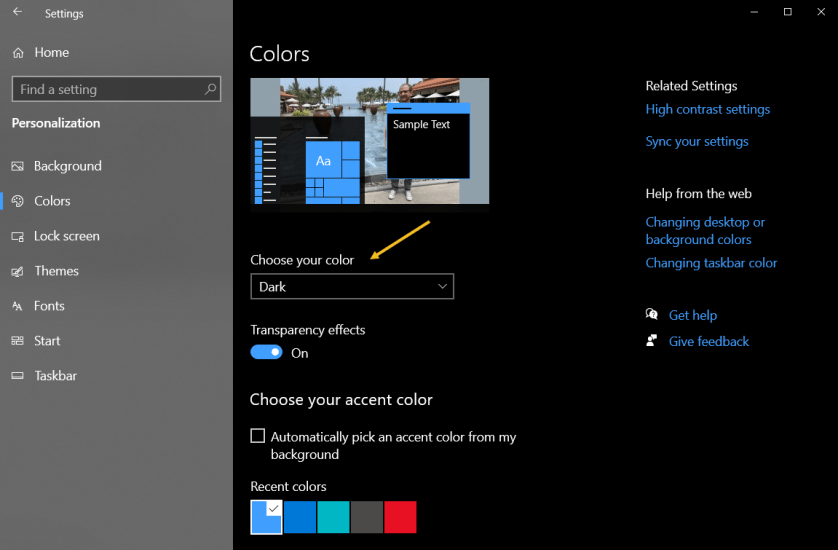
and playing with the options available here, especially those under the Notification Area tab, which will let you view your CPU temperature in the taskbar. We personally recommend selecting Highest Temperature here, then clicking the system tray’s arrow and dragging Core Temp’s icon to the taskbar to keep it visible at all times. You can also enable Core Temp to start with Windows. Refer to the below image:
Use Other Third Party Apps for Windows
HWINFO – Provides detailed reporting on chipsets, graphics cards, and processors for AMD and Intel families. It can also help detect overheating, performance loss, and overload.
Click here to download
Speccy – Provides detailed information on every piece of hardware in your computer.
Click here to download
COU-Z – A free system profiling and monitoring application that provides detailed information about your computer’s hardware.
Click here to download
What is Too Hot
If your CPU gets too hot, it will reduce performance to try and reduce the temperature; meaning whatever you are doing at the time will probably run slower. It will also keep your fans spinning at high speeds—meaning lots of noise; and could permanently damage your CPU, fan, or battery.
“Normal” temperatures, though, can vary wildly depending on the CPU type of computer. A thin and light ultraportable laptop that crams a powerful CPU into a small space with little airflow, for example, will likely get hotter than a desktop PC with a low-power CPU, even when performing the same tasks. And a CPU running at 70 degrees is likely to be just as effective as a CPU running at 40 degrees in that given moment.
That said, your CPU does have a maximum threshold; a specific temperature it will try to avoid going over. This is known as the maximum temperature junction or TJ Max. It varies from CPU to CPU, but for most chips, it lies somewhere between 95° C and 105° C. (Our Dell XPS 8960 TJ Max temperature is 100 degrees). So if your computer is regularly hitting that temperature, it’s probably throttling itself (and, if it cannot decrease the temperature, it may even shut itself off to prevent overheating.)
Lower CPU Temperature
If you regularly experience that kind of heat, you have a few options. First, open up your computer, either by removing the side panel on a desktop or unscrewing the bottom case on a laptop, and blow out any dust bunnies with an air blower or Blaster. This should help improve airflow and reduce temperatures. You can also adjust your CPU’s fan behavior, allowing it to run at higher speeds more often.
If you have a desktop, you may even want to reseat the CPU cooler to make sure it’s making good contact with the CPU, and if your computer is rather old, some new thermal paste could help lower temperatures as well. If you have a thin laptop known for overheating, though, these tips may only take you so far; and you will just have to deal with the excess heat. The next time you buy a laptop, be sure to read through reviews that include heat and fan noise before you commit.Spacer
Disclaimer
Technology is constantly evolving, and smartphone and desktop tech rarely remains static. Therefore, the information in this post is only accurate as of the date it was written. Blog posts that are older than six months may contain instructions that are no longer compatible with your device or operating system. We hope that the content from previous posts continues to function as intended. Thank you for reading TechSavvy.Life, where technology works for you.
Quote For the Day
“Technology made large populations possible; large populations now make technology indispensable.”
– Joseph Krutch
X (Twitter) Info
That’s it. Please feel free to share this post! One way to share is via Twitter.
Just click the Tweet icon below. This will launch Twitter where you click its icon to post the Tweet.
Checkout TechSavvy.Life for blog posts on smartphones, PCs, and Macs! You may email us at contact@techsavvy.life for comments or questions.
Tweet
I Would Like to Hear From You
We value your feedback! Was this post helpful? Please share your comments with us. If you have a tech question related to your computer or smart device, feel free to reach out. Just send an email to contact@techsavvy.life, and be sure to include the device, app, and version you are using. To assist us further, you can also attach screenshots related to your inquiry.
The author’s Vietnam eBook on the “Battle for Tra Bong Vietnam: Events and Aftermath” can be accessed from a Kindle device or the Kindle App for a desktop or smartphone. The apps are free.