
Unfortunately, not all microphones are created equal. Baseline volume levels differ significantly between models, and while one may sound more than adequate, another may be vastly underpowered. The issue can be particularly pronounced when using microphones with communication applications such as Skype. Let’s explore how to adjust your microphone volume.
This is for devices running Windows 10

All microphones, whether you are using an internal or external one, have different base volumes when transmitting your voice to other parties. If you find that people often complain of not being able to hear you during meetings, the most likely culprit is the out volume of your PC’s microphone.
Use Settings
First, click the Start menu, then select the gear icon on the bottom left to open Settings. You can also press Windows+i to open it. Refer to below image:

Now, click the System option. See below image:

Next, select Sound in the sidebar. See following image:
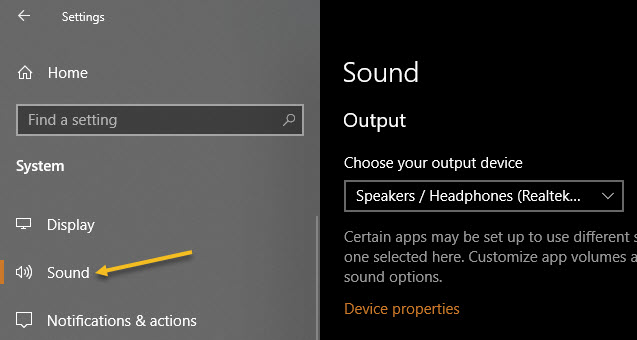
Now, scroll down to the Input section and select the device you would like to configure using the Choose your output device drop-down list. Then click Device properties option. Refer to below image:

Next, use the Volume slider to adjust the output level of the microphone. See below image:
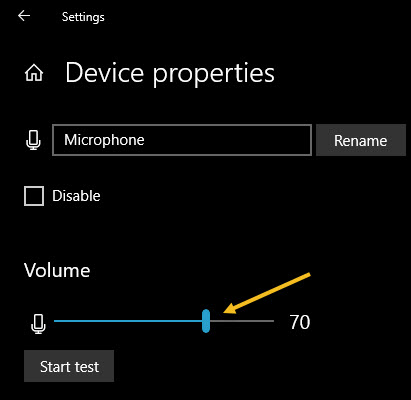
The louder the volume, the louder the output signal will be when you use the microphone. Louder is not always better, however, if the signal is too loud, your voice will be distorted. Try to find the ideal volume where your voice (or other sound source) is loud enough without having any kind of distortion.
If you need help, click the Start test button and speak into the microphone at a normal volume. See following image:

When you click Stop test, you will see the highest percentage level registered by the test program. You can then adjust the volume slider accordingly. If you keep hitting 100% by talking at a normal volume, then the volume slider is adjusted too high. Reduce the volume and try again. Refer to below image where you will get a zero percent if no microphone is plugged in:

When you are satisfied, close Settings. If you ever need to adjust it again, revisit the above steps.
Use Control Panel
You can launch this tool from the speaker icon in your taskbar’s notification area, which is opposite the Start button. First, right-click the speaker icon and select Sounds from the menu that appears. See below image:

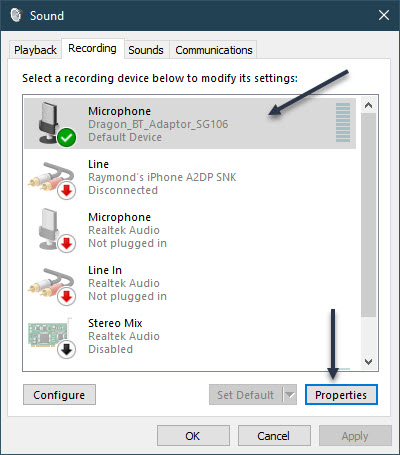
Now, click the Recording tab. See following image:

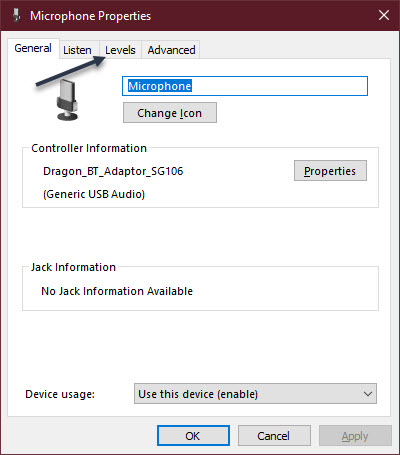
You will see a list of microphones installed on your system. Select the one you would like to adjust, then click the Properties button. Refer to below image:
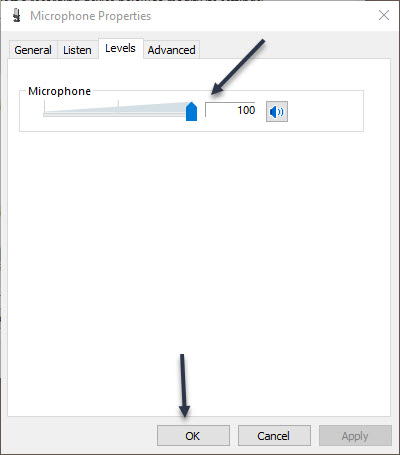
Next, click the Levels tab. See below image:
Now, use the Microphone slider to adjust the output level of the microphone. The higher the level, the louder your microphone signal will be while it is in use. That means your voice will come through louder. But a signal that is too loud will distort, so try to find the sweet spot where it is loud enough but not too loud to distort your voice. Next, click OK, then click OK again to close the Sound window. See following image:
If you need to adjust the level again, revisit the above steps.
That’s it. Please feel free to share this post! One way to share is via Twitter.
Just click the Tweet icon below. This will launch Twitter where you click its icon to post the Tweet.
Check out TechSavvy.Life for blog posts on smartphones, PCs, and Macs! You may email us at contact@techsavvy.life for comments or questions.
Tweet
I Would Like to Hear From You
Please feel free to leave a comment. I would love hearing from you. Do you have a computer or smart device tech question? I will do my best to answer your inquiry. Just send an email to contact@techsavvy.life. Please mention the device, app and version that you are using. To help us out, you can send screenshots of your data related to your question.
