RAYMOND OGLESBY @RaymondOglesby2
December 3, 2024 – 6 minutes read time
Overview
For quick access to frequently used apps and settings, Control Center is just a swipe or click away. And with iOS 18 and iPadOS 18, it’s even easier to customize and use.
Navigating the settings on your iPhone, iPad, and Mac can be difficult. That’s where the Control Center comes in, providing quick access to a variety of features that might otherwise be hidden within the device’s menus. From the Control Center, you can easily adjust settings for Wi-Fi, Bluetooth, and AirDrop, as well as control brightness and volume. It also allows you to manage Focus mode, access music controls, switch to dark mode, and enable screen mirroring. Additionally, you can customize the Control Center by adding or removing features as needed.
For many years, the Control Center on your iPhone and iPad was restricted to a single screen. If you wanted to change the controls, you had to navigate into the settings of your device. However, with the introduction of iOS 18 and iPadOS 18, you can now set up multiple screens and customize them directly within the Control Center. Let’s explore how to personalize the updated Control Center.
Why You Will Like This Tip
- Organize the Control Center so that your most frequently used controls are easily accessible at the front.
- Maintain a tidy and organized Control Center..
System Requirements
This tip is for iPhones running iOS 18 or later. The screenshots are from iPhone 14 Pro running iOS 18+.
Click here to learn how to update your iPhone to the latest iOS version.
Customize the Control Center
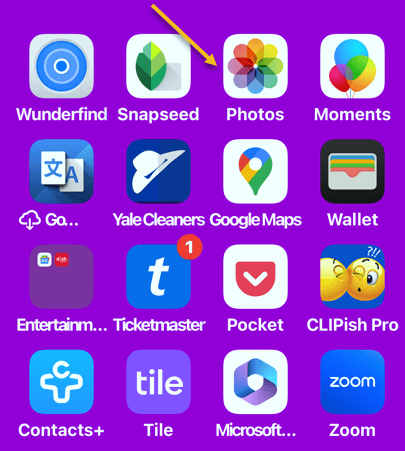
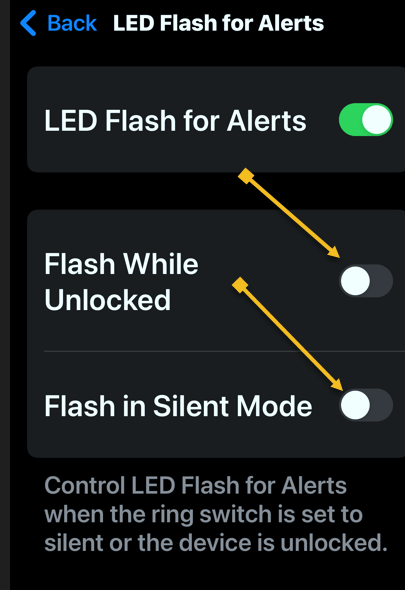
First, swipe down from the upper right edge to open the Control Center. Refer to the below image:

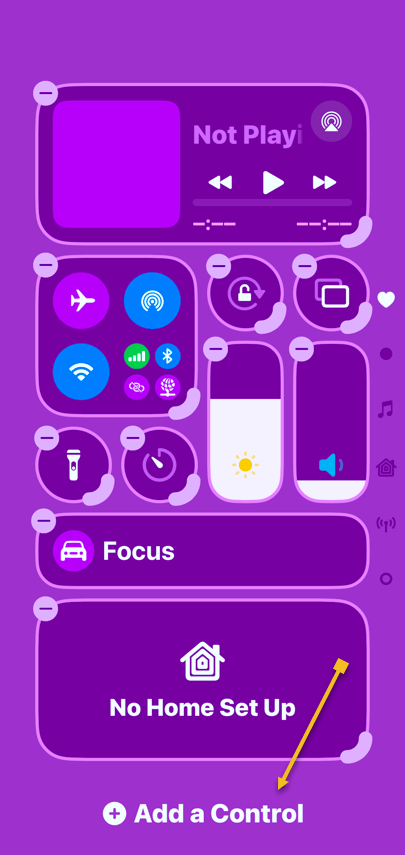
Next, rap and hold in an empty area. See the below image:

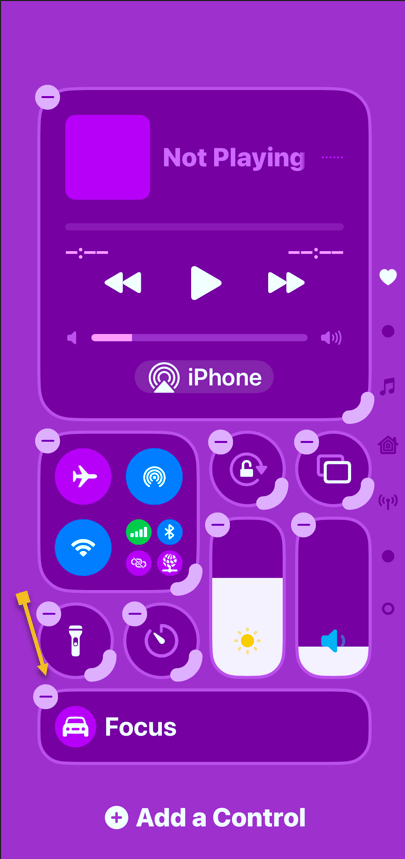
Now, the controls will have minus symbols next to them, indicating that you are in Edit mode. Tap Add a Control to get started. See the following image:
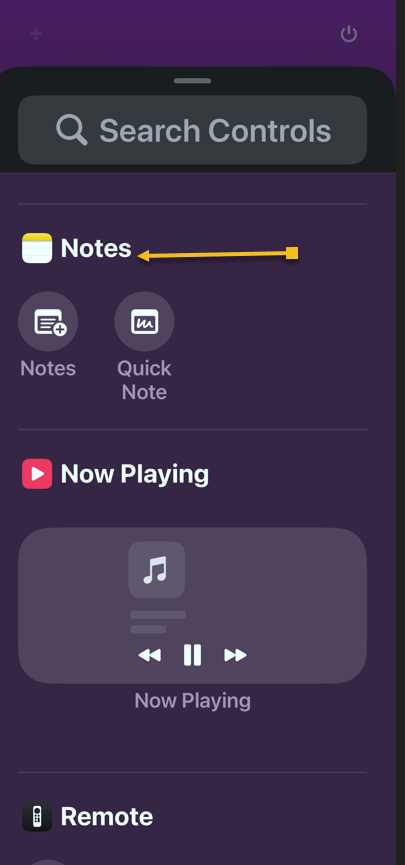
Next, find a control you want easy access to and tap on it to add it to the Control Center. Refer to the below image:
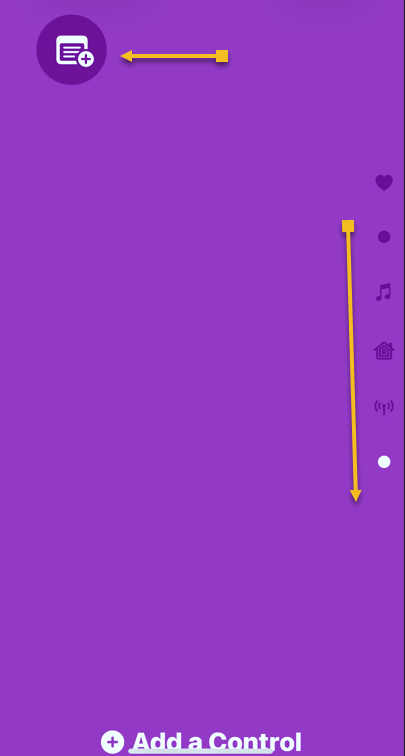
Now, if your first page becomes too full, a second page will be automatically created. You can swipe up and down to navigate between the Control Center pages. Each page is indicated by a dot on the far right side of the screen. Please note that we have a total of six pages. See the image below:
Next, to change the size of a control, tap and drag the corner. Keep in mind that some controls only have one size. See the following image:
Now, view your resized Playback control. Refer to the below image:

Next, to remove a control, simply tap the minus symbol next to it. See the below image:
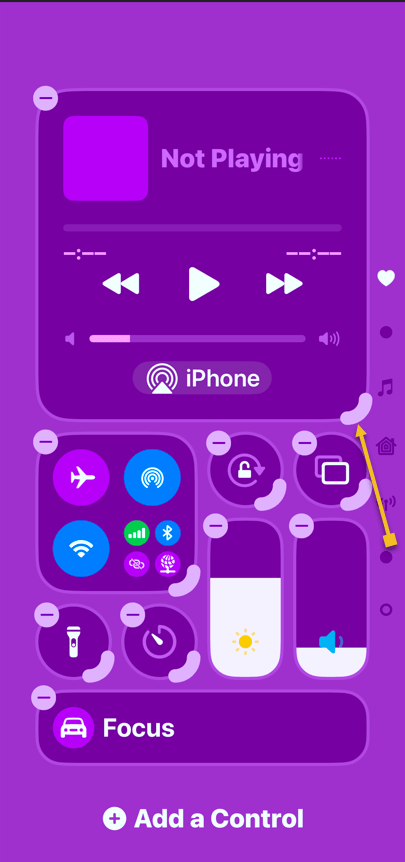
Now, you can place controls anywhere without worrying about order. Our Control Center has been rearranged from six pages to only three pages, as indicated by the dots on the right side. See the following image:

FAQ
- Why does my iPhone say SOS in the top right corner?
If your iPhone cannot connect to a cellular network or Wi-Fi, it may display ‘SOS’ in the top right corner. This indicates that your device can only make emergency calls.
- What does 5GUC mean?
5GUC stands for 5G Ultra Capacity. This is T-Mobile’s higher frequency 5G network. Other cellular providers have similar higher frequency networks with different names.
- What are the icons on the top right of iPhone?
At the top of your iPhone screen, you will typically see the strength of your cellular network represented by bars. To the right of this, there will be an indicator showing 4G, LTE, 5G, or a similar symbol if you are connected to a cellular network. If you are connected to Wi-Fi, you will see a Wi-Fi symbol instead. Finally, you will also find the battery indicator for your iPhone.
- What do the iPhone signal symbols mean?
The signal symbols indicate whether you are using cellular data or Wi-Fi, as well as the strength of the wireless connection.
Summary
That’s how to customize the Control Center on your iPhone. We recommend placing your most-used controls on the first page.
Disclaimer
Technology is constantly evolving, and smartphone and desktop tech rarely remains static. Therefore, the information in this post is only accurate as of the date it was written. Blog posts that are older than six months may contain instructions that are no longer compatible with your device or operating system. We hope that the content from previous posts continues to function as intended. Thank you for reading TechSavvy.Life, where technology works for you.
Quote For the Day
“The march of science and technology does not imply growing intellectual complexity in the lives of most people. It often means the opposite.”
– Thomas Sowell
(X) Twitter Info
You are finished with a revised Control Center. Please feel free to share this post! One way to share is via Twitter.
Just click the Tweet icon below. This will launch Twitter where you click its icon to post the Tweet.
Checkout TechSavvy.Life for blog posts on smartphones, PCs, and Macs! You may email us at contact@techsavvy.life for comments or questions.
Tweet
I Would Like to Hear From You
We value your feedback! Was this post helpful? Please share your comments with us. If you have a tech question related to your computer or smart device, feel free to reach out. Just send an email to contact@techsavvy.life, and be sure to include the device, app, and version you are using. To assist us further, you can also attach screenshots related to your inquiry.
The author’s Vietnam eBook on the “Battle for Tra Bong Vietnam: Events and Aftermath” can be accessed from a Kindle device or the Kindle App for a desktop or smartphone. The apps are free.