How to Use iOS 13+ Printing

We are going to explore how to print to PDF while on the go, do custom printing options like labels and manage existing print jobs through AirPrint right on your iOS 13+ devices.

We are going to explore how to print to PDF while on the go, do custom printing options like labels and manage existing print jobs through AirPrint right on your iOS 13+ devices. iOS 13+ has a very robust printing subsystem that can allow you to export PDFs and more.

In this blog post, we’ll delve into how to print custom items like labels. We’ll also see how to print to PDF instead of paper and how to manage printer jobs and viewing ink supply levels.

iOS 13+ can handily help in this situation, and it works in any app that supports printing or sharing. We will be using Safari browser in our examples.

This is for Apple devices supporting iOS 13+

Dilbert and Supremist
Copyright Scott Adams, Inc./Distributed by Universal Uclick for UFS

Check out TechSavvy.Life for similar blog posts!

Print to PDF

To print to PDF using any app that supports printing:

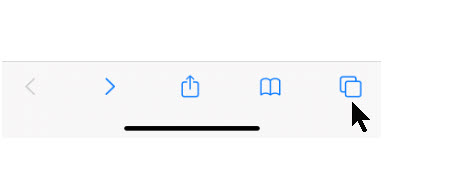
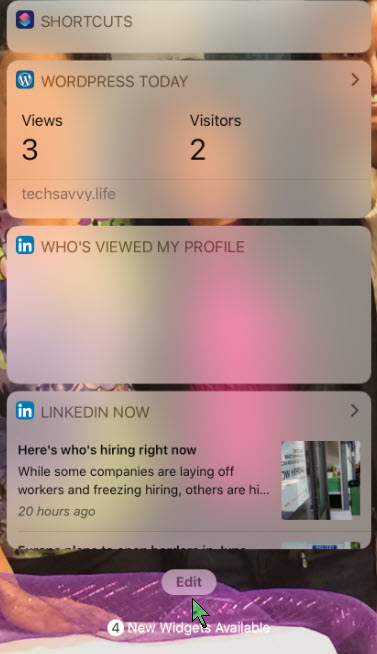
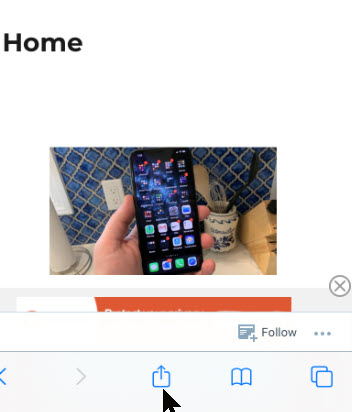
Select the Share (or Print) button in the app. When browsing in Safari, just tap the Share button in the bottom toolbar. Refer to below image:

iPhone Printing 1
The Share ibutton

Next, scroll down and tap Print. See below image:

iPhone Printing 2
The Print option

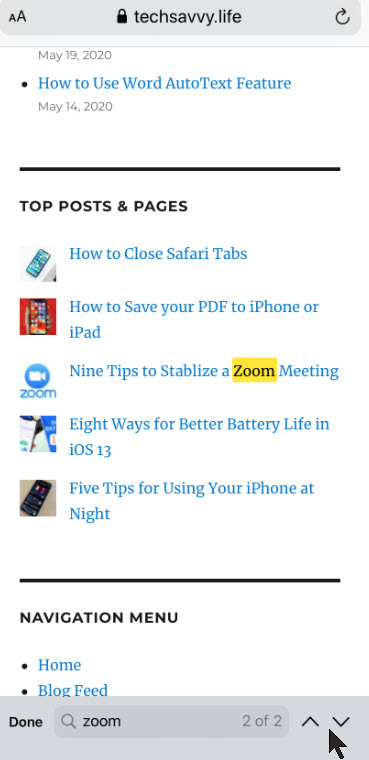
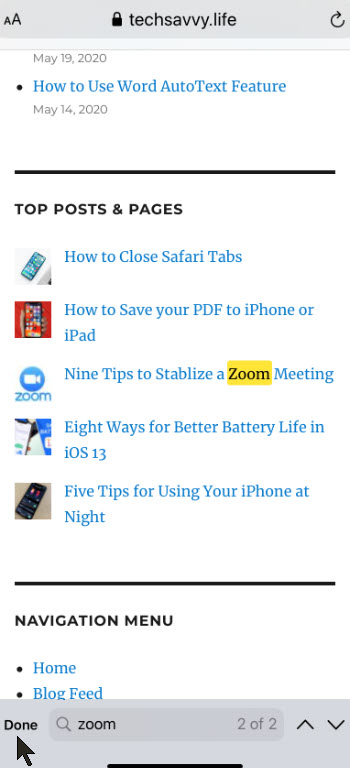
Using two fingers, pinch your fingers apart as if zooming on the Print Preview. This will generate a PDF and show a new view. Refer to below image:

iPhone Printing 3
Print Preview

In this Print Preview PDF view, tap the Share button in upper right-hand corner. See following image:

iPhone Printing 4
The Share button

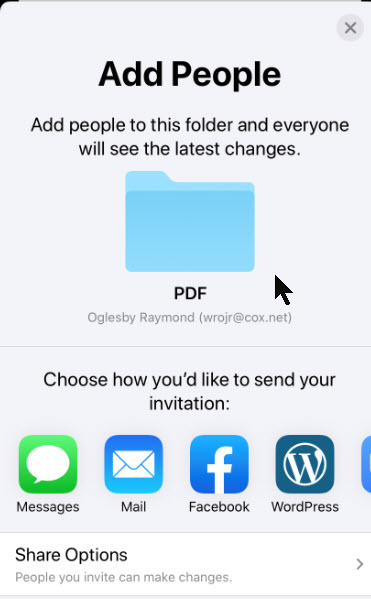
Select your choice to save the PDF to Files, send as an iMessage or an email. Refer to below image:

Phone Printing 5
The Save to Files option

Sharing a PDF from Print Preview is easy and works on all apps where printing is supported.

Printing Labels

For now, the only way to print labels for contacts is through third-party apps. This feature has been built-into Macs for years.

If you are using Avery Labels for printing contact sheets, there are two apps worth mentioning. Click on the links below to download from the Apple App Store.

Label Printer for $2.99 and the free Label Printer Lite.

Address Labels for CardLists for $1.99.

Both of these apps have numerous features. You can print multiple contacts or a single contact on a sheet, select templates from Avery and others, add a graphic to your labels, design your label, manually adjust alignment, and much more.

Managing Your Print Jobs and Ink Levels

You can check the ink or toner levels to ensure you have plenty for your print project. Once you have spooled a print job, you can monitor its status or cancel it.

Check Your Ink Levels

With iOS and iPadOS you are able to view your ink or toner levels without a computer. This is easily to do.

Select the Share (or Print) button in the app. Refer to image one above.

Next, scroll down and tap Print. Refer to image two above.

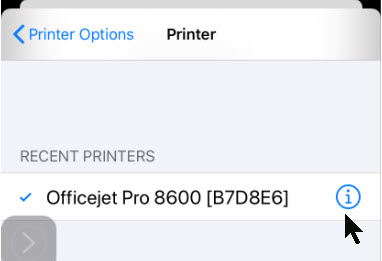
Now, tap the right hand arrow beside an available printer name. See following image:

iPhone Printing 6
Selecting your printer

Select the “i” with an enclosed circle button beside the available printer name. Refer to below image:

iPhone Printing 7
Your selected printer

If there is no printer listed, you do not have a wireless printer and/or lack support for the AirPrint feature; you may skip this section. Nearly all modern day printers support AirPrint.

You will now be viewing the Printer Info which contains ink levels, name and location (if supplied by the printer or printer server). See following image:

iPhone Printing 8
Your printer ink levels

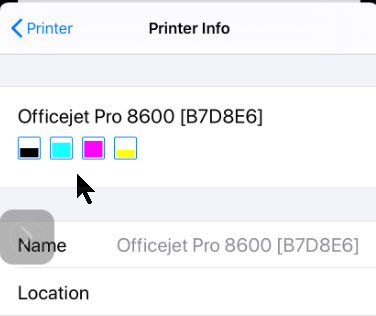
Viewing ink or toner levels can be done from the iOS or iPadOS Print Setup dialog in any app that supports it.

Manage Print Jobs

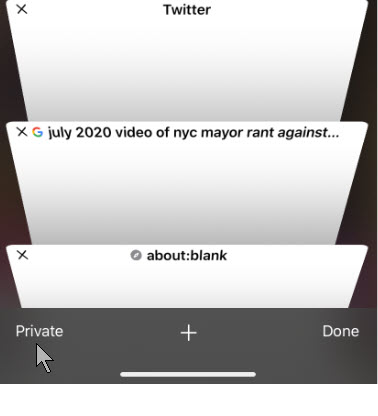
When you print with AirPrint, you are able to manage your print jobs. Once a print job has been started, you can look at the status of the job and/or cancel the job. This can be done by opening the App Switcher (double-tap the Home button if you have one). For Face ID devices, swipe up partially on the screen, hold, then release.

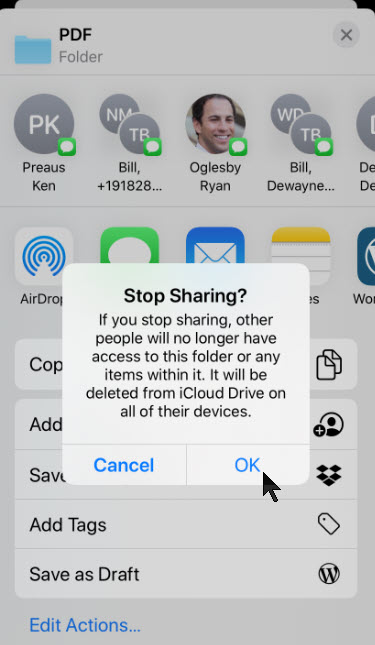
You’ll see the printer job app at the top of the screen. Just tap it to see the print details like how many pages are being printed and which page is active in the queue. Tap the Cancel Printing button to stop any active print jobs. See below image:

iPhone Printing 9
An active print job

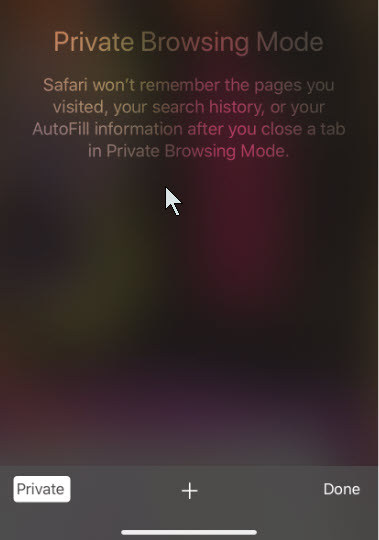
If the print queue is empty,, you will receive a message about no print jobs. Refer to below image:

iPhone Printing 10
No active print jobs

When printing in IOS or iPadOS, a new app will appear in the App Switcher for non-Face ID and Face ID devices to manage print jobs.

I have found TechSavvy.Life blog posts extremely helpful. Check them out for posts on smart phone apps, Macs and PCs!

I Would Like to Hear From You

Please feel free to leave a comment. I would love hearing from you. Do you have a computer or smart device tech question? I will do my best to answer your inquiry. Please mention the device, app and version that you are using. To help us out, you can send screenshots of your data related to your question.

The author’s Vietnam eBook on the Battle for Tra Bong: Events and Aftermath

How to Use Private Browsing in Safari on Your iPhone or iPad

Maybe you’d like to checkout a website without leaving a record of it on your iPhone or iPad. Safari includes a Private Browsing Mode that allows you to do this.

Maybe you’d like to checkout a website without leaving a record of it on your iPhone or iPad. Safari includes a Private Browsing Mode that allows you to do this. Lets explore this Safari feature.

While using Private Browsing Mode on your iPhone or iPad, Safari will not save your browsing history, AutoFill form information, cookie changes and recent searches when you close each Private Browsing window. We will cover this later, but its important to note that you must close each window of your private browsing session.

Private Browsing Mode does not protect your browsing history from the host of your network (such as your business or school), your ISP or websites that might use your IP address to track you.

This is for iPhone and iPad using Safari web browser

Dilbert and No
Copyright Scott Adams, Inc./Distributed by Universal Uclick for UFS

Check out TechSavvy.Life for similar blog posts!

Using Safari Private Browsing Mode

First, open Safari. You should see a toolbar at bottom of the screen, if not, tap to reveal the toolbar.

Next, tap the New Window icon in lower right hand corner. Refer to below image:

iPhone Privacy 1
The Safari New Window icon

Your screen will display your open browser windows. Now, tap the Private button in lower left-hand corner. See below image:

iPhone Privacy 2
The Safari Private button

Your Private Browsing Mode is now setup. At the bottom of the screen, tap the plus “+” button to open a Private window. Note! You will not see the below screen again as long as your device is logged in, you will just go in or our of Private Browsing Mode. See following image:

iPhone Privacy 3
To enter Private Browsing Mode., tap the plus button

From here, you can type in an address or tap on a Favorites. In Private mode, you can use Safari as usual but it won’t track you locally. See below image:

iPhone Privacy 4
Your Private Mode Browsing Mode entry screen

Exit Private Browsing Mode

First, you need close each Private window you opened by clicking the “X” in upper left-hand corner.

Now, to exit Private Browsing Mode, tap the New Window icon, then tap the Private button in lower-left hand corner. The Private button will be in reverse color. You will be switched to non-Private Mode Browsing. Refer to below image:

iPhone Privacy 5
Exiting Private Browsing Mode

I have found TechSavvy.Life blog posts extremely helpful. Check them out for posts on smart phone apps, Macs and PCs!

I Would Like to Hear From You

Please feel free to leave a comment. I would love hearing from you. Do you have a computer or smart device tech question? I will do my best to answer your inquiry. Please mention the device, app and version that you are using. To help us out, you can send screenshots of your data related to your question.

The author’s Vietnam eBook on the Battle for Tra Bong: Events and Aftermath

How to Secure Your iOS Lock Screen

Do you want to configure your iOS Lock Screen to block those picking up your device from reading messages, viewing the Today View or interacting with Siri.

Do you want to configure your iOS Lock Screen to block those picking up your device from reading messages, viewing the Today View or interacting with Siri.

It may appear that securing our devices with Touch ID and Face ID is all we need to protect our data. However, there’s other data accessible on the Lock Screen that can still be read by potential data thieves or on-lookers that can gain valuable information.

Lets explore how to secure the Lock Screen so that your messages and push notifications aren’t visible to anyone except you when you pick up your device. We’ll do this by disabling push notification, Siri and the Today View when the device is locked.

By doing the above, you will make your device more secure and prevent onlookers, or someone picking up your device, from gaining access to your private information contained on the Lock Screen.

This is for the iPhone and iPad running iOS 13+. Screenshots are for iPhone

Dilbert and Stupid
Copyright Scott Adams, Inc./Distributed by Universal Uclick for UFS

Click to tweet on how you like TechSavvy.Life!

Disable Notification and the Today View

Open the Settings app. Next, select Face ID & Passcode. Enter your Passcode to proceed. Then, scroll down till you see the section ALLOW ACCESS WHEN LOCKED. Now, toggle off all options except for Siri. We will handle Siri in the Disable Siri section below. Just ignore the USB Accessories option. You will be toggling off 7 options. Refer to below for before toggling off image:

iPhone Lock Screen 1
Before disabling

Refer to below for after toggling off image:

iPhone Lock Screen 2
After disabling

Unchecking items in this section will make them unavailable from the Lock Screen when the user is not authenticated by Passcode, Touch ID or Face ID.

There is an alternative feature if you are using a Face ID device.

Open the Settings app. Next, select Face ID & Passcode. Enter your Passcode to proceed. Scroll down to the ATTENTION section. Now, toggle on Attention Aware Features. See below image:

iPhone Lock Screen 3
Setting the Attention Aware Features

The Attention Aware Features setting is available on iPhone and iPads with Face ID.

When this option is enabled, you will be unable to view notifications on the Lock Screen or Notification Center until the face of the device owner is visible to the Face ID sensor. This feature also provides not dimming the screen when looking directly at it and lowering the volume when the device is picked up.

However, the Today View, will still be visible. You can disable this behavior from the Lock Screen by following instructions in Disable Notifications and the Today View section above.

Disable Siri

If you want to ensure the highest privacy protection, you can disable Siri on the Lock Screen till your device has been authenticated with the Passcode, Touch ID or Face ID.

Open the Settings app. Next, select Siri & Search. Toggle off the Allow Siri When Locked option. See following image:

iPhone Lock Screen 4
Disabling Siri

Now whenever you try to access Siri and any personal requests it allows, you will first need to enter your Passcode, Touch ID or Face ID.

Click to tweet if you find TechSavvy.Life blog posts extremely helpful. Check them out for posts on smart phone apps, Macs and PCs!

I Would Like to Hear From You

Please feel free to leave a comment. I would love hearing from you. Do you have a computer or smart device tech question? I will do my best to answer your inquiry. Please mention the device, app and version that you are using. To help us out, you can send screenshots of your data related to your question.

The author’s Vietnam eBook on the Battle for Tra Bong: Events and Aftermath

How to Find Text Using Safari on Your iPhone and iPad

At times it’s tough to find specific information within a web page in Safari for iPhone or iPad. Fortunately, Safari allows you to search for text on any currently open web page using either the touch screen or an attached keyboard. Let’s explore how to do this.

If you don’t have a keyboard hooked up to your iPhone or iPad, you can search for text within the current page using the touchscreen, although the feature is in a non-obvious place. This technique works both on iPhone and iPad.

This is for iPhone and iPad using the Safari web browser

Dilbert and Virus Deaths
Copyright Scott Adams, Inc./Distributed by Universal Uclick for UFS

Click to tweet on how you like TechSavvy.Life!

Find a Web Page

First, open Safari and navigate to the page you’d like to find text in. Once the page is loaded, tap on the Address Bar at the top of the screen. Refer to below image:

Safari Text 1
Locate a web page to Search

An on-screen keyboard will appear at the bottom of the screen and the current web page address will be highlighted. If you want, you can clear the address bar by tapping the backspace key on the keyboard (or tap on the small “X” in a circle beside the address). See below image:

Safari Text 2
Keyboard available for your Search

Set Your Search

Type in what you’d like to find on the page. Locate the On This Page section at the bottom of the search pop-up. Tap on the line just below it that starts with Find. See following image:

Safari Text 3

Enter your Search criteria

View Your Search

The pop-up will close and you will see the web page again with a search bar at the very bottom. Safari will highlight all occurrences of your search query on the current page. Refer to below image:

Safari Text 4
Your Search criteria highlighted

Navigate Your Search

You can cycle through the results, up and down the page, with the arrows beside the search bar. See below image:

Safari Text 5
Navigate your Search

Close Your Search

When you’re finished searching, tap Done in the lower-left corner of the screen. The Find in page mode will close. See following image:

Safari Text 6
Close your Search

Click to tweet if you find TechSavvy.Life blog posts extremely helpful. Check them out for posts on smart phone apps, Macs and PCs!

I Would Like to Hear From You

Please feel free to leave a comment. I would love hearing from you. Do you have a computer or smart device tech question? I will do my best to answer your inquiry. Please mention the device, app and version that you are using. To help us out, you can send screenshots of your data related to your question.

The author’s Vietnam eBook on the Battle for Tra Bong: Events and Aftermath

How Do You Start Safari With a Blank Page?

In the “old days”, back to iPhone 4, Safari was slooooow to load. By default, Safari either loads the last page you visited or your bookmarks. This tip will start Safari with a blank page. Then you can immediately begin searching for a particular topic without having to wait for graphics and text to load or for installed apps.

This is the second post in a series on Apple iPhone and its Safari web browser. I am updating and republishing this post. I just read another long blog about how to stop Safari from opening apps upon startup. All you have to do is start Safari with a blank page. Here’s how to do this.

In the “old days”, back to iPhone 4, Safari was slooooow to load. By default, Safari either loads the last page you visited or your bookmarks. This tip will start Safari with a blank page. Then you can immediately begin searching for a particular topic without having to wait for graphics and text to load or for installed apps.

This is for iPhone, iPad, and Mac using Safari web browser

Following are the steps to do this:

  • Tap on Safari, usually located in bottom right of your Home page
  • Tap on URL field and type “about:blank” (without quotation marks)
  • Tap Go (for iOS13 or higher)
  • Tap on the bottom Share arrow icon and scroll
  • Select Add to Home Screen to create a bookmark
  • Label the bookmark to something like “Blank Safari” (without any quotation marks)
  • Tap Add (for iOS13 or higher)
  • You will see a white blank Safari icon on your Home page. If you have several pages, it will appear on an empty icon space
  • You can drag this icon to wherever you want
  • When you tap this icon, Safari will instantly load a blank page

Your blank Safari screen should look like the following image:

Safari Blank Page
Just highlight the about:blank URL and enter your search criteria.

I Would Like to Hear from You

Please feel free to leave a comment. I would love to hear from you. Do you have a computer tech question? I will do my best to answer your inquiry. Please mention the app and version that you are using. To help me out, you can send screenshots of your data related to your question.

The author’s Vietnam eBook on the Battle for Tra Bong Vietnam: Events and Aftermath

How to Record and Annouce Your Name on LinkedIn

Pronouncing a name correctly isn’t just polite. It’s a way of recognizing someone’s identity. LinkedIn has introduced a new feature that lets members add a 10-second audio recording of their name pronunciation. Other users will be able to hear the clip by pressing a small speaker icon on a member’s profile.

Pronouncing a name correctly isn’t just polite. It’s a way of recognizing someone’s identity. LinkedIn has introduced a new feature that lets members add a 10-second audio recording of their name pronunciation. Other users will be able to hear the clip by pressing a small speaker icon on a member’s profile.

To use the feature, you’ll have to record your name on a mobile device (iOS or Android), but you’ll be able to play name pronunciations on mobile or a desktop. Let’s explore how to enable this feature.

This is for devices supporting LinkedIn

Dilbert and Morale
Copyright Scott Adams, Inc./Distributed by Universal Uclick for UFS

I like TechSavvy.Life!

Updating Your Profile

First, open the LinkedIn app on your smart device (iOS or Android). Next, from the the upper left hand corner, tap your Profile Photo. Refer to below image:

Linkedin 1
Accessing your Profile

Now, in the top menu, select the View Profile blue link . See below image

Linkedin 2
Selecting viewing your Profile

Next, tap on the Pencil icon next to your photo to edit your Profile. See following image:

Linkedin 3
Selecting edit your Profile

Next, tap on the Add Name Pronunciation blue link found under your First and Last name sections. Refer to below image:

Linkedin 4
Selecting add a recording of your name

Now, grant the LinkedIn app permission to access your smart device’s microphone. See below image:

Linkedin 5
Giving permission to access your microphone

Recording Your Name

Press and hold on the blue microphone button to record your name. You have up to 10 seconds to record your first and last name. LinkedIn recommends that you limit background noise, speak slowly and pronounce clearly. Also, hold your phone about four inches from your mouth. See following image:

Linkedin 6
Recording your name

Tap the Play button to hear your audio recording played back to you. If you aren’t happy with it, select the Retake button. When you are satisfied with the recording, tap the Apply button. Refer to below image:

Linkedin 7
Saving your name recording

Choosing Your Audience

Before you leave the editing page, you can modify who can listen to your name pronunciation recording. To do so, tap the Visible To blue link at the bottom of the screen. See below image:

Linkedin 8
Accessing your audience

Here you have two sharing options to choose from. Either all Linkedin members can listen to your name (the default option) or only 1st-degree connections only. See following image:

Linkedin 9
Selecting your audience

Saving Your Changes

When you’re all set to exit the LinkedIn profile editing process, in the top right hand corner, tap the Save button. Refer to below image:

Linkedin 10
Saving your changes

View and Test Your Recording

Now, you (or someone else) should see the tiny Audio icon next to your profile name. Select the icon to hear your name pronunciation. See following image:

Linkedin 11
Testing your name recording

That its. You and those you have selected can now hear the proper annunciation of your name.

I find TechSavvy.Life blog posts extremely helpful!

I Would Like to Hear From You

Please feel free to leave a comment. I would love hearing from you. Do you have a computer or smart device tech question? I will do my best to answer your inquiry. Please mention the device, app and version that you are using. To help us out, you can send screenshots of your data related to your question.

The author’s Vietnam eBook on the Battle for Tra Bong: Events and Aftermath

How to Format Notes on iPhone and iPad

Using Apple Notes is a fast way to capture thoughts and take notes on your iPhone or iPad. You can do more than just take plain text notes. Instead you can organize your notes by using formatting tools to make them stand out from plain text. Let’s explore how to do this.

This is for iPhone and iPad

Dilbert and High Risk

Copyright Scott Adams, Inc./Distributed by Universal Uclick for UFS

When you start a new note, Apple formats the first line into a Title format. You can change this by going to your Settings app, then navigate to:

Notes > New Notes > Starts With

and select your format. By default, the rest of your note is plain text.

As mentioned earlier, you can use formatting tools. These tools include headings, lists, indentations and more. These features are somewhat obscure for a new user.

The Formatting Toolbar

After opening a new note, tap on the screen to bring up the keyboard, if not already in view. Next, tap on the Aa button above the keyboard, the format row. You will see the text formatting tools that you can use. Refer to below image:

Notes 1
Accessing the formatting toolbar

The keyboard is replaced by the formatting toolbar split into three rows. See below image:

Notes 2
The formatting toolbar

From the first row, the Title Heading, Subheading and more are available to use. Monospaced is the only available font style to use in Notes. See following image:

Notes 3
The titles formatting

When the toolbar is open, tap the X to close, tap the plus sign (+) to open, both to the left of the toolbar.

From the middle row, you can change selected text to Bold, Italic, Underline or Strikethrough formats. You may select multiple formats. Refer to below image:

Notes 4
The text formatting

The last row has different bullet styles, indent and outdent formats. See below image:

Notes 5
The lists formatting

The Checklist is separate from the formatting toolbar. To add a checklist, tap on the Checklist icon. Simply, start typing in your item. Tap the Enter key to add a new item. To stop the checklist, tap the Enter key on an empty line. Refer to below image:

Notes 6
The checkbox formatting

To create a numbered list, start by typing 1 and then your first entry. To end your list, tap the Enter key on a blank line.

The Toolbar Examples

For a look at all our examples, see below image:

Notes 7
The entire formatting examples

I Would Like to Hear From You

Please feel free to leave a comment. I would love hearing from you. Do you have a computer or smart device tech question? I will do my best to answer your inquiry. Please mention the device, app and version that you are using. To help us out, you can send screenshots of your data related to your question.

The author’s Vietnam eBook on the Battle for Tra Bong: Events and Aftermath

How to Access your PC From an iPhone or iPad

With the Remote Desktop Mobile app for iOS and Android, you can connect to and control a remote Windows computer to work with your files and applications. This can be done from computer to computer, or you can use Microsoft’s Remote Desktop Mobile tool to access a remote PC from an iOS or Android device. With it, you can view the screen, open files and work with applications as easily as if you were in front of that computer. Let’s explore how to use the mobile app to access a remote computer.

We will first discuss setting up your PC for remote access, then explore what needs to be done on your iPhone or iPad. The steps for an Android will be similar

This is for PCs running Windows 10 and iPhones. The screenshots are for a PC and iPhone. Android devices will be similar.

Dilbert and Mask
Copyright Scott Adams, Inc./Distributed by Universal Uclick for UFS

Allow Remote Access

First, open Settings by typing in Settings in the Cortana search bar followed by clicking the app in upper left hand corner or click the Start button then click on the Settings tile (the cog wheel).

Next, click on the System option. Refer to below image:

Remote Access 1
Access the System option

Now, click on the Remote Desktop option. See below image:

Remote Access 2
Access Remote Desktop option for the PC

Next, slide the Enable Remote Desktop to the ON position. You will be presented with a confirmation screen. Just click Confirm to enable it. See following image:

Remote Access 3
Confirm Enable Remote Desktop access

By default, the options for Keep your PC awake for connections when it is plugged in and Make my PC discoverable on private networks to enable automatic connection from a remote device may both be enabled. To view or modify either option, click the corresponding link to Show settings, but you can leave both turned on at this point.

While you’re here, write down or copy the name of the PC as you may need it when you set up the connection. Refer to below image:

Remote Access 4
The Remote Desktop options for the PC

Remote Access Settings

Let’s check a few more options while in Settings. Click the Advanced settings link and make sure the box for Configure Network Level Authentication is turned on. This feature provides an extra layer of protection to ward off uninvited guests.

If you’ll be connecting to the computer on the same network via a Virtual Private Network (VPN) or other means, ignore the section for External connections. The section for Remote Desktop port shows the default port to listen for and accept a remote connection. Refer to below image:

Remote Access 5
Advanced Settings for Remote Desktop

Allowing User to Signin Remotely

By default, any user who has an administrative account on the remote PC can access it. Assuming you’re using a Microsoft Account or company account to sign into Windows, your best bet is to use that account to sign in remotely. 

If you want to give remote access to a different account, click the link at the bottom for Select users that can remotely access this PC. Click Add and enter the user name for the account you want to use. See below image:

Remote Access 6
Setup users to access the remote computer

Access Your IP Address

In the Cortana search box, enter cmd and press the Enter key. The Command Prompt app will open. Next, enter ipconfig and press the Enter key. Copy or write down your IP addresses (especially the IP4 address) for later use. Refer to below image: (Note! I have blanked out my IP addresses for security reasons).

Remote Access 7a

Access your User Account Name

If you are using a local account to sign in for Windows 10 and forgot your User Account name, navigate to the Settings app by:

  1. Pressing the Windows key + I
  2. Click the Accounts option
  3. Click on Your Info

Your User Account name will be in bold under your profile photo. See my info below:

Remote Access 13
Your Settings info

Download Remote Access for Your iPhone or iPad

Now, let’s explore the second part of our remote access, the iPhone or iPad setup.

To access the computer from your iPhone or iPad, download and install the Remote Desktop Mobile app from Apple’s App Store. Open the app, tap the plus (+) symbol in upper right hand, and choose the option to Add PC. See following image:

Remote Access 7
Add a PC to connect remotely

Setup Remote Access for iOS

At the Add PC window, enter the computer name or IP Address (both copied down earlier, normally this would be your IP4 address) in the PC Name field. Type the account name you want to use in the User Account field and password or leave the field set to Ask When Required if you’d rather enter the name each time for security reasons.

Under the General section, type a name in the field for Friendly Name to add a more convenient label for this connection. Turning on the switch for Admin Mode connects you to a console session to manage a Windows server; normally you would leave this turned off. The option for Swap Mouse Buttons swaps the left and right mouse buttons.

In the Gateway section, you will need to enable and set up the option for Gateway only if your organization uses a Remote Desktop Gateway to secure remote connections. See below image:

Remote Access 8
The Add PC options

Configure Session Features

Swipe down to the Device & Audio Redirection section to enable any features on your iOS device that you wish to use during a remote connection. You’d likely want to direct the Sound to play on this device. You may also want to enable the Clipboard if you plan to copy and paste back and forth. You can also enable the Microphone, Camera and Remote Storage. When finished, tap Save in the upper-right corner. Refer to below image:

Remote Access 9
Configure device features

Connect to Remote PC on iOS

The computer you wish to access will be displayed in the app. Tap the name and icon of the computer connection you just set up. The first time you try to access the computer, Remote Desktop may ask to verify the connection to that computer. Enable the option for Don’t ask me again for connections to this computer and then tap Accept. You may click the hamburger icon (the 3 dots) in lower left hand corner to edit your entries. See following image:

Remote Access 10
The connect icon to a PC from your smart device

Remote Connection Toolbar for iOS

You now should be connected to the remote computer. You may now open apps and windows, manage the desktop and do just about everything you can do if you were sitting in front of the PC.

If you get the error code “0x204”, navigate back to the section Setup Remote Access for iOS and enter the IP4 address in the PC Name field. If you still get the error code, then click here on guidelines to resolve this issue.

To help you control your remote session, the app displays a small toolbar at the top. Tap the Magnifying glass icon to zoom in on the screen. Tap it again to zoom back out. Tap the Keyboard icon to display your device’s keyboard. Refer to below image:

Remote Access 11
The Remote Desktop Connection toolbar

Manage Remote Connections

Tap the middle icon to view all your remote connections. Tap on a different remote connection to jump to another session. This page has its own toolbar at the top. Tap the Home icon to return to the home screen, where you can set up or access another connection. Tap the Hand icon to switch to touch-screen mode and tap the Mouse icon to switch to mouse mode. 

Tap the X button in the thumbnail to terminate the connection for that session. Otherwise, tap Disconnect All PCs to end every current session. See below image:

Remote Access 12
Access Remote Desktop options on the smartdevice

I Would Like to Hear From You

Please feel free to leave a comment. I would love hearing from you. Do you have a computer or smart device tech question? I will do my best to answer your inquiry. Please mention the device, app and version that you are using. To help us out, you can send screenshots of your data related to your question.

The author’s Vietnam eBook on the Battle for Tra Bong: Events and Aftermath

How to Use Widgets on Your iPhone and iPad

When you swipe right on your iPhone Lock or Home screen, you are presented with the Today View screen. On this screen are widgets from Apple main apps. If you want to customize this screen, you can add and customize widgets from Apple and/or third-party apps. Also, you can rearrange these widgets to your liking.

By default, Apple shows you the widgets from the Calendar, Siri App Suggestions, News, Weather and more. But that’s not all. When you go into the editing mode, you’ll discover that many of the apps that you have installed (whether they’re popular apps or not) include useful widgets.

You can add extra functionality to your iPhone using third-party app widgets. Here are a couple of recommendations:

This is for iPhone and iPad devices. Text and screenshots are for the iPhone.

Dilbert and Work
Copyright Scott Adams, Inc./Distributed by Universal Uclick for UFS

Accessing Your Widgets

Lets get started. First, swipe right when you’re on your iPhone’s Lock or Home screen to access the Today View. Here, you can swipe up to view more widgets and tap on any of the arrow buttons (to the right of the widget name) to expand or contract a widget. Refer to below image:

Widgets 1
Your Widgets screenshot

Editing a Widget

If we want to edit a widget, swipe all the way down to the bottom of the widgets screen and tap on the Edit button. See below image:

Widgets 2
Accessing the Edit button

At the top of the list are the widgets installed on your iPhone, they have a “-“ sign next to the widget name. See following image:

Widgets 3
Displaying your Widgets

Scroll down till you see the More Widgets listing, denoted by the “+” sign. Refer to below image:

Widgets 4
Listing of Widges you can add

Adding a Widget

When you see a widget you want to add, tap on that “+” sign next to the widget label. It will be added to the bottom of the enabled widgets list. Simply do this for each widget you want to add. In my example, I added the Bible widget. See following screen:

Widgets 5
Selecting a Widget to add

Remove a Widget

To remove a widget, navigate to the top of the list for the enabled widgets. Tap the “-“ sign left of the widget name, then tap the Remove option. Refer to below image for my removal of the Dropbox widget:

Widgets 6
Selecting a Widget to remove

This does not delete the iPhone app, only the widget associated with it.

Reorder Widgets

To reorder widgets, tap on the Hamburger icon to the right of the widget name and drag each item to a new location. See following image where I moved Siri App Suggestions to the top of the list:

Widgets 6
Rearrange a Widget

Saving Your Changes

To save all your changes, tap Done in upper right hand corner at the top of your enabled widgets list. Refer to below image:

Widgets 8
Saving all your changes

Note: Your must tap the Done option, if not, all your changes will be lost.

You will be taken back to the Today View with your saved changes.

When you add new apps, you can go back to the Edit screen and add new widgets to the Today View by following the above steps.

Checking if an App Has a Widget

To see if a widget is available for an app, press and hold the app icon. If it supports widgets, you will see the Add Widget link. Tap on it to add the widget to the bottom of Today View screen. See following image where I added back the Dropbox widget:

Widgets 9
Checking if your app has a Widget

As a confirmation, the Add Widget link will be replaced with a check mark. Refer to below image:

Widgets 10
Confirming your Widget has been added

That’s it. You have learned how to add, remove and rearrange your iPhone widgets. The process is similar for an iPad.

Feel free to tweet me. Thanks for reading this post and others.

I Would Like to Hear From You

Please feel free to leave a comment. I would love hearing from you. Do you have a computer or smart device tech question? I will do my best to answer your inquiry. Please mention the device, app and version that you are using. To help us out, you can send screenshots of your data related to your question.

The author’s Vietnam eBook on the Battle for Tra Bong: Events and Aftermath

How to Use the Files App to Share Files and Folders

With the release of iOS 13.4 and above, you can now share files and folders using your favorite share connection. This feature is built into the Files app.

Apple engineers took a long time in releasing this feature. It’s about time. Let’s see how this is done.

This is for iPhone and iPad running iOS 13.4 or higher

Dilbert and Reports
Copyright Scott Adams, Inc./Distributed by Universal Uclick for UFS

Sharing a Folder

First, launch the Files app. Navigate to the iCloud folder you would like to share. Next, press and hold the folder until a menu appears. Now, select Share. See below image:

iPhone Files 1
Selecting the Share option for a folder

Next, select Add People. Refer to below image:

iPhone Files 2
Selecting the Add People option for the folder to be shared

Now, select a share method from the options like Mail, Messages, Messenger and so on. See following image:

iPhone Files 3
Selecting the share connection for the folder

Type in your subject and message, if necessary, then select your audience. When finished, Send your message. See below image:

iPhone Files 4
Selecting the recipient(s) for sharing the folder

Change Access Rights

First, launch the Files app. Navigate to the shared iCloud folder. Next, press and hold the folder until a menu appears. Select Share then select Show People. Refer to below image:

iPhone Files 5
Accessing the Show People option

Tap a person in the list. Refer below to my list:

iPhone Files 6
Selecting the recipient(s) to change access rights

You are given two options for Permission: Can make changes and View only. You can also change Who Can Access options for the folder by selecting Only people you invite and Anyone with the link. See below image:

iPhone Files 7
Setting the access rights

There is the option to remove the user’s access, just tap Stop Sharing and tap OK. See following image:

iPhone Files 8
Cancelling the sharing

I Would Like to Hear From You

Please feel free to leave a comment. I would love hearing from you. Do you have a computer or smart device tech question? I will do my best to answer your inquiry. Please mention the device, app and version that you are using. To help us out, you can send screenshots of your data related to your question.

The author’s Vietnam eBook on the Battle for Tra Bong: Events and Aftermath