

With the Remote Desktop Mobile app for iOS and Android, you can connect to and control a remote Windows computer to work with your files and applications. This can be done from computer to computer, or you can use Microsoft’s Remote Desktop Mobile tool to access a remote PC from an iOS or Android device. With it, you can view the screen, open files and work with applications as easily as if you were in front of that computer. Let’s explore how to use the mobile app to access a remote computer.
We will first discuss setting up your PC for remote access, then explore what needs to be done on your iPhone or iPad. The steps for an Android will be similar
This is for PCs running Windows 10 and iPhones. The screenshots are for a PC and iPhone. Android devices will be similar.

Allow Remote Access
First, open Settings by typing in Settings in the Cortana search bar followed by clicking the app in upper left hand corner or click the Start button then click on the Settings tile (the cog wheel).
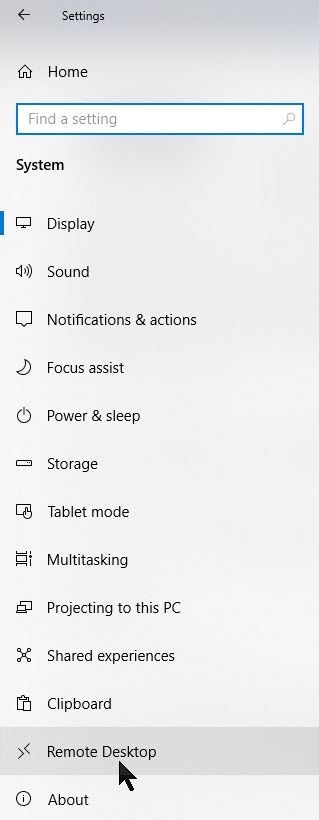
Next, click on the System option. Refer to below image:

Now, click on the Remote Desktop option. See below image:
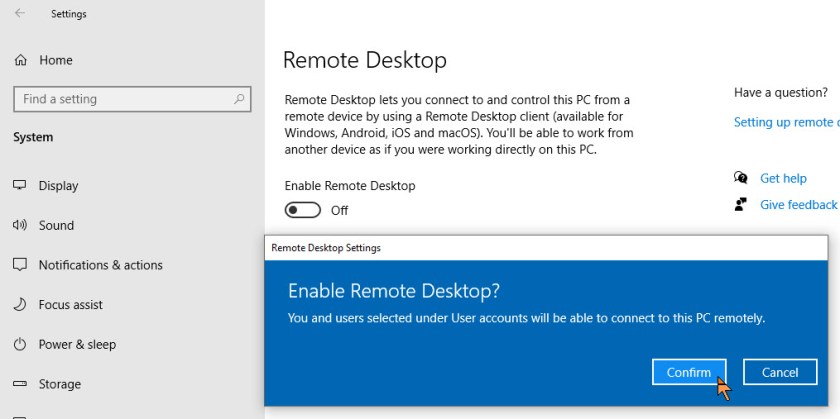
Next, slide the Enable Remote Desktop to the ON position. You will be presented with a confirmation screen. Just click Confirm to enable it. See following image:
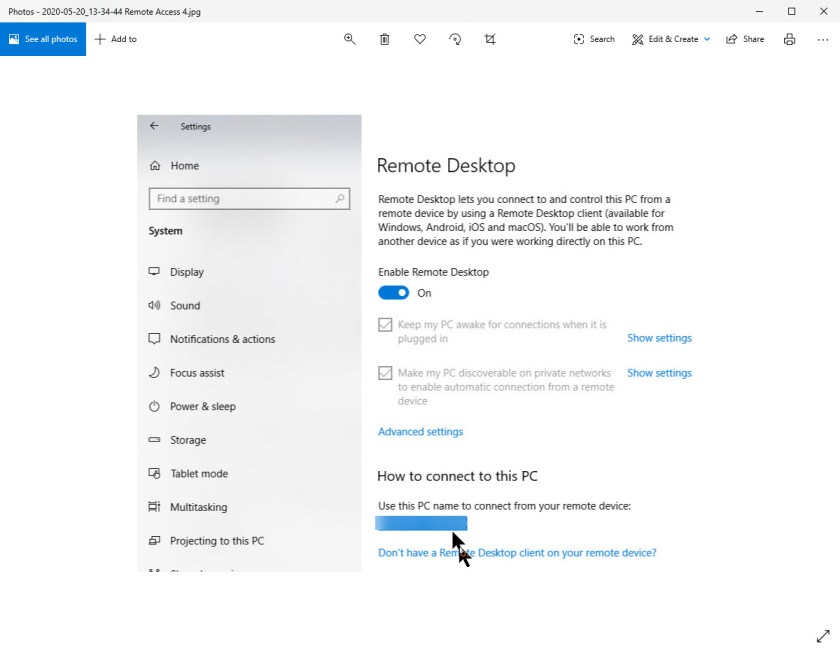
By default, the options for Keep your PC awake for connections when it is plugged in and Make my PC discoverable on private networks to enable automatic connection from a remote device may both be enabled. To view or modify either option, click the corresponding link to Show settings, but you can leave both turned on at this point.
While you’re here, write down or copy the name of the PC as you may need it when you set up the connection. Refer to below image:
Remote Access Settings
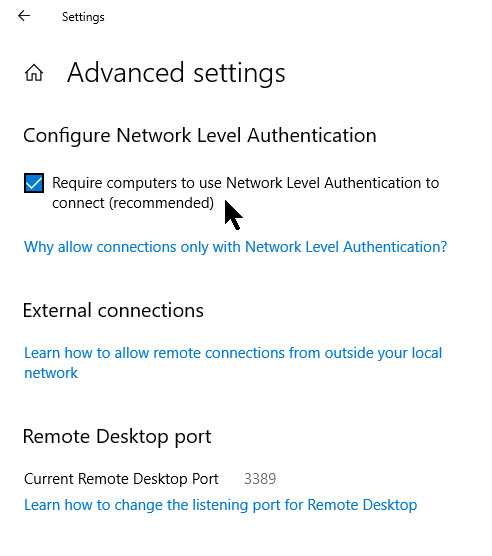
Let’s check a few more options while in Settings. Click the Advanced settings link and make sure the box for Configure Network Level Authentication is turned on. This feature provides an extra layer of protection to ward off uninvited guests.
If you’ll be connecting to the computer on the same network via a Virtual Private Network (VPN) or other means, ignore the section for External connections. The section for Remote Desktop port shows the default port to listen for and accept a remote connection. Refer to below image:
Allowing User to Signin Remotely
By default, any user who has an administrative account on the remote PC can access it. Assuming you’re using a Microsoft Account or company account to sign into Windows, your best bet is to use that account to sign in remotely.
If you want to give remote access to a different account, click the link at the bottom for Select users that can remotely access this PC. Click Add and enter the user name for the account you want to use. See below image:

Access Your IP Address
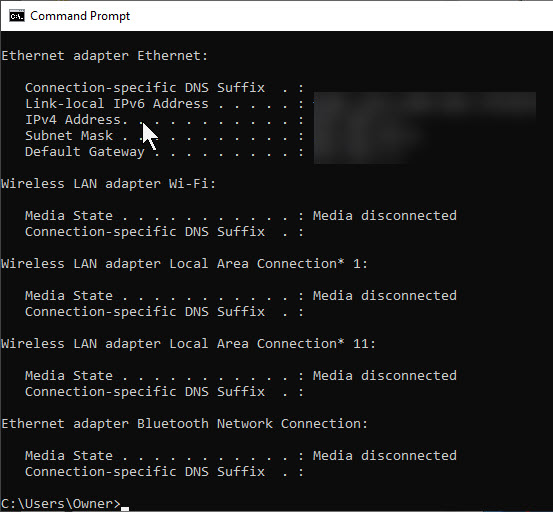
In the Cortana search box, enter cmd and press the Enter key. The Command Prompt app will open. Next, enter ipconfig and press the Enter key. Copy or write down your IP addresses (especially the IP4 address) for later use. Refer to below image: (Note! I have blanked out my IP addresses for security reasons).
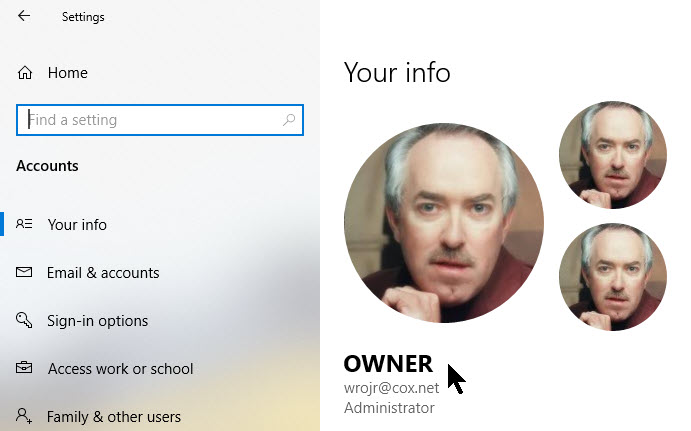
Access your User Account Name
If you are using a local account to sign in for Windows 10 and forgot your User Account name, navigate to the Settings app by:
- Pressing the Windows key + I
- Click the Accounts option
- Click on Your Info
Your User Account name will be in bold under your profile photo. See my info below:
Download Remote Access for Your iPhone or iPad
Now, let’s explore the second part of our remote access, the iPhone or iPad setup.
To access the computer from your iPhone or iPad, download and install the Remote Desktop Mobile app from Apple’s App Store. Open the app, tap the plus (+) symbol in upper right hand, and choose the option to Add PC. See following image:

Setup Remote Access for iOS
At the Add PC window, enter the computer name or IP Address (both copied down earlier, normally this would be your IP4 address) in the PC Name field. Type the account name you want to use in the User Account field and password or leave the field set to Ask When Required if you’d rather enter the name each time for security reasons.
Under the General section, type a name in the field for Friendly Name to add a more convenient label for this connection. Turning on the switch for Admin Mode connects you to a console session to manage a Windows server; normally you would leave this turned off. The option for Swap Mouse Buttons swaps the left and right mouse buttons.
In the Gateway section, you will need to enable and set up the option for Gateway only if your organization uses a Remote Desktop Gateway to secure remote connections. See below image:

Configure Session Features
Swipe down to the Device & Audio Redirection section to enable any features on your iOS device that you wish to use during a remote connection. You’d likely want to direct the Sound to play on this device. You may also want to enable the Clipboard if you plan to copy and paste back and forth. You can also enable the Microphone, Camera and Remote Storage. When finished, tap Save in the upper-right corner. Refer to below image:

Connect to Remote PC on iOS
The computer you wish to access will be displayed in the app. Tap the name and icon of the computer connection you just set up. The first time you try to access the computer, Remote Desktop may ask to verify the connection to that computer. Enable the option for Don’t ask me again for connections to this computer and then tap Accept. You may click the hamburger icon (the 3 dots) in lower left hand corner to edit your entries. See following image:

Remote Connection Toolbar for iOS
You now should be connected to the remote computer. You may now open apps and windows, manage the desktop and do just about everything you can do if you were sitting in front of the PC.
If you get the error code “0x204”, navigate back to the section Setup Remote Access for iOS and enter the IP4 address in the PC Name field. If you still get the error code, then click here on guidelines to resolve this issue.
To help you control your remote session, the app displays a small toolbar at the top. Tap the Magnifying glass icon to zoom in on the screen. Tap it again to zoom back out. Tap the Keyboard icon to display your device’s keyboard. Refer to below image:

Manage Remote Connections
Tap the middle icon to view all your remote connections. Tap on a different remote connection to jump to another session. This page has its own toolbar at the top. Tap the Home icon to return to the home screen, where you can set up or access another connection. Tap the Hand icon to switch to touch-screen mode and tap the Mouse icon to switch to mouse mode.
Tap the X button in the thumbnail to terminate the connection for that session. Otherwise, tap Disconnect All PCs to end every current session. See below image:

I Would Like to Hear From You
Please feel free to leave a comment. I would love hearing from you. Do you have a computer or smart device tech question? I will do my best to answer your inquiry. Please mention the device, app and version that you are using. To help us out, you can send screenshots of your data related to your question.
