RAYMOND OGLESBY @RaymondOglesby2
October 5, 2021
What does it mean to pin a post on Facebook? A pinned post is a status update that you manually select to stay at the top of your page’s timeline, meaning it will not slip down as you continue to add other posts to your page. Let’s explore how to do this.
This is for devices running Facebook

You can only have one post pinned to your profile at a time. If you try to pin a second post, that second post gets pinned and the first post gets unpinned.
Pin to Your Profile
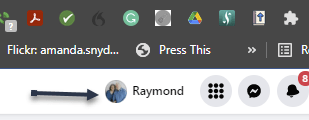
First, launch a web browser on your computer and access the Facebook site. Next, log in to your account and in the top right-hand corner of the site, click your profile icon. Refer to below image:
Now, on your profile page that opens, find the post you want to pin. At the top right-hand corner of the post, click the three dots menu. See below image:

Next, from the three-dots menu, select Pin post. See following image:

And immediately, Facebook will pin the selected post to the top of your profile page. Scroll up your profile and your pinned post will appear there. Refer to below image:

To unpin a pinned post, from the top right-hand corner of the pinned post, select the three dots menu and click Unpin post in the menu. See below image:

Facebook will remove the post from the top of your profile page. It will continue to appear at its original location in your profile, though. Now, refresh the page or exit Facebook.
Related
How to Pin/Unpin a Twitter Tweet
Pin to Your Page
In addition to your personal profile, you can pin a post to your Facebook page, too.
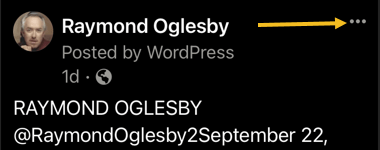
First, access your page and find a post to pin. (Note! I am doing this on my business page using my iPhone). Next, at the top right-hand corner of the post, click the three dots menu. See following image:
Now, from the three-dots menu, select Pin to Top. Refer to below image:

Next, Facebook will add your selected post to the top of the page.
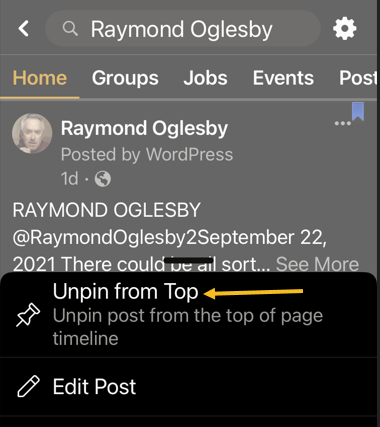
To remove the post from the top of the page, from the top right-hand corner of the post, click the three dots menu. Next, from the menu that opens, select “Unpin from Top. See below image:
Quote For the Day
You can’t just ask customers what they want and then try to give that to them. By the time you get it built, they’ll want something new.
Steve Jobs
That’s it. You now know how to pin/unpin a Facebook post. Please feel free to share this post! One way to share is via Twitter.
Just click the Tweet icon below. This will launch Twitter where you click its icon to post the Tweet.
Check out TechSavvy.Life for blog posts on smartphones, PCs, and Macs! You may email us at contact@techsavvy.life for comments or questions.
Tweet
I Would Like to Hear From You
Please feel free to leave a comment. I would love hearing from you. Do you have a computer or smart device tech question? I will do my best to answer your inquiry. Just send an email to contact@techsavvy.life. Please mention the device, app and version that you are using. To help us out, you can send screenshots of your data related to your question.