What’s Coming in iOS and iPadOS 15

Apple in June 2021 introduced the latest version of its iOS operating system, iOS 15, which is set to be released in the fall. iOS 15 introduces new features for FaceTime calls, tools to reduce distractions, a new notifications experience, added privacy features, complete redesigns for Safari, Weather, and Maps, and more.

Courtesy of MacRumors.com

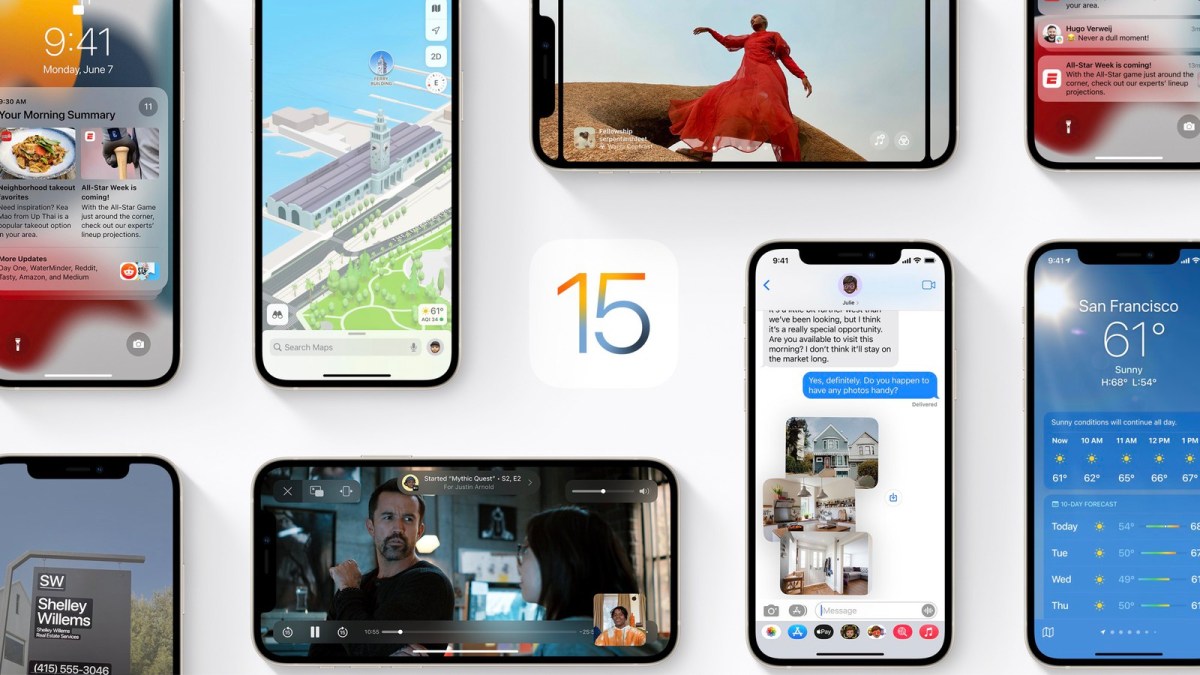
In June 2021 Apple introduced the latest version of its iOS operating system, iOS 15, which is set to be released in the fall. iOS 15 introduces new features for FaceTime calls, tools to reduce distractions, a new notifications experience, added privacy features, complete redesigns for Safari, Weather, and Maps, and more.

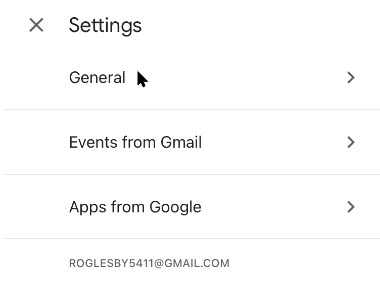
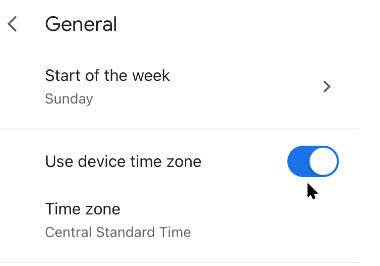
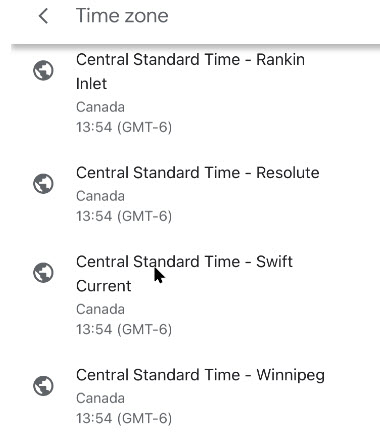
This is for devices running iOS and iPadOS 15

Dilbert and Auditors
Copyright Scott Adams, Inc./Distributed by Universal Uclick for UFS

Notifications have been redesigned in iOS 15, adding contact photos for people and larger icons for apps. To reduce distraction, a notification summary collects notifications together for delivery at an appropriate time and arranges notifications by priority.

Focus is a new feature that can filter notifications and apps based on what a user wishes to focus on at a certain time. When a user’s Focus is blocking incoming notifications, their status will be displayed to others in Messages. iOS will suggest a Focus for different occasions, such as work hours or winding down for bed, using on-device intelligence, but users can also create a custom Focus. When a Focus is set on one Apple device, it automatically applies to other Apple devices.

Safari features a completely new design. Controls are now easier to reach with one hand and give more focus to a webpage’s content. There is a new, compact tab bar that floats at the bottom of the screen so users can easily swipe between tabs. Tab Groups allow users to save tabs and easily access them at any time across devices. There is also a customizable start page and web extensions for the first time.

The Maps app now offers a new 3D view in cities with significantly enhanced details, showing buildings, pedestrian crosswalks, bike lanes, and more. There is a new city-driving experience with added road details and improved Transit features, such as pinned favorite lines, notifications to disembark, and walking directions.

iOS 15 brings voice isolation and Spatial Audio to FaceTime calls so that voices appear to sound as if they are coming from where the person is located on the screen.

FaceTime also supports Portrait mode and offers a new grid view to see more faces at the same time. SharePlay is a new feature that allows users to share media together in sync during a FaceTime call. Users can also generate shareable links to a scheduled FaceTime call, which can also be opened in Android and Windows devices.

The Weather app has been redesigned in iOS 15, showing more graphical displays of weather data, full-screen maps, and dynamic layouts that change based on weather conditions. Totally new animated backgrounds can now more accurately reflect the sun’s position and current precipitation, and there are notifications to highlight when rain or snow starts and stops.

The Wallet app adds support for new key types in iOS 15, such as homes, offices, or hotel rooms. Later this year, customers in participating U.S. states will be able to add a driver’s license or state ID to the Wallet app.

The Photos app features a major update to Memories with a new design and an interactive interface. Memories how supports integration with Apple Music, using on-device intelligence to offer song suggestions for personalized Memories.

Live Text is a new feature that uses on-device intelligence to recognize text in a photo that users can search for, highlight, and copy it. Spotlight can now search for photos by location, people, scenes, objects, and text. Spotlight now offers web image search and richer results for actors, musicians, TV shows, and movies. Enhanced results for contacts show recent conversations, shared photos, and even their location if shared through Find My.

iOS 15 also introduces new privacy measures, such as processing Siri requests directly on the iPhone, which has the added benefit of better responsiveness, Mail Privacy Protection to stop senders knowing if an email has been opened and detecting a recipient’s IP address, and an App Privacy Report view to show how often apps use the permissions they have been granted.

There are dozens of tweaks and changes for other apps, such as user-created tagsmentions, and an Activity view in the Notes app, TrendsWalking Steadiness, and a new sharing tab in the Health app, a systemwide Shared with You feature for highlighting content that has been shared in Messages conversations, and a new For All of You row in the TV app to suggest entertainment for the whole household.

iOS 15 is compatible with the iPhone 6s and later, which means it runs on all devices able to run iOS 14, and will be released this fall, 2021.

As you have read, lots of new features. Look forward to learning about iOS 15 in upcoming TechSavvy.Life blog posts.

Quote For the Day

I am just a child who has never grown up. I still keep asking these ‘how’ and ‘why’ questions. Occasionally, I find an answer.

Stephen Hawking

That’s it. Please feel free to share this post! One way to share is via Twitter.

Just click the Tweet icon below. This will launch Twitter where you click its icon to post the Tweet.

Check out TechSavvy.Life for blog posts on smartphones, PCs, and Macs! You may email us at contact@techsavvy.life for comments oar questions.

I Would Like to Hear From You

Please feel free to leave a comment. I would love hearing from you. Do you have a computer or smart device tech question? I will do my best to answer your inquiry. Just send an email to contact@techsavvy.life. Please mention the device, app and version that you are using. To help us out, you can send screenshots of your data related to your question.

The author’s Vietnam eBook on the Battle for Tra Bong: Events and Aftermath

How to Change the Default Fonts in Your Chrome Browser

While changing your browser’s font may not be a pressing issue, sometimes it is fun to make a change. We going to explore how to change the default fonts in Google Chrome.

While changing your browser’s font may not be a pressing issue, sometimes it is fun to make a change. We going to explore how to change the default fonts in Google Chrome.

This is for devices running Google Chrome

Dilbert and Issue
Copyright Scott Adams, Inc./Distributed by Universal Uclick for UFS

Changing Chrome’s Fonts

In order to change the fonts in Google Chrome, you will need to access your Customize Fonts section. First, open your Chrome browser. Next, click on the three 3-dot (hamburger icon) in the upper right-hand corner. Refer to below image:

Font 1
Accessing your Chrome menu

Now, click on Settings. See below image:

Font 2
Accessing Settings

Next, click on the Appearance tab in the sidebar. Now, scroll down until you get to the Customize Fonts section and click on it. See following image:

Font 3
Accessing your customize fonts section from the Appearance tab

Now, you can change all your font settings. Just click on each drop-down box and select a font from the listing. It is recommended you write down the default fonts in case you want to revert to the original ones. Refer to below image:

Font 4
Accessing the drop-down boxes to change your fonts

When finished, exit Settings and restart your Chrome browser for the changes to take effect.

Quote for the Day

If future generations are to remember us more with gratitude than sorrow, we must achieve more than just the miracles of technology. We must also leave them a glimpse of the world as it was created, not just as it looked when we got through with it.

Lyndon B. Johnson, Former President of the United States of America

That’s it. Please feel free to share this post! One way to share is via Twitter.

Just click the Tweet icon below. This will launch Twitter where you click its icon to post the Tweet.

Check out TechSavvy.Life for blog posts on smartphones, PCs, and Macs! You may email us at contact@techsavvy.life for comments or questions.

I Would Like to Hear From You

Please feel free to leave a comment. I would love hearing from you. Do you have a computer or smart device tech question? I will do my best to answer your inquiry. Just send an email to contact@techsavvy.life. Please mention the device, app and version that you are using. To help us out, you can send screenshots of your data related to your question.

The author’s Vietnam eBook on the Battle for Tra Bong: Events and Aftermath

How to Turn On Safer Browsing in Google Chrome

Google has some built-in tools in Chrome that attempt to make browsing safer. Enhanced Safe Browsing is one such tool.

With Safe Browsing, you get alerts about malware, risky extensions, phishing, or sites on Google’s list of potentially unsafe sites.

Google has some built-in tools in Chrome that attempt to make browsing safer. Enhanced Safe Browsing is one such tool. Let’s explore how to turn on this feature.

This is for the desktop version of Chrome and Android. Screenshots are from Chrome on Windows 10.

Copyright Scott Adams, Inc./Distributed by Universal Uclick for UFS

Enhanced Safe Browsing Explained

Safe Browsing is a list of dangerous URLs that is maintained by Google and used to protect users from malicious sites. Enhanced Safe Browsing builds upon this feature with some additional tools.

With Enhanced Safe Browsing enabled, Chrome shares even more browsing data with Google. This allows for threat assessments to be more accurate and proactive, though it does present a privacy concern in itself. You are letting Google monitor your browsing.

Per Google’s description, Enhanced Safe Browsing enables the following:

  • It predicts and warns you about dangerous events before they happen.
  • It keeps you safe on Chrome and may be used to improve your security in other Google apps when you are signed in.
  • It improves security for you and everyone on the web.
  • It warns you if passwords are exposed in a data breach.

Enable This Feature

The feature is available for Chrome on the desktop and Android. It is not available for iPhone and iPad. The process for enabling it is very similar on both platforms.

First, launch Chrome. Next, select the three-dot menu (the hamburger) icon in the top-right corner of Chrome. Now, choose Settings from the menu. Refer to below image:

Selecting Settings

Next, go to the Privacy and Security section. See below image:

Accessing Privacy and security option

Now, on the desktop, click Security. On the Android, it is called Safe Browsing. See following image:

Browsing 3
Accessing the Security option

Next, click or tap on the radio button to enable Enhanced protection. Refer to below image:

Enabling Enhanced protection

Now, exit Settings. You are finished. You will not notice anything different in your everyday browsing, but you will now have better protection. In the event that something is amiss, Google Chrome will give you a warning.

Please feel free to share this post! One way to share is via Twitter.

Just click the Tweet icon below. This will launch Twitter where you click its icon to post the Tweet.

Check out TechSavvy.Life for blog possts on smartphones, PCs, and Macs! You may email us at contact@techsavvy.life for comments or questions.

I Would Like to Hear From You

Please feel free to leave a comment. I would love hearing from you. Do you have a computer or smart device tech question? I will do my best to answer your inquiry. Just send an email to contact@techsavvy.life. Please mention the device, app and version that you are using. To help us out, you can send screenshots of your data related to your question.

The author’s Vietnam eBook on the Battle for Tra Bong: Events and Aftermath

How to Force Chrome to Always Open Previously Open Tabs

Let’s say you are in the middle of a complex task in Chrome but you need to restart, log out, or Chrome has crashed. With one quick settings change, Chrome can remember all of your open tabs and reload them automatically the next time you start Chrome. Let’s explore how to setup this feature.

Let’s say you are in the middle of a complex task in Chrome but you need to restart, log out, or Chrome has crashed. With one quick settings change, Chrome can remember all of your open tabs and reload them automatically the next time you start Chrome. Let’s explore how to setup this feature.

This is for devices running Google Chrome. Screenshots are from Windows 10

Copyright Scott Adams, Inc./Distributed by Universal Uclick for UFS

First, launch Chrome. In any window, click the three vertical dots button (the hamburger icon) in the upper right-hand corner and select Settings from the menu. Refer to below image:

Accessing Settings

Next, select On startup option in the sidebar. See below image:

Selecting On startup option

Now, in the On startup section, select the radio button beside Continue where you left off. See following image:

Enabling opening your previous tabs

You can also force Chrome to launch with a set of your favorite pages. In the same On startup page in Chrome Settings just select Open a specific page or set of pages instead. Refer to below image where you can open the browser to Chrome apps using the text of chrome://apps/.

Enabling open to a specific page

Here you will see your Google (and non Google) apps. Yes, you can add third party apps to your opening Chrome apps page. See below image:

Your Google apps screen

If you want Chrome to always open with a fresh, empty browser state, you can head back to this screen and select Open the New Tab page instead.

After that, close Settings, The next time you restart Chrome, all of your tabs will open again exactly where you left off.

Note! If you were browsing through Incognito (private mode) and you lose your tabs, Chrome will not remember them.

That’s it. Please feel free to share this post! One way to share is via Twitter.

Just click the Tweet icon below. This will launch Twitter where you click its icon to post the Tweet.

Check out TechSavvy.Life for blog posts on smartphones, PCs, and Macs! You may email us at contact@techsavvy.life for comments or questions.

I Would Like to Hear From You

Please feel free to leave a comment. I would love hearing from you. Do you have a computer or smart device tech question? I will do my best to answer your inquiry. Just send an email to contact@techsavvy.life. Please mention the device, app and version that you are using. To help us out, you can send screenshots of your data related to your question.

The author’s Vietnam eBook on the Battle for Tra Bong: Events and Aftermath

How to Change Google Assistant’s Voice

If you use the Google Assistant often, you might be getting tired of hearing the Assistant reply in the same voice. Fortunately, Google realized their customers wanted voice options for their devices, and introduced the ability to change your Assistant’s voice some time ago; and added a few surprise options.

If you use the Google Assistant often, you might be getting tired of hearing the Assistant reply in the same voice. Fortunately, Google realized their customers wanted voice options for their devices, and introduced the ability to change your Assistant’s voice some time ago; and added a few surprise options.

With a few simple steps, you can change the voice on all of your Google-powered devices, including your Chromebook and smartphones. Here’s the simple guide on how to change the Google Assistant’s voice.

This is for smartdevices using Google. Screenshots are from iPhone XR

Dilbert and Wrong
Copyright Scott Adams, Inc./Distributed by Universal Uclick for UFS

First, open the Google Assistant app from your iPhone App Library. Hold, swipe right, and release using the Dots bar at the bottom or swipe left all the way to open the App Library. Refer to below image:

Voice 1
Using the Dots bar

Next, at the top of your screen you will see a Search box. See below image:

Voicd 2
The App Library screen

Now, in the Search bar, type in google assistant and tap the app to open. See following image:

Voicd 3
The Google Assistant app

Here you will see a list of things you can do with the app. Locate the Assistant voice option and tap it. Refer to below image:

Voice 4
The Assistant Voice option

The default voice will be displayed, usually Red. At the bottom of your screen you will see the list of devices supporting this voice. See below image:

Voice 5
Selecting the Red voice, the default

To change the voice setting, just swipe the Dots bar to highlight one or tap a color bubble to hear a voice sample. After your selection, that voice will remain as your Google Assistant Voice setting. See following image;

Voicd 6
Selecting the Amber voice

Google Assistant also has the option to assume a variety of celebrity voices, giving you some very unique options for your voice assistant. The range of celebrity voices available continues to grow, but popular options currently include John Legend and Issa Rae.

You may have found the celebrity voice options when looking at the voice settings we mentioned earlier, but there’s an, easier way to give your Google Home a celebrity voice. All you have to do is say, “Hey Google, talk like John Legend,” or whoever you prefer, and the voice assistant will address you in that voice until you tell it otherwise. All voices are not available in all areas.

Now, exit the Assistant. That’s it. Please feel free to share this post! One way to share is via Twitter.

Just click the Tweet icon below. This will launch Twitter where you click its icon to post the Tweet.

spacer

Check out TechSavvy.Life for blog posts on smartphones, PCs, and Macs! You may email us at contact@techsavvy.life for comments or questions.

I Would Like to Hear From You

Please feel free to leave a comment. I would love hearing from you. Do you have a computer or smart device tech question? I will do my best to answer your inquiry. Just send an email to contact@techsavvy.life. Please mention the device, app and version that you are using. To help us out, you can send screenshots of your data related to your question.

The author’s Vietnam eBook on the Battle for Tra Bong: Events and Aftermath

How to Auto-Delete Your Google History Activities

Google collects and remembers “tons” of information about your activity, including your web, search, YouTube, and location history. Google auto-deletes for new users after 18 months but it will remember history forever if you previously enabled this feature with the default options.

Google collects and remembers “tons” of information about your activity, including your web, search, YouTube, and location history. Google auto-deletes for new users after 18 months but it will remember history forever if you previously enabled this feature with the default options.

As an existing user, you have four options in making Google delete your data; after 36 months, 18 months, 3 months, or stop activity collection entirely. The options are buried in Google Settings.

This is for devices running Google. Screenshots are from iPhone XR

Dilbert and Vaccine
Copyright Scott Adams, Inc./Distributed by Universal Uclick for UFS

Note! Google uses this history to personalize your experience, including your web search results and recommendations. Deleting it will make your Google experience less “personalized.”

Let’s explore how to set up this auto-delete function..

Control Web and App Activity

First, launch Google and tap your profile photo. Refer to below image:

Google 1
Launch Google

Now, tap the Google Account settings option See below image:

Google 2
Accessing Google Account option

Next, scroll down to Privacy & personalization section and tap Manage your data & personalization. See following image:

Google 3
Accessing your data and personalization link

Now, scroll down to Activity controls section. Here, tap the Web & App Activity option. Refer to below image:

Google 4
Accessing your Web & App Activity section

Next, toggle to On the Web & App Activity toggle. Next, tap the Auto-delete (Off) switch to turn in On. See below image:

Enabling Auto-delete by its link

Now, select one of four options. See following image where I selected Auto -delete activity older than 18 months and tap the Next button:

Google 6
Selecting one of four options for Auto-delete

A Confirmation screen will be displayed. Just tap the Confirm button in lower right-hand corner. Refer to below image:

Google 7
Confirming your selection

Now, you will see a Preference saved dialog box. Just tap Got It text in lower right-hand corner. See below image:

Google 8
Saving your preference

Control Location and YouTube Activity

Next, go back to Activity controls section and repeat above steps for Location History and YouTube History.

Let’s say you Search, read articles, watch videos, or see photos on ‘drones’. Google will send out ad links for ‘drones’, this is called ‘ad personalization’. Through these sponsored ads is one way Google makes money. You can turn off these ads but at the expense of a ‘depersonalization experience’.

Control Ad Personalization

Now, go back to Activity controls and scroll down a little till you see the Ad personalization section and tap the Go to ad settings link. See following image:

Google 9
Selecting your ad settings link

Next, toggle the Ad personalization switch to ON. Refer to below image:

Google 10
Enabling your Ad personalization

Here you will see a listing of companies/others who are using ad personalization. See below image where I selected WooCommerce:

Google 11
Selecting a targeted ad

Now, you will be presented a dialog box to Turn off or Close. Next, tap the Turn off button to no longer see this company/others targeted ads. See following image:

Google 12
Turning off your targeted ad

Now, a confirmation dialog box appears where you have to tap the Turn off button again. Google makes you go through ‘hoops’ to reduce their ads. Refer to below image:

Google 12
Your confirmation for turning off the targeted ad

Really, Turn Off Ads?

Google is making you go through a myriad of selections. Notice the text that states turning off your selected ad will stay off for at least 90 days. Your selected ad will stay off for this period, then guess what, the ad comes back! Google wants to make money off these ads; they do not want you to turn them off. See above image.

That’s it. Please feel free to share this post! One way to share is via Twitter.

Just click the Tweet icon below. This will launch Twitter where you click its icon to post the Tweet.

Check out TechSavvy.Life for blog posts on smartphones, PCs, and Macs! You may email us at contact@techsavvy.life for comments or questions.

I Would Like to Hear From You

Please feel free to leave a comment. I would love hearing from you. Do you have a computer or smart device tech question? I will do my best to answer your inquiry. Just send an email to contact@techsavvy.life. Please mention the device, app and version that you are using. To help us out, you can send screenshots of your data related to your question.

The author’s Vietnam eBook on the Battle for Tra Bong: Events and Aftermath

How to Block Fact Checkers and Gate Keepers On Facebook

Have you received the message “This post has been removed for misinformation… or deemed inappropriate….” on Facebook. Just who are these Facebook “Police”?

Who you goin to call, Fact Checkers? A ‘play on words’ from the movie ‘Ghostbusters’.

Have you received the message “This post has been removed for misinformation… or deemed inappropriate….” on Facebook. Just who are these Facebook “Police”?

You will be surprised at the number of people who use ‘fact checker’ or ‘gate keeper’ as their name

Facebook has partnered with independent third-party fact-checkers globally who are certified through the non-partisan International Fact-Checking Network (ICFN). This fact-checking program launched in 2016, and has continued to expand it since then to cover more languages and countries.

The focus of this program is to address viral misinformation; provably false claims, particularly those that have the potential to mislead or harm.

Fact-checking partners are able to review content across both Facebook and Instagram, including organicand boosted posts. They can also review videos, images, links or text-only posts.

There are a lot of guides on the Internet that tell you to block ‘fact checker’ from the Facebook block user function. However, all this does is block users and pages that call themselves ‘fact checker’. Facebook does not actually disclose who and where the ‘fact checker’ actually are, so blocking random pages named ‘fact checker’ won’t really do much. The same goes for ‘gate keeper’.

So, this post is just for fun and informational. You are unable to actually block a Facebook ‘fact checker’ or ‘gate keeper’. With that said, let’s explore how to block people who call themselves ‘fact checker’ or ‘gatekeeper’.

This is for devices running Facebook

Dilbert and Wrong
Copyright Scott Adams, Inc./Distributed by Universal Uclick for UFS

Who Are Fact Checkers

Source: Facebook

Since we do not believe that a private company like Facebook should be the arbiters of truth, we rely on independent fact-checkers to identify and review potential misinformation, which enables us to take action.

  1. Identify: We identify potential misinformation using a variety of signals, and our fact-checking partners can also proactively identify content on their own.
  2. Review: Fact-checkers review and rate the accuracy of stories through original reporting, including interviewing primary sources, consulting public data, and conducting analyses of media, including photos and video.
  3. Act: Once we have a rating from a fact-checking partner, we take action by ensuring that fewer people see that misinformation by surfacing fact-check articles to users across our platforms and showing labels on top of false stories.

Who Are Gate Keepers

Source: Slate

Facebook Oversight Board is their gatekeeper. A gatekeeper decides what is free speech or not. The board will act much like a court of appeals for the platform, and it will take on cases regarding how to handle controversial content on Facebook and Instagram. The board will also act in an advisory capacity, giving policy recommendations to the company.

Block a Fact Checker

First, launch Facebook and tap the Menu icon. Refer to below image:

FC 1
Accessing Facebook menu

Now, scroll down and open the Settings and Privacy section and tap Settings. See below image:

FC 2
Accessing Facebook settings

Next, scroll down to the Blocking section and tap it. See following image:

FC 3
Accessing the Blocking section

Next, tap the link Add to blocked list. Refer to below image:

FC 4
Accessing the Add to blocked list link

At the top of the page, in the Search box, type in: fact checker. Here you will see a long list of people using the name of ‘fact checker’. See below image:

FC 5
Entering Fact Checker in the Search box

Next, tap a listing or the Block icon and you will be given a dialog box to Block or Cancel. Tap the Block icon. That person will be added to your Blocked People list. See following image:

FC 6
Blocking a Fact Checker

Now, repeat the above for each ‘fact checker’ person you want to block. Next, in the Search box, type in: fact checkers. Here you will see another long list of people using the name of ‘fact checkers’. Next, tap a listing or the Block icon. Tap the Block icon and repeat for each person in the list as needed.

Block a Gate Keeper

Go back to the Search box and type in: gate keeper. Here you will see a long list of people using the name of ‘gate keeper’. Refer to below image:

FC 7
Entering Gate Keeper in the Search box

Next, tap a listing or the Block icon you will be given a dialog box to Block or Cancel. Tap the Block icon. See below image:

FC 8
Blocking a Gate Keeper

Repeat the above for a search of ‘gate keepers’ and block as needed. Next, tap the back button to see your Blocked People list that includes ‘fact checker’, ‘fact checkers’, ‘gate keeper’ and/or ‘gate keepers’. Why do people use such names? See following image:

FC 9
Your Blocked People list

Now, tap all the way back using the Back button and exit Facebook.

I hope you learned something about the Facebook ‘Police’. We did. Well, that’s it. Please feel free to share this post! One way to share is via Twitter.

Just click the Tweet icon below. This will launch Twitter where you click its icon to post the Tweet.

Check out TechSavvy.Life for blog posts on smartphones, PCs or Macs! You may email us at contact@techsavvy.life for comments or questions.

I Would Like to Hear From You

Please feel free to leave a comment. I would love hearing from you. Do you have a computer or smart device tech question? I will do my best to answer your inquiry. Just send an email to contact@techsavvy.life. Please mention the device, app and version that you are using. To help us out, you can send screenshots of your data related to your question.

The author’s Vietnam eBook on the Battle for Tra Bong: Events and Aftermath

How to Save Facebook Posts to Read Them Later

Facebook can feel a little overwhelming. What if you miss a post and you can not find it later? Thankfully, Facebook has a bookmarking feature to help you keep track of things and save them for later.

Facebook can feel a little overwhelming. What if you miss a post and you can not find it later? Thankfully, Facebook has a bookmarking feature to help you keep track of things and save them for later.

You can save shared links, posts, photos, videos, and even pages and events. These things can all be organized into Collections. Let’s explore how to do this.

This is for iPhone, iPad, and Android using Facebook

Dilbert and Teamwork
Copyright Scott Adams, Inc./Distributed by Universal Uclick for UFS

How to Save Facebook Posts

First, find any Facebook post you would like to save. Tap or click the three-dot hambuger icon in the upper right-hand corner of the post. Refer to below image:

FB 1
Accessing the hamburger icon for a post

Next, select Save Post (or Save Event, Save Link, etc). In my example I am saving a link. See below image:

FB 2
Accessing Save link option

After you select Save Post or Link, etc, you will immediately get the choice to save it to a collection or create a new one. See following image:

FB 3
Saving the link to collection For Later

How to Access Facebook Posts

Now, you will need to open the post (if it is a link) and tap the hamburger icon. Next, select View Saved Items. Refer to below image:

FB 4
Accessing View saved items option

The most recent items will appear at the top, and Collections can be found underneath. See below image:

FB 5
Listing of your most recent saves

Thje steps are similar for your desktop version of Facebook. That’s it! This is a nice little trick to save posts you enjoyed or to remember to read something later.

Just click the Tweet icon below. This will launch Twitter where you click its icon to post the Tweet.

Check out TechSavvy.Life for blog posts on smartphones, PCs, and Macs! You may email us at contact@techsavvy.life for comments or questions.

I Would Like to Hear From You

Please feel free to leave a comment. I would love hearing from you. Do you have a computer or smart device tech question? I will do my best to answer your inquiry. Just send an email to contact@techsavvy.life. Please mention the device, app and version that you are using. To help us out, you can send screenshots of your data related to your question.

The author’s Vietnam eBook on the Battle for Tra Bong: Events and Aftermath

How to Edit Office Documents Directly in GMail

Google is making it even easier to work with Microsoft Office files, with the company now allowing you to directly edit attached Office files in Gmail as well as Google Docs, Sheets and Slides. It’s available to all Gmail users, free and paid accounts. No more document conversion hassles, at long last!

Google is making it even easier to work with Microsoft Office files, with the company now allowing you to directly edit attached Office files in Gmail as well as Google Docs, Sheets and Slides. It’s available to all Gmail users, free and paid accounts. No more document conversion hassles, at long last!

This is for devices using Google Gmail

Dilbert and Smell
Copyright Scott Adams, Inc./Distributed by Universal Uclick for UFS

Google Editing Explained

Previously, documents had to be imported into Google Drive in order to edit or modify them; while emailed attachments were only able to be viewed.

The new workflow, however, streamlines that process considerably. Now, you can directly open and edit an Office file using the Google Docs editor just by clicking on it; just like you would a native Google Docs. But the new editing function does not convert Office files into Google Docs, instead preserving the original file format.

Gmail will allow you to respond to the original email and include the now-updated file (still in an Office file format) without first requiring you to download and re-attach the updated file.

This means you can now edit your Word, Excel and PowerPoint files without ever leaving Gmail.

For example, when you receive a Word document as an email attachment, you can open it and start editing in Docs with a single click while still preserving the Word file format.

With the new change, Microsoft Office attachments will have a new “edit” option and when edits are complete, there will be a new option to share the document via email.

Remove a Chrome Extension

First, you must remove an Extension (if installed) from Google Chrome.

  1. Sign into your managed Google Account.
  2. In a Chrome browser, click More.
  3. Scroll down to More tools.
  4. Click Extensions.
  5. Find the Office Editing for Docs, Sheets. & Slides extension and click Remove.

Once you have removed the Extension you can use the Office editing feature.

Directly Edit Office Attachments

Any incoming email with a Microsoft Office document appears in the Inbox list with icons, preview pane, and the name of the document attachment. Refer to below image:

Gmail 1
Accessing the email with attached Office files

Clicking one of those panes opens a pop-up windows with various options. At top right there is a download button; use that to save a copy for opening in Word, Excel or PowerPoint on your computer. Now, click on the Edit icon to edit your file. See below image where we are selecting the Word file to edit:

Gmail 2
Selecting the Edit for a Word file

Hover your mouse over each attachment to see some options:

  • Download – save to your computer
  • Save to Google Drive
  • Edit with Google Docs – opens a new browser window ready to edit.

After Google Editing

Once you have edited the attachment, there are various options for sharing the revised document. Look under the File menu. See following image for the Email option:

Gmail 4
Your Email option

Now, checkout your various options to save the document. Refer to below image for the Download options:

Gmail 5
Your Download options

Google Editing of Office Files

Word docx files can be edited directly with Google Docs, look for the .DOCX icon at top left. See below image:

Gmail 6
Edit a Word document

Excel xlsx files can be edited directly with Google Sheets look for the .XLSX icon at top left. See following image:

Gmail 7
Edit an Excel file

PowerPoint .pptx files can be edited directly with Google Slides, look for the .PPTX icon at top left. Refer to below image:

Gmail 8
Edit a PowerPoint file

Note! There may be compatibility problems between Excel and Sheets or PowerPoint and Slides.

You are finished. Please feel free to share this post! One way to share is via Twitter.

Just click the Tweet icon below. This will launch Twitter where you click its icon to post the Tweet.

Check out TechSavvy.Life for blog posts on smartphones, PCs, and Macs! You may contact us at contact@techsavvy.life for comments or questions.

I Would Like to Hear From You

Please feel free to leave a comment. I would love hearing from you. Do you have a computer or smart device tech question? I will do my best to answer your inquiry. Just send an email to contact@techsavvy.life. Please mention the device, app and version that you are using. To help us out, you can send screenshots of your data related to your question.

The author’s Vietnam eBook on the Battle for Tra Bong: Events and Aftermath

How to Use Different Time Zones in Google Calendar on Mobile Devices

You can change your time zone and create events with certain time zones. This helps if you will be traveling when the event happens, or if you are creating events for people in different time zones.

You can change your time zone and create events with certain time zones. This helps if you will be traveling when the event happens, or if you are creating events for people in different time zones.

Time might be constant, but your time zone does not have to be. You can set a one-off time zone to an event, or set primary and secondary (desktop version only) time zones for an entire calendar or account.

This is for Android, iPhone, and iPad running Google Calendar

Copyright Scott Adams, Inc./Distributed by Universal Uclick for UFS

How Your Calendar Uses Time Zones

According to Google:

  • For Events; When you create an event, you will see it in your local time zone. It will also show up in the local time zones for anyone you invite, even if they are in a different time zone.
  • For Reminders: Reminders always show up at the same hour regardless of time zone. For example, a daily 9 AM MT reminder becomes a 9 AM ET reminder if you travel from Denver to New York.
  • For Tasks: Tasks adapt to the new time zone if the Calendar’s time zone is changed after a task is created. For example, a 9 AM MT task changes to an 11 AM ET task if you travel from Denver to New York.

Confused, I am. Why not make all these options the same? I do not know why Google treats each option differently. Lets explore how to set a Google Calendar time zone.

Change Your Time Zone for One Event

You can change the time zone for a new or existing event in the Google Calendar app on Android, iPhone, and iPad.

To create a new event, click the Add button in the bottom-right corner and select the type of event you wish to create. Refer to below image:

Calendar 1
Add an Event

To edit an existing event, tap on that event in your calendar view and then tap the Edit Event button. See below image:

Calendar 2
Edit an Event

Next, in the event details menu, tap the current time zone. (Note!. You may have to tap More options to see the time zone). See following image:

Calendar 3
The current time zone for the Event

In the next menu, search for a country or specific time zone. Next, tap one of the results to select it as the new time zone. (Note! I kept the Event in CST). Refer to below image:

Calendar 4
Selecting a time zone for the Event

The time zone for the event will be added immediately after selecting it from the Search menu.

Confirm the rest of the event details are correct. Now, tap the Save button in the top-right corner to save the Event with the new time zone details. See below image:

Calendar 5
Save your changes

Change Your Time Zone Settings for All Events

When you travel to a different time zone, you can see your calendar in the local time. This can be confusing. The time zone is updated depending on if you are creating an event, reminder, or task. To keep your event times in your local time, I recommend not to create events, reminders, or tasks while in a different time zone, espicially if you are only going to be away from home a short while; wait till you get back to your local time zone to create them.

To change this setting:

Launch the Google Calendar app.

Next, tap the Menu hamburger icon in top left of your screen. See following image:

Calendar 6
Acccess the Menu

Now, swipe down and tap the Settings option. Refer to below image:

Calendar 7
Access Settings

Next, tap the General option. See below image:

Calendar 8
Access the General option

Now, tap Use device time zone on or off. If On, your device will update automatically as you travel. See following image:

Calendar 9
Selecting Use device time zone toggle

If Off, you can select a new time zone from the drop down menu. (Note! I kept the Events in CST). Refer to below image:

Calendarr 10
=Select a time zone for all Events

The new time zone for Google Calendar on your device will be applied automatically. Any entries in your Google Calendar will now be displayed in this new time zone on your mobile device. As I mentioned previously, this can be confusing, at least to me it is, so make sure what time zone you want to create events, teminders, or tasks. Now, tap back and exit Settings.

You are finished. Now you know how to see time zones in Google Calendar for events, remindars, or tasks. Please feel free to share this post! One way to share is via Twitter, as mentioned below.

Just click the Tweet icon below. This will launch Twitter where you click its icon to post the Tweet.

Check out TechSavvy.Life for blog posts on smartphones, PCs, and Macs! You may email us at contact@techsavvy.life for comments or questions.

I Would Like to Hear From You

Please feel free to leave a comment. I would love hearing from you. Do you have a computer or smart device tech question? I will do my best to answer your inquiry. Just send an email to contact@techsavvy.life. Please mention the device, app and version that you are using. To help us out, you can send screenshots of your data related to your question.

The author’s Vietnam eBook on the Battle for Tra Bong: Events and Aftermath