How to Turn iPhone Live Photos to Videos

The iPhone allows users to convert Live Photos into videos through the Shortcuts app, creating high-quality clips. Users need to download a specific shortcut from Apple’s website, after which they can select the Convert Live Photos to Video shortcut and choose the photo they wish to convert. The shortcut only works with Live Photos, and for best results, users should select pictures that depict movement. Live Photos can be used with the Bounce, Loop, or Long Exposure effect.

RAYMOND OGLESBY @RaymondOglesby2
November 7, 2023

This is for the iPhone. Screenshots are from iPhone 14 Pro running iOS 16+

If you can not do something in the Apple Photos app on your iPhone, chances are there is a third-party photo-editing app that can. For instance, have you ever viewed a Live Photo and realized it would make a much better video? Get it done with the Shortcuts app. It only takes a few minutes to set up and a couple taps to perform. Let’s explore this feature.

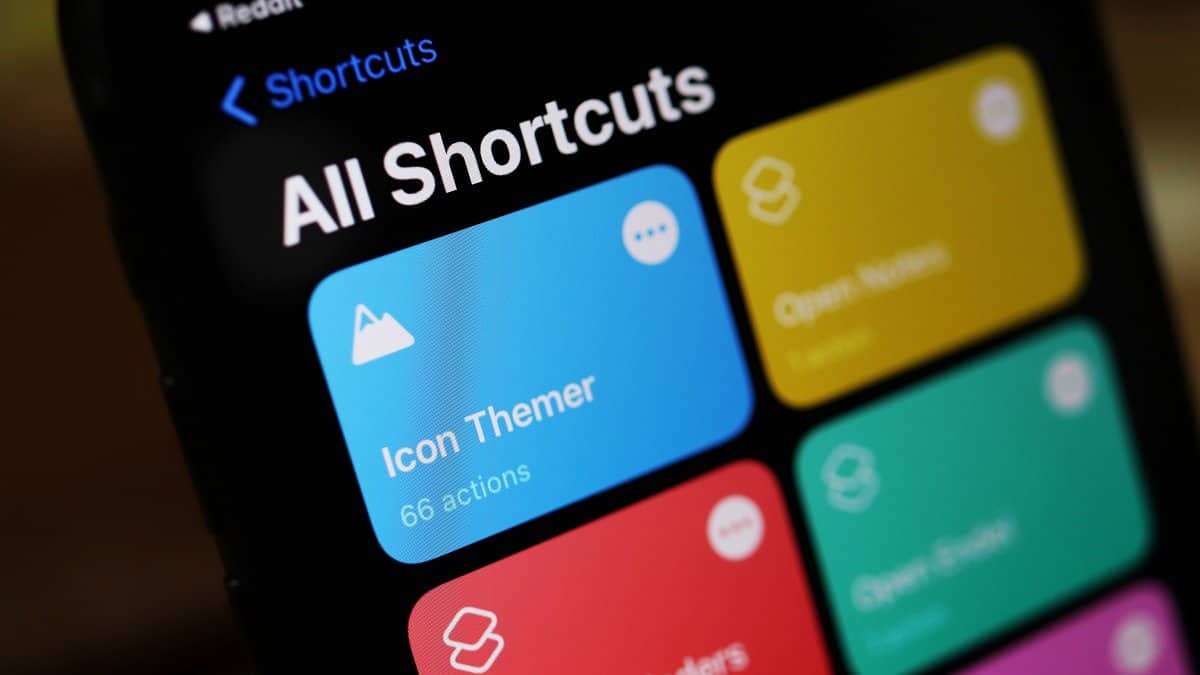
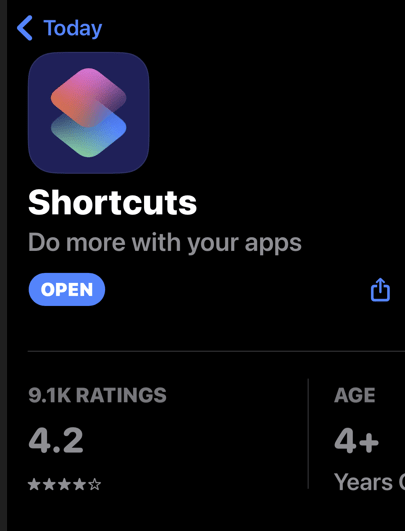
First, Apple’s Shortcuts app should already be on your iPhone, but you can also download it from the App Store. Refer to the below image:

Live Photo 1
Get your Shortcuts app

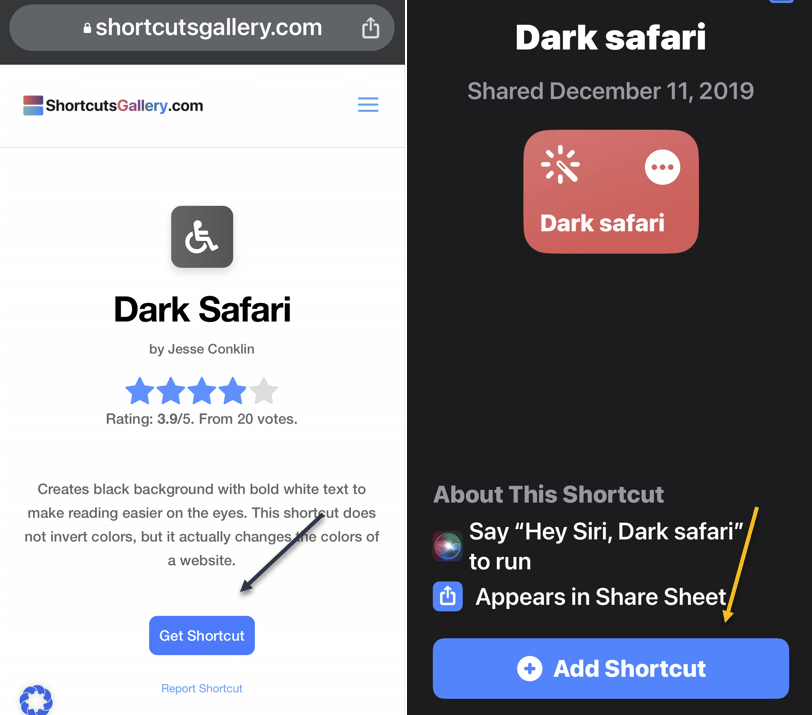
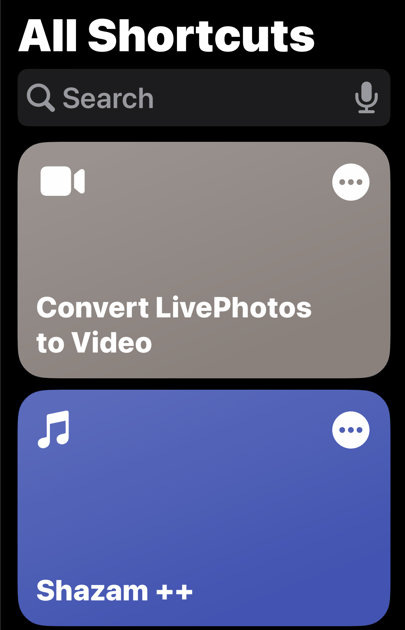
While the app comes loaded with many different pre-existing shortcuts, you must download a specific one from Apple’s website to convert Live Photos to videos.

Next, head to the Convert LivePhotos to Video page and tap the Add Shortcut button. See the below image:

Live Photo 2
Add the Convert shortcut

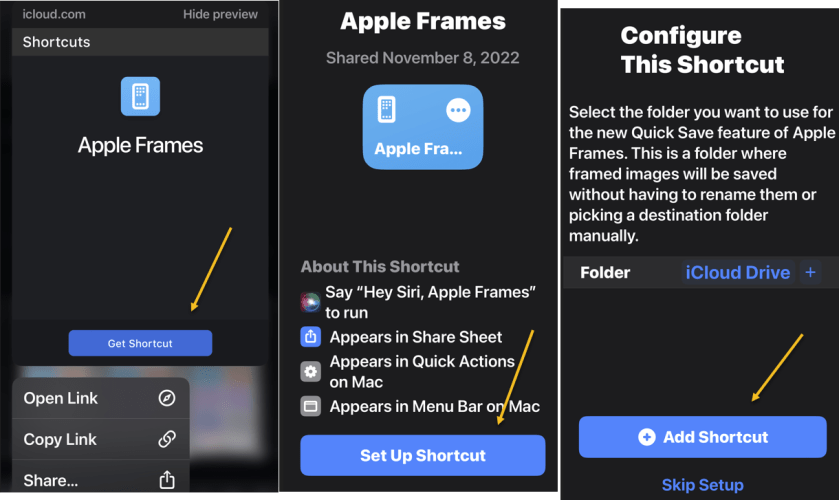
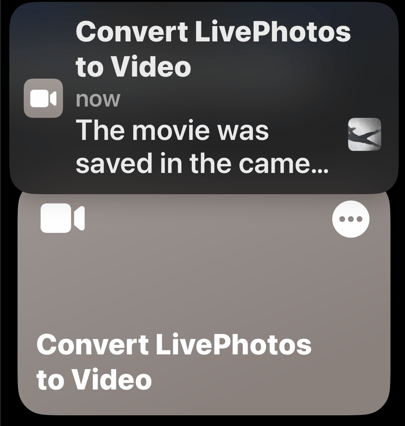
Now, this will add it to your Shortcuts app. See the following image:

Live Photo 3
Your Shortcut added

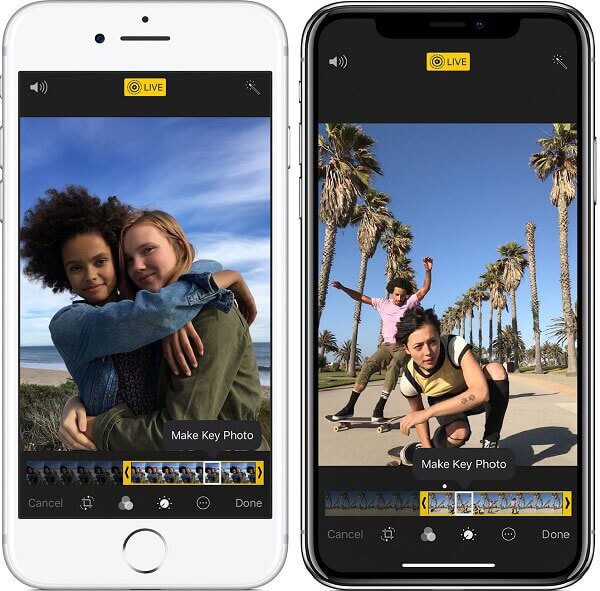
Next, all you have to do is select the Convert Live Photos to Video shortcut and pick the Live Photo you wish to convert. That’s all it takes. The new video will automatically be added to your Camera Roll as if you captured the clip with your phone’s camera. Refer to the below image:

Live Photo 4
Message about the conversion

Now, if you have ever edited a Live Photo, you might notice that most of the photo outside the Key Photo can be quite blurry. However, your new video will retain the quality of the main photo throughout, giving you a crisp and clear clip. Click on the image to play the video:

Live Photo to Video example

This process is as simple as can be, but there are a few tricks to get the best results possible.

  • This might sound obvious, but the shortcut only works with Live Photos.
  • When selecting photos to convert, filter out all still images in Apple Photos by selecting Albums > Live Photos to make sure you are only viewing Live Photos.
  • For best results, select photos that depict movement. For example, fireworks, moving cars, grass blowing in the wind, ocean waves crashing, etc. These will make for a better video than a stationary moment.
  • You can use Live Photos with the Bounce, Loop, or Long Exposure effect.
  • While you can not make a Boomerang out of a Live Photo, or a photo with the Bounce effect, you can convert your Live Photo to a video and make a Boomerang.

Related

Convert a Live Photo to a Still Photo

Disclaimer

Technology is always changing and rarely is there static tech for smartphones and desktops. Thus, the contents of this post are only valid at the time of writing. Blog posts older than six months may have directions incompatible with your device or OS. Hopefully, older post content will continue to work as advertised. Thank you for reading TechSavvy.Life for Technology at Work For You.

So often people are working hard at the wrong thing. Working on the right thing is probably more important than working hard.

Caterina Fake

You are finished. Please feel free to share this post! One way to share is via Twitter.

Just click the Tweet icon below. This will launch Twitter where you click its icon to post the Tweet.

Just click the Tweet icon below. This will launch Twitter where you click its icon to post the Tweet.

Please feel free to leave a comment. I would love to hear from you. Do you have a computer or smart device tech question? I will do my best to answer your inquiry. Just send an email to contact@techsavvy.life. Please mention the device, app, and version you are using. To help us out, you can send screenshots of your data related to your question.

The author’s Vietnam eBook on the Battle for Tra Bong Vietnam: Events and Aftermath

How to Use the App Library to Organize Your Home Screen

Apple’s App Library has been designed to help iPhone and iPad users manage and locate their apps more easily by organizing them into folders based on specific categories. This feature is available on iPhone iOS 14 or higher and iPad iOS 15 or higher. Users can also move apps from the App Library to the Home screen, but can’t change a misallocated folder. A search function guides users to find specific apps.

RAYMOND OGLESBY @RaymondOglesby2
October 31, 2023

This is for the iPhone and iPad. Screenshots are from iPhone 14 Pro running iOS 16+

Thanks to Apple’s App Library, you no longer have to keep every app on the Home Screen. iPhone and iPad apps are organized in folders, so you can locate them more easily.

Keeping track of all the apps on your iPhone or iPad can be challenging, but the App Library has made it more accessible. This feature lets you remove apps from the Home screen and organize them into folders based on specific categories. Open the App Library with a simple swipe to browse all your apps or search for the right one.

To use the feature, you need to update your iPhone to iOS 14 or higher and your iPad to iPadOS 15 or higher if you have not already done so. On either device, go to

Settings > General > Software Update

Your device will indicate that your software is up to date or prompt you to download and install the latest update.

Overall, the App Library is a helpful tool for managing your apps and finding the ones you need. It’s really useful if you have not already manually organized your apps into different folders. Let’s explore how this feature works.

To access your App Library, open the Home screen and swipe to the left until you see a screen with apps automatically organized into folders. Here, you will see folders called Suggestions, Recently Added, Social, Entertainment, Shopping, Music, Games, and more, depending on what apps you have on your device. Refer to the below image:

Apps 1
Your App Library screen

You will notice that some of the apps in a folder have large icons, while others sport smaller icons grouped in fours. To open an app that has a large icon, all you have to do is tap it.

For the smaller app icons, you have to tap the group of four apps to bring up a screen showing all the apps in that category. From there, simply tap an icon to open the corresponding app. See the below image:

Apps 2
Your sub icons under a master icon screen

Apps can be moved from the App Library to the Home screen, or deleted entirely, but apps in the library can not be moved from one folder to another. If you feel an app has been categorized in the wrong folder, there’s nothing you can do.

If you are having trouble finding a specific app, you can search for it by name. Start typing the name of the app you want in the App Library search field at the top to see the corresponding apps. Tap the app icon to launch the app. See the following image:

Apps 3
Using Search

Otherwise, you can swipe down on the App Library screen to view an alphabetical list of all the apps installed on the device. To find a specific app faster, tap a letter on the right-hand side to see all apps starting with that letter. Refer to the below image:

Apps 4
Using alphabetical list

You can add an app from the App Library to your Home screen if it’s not already there. Long-press on the icon to open the command menu and then tap Add to Home Screen. The app’s icon appears on the next free spot on your Home screen but also remains in the App Library. See the below image:

Apps 5
Add to your Home screen option

Another method of moving apps from the App Library to the Home screen is to hold down on an app until all the icons start jiggling. Press down on the icon for the app you want to move and then drag it to the left until the Home screen appears, allowing you to place the icon into the correct position. See the following image:

Apps 6
Using jiggling

You can also press down on an icon from the Home screen and select the Edit Home Screen command from the menu to make all the apps jiggle and then go to the App Library to move an icon to the Home screen. Refer to the below image:

Apps 7
Edit your Home Screen option

Note! Tap on any blank area of your Home screen to turn off the giggles.

Disclaimer

Technology is always changing and rarely is there static tech for smartphones and desktops. Thus, the contents of this post are only valid at the time of writing. Blog posts older than six months may have directions incompatible with your device or OS. Hopefully, older post content will continue to work as advertised. Thank you for reading TechSavvy.Life for Technology at Work For You.

You just have to pay attention to what people need and what has not been done.

Russell simmons

That’s it. Please feel free to share this post! One way to share is via Twitter.

Just click the Tweet icon below. This will launch Twitter where you click its icon to post the Tweet.

Checkout TechSavvy.Life for blog posts on smartphones, PCs, and Macs! You may email us at contact@techsavvy.life for comments or questions.

Please feel free to leave a comment. I would love to hear from you. Do you have a computer or smart device tech question? I will do my best to answer your inquiry. Just send an email to contact@techsavvy.life. Please mention the device, app, and version you are using. To help us out, you can send screenshots of your data related to your question.

You can access the e-book from a Kindle device, the Kindle App for the desktop or smartphone, which is a free app.

The author’s Vietnam eBook on the Battle for Tra Bong Vietnam: Events and Aftermath

How to Block or Hide Your Phone Number

This article outlines ways to hide your caller ID on Android and iPhone, preventing recipients from seeing your number. One method involves dialing a specific shortcode (*67 for US) before a number. Alternatively, you can permanently block your number via the phone’s operating system. However, this may lead to missed calls from contacts who may not pick up unidentified calls. It also mentions ways to deal with spammy no caller ID calls.

RAYMOND OGLESBY @RaymondOglesby2
October 24, 2023

This is for iPhone and Android. Screenshots are from iPhone 14 Pro running iOS 16+

Nobody likes receiving calls from No Caller ID numbers, as they are usually scams. But there might be cases where you will want your iPhone or Android to hide your phone number to protect your privacy. Whether the person at the other end of the line picks up or not, you can still block your phone number so it’s hidden when you call others.

There are two ways to hide your phone number. One involves using a specific shortcode before the phone number you want to dial. The other is having the operating system block your number permanently. We will show you both, and a tip that makes blocking your number a two-second process.

If you plan on blocking your number only for certain calls, there’s no reason to mess with the iPhone or Android phone’s settings. Instead, just add *67 before the number you are about to dial. When you do this, it tells your carrier not to show any Caller ID for that call.

An example of the phone number string to dial would be *67-555-555-5555.

Each country has different shortcodes to hide phone numbers. This is the US version. In the UK, you would need to dial 141 before the number.

If you want to hide your phone number routinely, you will need to go into the phone’s settings to enable it.

On iPhone, head to:

Settings > Phone > Show My Call ID

You might have to wait a short while until the toggle appears. Toggle the switch to OFF. Refer to the below image:

Block 1
Disable showing Caller ID

The feature can come in handy if you are using your personal phone number for work-related calls and do not want others to find out your number. But it can be a hassle if you forget to reenable it when calling family and friends. They will see No Caller ID appear on their devices and might not pick up.

The same warning applies to Android. You can block your phone number on Android phones just as easily as on iPhones. But you will have to remember to unblock it for your closest contacts to see your Caller ID.

To hide your phone number on Android, go to:

Phone > Setting > Calls and Additional Settings > Hide Number

and toggle the switch to OFF.

Repeat the steps to reenable the Caller ID on your Android phone when you are done blocking access to it.

While we are at it, we will remind you there are ways to deal with spammy No Caller IDs on iPhone and Android and ensure they are not too big a hassle for you. Check a related post below to avoid no Caller ID calls.

RELATED

Block No Caller ID

Disclaimer

Technology is always changing and rarely is there static tech for smartphones and desktops. Thus, the contents of this post are only valid at the time of writing. Blog posts older than six months may have directions incompatible with your device or OS. Hopefully, older post content will continue to work as advertised. Thank you for reading TechSavvy.Life for Technology at Work For You.

When you innovate, you’ve got to be prepared for people telling you that you are nuts.

Larry Ellison

That’s it. Please feel free to share this post! One way to share is via Twitter.

Just click the Tweet icon below. This will launch Twitter where you click its icon to post the Tweet.

Checkout TechSavvy.Life for blog posts on smartphones, PCs, and Macs! You may email us at contact@techsavvy.life for comments or questions.

Please feel free to leave a comment. I would love to hear from you. Do you have a computer or smart device tech question? I will do my best to answer your inquiry. Just send an email to contact@techsavvy.life. Please mention the device, app, and version you are using. To help us out, you can send screenshots of your data related to your question.

You can access the e-book from a Kindle device, the Kindle App for the desktop or smartphone, which is a free app.

The author’s Vietnam eBook on the Battle for Tra Bong Vietnam: Events and Aftermath

How to Block No Caller ID Calls on iPhone

The blog post by Raymond Oglesby offers tips for iPhone users on how to handle blocked or unknown calls. Among the suggestions are enabling the block unknown callers feature on iOS, which could also inadvertently block legitimate calls. Outgoing calls can be anonymized by dialing *67 before the number. A distinction is made between No Caller ID (intentionally blocked by the caller) and Unknown Caller (Caller ID was provided but not recognized). The post also answers FAQs about related subjects.

RAYMOND OGLESBY @RaymondOglesby2
October 17, 2023

This is for the iPhone with iOS 13 +. Screenshots are from iPhone 14 Pro running iOS 16+

When your phone rings and the Caller ID is blocked, or it’s an unknown caller, it’s pretty frustrating. Especially with repeat unknown calls. If you are ready to stop those annoying spam calls and unmask the Caller ID behind them, these are some of the best methods to reveal unknown numbers.

  • There are two important distinctions you should know. No Caller ID and Unknown Caller are two different things.
  • No Caller ID means that the caller intentionally blocked their ID from you. On the contrary, an Unknown Caller means the Caller ID was not recognized even though it was provided.
  • The best way to handle this is to turn on the option to block unknown callers on iOS. It sometimes blocks real callers, but it’s a good balance between being inundated with spam calls all day.

If you are looking to hide your phone number when making outbound calls, you do not need to even fiddle with your phone’s settings.

Simply dial *67 followed by the phone number you are trying to call. When you do this, it tells your carrier not to show any Caller ID for that call.

An example of the phone number string to dial would be *67-555-555-5555.

First, open the Settings app on your iPhone. Refer to the below image:

Block Call 1
Accessing Settings

Next, scroll down to the Phone option and tap on it. See the below image:

Block Call 2
Accessing Phone option

Now, scroll down to the Silence Unknown Callers option. See the following image:

Block Call 3
Accessing the Silence Unknown Callers option

Next, toggle its switch to the ON position. Refer to the below image:

Block Call 4
Turn the option ON

All calls without a Caller ID will be automatically blocked from your phone. Remember, real numbers and callers can also be affected by this, and customer service-based calls frequently are a target. We recommend you check your voicemails and missed calls list.

Can you find out a no Caller ID number?

If you receive a call without any Caller ID, the caller has deliberately blocked their phone number from showing up. There’s no way to find out the number if the call was purposely blocked.

What does *57 do on a phone?

The service code *57 activates malicious caller identification. This is an upcharged fee service offered by some phone company providers. *57 should be dialed immediately after receiving a call from a number with no Caller ID. When you do so, it records the metadata of the malicious call to aid law enforcement investigations.

How do you call a number with a blocked ID back?

You can not call back a number that calls you with a hidden ID. If you miss a call from these numbers, you must wait till they call you back. Their hidden Caller ID prevents you from calling back if you do not have their number.

Will my telephone provider reveal an Unknown Caller’s ID to me?

It is against the law for your mobile carrier to reveal information about another user to you. They can only do that if you can prove that you are in danger or feel threatened. If you are going to request details like that from your mobile carrier, you must have enough evidence to back up your claim and most likely a police report.

Disclaimer

Technology is always changing and rarely is there static tech for smartphones and desktops. Thus, the contents of this post are only valid at the time of writing. Blog posts older than six months may have directions incompatible with your device or OS. Hopefully, older post content will continue to work as advertised. Thank you for reading TechSavvy.Life for Technology at Work For You.

When I’m old and dying, I plan to look back on my life and say, ‘Wow, that was an adventure,’ not, “Wow, I sure felt safe”.

Tom Preston-Werner

That’s it. Please feel free to share this post! One way to share is via Twitter.

Just click the Tweet icon below. This will launch Twitter where you click its icon to post the Tweet.

Checkout TechSavvy.Life for blog posts on smartphones, PCs, and Macs! You may email us at contact@techsavvy.life for comments or questions.

Please feel free to leave a comment. I would love to hear from you. Do you have a computer or smart device tech question? I will do my best to answer your inquiry. Just send an email to contact@techsavvy.life. Please mention the device, app, and version you are using. To help us out, you can send screenshots of your data related to your question.

You can access the e-book from a Kindle device, the Kindle App for the desktop or smartphone, which is a free app.

The author’s Vietnam eBook on the Battle for Tra Bong Vietnam: Events and Aftermath

How to Reverse Image Search With Google Images

Google Image Search allows users to perform a reverse image search by either using a URL from a website or a local image on your device. To do so, paste the image’s URL or upload the image file onto the Google Images search bar. Google will then provide visually similar images and may also help identify the original source of the image. However, pinpointing the exact origin of the image may not always be successful.

RAYMOND OGLESBY @RaymondOglesby2
October 10, 2023

This is for devices using Google. Screenshots are from Windows 10

Google Image Search is a great way to find images similar to one you already have or to help you track down the original source of a photo. Let’s find out how to do a reverse image search.

If you would like to search for an image that appears on a website, you can paste the URL into the Google Images search bar; drag and drop an image or browse your files. We will show you how to do both.

For the first method, you need the URL of the image itself, not just the address for the page on which the image appears. The easiest way to grab that URL is to right-click the image and select the Copy image address. Refer to the below image:

Google Image 1
Selecting the Copy image address option

Next, with the URL in your clipboard, head to Google Images and click the Google Lens icon. See the below image:

Google Image 6
Selecting the Google Lens icon

Now, in the Paste image link text box, paste the URL you copied earlier and click Search. See the following image:

Google Image 3
Paste the image link

Next, you will see visually similar images in the right sidebar, and you can click Find image source to see where the image originated from. Keep in mind that this is not an exact science. Google often can not find the source, if there is one. Refer to the below image:

Google Image 4
Selecting Find image source

Now, if there’s a specific part of the image you would like to search for, you can use the handles to adjust which part of the image is selected. See the below image:

Google Image 5
Find image source by using the handles

That’s it! This is definitely the easiest method for searching Google with images. There are also ways to do reverse image searches on Android and iPhone or iPad.

To search Google Images with a local image you already have; maybe one you downloaded from the web; use the Google Lens icon in the Google Images search bar. You will be able to drag and drop an image or browse your files.

First, head on over to the Google Images page and click the Google Lens icon. See the following image:

Google Image 6
Selecting the Google Lens icon

Next, you can either drag an image from another window; such as the file explorer; or click upload a file to browse for photos on your computer. Refer to the below image:

Google Image 8
Selecting to drag and drop an image or upload a file

Now, after the image uploads, you will be brought to a page with visually similar images in the right sidebar. Click Find image source to see where the image originated from. One thing to note is with images that have not been grabbed from the web, it’s not as easy to find the original source. See the below image:

Google Image 4
Selecting Find image source

Next, if there’s a specific part of the image you would like to search for, you can use the handles to adjust which part of the image is selected. See the following image:

Google Image 5
Find image source by using the handles

How about that! This is a great way to find similar images, or maybe you want to find different sizes of an image you already have. Google Search is a powerful tool, and Google Lens drives a lot of image-related search functions. It’s a pretty impressive tool in itself.

Disclaimer

Technology is always changing and rarely is there static tech for smartphones and desktops. Thus, the contents of this post are only valid at the time of writing. Blog posts older than six months may have directions incompatible with your device or OS. Hopefully, older post content will continue to work as advertised. Thank you for reading TechSavvy.Life for Technology at Work For You.

When you want to succeed as bad as you want to breathe, then you’ll be successfull.

Eric Thomas

That’s it. Please feel free to share this post! One way to share is via Twitter.

Just click the Tweet icon below. This will launch Twitter where you click its icon to post the Tweet.

Checkout TechSavvy.Life for blog posts on smartphones, PCs, and Macs! You may email us at contact@techsavvy.life for comments or questions.

Please feel free to leave a comment. I would love to hear from you. Do you have a computer or smart device tech question? I will do my best to answer your inquiry. Just send an email to contact@techsavvy.life. Please mention the device, app, and version you are using. To help us out, you can send screenshots of your data related to your question.

The author’s Vietnam eBook on the Battle for Tra Bong Vietnam: Events and Aftermathsd

Six Best Shortcuts for iPhone

RAYMOND OGLESBY @RaymondOglesby2
October 3, 2023

This is for the iPhone. Screenshots are from iPhone 14 Pro running iOS 16+

Since the release of iOS 13, the Shortcuts app has come preinstalled on compatible devices, hosting useful automation and timesaving techniques ranging from automating texts to organizing your photos.

Making the most of these shortcuts can, however, feel a little foreign to first-time users. A lot of Apple device owners do not even know what the app is. It comes with a fairly extensive library of pre-existing shortcuts, but beyond this lies a world of user-generated shortcuts.

In principle, iOS Shortcuts are fairly simple, considering they are based on IFTTT (If This Then That) automation; trigger results in an action. However, in practice it is not always so simple; there are multitudes of triggers, and the debugging is entirely nonexistent.

The learning curve is staggeringly high. To help you get started, here are some of the most useful, easy-to-use Shortcuts you should have on your device, plus they are free.

Installing shortcuts has become simplified over the years. Previously, you had to go to the Settings app on your iPhone and allow to install shortcuts from third-party links. Now, there’s no such need. Just click on the download links we have provided and use the Add Shortcut button to add the shortcut to your library. You may be asked to set certain options for the Shortcuts to function, if so, just follow the shortcut instructions. Not mentioned in this post, is another favorite, Charge Time shortcut which can be opened in the link below.

Charge Time

If you do not want your iPhone or iPad to die at the most unfortunate times, Super-Low Battery v2.0 is the shortcut you should use. While the low-power mode on iOS devices does well enough job for normal days, sometimes you need that extra hour or two of usage off your iPhone, and the low-power mode does not cut it. Enter the Super-Low Battery v2.0 shortcut.

Using the Super-Low Battery v2.0 shortcut you can enable super low-power mode. When run, it not only stops background processes and activates native low-power mode, but also turns off WiFi, and Mobile Data. It also turns on Airplane Mode and sets both Brightness and Volume to 0.  It’s best to use when your iPhone’s battery falls below 10%. After running it, you should have a few hours left. If you want, you can make a call or send a text, deactivate it by running the shortcut, make that call or send a text, and run it again. Click this link to Download Super-Low Battery v2.0. Refer to the below image:

Best Shortcut 1
Super-Low Battery v2.0 shortcut

Another favorite to share is Dark Safari. Since the introduction of Dark Mode on iOS 13, it’s helpful at night. It reduces strain on your eyes and ensures you are not blinded by bright light when you open an app. That said, when reading articles on Safari, the dark mode fails. This shortcut will help you solve this problem.

It creates a black background with bold white text to make reading easier on the eyes. Unlike other similar shortcuts, it does not invert the colors, but rather actually changes the colors of a website. This will improve your late-night reading. Click this link to Download Dark Safari. See the below image:

Best Shortcut 2
Dark Safari shortcut

Another powerful shortcut created by Federico is Apple Frames. It allows you to apply frames to your iOS screenshots. I know most people will not need it, but if you are a writer, blogger, or content creator using screenshots, this is for you. (As for our blog posts, we use a subscription-based third-party screen capture program on the desktop). Click this link toDownload Apple Frames. See the following image:

Best Shortcut 3
Apple Frames shortcut

The iPhone has become water resistant since the iPhone 7, but your iPhone can get water damage. Sometimes water can get stuck inside the speakers and microphone grills of the iPhone, compromising the audio quality of the microphone speakers. You can solve this issue by using the Water Eject shortcut. When you tap the shortcut it plays a series of sounds that can eject water from the speaker grills. Click this link to Download Water Eject. Refer to the below image:

Best Shortcut 4
Water Eject shortcut

Calculating the tip on a bill is always harder than it should be, especially if you are in a hurry at the end of the meal. After running this shortcut, you simply enter the bill and choose the tip percent, such as 12%, 15%, 18%, or 20%. You will immediately see the tip amount and final bill total including the tip. Click this link to Download Calculate Tip. See the below image:

Best Shortcut 5
CalculatSe Tip shortcut

Ever since Apple integrated Shazam into iOS, it has been easy to find the name of whatever song is playing around you. But Shazam++ takes that a step further; this shortcut will use Shazam to identify the song and then offer you a menu of options that include sharing the song or playing it in your favorite music player such as Spotify or Apple Music.

Shazam++ presents a small yet significant addition to the tool, presenting you with various actions once it’s identified the song, including sharing the song or playing it directly in the music streaming service, from where you can easily add it to your playlists. Click this link to Download Shazam ++. See the following image:

Best Shortcut 6
Shazam ++ shortcut

Open your Shortcuts app and head to My Shortcuts gallery where your six shortcuts will be displayed as shown below:

Best Shortcut 7
Your shortcuts gallery

Disclaimer

Technology is always changing and rarely is there static tech for smartphones and desktops. Thus, the contents of this post are only valid at the time of writing. Blog posts older than six months may have directions incompatible with your device or OS. Hopefully, older post content will continue to work as advertised. Thank you for reading TechSavvy.Life for Technology at Work For You.

The only thing worse than starting something and failing is not starting something.

Seith Godin

You are finished. Please feel free to share this post! One way to share is via Twitter.

Just click the Tweet icon below. This will launch Twitter where you click its icon to post the Tweet.

Checkout TechSavvy.Life for blog posts on smartphones, PCs, and Macs! You may email us at contact@techsavvy.life for comments or questions.

Please feel free to leave a comment. I would love to hear from you. Do you have a computer or smart device tech question? I will do my best to answer your inquiry. Just send an email to contact@techsavvy.life. Please mention the device, app, and version you are using. To help us out, you can send screenshots of your data related to your question.

You can access the e-book from a Kindle device, the Kindle App for the desktop or smartphone, which is a free app.

The author’s Vietnam eBook on the Battle for Tra Bong Vietnam: Events and Aftermath

What Is the Green Dot on Facebook and Messenger

Wondering why Facebook displays a green dot on someone’s profile picture, in the Messenger app, and next to the camera icon in Messenger? What the green dot means is context-dependent.

RAYMOND OGLESBY @RaymondOglesby2
September 19, 2023

This is for mobile devices and desktops using Facebook and Messenger. Screenshots are from Windows 10

Wondering why Facebook displays a green dot on someone’s profile picture, in the Messenger app, and next to the camera icon in Messenger? What the green dot means is context-dependent. Let’s decode this green dot.

Key Points

  •  The green dot on someone’s Facebook profile picture indicates that they are active on the Facebook platform, whether on the site, through the app, or on the Messenger app.
  •  In Facebook Messenger, the green dot next to people’s profile pictures confirms that they are currently active on Facebook, either through Messenger, the app, or the site.
  •  A green dot next to the camera icon in Messenger means that the user is available for a video call.
  • Disable the feature so others do not know you are active on Facebook or Messenger.

Green Dot on Facebook

On Facebook’s desktop site or mobile app, when you visit someone’s profile page, you might have seen a green dot. This green dot indicates that the user is active on the Facebook platform. Refer to the below image:

Green Dot 1
The user is active on the Facebook platform

The dot does not necessarily mean the user is active on the Facebook site. The user may be using the Facebook app or even the Messenger app. But if you see it, it means the user is active somewhere within the Facebook network and it can stand in as an online indicator.

Green Dot on Messenger

While scrolling chat lists in the Messenger app, you may have seen green dots appearing in the bottom-right corner of people’s profile pictures. These green dots indicate that those users are currently active on Facebook. See the below image:

Green Dot 2

Those users may be active on Messenger, the Facebook app, or the Facebook site. The dot just indicates that they are active somewhere on the Facebook platform.

Green Dot Next to Camera Icon on Messenger

When you see a green dot next to the camera icon in the Messenger app, it means that the user is available for a video call in the app. This indicator is separate from the profile picture indicator we discussed in the previous two sections and only references video call availability. See the following image:

Green Dot 3
The user is available for a video call

So when you see the camera-adjacent green dot you know the user has Messenger installed, and it’s possible for you to initiate a video call with them.

Disable Active Status on Desktop Facebook Website

  1. In a browser, log in to Facebook and then click the Messenger icon in the top-right corner of the page.
  2. Click the Menu icon (three dots)  at the top of the chats window.
  3. Click Active Status.
  4. Toggle off the switch next to Active Status: ON to disable it. The switch will be turned OFF.

You can enable the Active Status at any time. by toggling the switch to the ON position.

Note! A couple of additional options in the Active Status window allow you to appear active for some friends, but not others, and vice versa. Simply tap the edit button to select which friends you want to include in either list. Refer to the below image:

Green Dot 4
Active Status options

You can disable the feature on your mobile device but it’s more complicated.

Disclaimer

Technology is always changing and rarely is there static tech for smartphones and desktops. Thus, the contents of this post are only valid at the time of writing. Blog posts older than six months may have directions incompatible with your device or OS. Hopefully, older post content will continue to work as advertised. Thank you for reading TechSavvy.Life for Technology at Work For You.

Quote For the Day

When you find an idea that you just can’t stop thinking about, that’s probably a good one to pursue.

Josh James

Tweet Info

You are finished. Please feel free to share this post! One way to share is via Twitter.

Just click the Tweet icon below. This will launch Twitter where you click its icon to post the Tweet.

Checkout TechSavvy.Life for blog posts on smartphones, PCs, and Macs! You may email us at contact@techsavvy.life for comments or questions.

I Would Like to Hear From You

Please feel free to leave a comment. I would love to hear from you. Do you have a computer or smart device tech question? I will do my best to answer your inquiry. Just send an email to contact@techsavvy.life. Please mention the device, app, and version you are using. To help us out, you can send screenshots of your data related to your question.

Author’s E-Book

You can access the e-book from a Kindle device, the Kindle App for the desktop or smartphone, which is a free app.

The author’s Vietnam eBook on the Battle for Tra Bong Vietnam: Events and Aftermath

How to Hide and Unhide Spotify Songs

If you do not wish to listen to certain songs or hide those songs so they do not play when you are using Spotify, we will show you how. You can unhide your songs in the future if you change your mind.

RAYMOND OGLESBY @RaymondOglesby2
September 12, 2023

This is for iPhone and Android. Screenshots are from iPhone 14 Pro running iOS 16+ and Windows 10

If you do not wish to listen to certain songs or hide those songs so they do not play when you are using Spotify, we will show you how. You can unhide your songs in the future if you change your mind.

Note: You can not hide songs in your own playlists. If you do not want a specific song in your playlist, simply remove it from the list.

Hide Songs on Spotify

To hide a song so it does not play when you are listening to your music, use the following steps in the Spotify app on your iPhone or Android phone.

First, launch Spotify on your phone and find the music track to hide. Then, next to the song, tap the three dots (the Menu icon). Refer to the below image:

Spotify 1
Accessing the Menu of the song to Hide

Next, in the menu that opens, select Hide Song. See the below image:

Spotify 2
Selecting the option to Hide your song

Now, Spotify will immediately hide your song in your list. See the following image:

Spotify 3
Your hidden song is greyed out

Unhide Songs on Spotify

If you have changed your mind about a song and want to unhide that song, follow the following steps to see your hidden songs and unhide them.

First, open Spotify on your phone. Then, find the playlist or album where you hid your song.

Next, find your hidden song (which will be grayed out), and next to that song, tap the three dots (the Menu icon). Refer to the below image:

Spotify 4
Accessing the Menu to unhide a song

Now, in the open menu, select Hidden. See the below image:

Spotify 5
Selecting the option to unhide your song

Now, Spotify will unhide your song, allowing you to tap and play it. See the following image:

Spotify 6
Your hidden song is now visible


For Desktop Only

You can not hide songs on Spotify’s desktop and web versions. Only the platform’s mobile app allows you to hide and unhide songs, as of this writing.

If you have an unwanted song in your playlist (not a Spotify sample playlist), remove it from your list and the app will not play it. To do that, access your playlist and find that song. Next to the song, click the three dots (the Menu icon) and choose Remove from this playlist. See the following image:

Spotify 7
Selecting to remove your song on the desktop

Spotify will remove the selected song from your playlist, and you are all done.

Disclaimer

Technology is always changing and rarely is there static tech for smartphones and desktops. Thus, the contents of this post are only valid at the time of writing. Blog posts older than six months may have directions incompatible with your device or OS. Hopefully, older post content will continue to work as advertised. Thank you for reading TechSavvy.Life for Technology at Work For You.

Quote For the Day

“Motivation is what gets you started. Habit is what keeps you going.

Jim Rohn

Tweet Info

That’s it. Please feel free to share this post! One way to share is via Twitter.

Just click the Tweet icon below. This will launch Twitter where you click its icon to post the Tweet.

Checkout TechSavvy.Life for blog posts on smartphones, PCs, and Macs! You may email us at contact@techsavvy.life for comments or questions.

I Would Love to Hear From You

Please feel free to leave a comment. I would love to hear from you. Do you have a computer or smart device tech question? I will do my best to answer your inquiry. Just send an email to contact@techsavvy.life. Please mention the device, app, and version you are using. To help us out, you can send screenshots of your data related to your question.

Author’s E-Book

You can access the e-book from a Kindle device, the Kindle App for the desktop or smartphone, which is a free app.

The author’s Vietnam eBook on the Battle for Tra Bong Vietnam: Events and Aftermath

How to Scan a Document on iPhone and iPad

Scanners had their moment, but nowadays it’s not as necessary to own one. However, that does not mean you never need to scan a document or photo. Thankfully, you probably have some tools to do it without a scanner.

RAYMOND OGLESBY @RaymondOglesby2
September 5, 2023

This is for the iPhones and Tablets. Screenshots are from iPhone 14 Pro running iOS 16+

Scanners had their moment, but nowadays it’s not as necessary to own one. However, that does not mean you never need to scan a document or photo. Thankfully, you probably have some tools to do it without a scanner.

If you find yourself scanning a lot of documents and photos, it’s a good idea to invest in an actual scanner. Most people only need to scan a few things a year, so we will show you some good alternatives.

Scan Photos and Documents

A scanner is essentially just a camera that takes a photo of your document in a specific way. Well, you carry a camera with you every day, so why not use that as a scanner?

A smartphone camera is usually perfectly fine for getting the job done as a scanner. The results will not be as crisp and clear as an actual scanner, but it will get the point across. Here are some suggestions for taking photos of a document.

  • Lighting: Place the document on a flat surface with good lighting. Try to avoid casting a shadow on the document with your hand and phone.
  • Placement: Take the photo straight on to avoid any weird angles. This can be done directly above or at a right angle by propping up the document. Do whichever results in the best lighting with the fewest shadows.
  • Framing: Make sure to take the photo from far enough away so the entire document is in view. After you take the photo, crop it to the document so you do not see any of the surroundings.

The camera on your phone will suffice in many situations, but sometimes a more professional-looking scan is necessary. For that, you will want to turn to a document scanner app. You already have one installed on your iPhone, iPad, or Android phone.

Scan Using the Files App on iPhone

Phones and iPads have a built-in Document Scanner feature. This tool is not its own app, but you will find it both in Apple’s Files app and the Apple Notes app. Many websites suggest using the Notes app to scan a document, and that works fine; but you can also use the Files app, which is convenient if you just want to scan the document to a file.

To scan a document on an iPhone or iPad with the Files app, first, open the Files app and go to the location you want to save your scanned document to. For example, to keep it in your iCloud Drive, open the iCloud Drive location. To save it in your iPhone’s Downloads folder, open Downloads.

Next, tap the Menu button (it looks like a “”) at the top-right corner of the screen and tap Scan Documents to get started. Refer to the below image:

iPhone Scan 1
Selecting to scan from the Files app into the Downloads folder

Now, position the document in view of your iPhone or iPad’s camera and hold it still. Your device will automatically capture an image of the document, and you will see it flash on the screen. See the below image:

iPhone Scan 2
The scanned document in Files

Next, to scan a multi-page document, position the second page in view of your iPhone or iPad’s camera. Continue this process to capture as many pages as you like. When you are done, tap Save, and you will get a combined PDF file containing each page. See the following image:

iPhone Scan 3
The scanned document is in the Downloads folder

Scan Using the Notes App on iPhone

You can also use the Notes app to scan documents. First, open the Notes app on your iPhone or iPad, open an existing note or create a new note, tap the camera icon, and tap Scan Documents. The Notes app will then save your scanned documents as notes rather than files Refer to the below image:

iPhone Scan 4
Selecting to scan from the Notes app

Next, your saved document is in the Notes app. See the below image:

iPhone Scan 5
The scanned document in Notes
Disclaimer

Technology is always changing and rarely is there static tech for smartphones and desktops. Thus, the contents of this post are only valid at the time of writing. Blog posts older than six months may have directions incompatible with your device or OS. Hopefully, older post content will continue to work as advertised. Thank you for reading TechSavvy.Life for Technology at Work For You.

Quote For the Day

Whatever you’re thinking, think bigger.

Tony Hsieh

Tweet Info

That’s it. Please feel free to share this post! One way to share is via Twitter.

Just click the Tweet icon below. This will launch Twitter where you click its icon to post the Tweet.

Checkout TechSavvy.Life for blog posts on smartphones, PCs, and Macs! You may email us at contact@techsavvy.life for comments or questions.

I Would Like to Hear From You

Please feel free to leave a comment. I would love to hear from you. Do you have a computer or smart device tech question? I will do my best to answer your inquiry. Just send an email to contact@techsavvy.life. Please mention the device, app, and version you are using. To help us out, you can send screenshots of your data related to your question.

Author’s E-Book

You can access the e-book from a Kindle device, the Kindle App for the desktop or smartphone, which is a free app.

The author’s Vietnam eBook on the Battle for Tra Bong Vietnam: Events and Aftermath

How to Check Your Battery Charge Time for iPhone or iPad

Have you ever wanted to check how long it would take for your iPhone or iPad to charge completely? Maybe, you do not like to frequently check how much your device has charged? Well, this particular iOS shortcut intends to do just that. It’s pretty simple to set up and use on your device.

RAYMOND OGLESBY @RaymondOglesby2
August 29, 2023

This is for iPhone and iPad. Screenshots are from iPhone 14 Pro running iOS 16+

Have you ever wanted to check how long it would take for your iPhone or iPad to charge completely? Maybe, you do not like to frequently check how much your device has charged? Well, this particular iOS shortcut intends to do just that. It’s pretty simple to set up and use on your device.

Anyone could estimate that your iPhone can fully charge from 0 to 100% in roughly about 2-3 hours. But, this is a very rough estimation. The actual time it takes could vary anywhere between two and three hours, or sometimes even lower depending on whether you have enabled Airplane mode or not. The Charge Time iOS shortcut can make a far more approximate guess from the current battery percentage and tell you how long it’d take to fully charge if you plug it in.

For those unaware, the Shortcuts app is one of the stock apps for devices running iOS 13/iPadOS 13 or later. We will be using the Shortcuts app to determine the charging time for your device.

First, head to this Charge Time link and tap Get Shortcut to download the shortcut on your iPhone or iPad. This shortcut is not available on the App Store nor is it pre-loaded on your device. You can use the link above or perform a Google search to locate the shortcut.

There are other charging time shortcuts from various sources. This post is only for the Charge Time shortcut as mentioned above.

Note! You may receive a screen asking to enable cookies and other data. Select the items you wish to share.

Refer to the below image:

Charge Time 1
Get the shortcut

Next, the Shortcuts app will launch on your device and display the Charge Time shortcut. At the bottom, tap on Add Shortcut to proceed. See the below image:

Charge Time 2
Add the shortcut

Now, this will install the shortcut and add it to the All Shortcuts and My Shortcuts gallery. See the following image:

Charge Time 3
Added shortcut

Next, tap on the Charge Time shortcut to reveal its menu. From here, tap the Details option. Refer to the below image:

Charge Time 4
Accessing shortcut options

Now, tap the Add to Home Screen link. See the below image:

Charge Time 5
Add the shortcut to your Home screen

Next, a preview screen will display the Charge Time shortcut. At the top of this screen, tap Add. See the following image:

Charge Time 6
Shortcut preview screen

Now, the Charge Time shortcut will be added to your Home screen (the first empty space it finds). Refer to the below image:

Charge Time 7
Shortcut added to your Home screen

Next, simply tap on the Charge Time icon. You will get a pop-up message at the top of your screen stating how long it will take for your device to charge to 100%. Tap Done or Cancel (depending on if you have made any changes) to close the pop-up. See the below image:

Charge Time 8
Results of running your shortcut

Before closing the pop-up message, you have more options. Long press on the pop-up message. At the top of the screen, you will notice a down arrow next to the message.

If you say, “Hey Siri, Charge Time”; the shortcut will run but you are unable to use a long press on the pop-up message to view options.

See the following image:

Charge Time 9
Accessing the drop-down arrow

Now, tap on this down arrow to upload as a text document, save to Files or Print. Finally, to exit, tap Done. Refer to the following image:

Charge Time 10
Options for the shortcut

That’s pretty much all you have to do.

It’s important to note the result you get is just an approximate value and not completely accurate to the minute.

As useful as this shortcut is, we would like to point out that there’s one major downside to it. This might be a dealbreaker for a lot of users. The Charge Time shortcut only takes into account the standard charger that comes in the box with your iPhone. Nowadays, people use fast chargers, wireless chargers, or even MagSafe to charge their iPhones, and if you are one of them, this shortcut will not be helpful.

Having said that, there are still plenty of iPhone owners who did not purchase the optional fast charger and instead use the one that came in the box, so it’s not like the shortcut is useless at all. Hopefully, this shortcut was useful for you.

Disclaimer

Technology is always changing and rarely is there static tech for smartphones and desktops. Thus, the contents of this post are only valid at the time of writing. Blog posts older than six months may have directions incompatible with your device or OS. Hopefully, older post content will continue to work as advertised. Thank you for reading TechSavvy.Life for Technology at Work For You.

Customers don’t care about your solution. They care about their problems.

Dave McClure

That’s it. Please feel free to share this post! One way to share is via Twitter.

Just click the Tweet icon below. This will launch Twitter where you click its icon to post the Tweet.

Checkout TechSavvy.Life for blog posts on smartphones, PCs, and Macs! You may email us at contact@techsavvy.life for comments or questions.

Please feel free to leave a comment. I would love to hear from you. Do you have a computer or smart device tech question? I will do my best to answer your inquiry. Just send an email to contact@techsavvy.life. Please mention the device, app, and version you are using. To help us out, you can send screenshots of your data related to your question.

You can access the e-book from a Kindle device, the Kindle App for the desktop or smartphone, which is a free app.

The author’s Vietnam eBook on the Battle for Tra Bong Vietnam: Events and Aftermath