Facebook has tons of privacy checks that it would take three or more blog posts to cover the topic. In this post we are going to tackle two topics. The Privacy Checkup is tedious and laborious, plus, there are way too many checks. In our opinion, Facebook is a giant bureaucracy, too big for its own good Regardless, you may be surprised at the kinds and amount of information you are sharing, I know I was. Just take the time to discover what you are sharing using Facebook’s Privacy Checkup tool.
The Privacy Checkup tool allows you to determine how much or how little information you reveal, and to whom. Let’s explore this Facebook tool.
This is for devices running Facebook. Screenshots are from Windows 10
Start Privacy Checkup
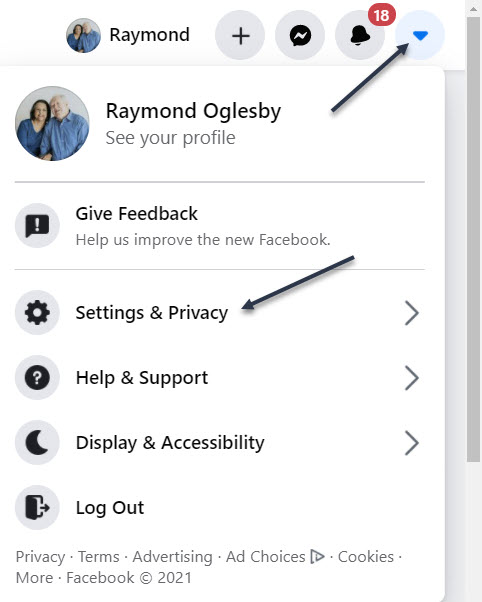
To run the latest version of Facebook’s Privacy Checkup tool, first, launch Facebook. Next, click the down arrow icon in the upper right-hand corner, then click on Settings & Privacy. Refer to below image:
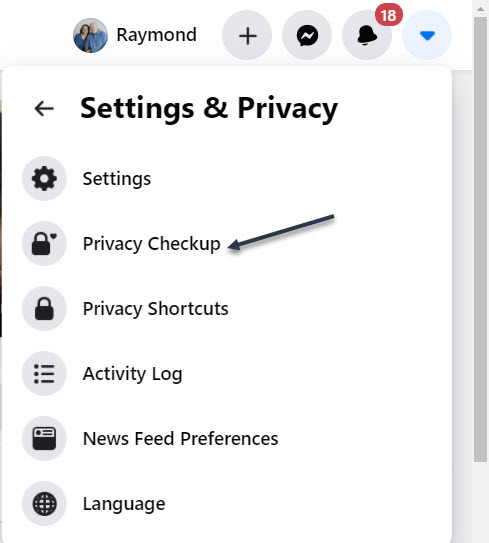
Now, select Privacy Checkup. See below image:
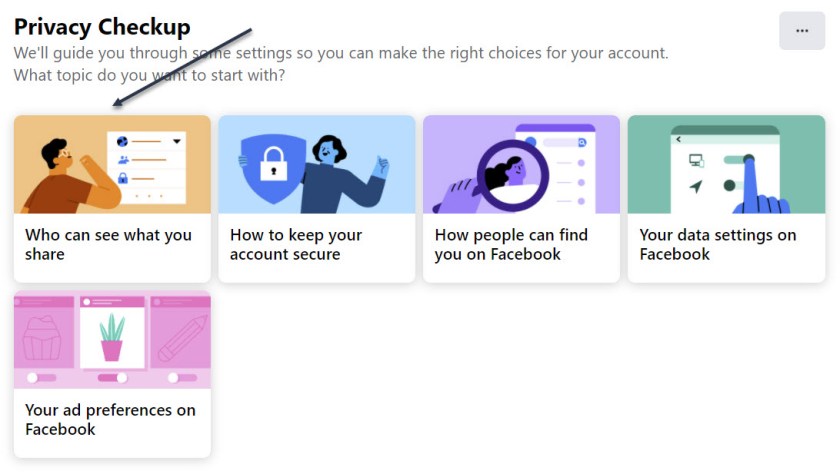
Choose the First Topic
Next, in the Privacy Checkup window, click the first topic, Who can see what you share. See following image:
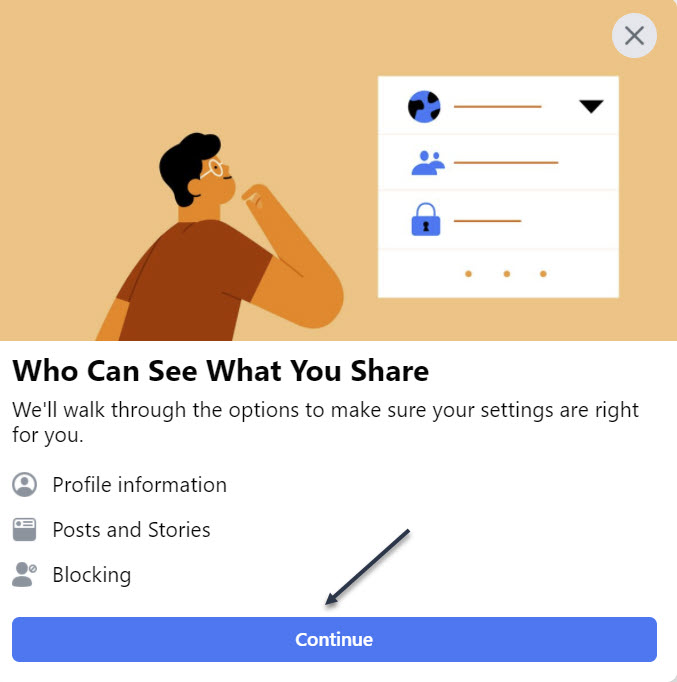
Now, click Continue. Refer to below image:
Your Profile Information
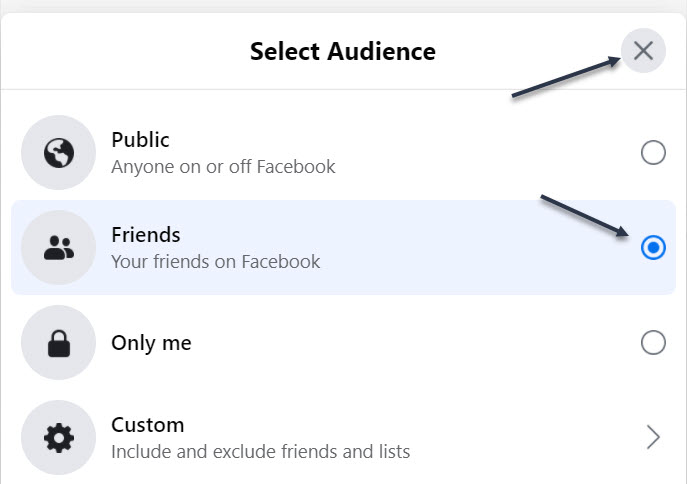
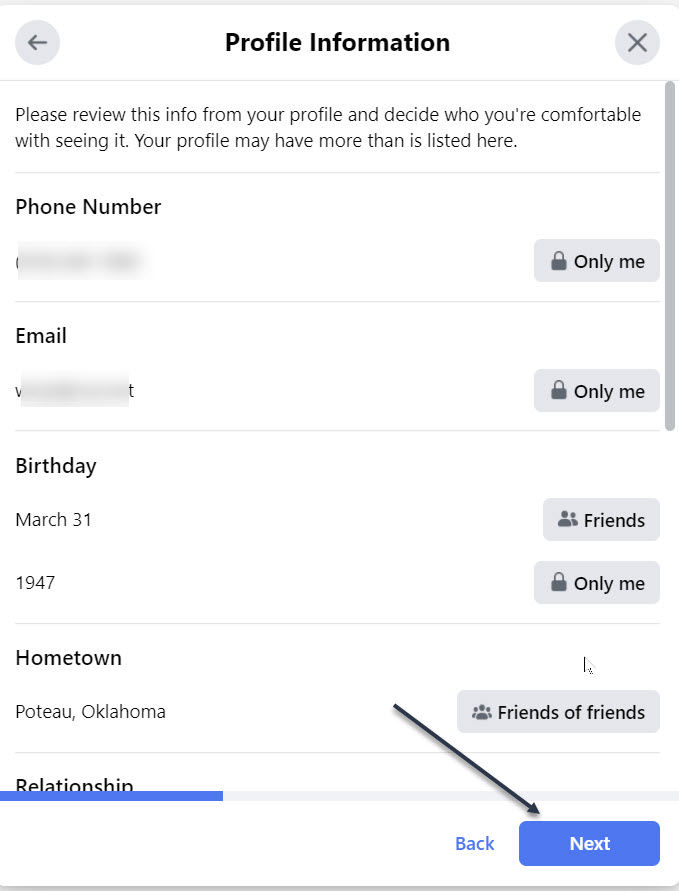
Next, at the Profile Information window, review the settings for your phone number, email addresses, and birthday. Click the button next to each one, and choose whether to change it to Public, Friends, Only Me, or a specific Facebook list. See below image:
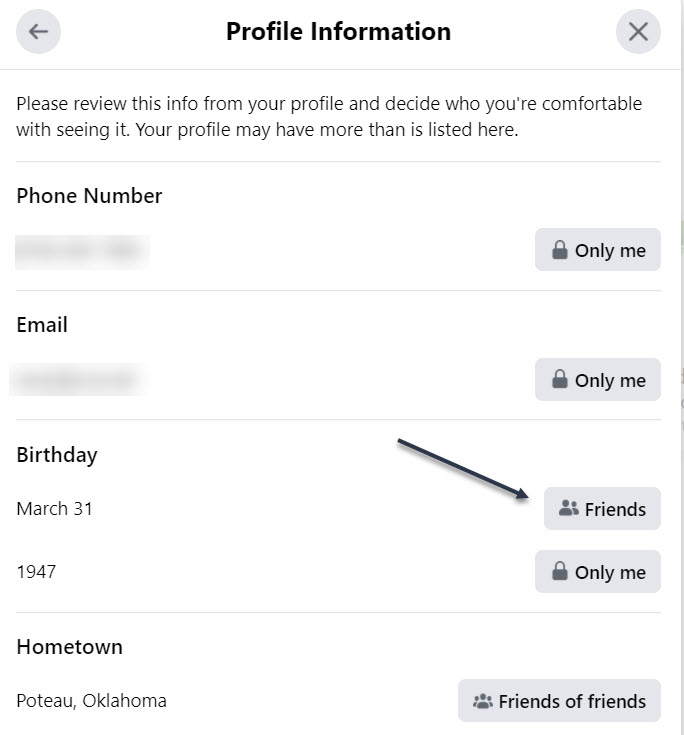
I changed my Birthday to Friends (it was already Friends, I kept it the same). To exit, click the “X” in upper right-hand corner. See following image:
You probably want this information to remain private or only visible to friends or a specific group. When done, click Next. Refer to below image:
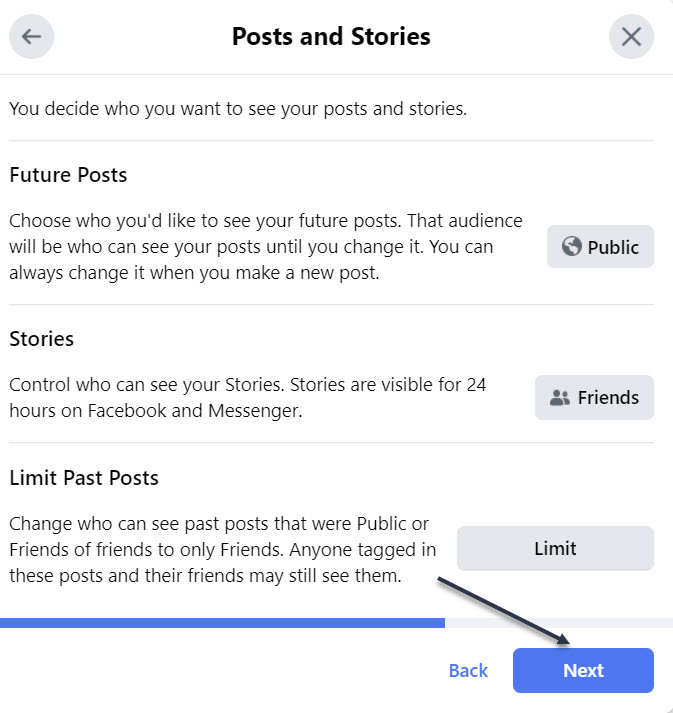
Your Posts
Now, at the Posts window, set the option for who should see future posts. You would likely want to set this to Friends. The Limit Past Posts option changes past posts that were seen by the Public or Friends of Friends to only Friends. Click Next to continue. See below image:
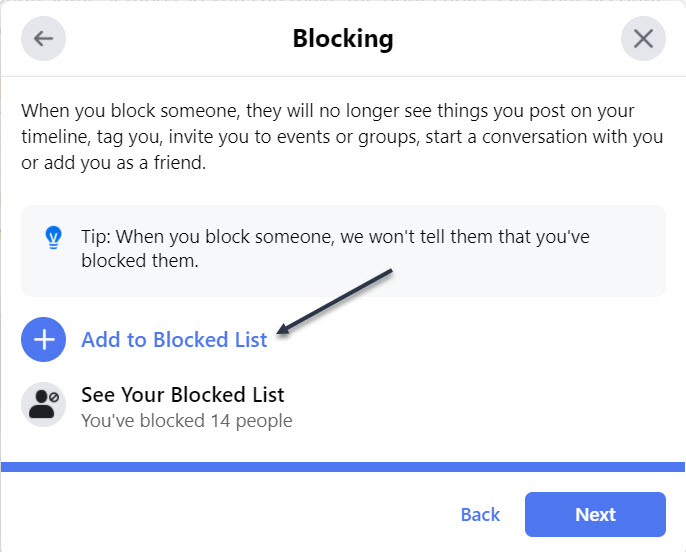
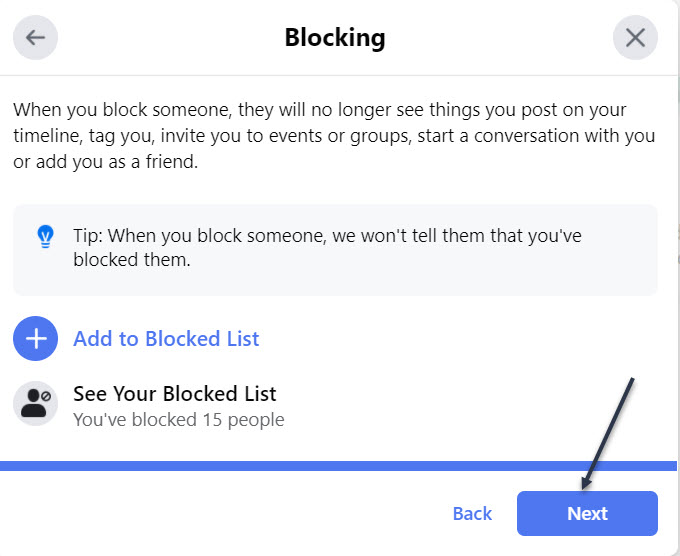
Your Blocked People
Next, at the Block screen, you can block specific people from seeing things you post, starting conversations with you, or trying to add you as a friend. To do this, click Add to Blocked list link. See following image:
Related
How to Block Fact Checkers and Gate Keepers On Facebook
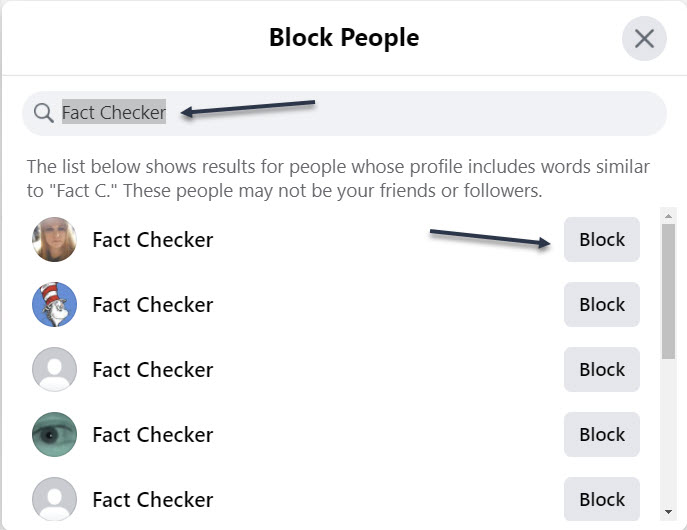
Now, type the name of the person or account you wish to block. From the list of suggestions, click the Block button for the correct person, then click Next. Refer to below image:
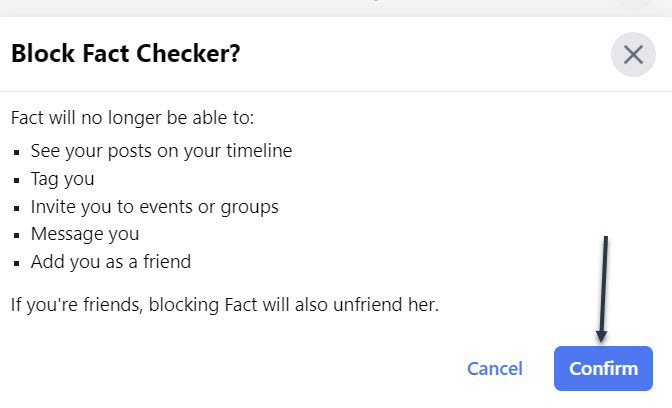
Next, click Confirm to block the person and continue. See below image:
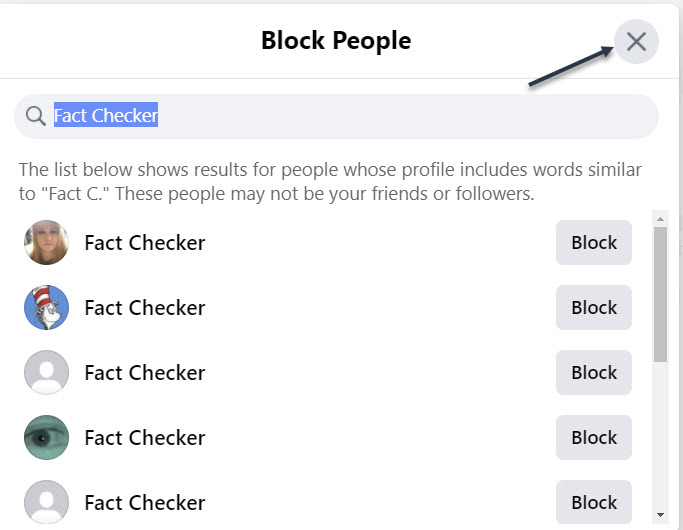
Now, you will be taken back to the Block screen. You may select another person to block. When finished, click the “X” in upper right-hand corner. See following image:
Next, to continue, click Next. Refer to below image:
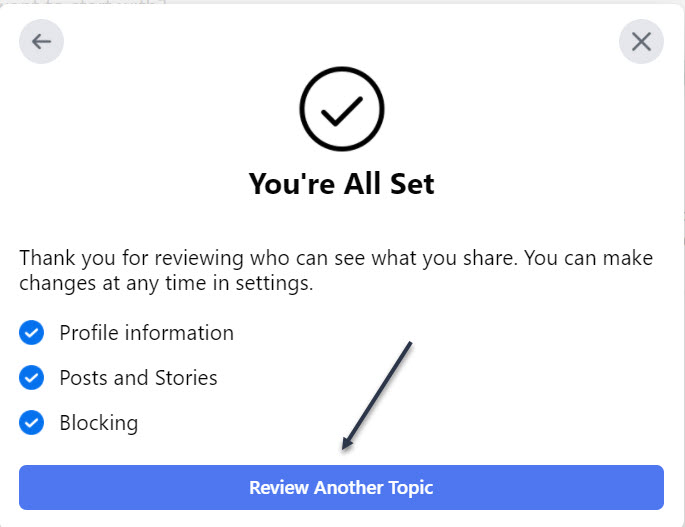
You Are Finished With First Topic
Now, the You’re All Set window will open indicating you are finished with the topic. To continue, click the Review Another Topic button. See below image:
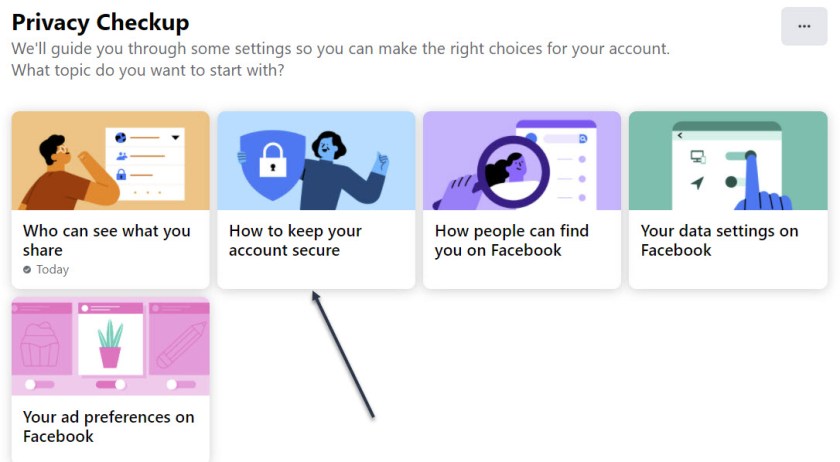
Choose Your Second Topic
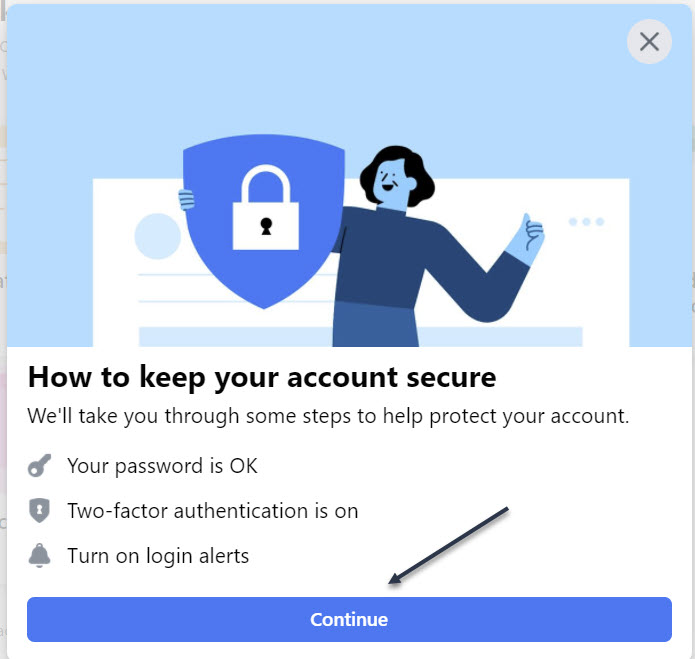
Next, select How to keep your account secure. See following image:
Note! My Password is OK and Two-factor authentication is on. Now, click Continue. Refer to below image:
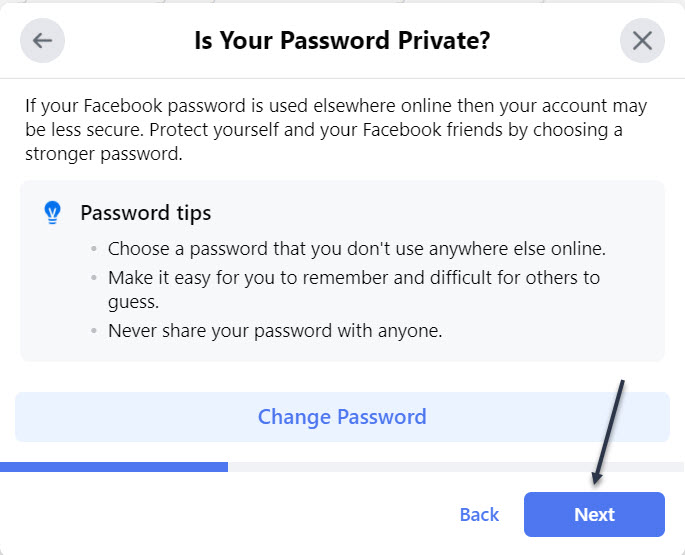
Check Your Password
Next, at the window for Is Your Password Private, click Change Password if you are concerned that it was compromised or you want to change it to something more secure then click Next. See below image:
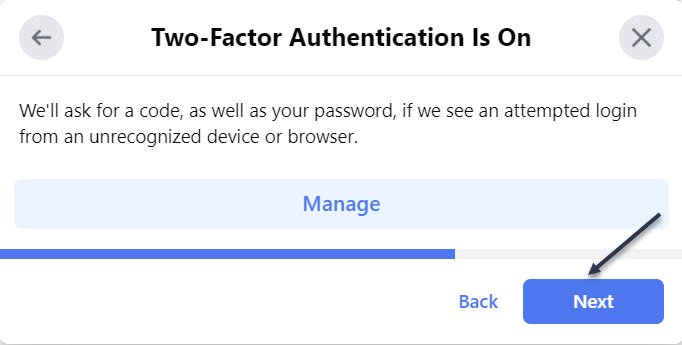
Check Your Two-Factor Authentication
If Two-factor authentication is off, click the Get Started button to add Two-Factor authentication to protect your Facebook account. You want to do this. Just, follow the steps to set this up. Now, click Next to continue. See following image:
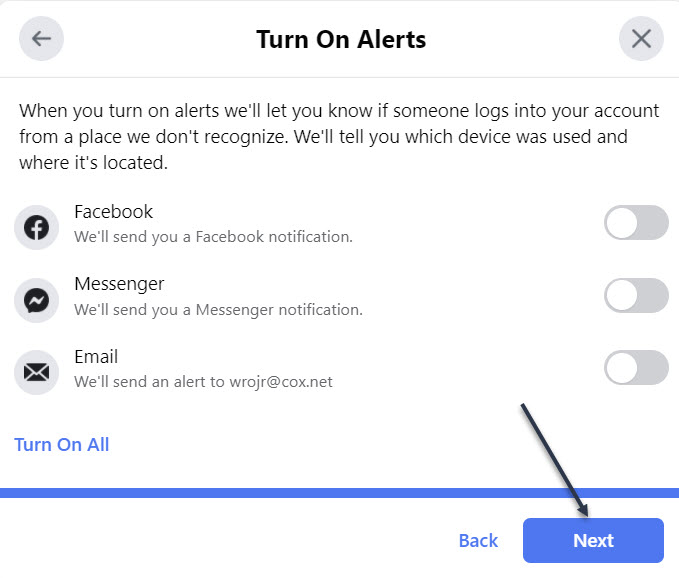
Check Your Alerts
Next, at the window for Turn On Alerts, turn on the switch for any alerts you wish to receive if you or someone else signs into your Facebook account from a new or different location, then click Next. Refer to below image:
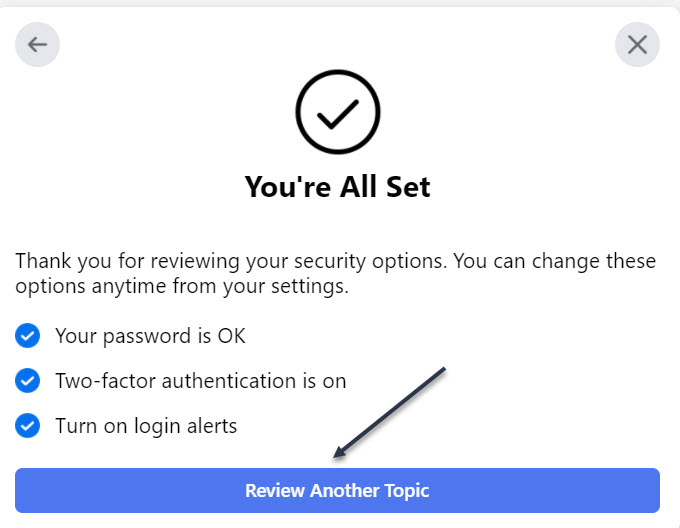
You Are Finished With Second Topic
Now, the You’re All Set window will open indicating you are finished with the topic. To continue, click the Review Another Topic button. See below image:
You may continue to one or more of the next three topics and follow its directions.
Quote For the Day
“Technology is a useful servant but a dangerous master”.
Christian Lous Lange
That’s it. You now have controlled your Privacy settings in Facebook. Please feel free to share this post! One way to share is via Twitter.
Just click the Tweet icon below. This will launch Twitter where you click its icon to post the Tweet.
Check out TechSavvy.Life for blog posts on smartphones, PCs, and Macs! You may email us at contact@techsavvy.life for comments or questions.
Tweet
I Would Like to Hear From You
Please feel free to leave a comment. I would love hearing from you. Do you have a computer or smart device tech question? I will do my best to answer your inquiry. Just send an email to contact@techsavvy.life. Please mention the device, app and version that you are using. To help us out, you can send screenshots of your data related to your question.