RAYMOND OGLESBY @RaymondOglesby2
February 25, 2025 – 7 minutes read time
Overview
Not sure whether to hook your new monitor up to your computer using HDMI or DisplayPort? Different ports have different capabilities and compatibilities. Let’s find out which is best.
What is Best?
One often overlooked consideration when choosing your PC monitor is the ports that come with it. The two primary standards are HDMI and DisplayPort, which offer different features and capabilities. Displays often use one over the other, while some even feature both options. But which should you use? The answer, as always, is “it depends.”
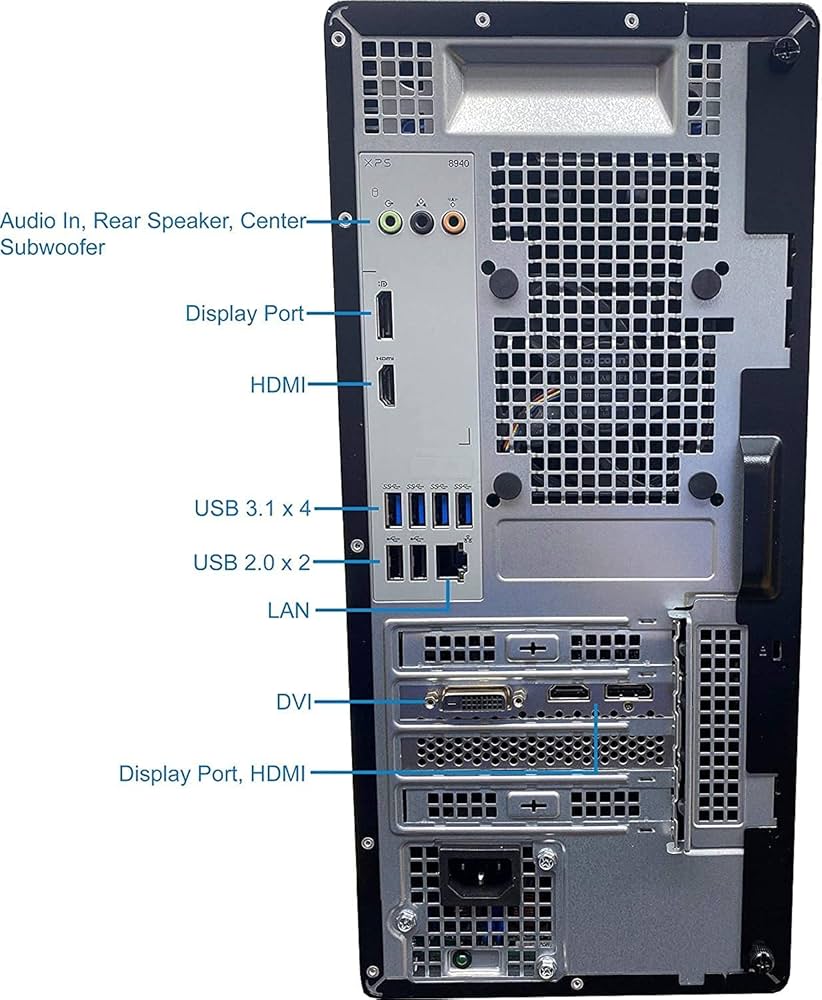
Let’s break down the major differences between standards, and help you identify which will better suit your individual needs and setup. Refer to the below image for the rear view of our Dell 8960 PC which supports both:
HDMI
Let’s start by talking about HDMI, the standard with which you are probably most familiar. See the below image:
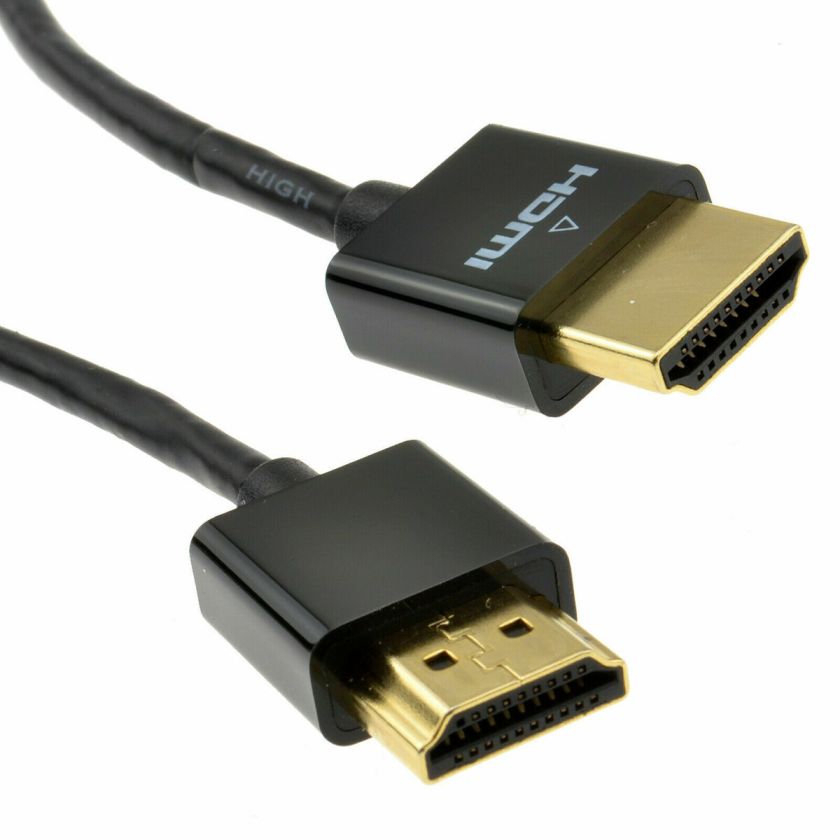
HDMI is most commonly used on TVs, sending high-definition video and audio signals over one cable for an easy, clean setup. There have been multiple versions of HDMI, each improving on the last. On modern monitors, you will find any combination of the following:
- HDMI 1.4: Supports up to 4K (4,096 by 2,160) at 24Hz, 4K (3,840 by 2,160) at 30Hz, or 1080p at 120Hz.
- HDMI 2.0: Supports up to 4K at 60Hz, and later versions (HDMI 2.0a and 2.0b) include support for HDR.
- HDMI 2.1: Supports up to 10K resolution at 120Hz, adds improved HDR with dynamic metadata and enhanced Audio Return Channel (eARC) to send Dolby Atmos and DTS:X audio from display to receiver. HDMI 2.1 includes a variable refresh rate, like FreeSync, though some HDMI 2.0 monitors also support it.
- HDMI 2.1a: Adds Source-Based Tone Mapping (SBTM).
- HDMI 2.1b: Adds up to 48Gbps in bandwidth.
- HDMI 2.2: Introduced at CES 2025, it supports 96Gbps data-transfer speeds, 12K resolution, and a Latency Indication Protocol (LIP) specification that assists in synchronizing audio and video signals between devices. However, it will take years before devices and media catch up to this new standard.
These are somewhat simplified explanations of each HDMI version, as there are other feature improvements in each standard, but they are the things most users will care about. If you want to take full advantage of those specifications, you will also need an HDMI cable capable of the correct bandwidth.
For example, if you are running 4K at 60Hz with HDR, you will want a cable labeled Premium High Speed or 18Gbps (or better). For 8K at high refresh rates, you may need even more bandwidth, so check the description and reviews of any cable you plan to buy. Lower-spec cables may still work under certain circumstances, but can be finicky, adding “snow” to the image or not routing your surround sound audio properly. If you ever experience issues, make sure the cable is up to snuff.
In addition to the above, all modern HDMI ports should support AMD’s FreeSync technology, which eliminates screen tearing in games by matching the monitor’s refresh rate to your video card’s output framerate (with newer HDMI versions supporting FreeSync at higher refresh rates). Nvidia’s similar G-Sync technology, however, does not always work over HDMI; on many monitors, it’s DisplayPort only.
DisplayPort
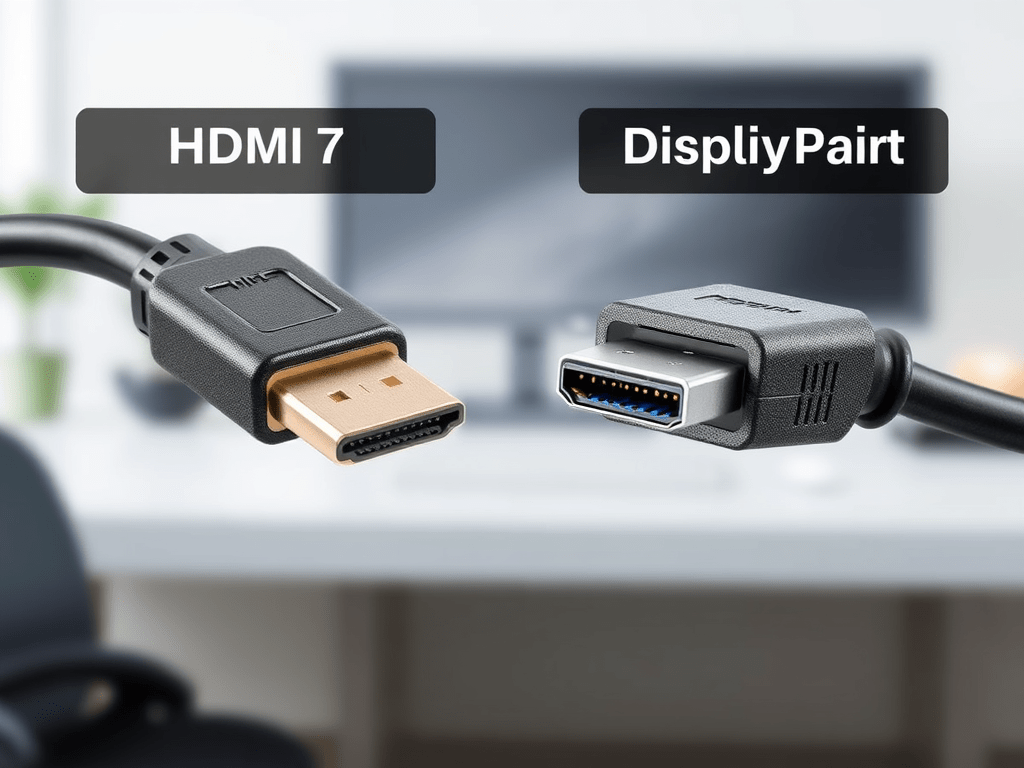
DisplayPort looks similar to HDMI but is a connector more common on PCs than TVs. See the following image:
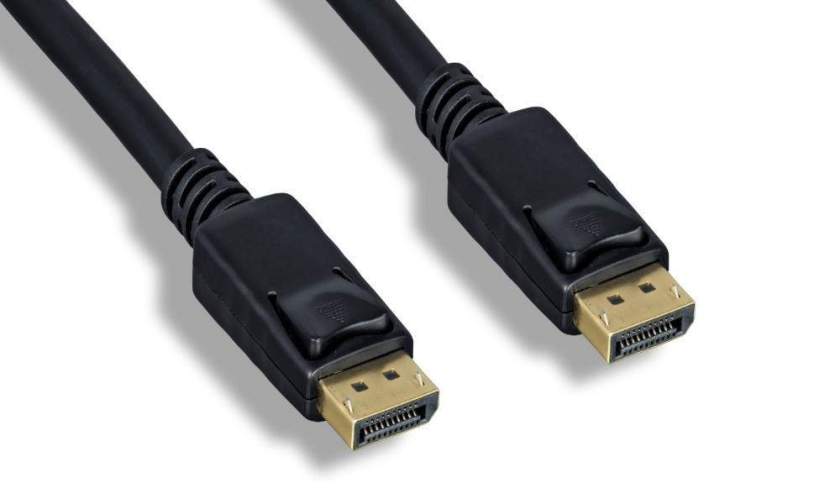
It still allows for high-definition video and (in many cases) audio, but its standards are a bit different. On modern monitors, you will likely find any of the following:
- DisplayPort 1.2: Supports up to 4K at 60Hz, some 1.2a ports may also support AMD’s FreeSync
- DisplayPort 1.3: Supports up to 4K at 120Hz or 8K at 30Hz
- DisplayPort 1.4: Supports up to 8K at 60Hz and HDR
- DisplayPort 2.0: Supports 16K with HDR at 60Hz and 10K without HDR at 80Hz.
- DisplayPort 2.1: Adds USB4 compatibility.
When shopping for a DisplayPort cable,we recommend picking one from DisplayPort’s certified cables list to ensure it performs as advertised. In addition, DisplayPort has a few other useful features. First, it supports AMD’s FreeSync and Nvidia’s G-Sync, so you can have a tear-free gaming experience no matter which brand of card you use (as long as your monitor supports the technology, of course).
You can also drive multiple monitors from one DisplayPort connection, rather than having to use multiple ports, which is handy. Laptops can even send DisplayPort signals through a USB-C port. Similarly, some modern laptops feature Thunderbolt 2/3/4, which can route DisplayPort signals over a different connection. Many DisplayPort cables also have clips to keep them securely in your monitor, which is both a pro and a con because they can sometimes be tough to get out!
Which Cable to Use?
One cable is not better than the other across the board, but each has its place. Refer to the below image:
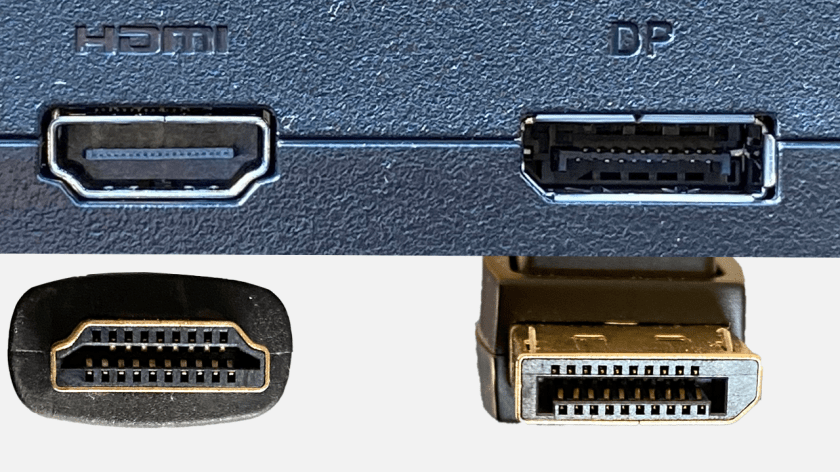
First, you will need an output on your GPU that matches the desired input on your monitor, as well as an appropriate cable. If you are choosing between DisplayPort 1.4 and IDMI 2.0, DisplayPort would be the better option. If a monitor only gives you the choice between, say, HDMI 2.0 and DisplayPort 1.2, HDMI could be the way to go for HDR support, as long as all your devices support the HDMI version.
Ultimately, if you are a gamer looking for the highest-end performance and the most future-proofed standard, DisplayPort 2.1 is the best option. It offers the highest maximum data transfer rate (at 77.37 Gbps, it’s nearly double HDMI 2.1’s 42.6 Gbps maximum), much higher refresh rates at both 4K and 8K than HDMI (240 Hz and 85 Hz vs.144 Hz and 30 Hz), as well as higher Display Stream Compression (DSC) resolutions and refresh rates than IDMI. This is especially important for monitors that require compression to reach their highest resolution/frame rate specs.
That said, DisplayPort 2.1 adoption is far from universal on the monitor side, and many GPUs do not provide the bandwidth required to properly make full use of it regardless. DisplayPort 2.1 supports three different transmission modes, called Ultra High Bit Rate: UHBR10, UHBR13.5 and UHBR20. Only UHBR20 takes full advantage of the full bandwidth potential of DisplayPort 2.1, and only the most recent graphics cards support it. The best choice you can make is what’s best for your particular setup. Check every link in the chain before you buy a cable, so you can pick the best combination for optimal performance.
Source: Various PC manufacturers
Disclaimer
Technology is constantly evolving, and smartphone and desktop tech rarely remains static. Therefore, the information in this post is only accurate as of the date it was written. Blog posts that are older than six months may contain instructions that are no longer compatible with your device or operating system. We hope that the content from previous posts continues to function as intended. Thank you for reading TechSavvy.Life, where technology works for you.
Quote For the Day
Don’t become a slave to technology – manage your phone, don’t let it manage you.
-Richard Branson
X (Twitter) Info
That’s it. Please feel free to share this post! One way to share is via Twitter.
Just click the Tweet icon below. This will launch Twitter where you click its icon to post the Tweet.
Checkout TechSavvy.Life for blog posts on smartphones, PCs, and Macs! You may email us at contact@techsavvy.life for comments or questions.
Tweet
I Would Like to Hear From You
We value your feedback! Was this post helpful? Please share your comments with us. If you have a tech question related to your computer or smart device, feel free to reach out. Just send an email to contact@techsavvy.life, and be sure to include the device, app, and version you are using. To assist us further, you can also attach screenshots related to your inquiry.
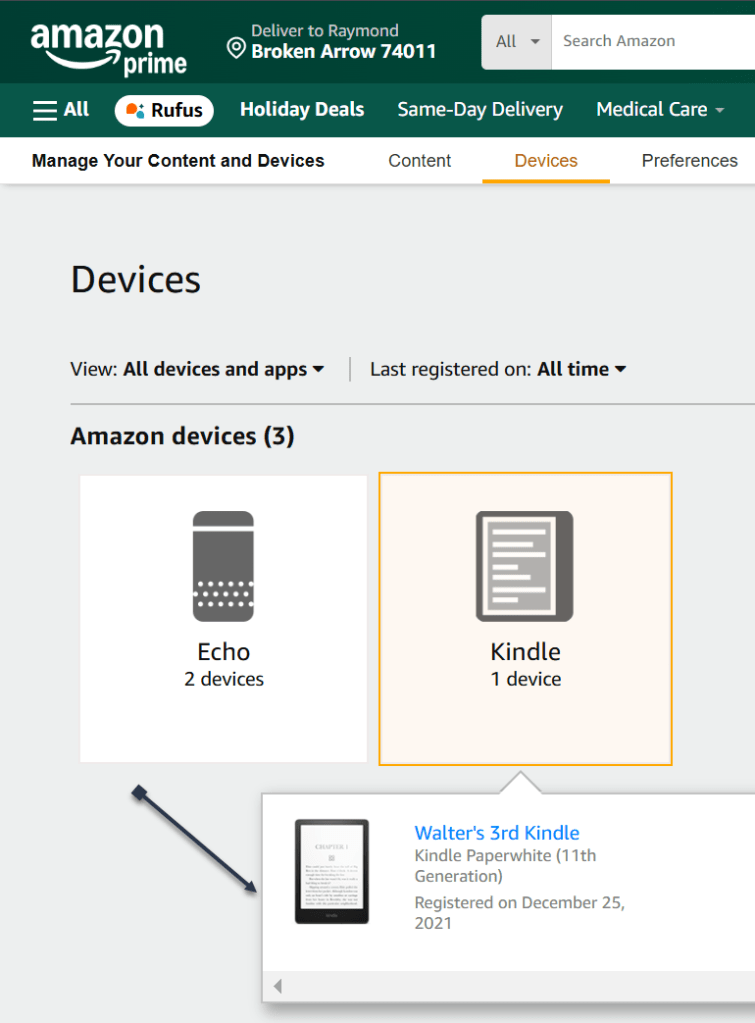
The author’s Vietnam eBook on the “Battle for Tra Bong Vietnam: Events and Aftermath” can be accessed from a Kindle device or the Kindle App for a desktop or smartphone. The apps are free.