RAYMOND OGLESBY @RaymondOglesby2
August 17, 2021
Microsoft Word, PowerPoint, and Outlook offer a hidden measurement converter to save you from doing measurement conversions manually. If you are working with a document, presentation, or email that contains measurements, you will find this time-saving feature useful. Lets explore this feature.
This is for Office 365. Screenshots are from Windows 10 PC.

Enable Converter in Word and PowerPoint
First, open a document in Microsoft Word or a presentation in PowerPoint. Next, click
File > Options
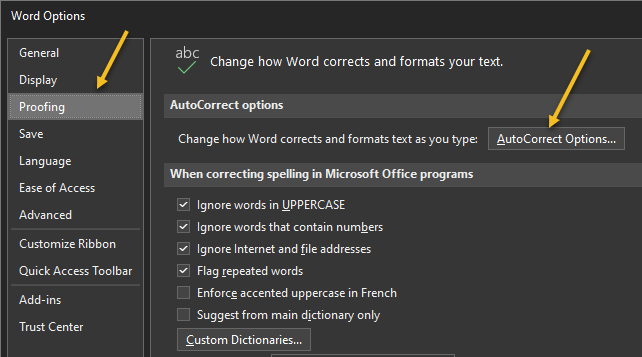
from the menu. Now, select Proofing on the left and click AutoCorrect Options on the right. Refer to below image:
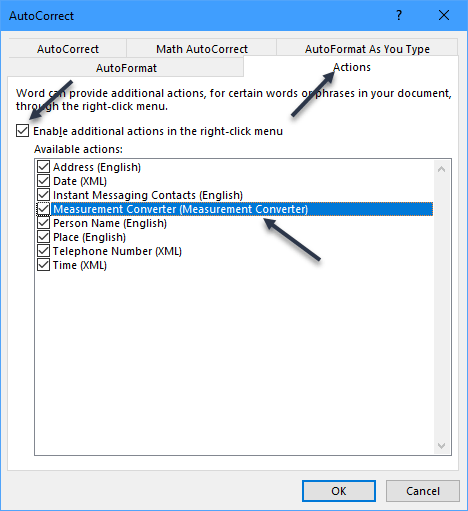
Next, select the Actions tab. Now, check the boxes for Enable Additional Actions in the right-click menu then Measurement Converter from the list. You will notice other actions you can enable. Just checkmark any additional ones you would like to use. See below image:
Click OK, then OK once more to save and exit the options menu.
Enable Converter in Outlook
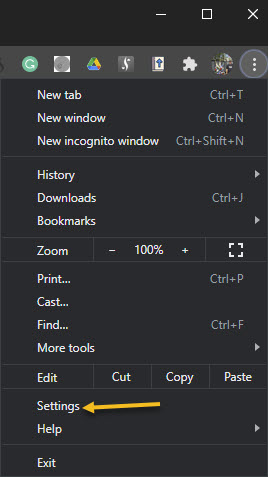
First, open Microsoft Outlook and click
File > Options
from your inbox or an email window.
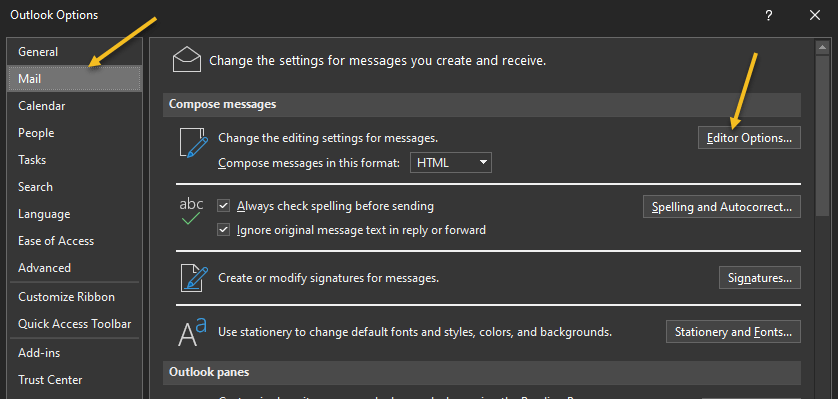
Now, select Mail on the left and click Editor Options on the right. See following image:
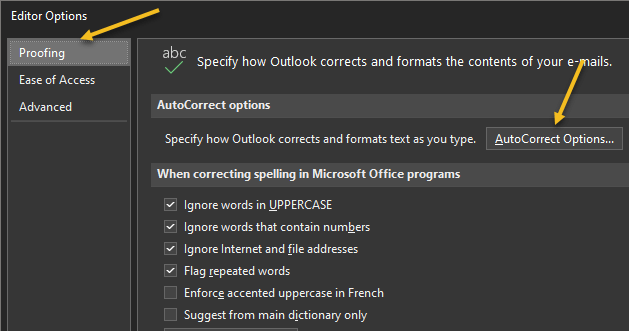
On the next screen, choose Proofing on the left and AutoCorrect Options on the right. Refer to below image:
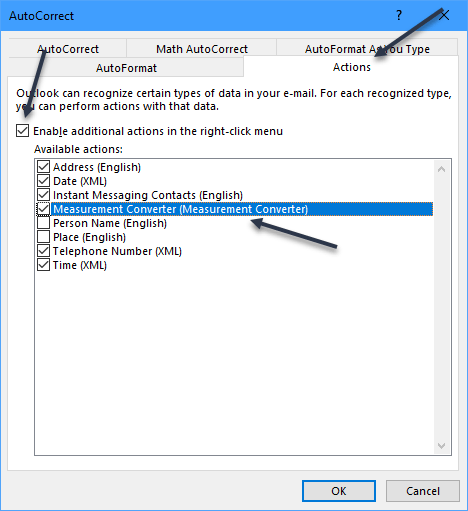
Next, select the Actions tab. Now, check the boxes for Enable Additional Actions in the right-click menu, and Measurement Converter in the list. Like with Word and PowerPoint you can checkmark the boxes for any other actions you would like to use. See below image:
Next click OK on all screens to save and exit,
Use the Converter in Office
When you receive a document that includes unfamiliar measurements, such as those from a foreign country, this tool takes the work out of manual conversions. And if you are creating the document yourself, you can convert the measurement for your audience.
Just, select the text containing the measurement. You can do this by dragging your cursor through it.
Now, right-click and move your cursor down to Additional Actions in the menu. You will see the Measurement Converter in the pop-out window. Refer to below image:
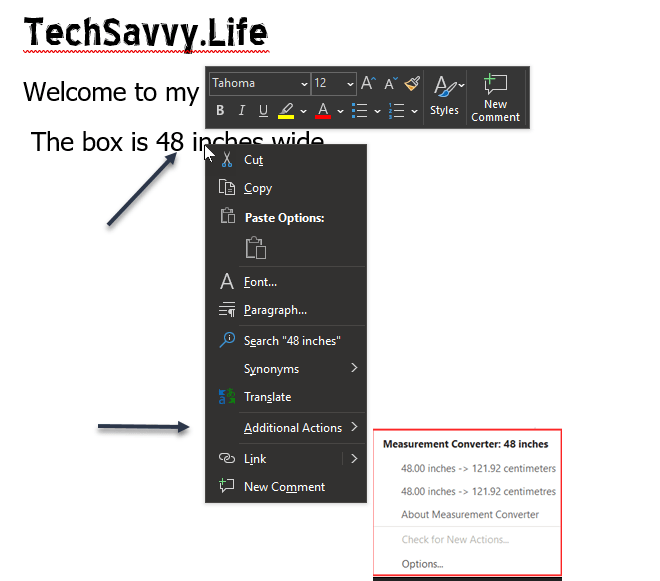
This lets you view the conversion. Additionally, you can click to select a conversion from the list and it will replace the measurement in your document, presentation, or email. This is convenient when you are preparing an item for someone expecting a different unit of measurement.
Quote For the Day
The greatest mistake you can make in life is continually fearing that you’ll make one.
Elbert Hubbard
That’s it. Please feel free to share this post! One way to share is via Twitter.
Just click the Tweet icon below. This will launch Twitter where you click its icon to post the Tweet.
Check out TechSavvy.Life for blog posts on smartphones, PCs, and Macs! You may email us at contact@techsavvy.life for comments or questions.
Tweet
I Would Like to Hear From You
Please feel free to leave a comment. I would love hearing from you. Do you have a computer or smart device tech question? I will do my best to answer your inquiry. Just send an email to contact@techsavvy.life. Please mention the device, app and version that you are using. To help us out, you can send screenshots of your data related to your question.