RAYMOND OGLESBY @RaymondOglesby2
March 7, 2023
For troubleshooting, testing, or other similar purposes, you may need to turn off your Windows 11 or Windows 10’s firewall. It’s easy to disable this feature on your PC. Let’s explore this feature.
This is for Windows 11/10. Screenshots are from Windows 10
Note! The Dilbert comic will be suspended until further notice. Due to racists remarks by the creater of Dilbert, Scott Adams on a talk show, Dilbert has been removed from the Internet and newspapers. We have been following Dilbert for three decades and we thought the comic titted in with the theme of these posts.
Disable Your Firewall Only If You Have To
Turning off Windows’ firewall allows unauthorized network access on your PC. So unless you have a strong reason to disable the feature, you must keep the firewall turned on at all times.
The only times you may need to disable your firewall are when you are troubleshooting an issue, testing an app, or using a third-party firewall on your computer. Even then, if you are disabling the firewall to let an app through your network, add that app to the Firewall Exception list instead of turning the entire feature off.
When you are finished with your task, remember to turn the firewall back on to stay secure.
Turn Off Firewall
On both Windows 11 and 10, you will use the built-in Windows Security app to disable and enable the firewall.
First, launch Windows Security on your PC. Do this by opening the Start menu, searching for Windows Security, then click the app in the search results. Refer to the below image:

Next, in the window that opens, click Firewall & network protection. See the below image:

Now, on the Firewall & network protection page, select your network profile. To disable the firewall for your current profile, you will see Active next to that profile, so click that option. See the following image:

Next, in the Microsoft Defender Firewall section, toggle OFF the option. Later, to re-enable the firewall, toggle ON the option. Refer to the below image:

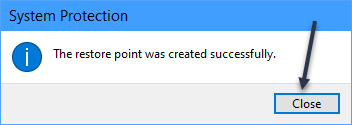
Now, select Yes in the User Account Control prompt, and your Windows firewall is now disabled. You may now continue your troubleshooting, testing, or other similar tasks.
Remember to turn the firewall back on when you are finished.
Disclaimer
Technology is always changing and rarely is static for smartphones and desktops. Thus, the contents of this post are only valid at the time of writing. Blog posts older than six months may have directions incompatible with your device or OS. Hopefully, older post content will continue to work as advertised. Thank you for reading TechSavvy.Life for Technology at Work For You.
Quote For the Day
Communication tools don’t get socially interesting until they get technologically boring.
Clay Shirky
Tweet Info
That’s it. Please feel free to share this post! One way to share is via Twitter.
Just click the Tweet icon below. This will launch Twitter where you click its icon to post the Tweet.
Checkout TechSavvy.Life for blog posts on smartphones, PCs, and Macs! You may email us at contact@techsavvy.life for comments or questions.
Tweet
I Would Like to Hear From You
Please feel free to leave a comment. I would love to hear from you. Do you have a computer or smart device tech question? I will do my best to answer your inquiry. Just send an email to contact@techsavvy.life. Please mention the device, app, and version you are using. To help us out, you can send screenshots of your data related to your question.
Author’s E-Book
You can access the e-book from a Kindle device, the Kindle App for the desktop or smartphone, which is a free app.