RAYMOND OGLESBY @RaymondOglesby2
November 25, 2025 – 3 minutes read time
Overview
Some people love the Mail app Preview feature, while others want to know how to turn off Mail Preview.
The iOS 18 Mail app update included an Apple Intelligence feature that gives you email summaries. With iOS 26, you can shrink or enlarge those email summaries.
Here’s how to turn off Mail Preview, as well as how to change the length of the previews you see in the Mail app, so you can get a preview that’s actually helpful for you.
Key Takeaways
- Choose anywhere from a one-line to a five-line summary of your emails in the Mail app.
- Turn off email summaries if you do not find them useful.
System Requirements
This tip was performed on an iPhone 14 Pro running iOS 26.1.
Click here to learn how to update your iPhone to the latest iOS version.
Set Email Preview
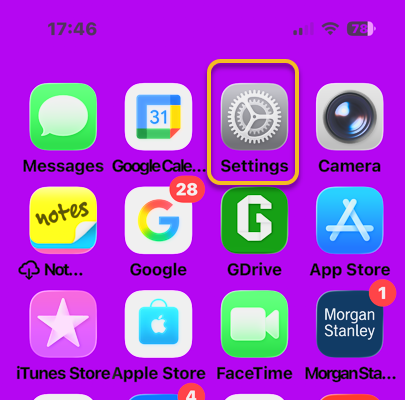
First, open the Settings app. Refer to the image below:
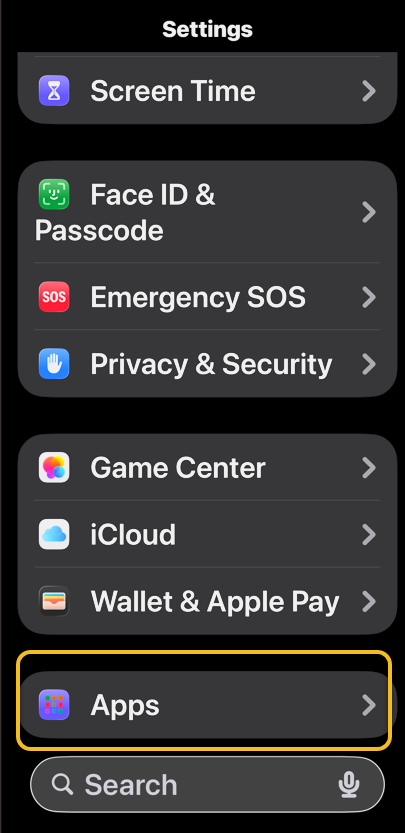
Next, rap Apps option.See the image below:
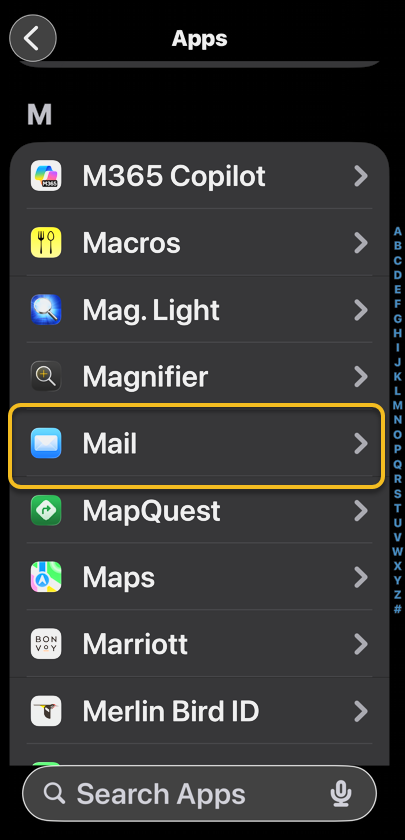
Now, tap the Mail app,See the following image:
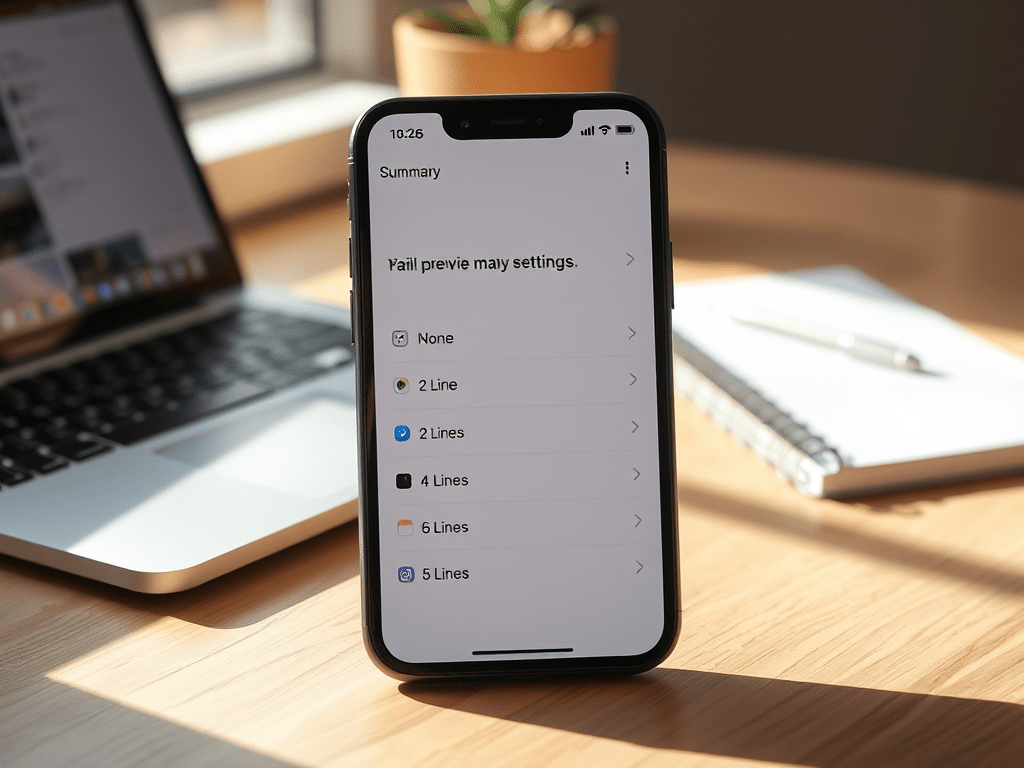
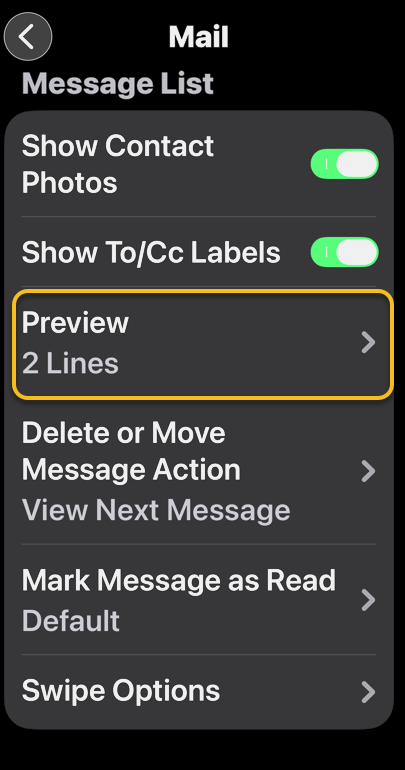
Next, scroll down and tap the Preview option.Refer to the image below:
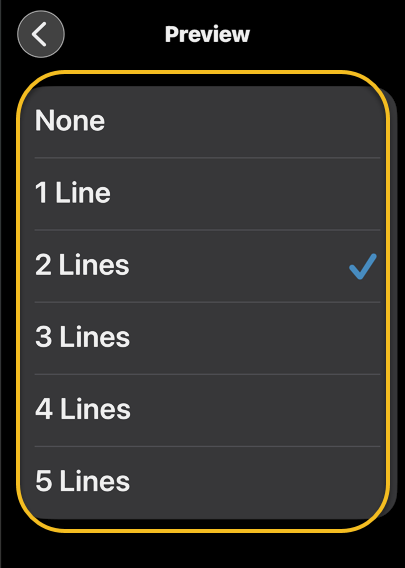
Now, tap None, 1 Line, 2 Lines, 3 Lines, 4 Lines, or 5 Lines for your preview length. See the below image:
Now you know how to turn off email previews or change the length of your iPhone and iPad email previews to anywhere from none to five lines.
Disclaimer
Technology is constantly evolving, and smartphone and desktop tech rarely remains static. Therefore, the information in this post is only accurate as of the date it was written. Blog posts that are older than six months may contain instructions that are no longer compatible with your device or operating system. We hope that the content from previous posts continues to function as intended. Thank you for reading TechSavvy.Life, where technology works for you.
Quote For the Day
“First we build the tools, then they build us.”
Marshall McLuhan, Media Theorist
(X)) Twitter Info
That’s it. Please feel free to share this post! One way to share is via Twitter.
Just click the Tweet icon below. This will launch Twitter where you click its icon to post the Tweet.
Checkout TechSavvy.Life for blog posts on smartphones, PCs, and Macs! You may email us at contact@techsavvy.life for comments or questions.
Tweet
I Would Like to Hear From You
We value your feedback! Was this post helpful? Please share your comments with us. If you have a tech question related to your computer or smart device, feel free to reach out. Just send an email to contact@techsavvy.life, and be sure to include the device, app, and version you are using. To assist us further, you can also attach screenshots related to your inquiry.
The author’s Vietnam eBook on the “Battle for Tra Bong Vietnam: Events and Aftermath” can be accessed from a Kindle device or the Kindle App for a desktop or smartphone. The apps are free.