At times, you will want to entertain your guests before an event, like at a wedding or a trade show. You’ll want to loop your PowerPoint presentation so your guests aren’t staring at a blank screen. I have included a link to a sample slideshow using the loop feature.
Here is a link to a sample slideshow demonstrating the PowerPoint looping feature. I am using a presentation available from TechRepublic.
Lets examine how this is done.
This is for PowerPoint for Office 365 Windows and Mac versions. Other versions of PowerPoint will be similar.
Setting Up your Slideshow
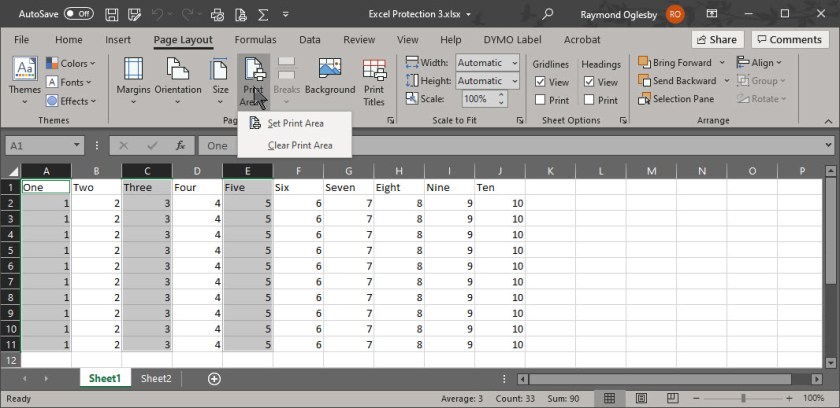
First, open your PowerPoint presentation in which you would like to use the loop feature. Once open, navigate to the Set Up group of the Slide Show tab and select the Set Up Slide Show option.
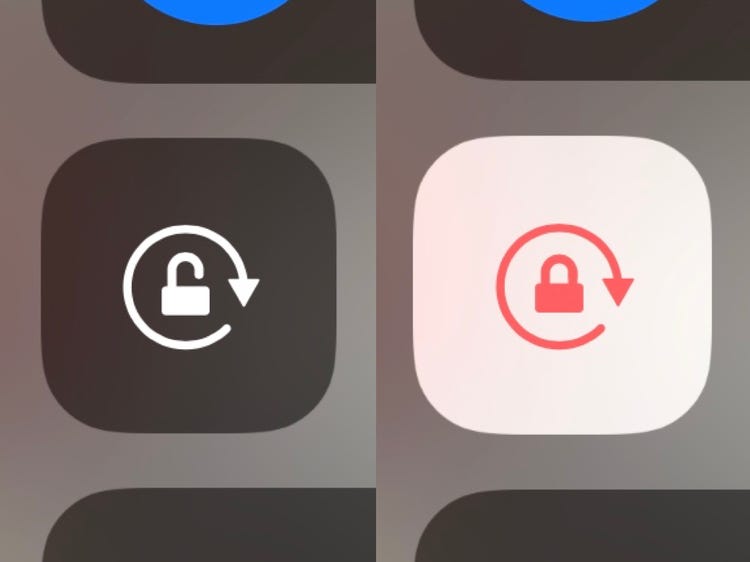
The Set Up Show window will open. Check the box next to Loop continuously until Esc. After selection, click OK. Refer to below image:

When you play your slideshow, it will loop until you press the “Esc” key. Now we want to set up the presentation for automatic slide transitions.
Applying the Loop Feature
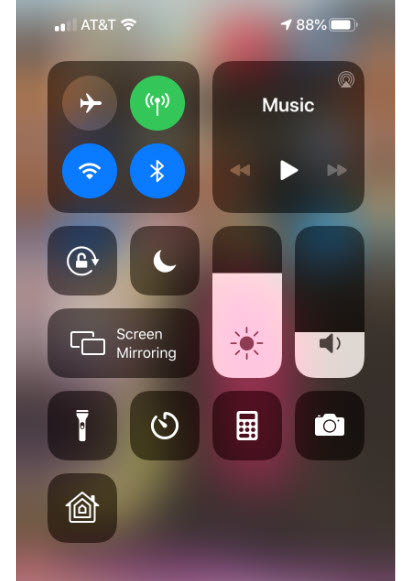
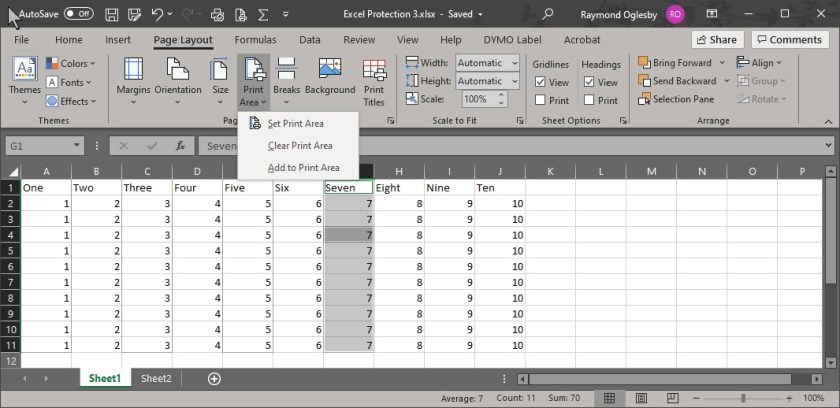
Navigate back to the Set Up group of the Slide Show tab and select the Set Up Slide Show option. There is one option you need to set, the Using Timings, if Present under the Advance Slides group.
Now, under the Show Type group, select Browsed at a kiosk (full screen). The Loop continuously until Esc option will be enabled automatically (we turned it on above) Also, select the Using timings, if present option. Select OK to proceed. See following image:
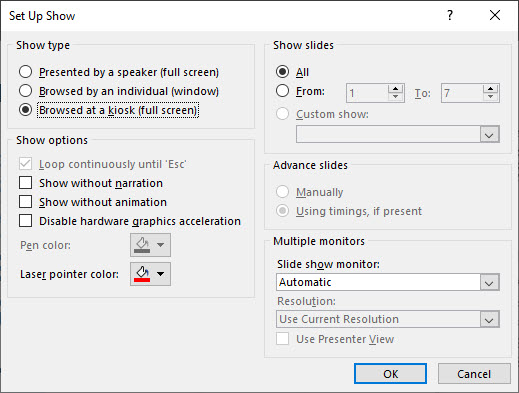
By setting the Browsed at a kiosh (full screen) option, the Forward and Back keys are locked, thus allowing unattended playback without the fear of someone breaking it.
Setting Up Transitions
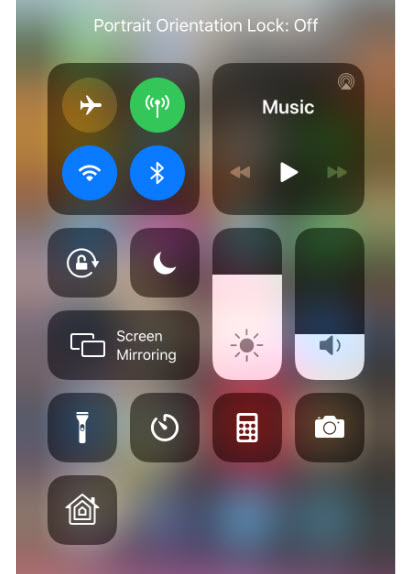
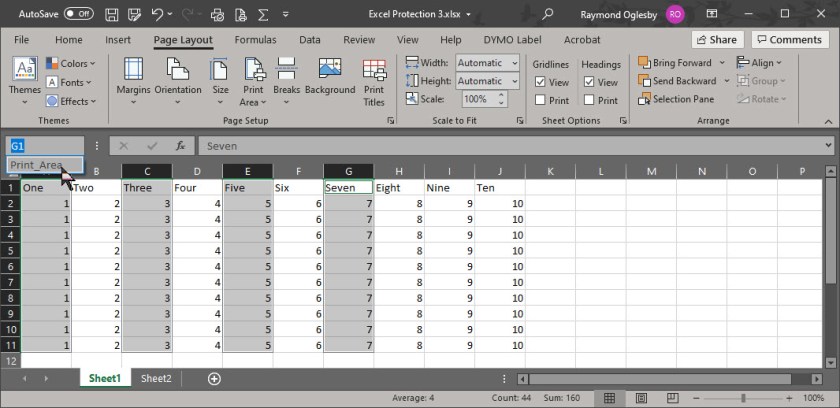
Now, lets setup the timings of your slides. Click on the Transitions tab and check the box next to After and set the timing for slide transition. In my example, I have the timining set to 10 seconds. If On Mouse Click is enabled, it won’t work because we have previously selected to loop the slideshow until the presenter has pressed the “Esc” key. To finish the loop feature, select the Apply To All option. See following image:

Now when you play your presentation, it will continuously loop until you press the “Esc” key.
Related
How to use the Dim feature in PowerPoint which is demonstrated in Slide 3 of the sample slideshow.
I Would Like to Hear from You
Please feel free to leave a comment. I would love hearing from you. Do you have a computer or smart device tech question? I will do my best to answer your inquiry. Please mention the device, app and version that you are using. To help us out, you can send screenshots of your data related to your question.