RAYMOND OGLESBY @RaymondOglesby2
September 20, 2022
To help you type faster and more conveniently, your iPhone offers a Predictive Text feature that automatically suggests the words that you are likely to type. You can activate this feature from both Settings and your Keyboard menu on your iPhone. Let’s find out about this feature.
This is for the iPhone. Screenshots are from iPhone XR running iOS 15.6 +

What Is Predictive Text
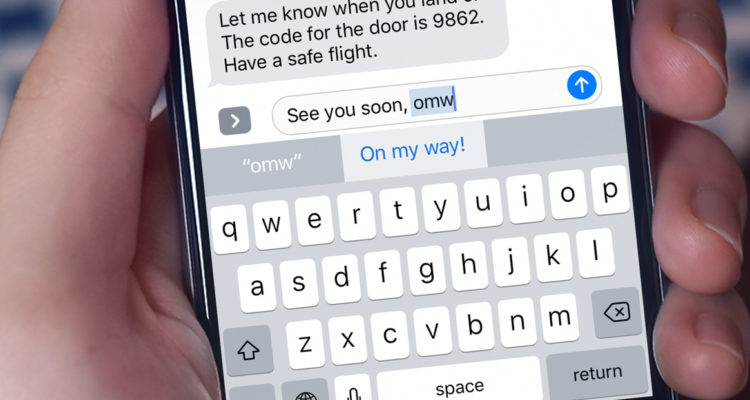
As the name implies, the Predictive Text feature predicts the words that you are likely going to type next. You can then tap those predicted words to add them to what you are already typing, which speeds up your input.
For example, if you start typing “How are,” the feature automatically suggests “you,” so your resulting sentence is “How are you?”
The feature predicts words based on the data it has gathered from your past conversations, writing style, and the sites you have visited in Safari. It may also use your other apps and recent activity to suggest words.
Enable Predictive Text from Settings
If you are not typing anything at the moment (meaning your keyboard is not open), use the Settings app to activate Predictive Text on your iPhone.
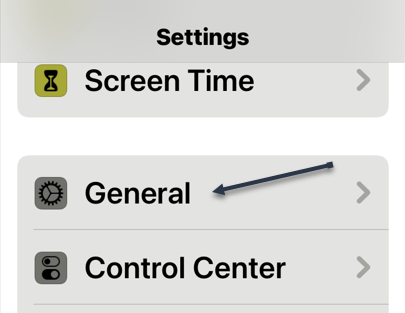
First, head to:
Settings > General > Keyboard.
Refer to the below image:

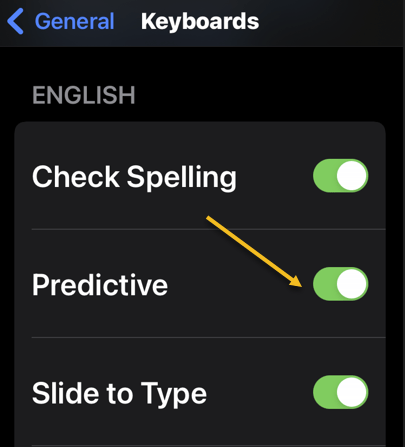
Next, scroll down the Keyboards page that opens to the bottom. There, turn on the Predictive option. See the below image:
Tip: To disable Predictive Text later, toggle off the Predictive option in General > Keyboard.
You are done. From now on, your keyboard will suggest words that you should be using in your text when you’re typing something on your iPhone.
Enable Predictive Text From Keyboard Settings
If you are typing something and your iPhone’s keyboard is open, you can use an option on the keyboard itself to toggle on the Predictive Text feature.
First, open your iPhone’s keyboard, then tap and hold on to the globe icon (just beside the space bar). See the following image:

Next, in the menu that opens, select Keyboard Settings. Refer to the below image:

Now, on the Keyboards page, scroll down to the bottom. There, enable the Predictive feature. See the below image:

Your keyboard will now predict the words you are likely going to type. And that’s how you make typing faster and easier on your iPhone.
Quote For The Day
The real problem is not whether machines think but whether men do.
B.F. Skinner
Tweet Info
That’s it. Please feel free to share this post! One way to share is via Twitter.
Just click the Tweet icon below. This will launch Twitter where you click its icon to post the Tweet.
Checkout TechSavvy.Life for blog posts on smartphones, PCs, and Macs! You may email us at contact@techsavvy.life for comments or questions.
Tweet
I Would Like To Hear From You
Please feel free to leave a comment. I would love to hear from you. Do you have a computer or smart device tech question? I will do my best to answer your inquiry. Just send an email to contact@techsavvy.life. Please mention the device, app, and version you are using. To help us out, you can send screenshots of your data related to your question.
Author’s E-Book
You can access the e-book from a Kindle device, the Kindle App for the desktop or smartphone, which is a free app.