RAYMOND OGLESBY @RaymondOglesby2
August 25, 2021
A big part of your daily time is spent using your iPhone. Whether you want to understand your app usage, change your lifestyle, or just know which apps you need to cut down on, its helpful to know about your most used apps. Let’s explore this feature, called Screen Time.
This is for the iPhone

Enable Screen Time
Before you can find out which apps you use the most on your iPhone, you will need to turn on a free feature built into iOS called Screen Time. This feature helps you keep track of how you use your iPhone. It can also help you put limits on your app usage if you would like, although that’s optional.
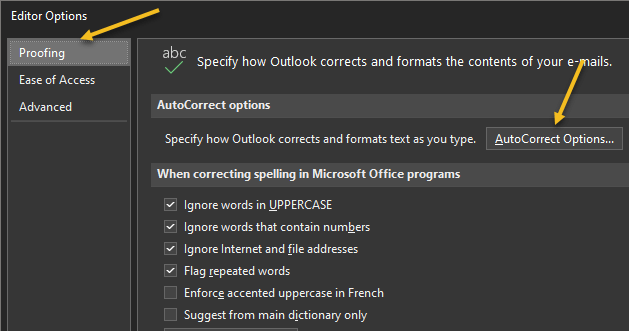
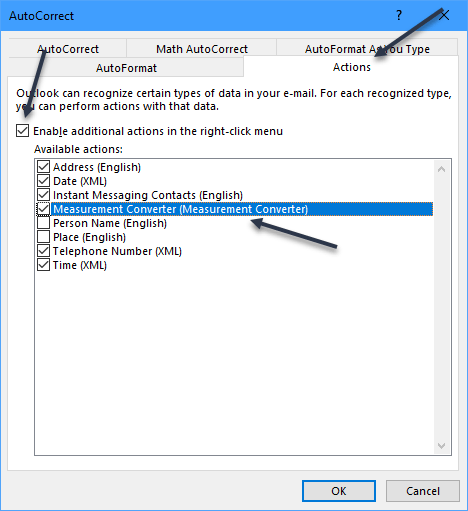
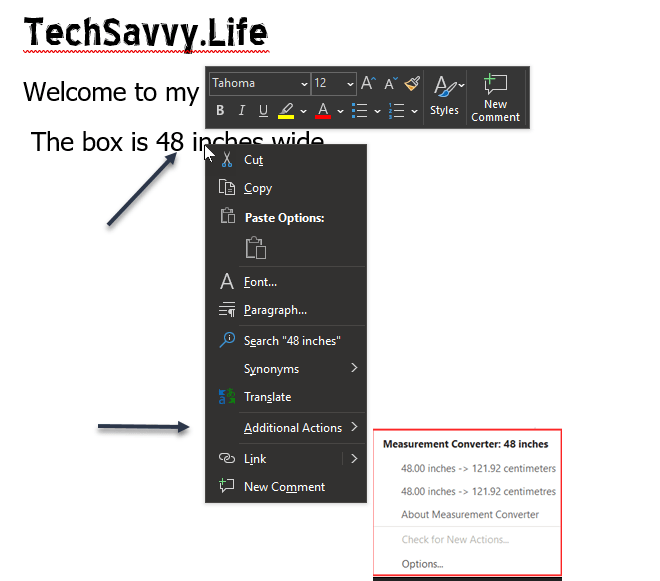
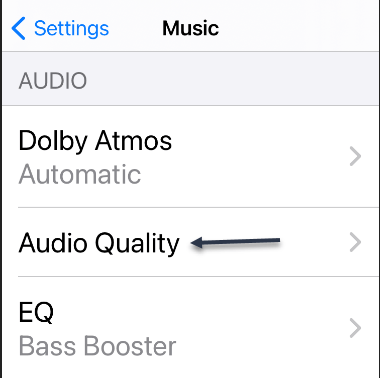
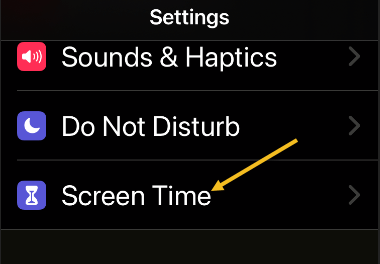
First, open the Settings app, and then tap the Screen Time option. Refer to below image:
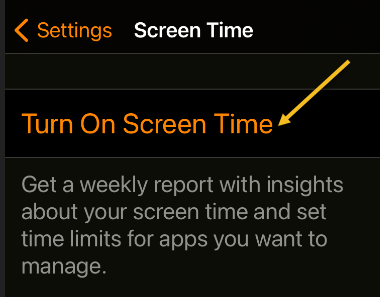
Next, tap Turn on Screen Time and tap This is My iPhone or This is My Child’s iPhone. See below image:
Now, you will see a Screen Time summary page with no data, but we will fix that problem. Note! Each time you enable Screen Time, you data is removed.
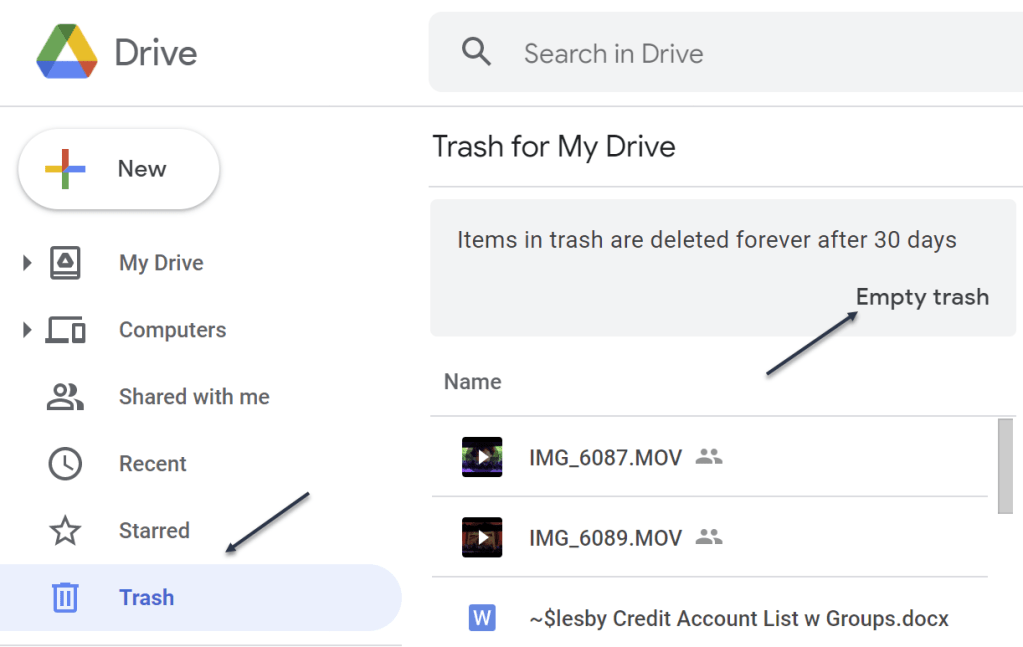
Check Screen Time Again
The catch with using Screen Time is that it needs to be enabled to start gathering data about which apps you use the most. If you just turned it on, you will not have a most-used app list to look at.
So, now that Screen Time has been enabled, use your iPhone as you normally would. After a while, you can check back in with Screen Time and see some statistics.
Next, open the Settings app and tap Screen Time again. See following image:
Now, on the Screen Time summary page, you will see a chart that shows your average daily activity. Just under that chart, tap See All Activity. Refer to below image:

Next, choose whether you want to see your most used apps over the period of a day, week, month, or year at the top of the screen. See below image:

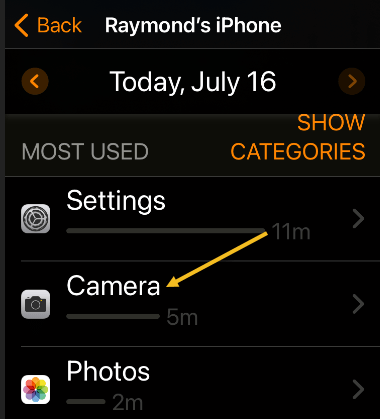
Now, scroll down to the Most Used section, and you will see a list of apps sorted by which you used the most over the selected time period, with your most used apps listed at the top. Tap an app to see more details. See following image:
Add a Limit
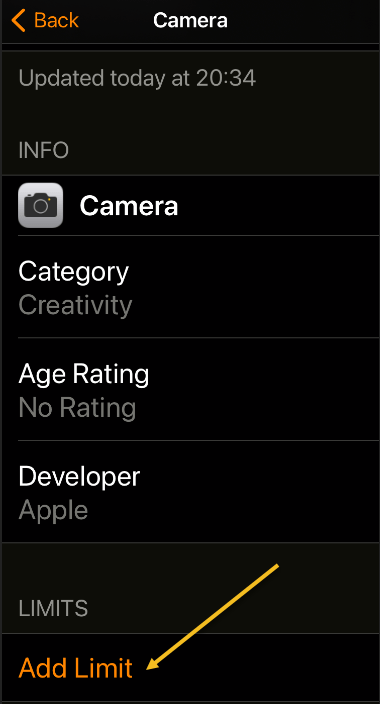
Next, while on the detailed-view screen, if you want to set a time limit to prevent you from using the app too much, scroll down and tap Add Limit. Refer to below image:
Now, you will see a screen where you can set a time limit for the app in hours or minutes. When you’re done, tap Add. See below image:

From now on, whenever your time is up, you will see an alert pop up, reminding you not to use the app anymore.
Quote For the Day
True terror is to wake up one morning and discover that your high school class is running the country.
Kurt Vonnegut
That’s it. Please feel free to share this post! One way to share is via Twitter.
Just click the Tweet icon below. This will launch Twitter where you click its icon to post the Tweet.
Check out TechSavvy.Life for blog posts on smartphones, PCs, and Macs! You may email us at contact@techsavvy.life for comments or questions.
Tweet
I Would Like to Hear From You
Please feel free to leave a comment. I would love hearing from you. Do you have a computer or smart device tech question? I will do my best to answer your inquiry. Just send an email to contact@techsavvy.life. Please mention the device, app and version that you are using. To help us out, you can send screenshots of your data related to your question.