RAYMOND OGLESBY @RaymondOglesby2
January 28, 2025 – 7 minutes read time
Overview
The Amazon Kindle is a great ebook reader, but it’s tightly tied to Amazon’s ecosystem. If you have a Fire tablet or a smartphone, you can download other e-reading apps to beef up your library, but with the Kindle hardware, you are pretty much tied to getting your content directly from Amazon. Well, sort of. Using some free software, you can take ebooks in various formats and zap them over to your Kindle.
Let’s explore how to send other ebook formats to your e-reader, and where to get free ebooks.
Why You Will Like This Tip
- Of course, we all like free stuff.
- A large variety of free ebooks to choose from.
- Download in a variety of formats for reading on your Kindle.
System Requirements
This is for the Amazon Kindle. It uses the iPhone, Android, PC, and Mac. The screenshots are from Windows 10 and iPhone 14 Pro.
Use “Send to Kindle”
Amazon offers a Send to Kindle page where you can upload ebook files saved on your device. First, on amazon.com/sendtokindle, click Select files from device. Refer to the below image:
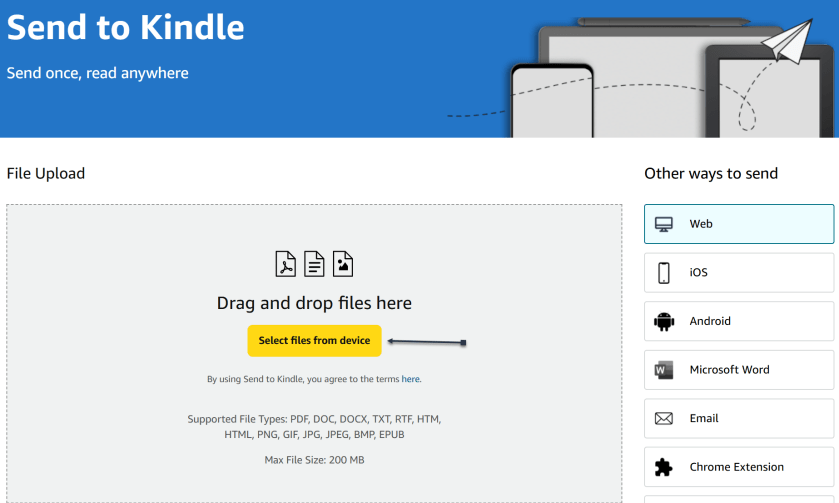
Next, select the book you want on your Kindle. This tool supports PDF, DOC, DOCX, TXT, RTF, HTM, HTML, PNG, GIF, JPG, JPEG, BMP, and EPUB formats on ebooks up to 200MB in size. (Amazon no longer supports sending new Mobi files.) Ensure the Add to your library toggle is ON, then click Send. See the below image:
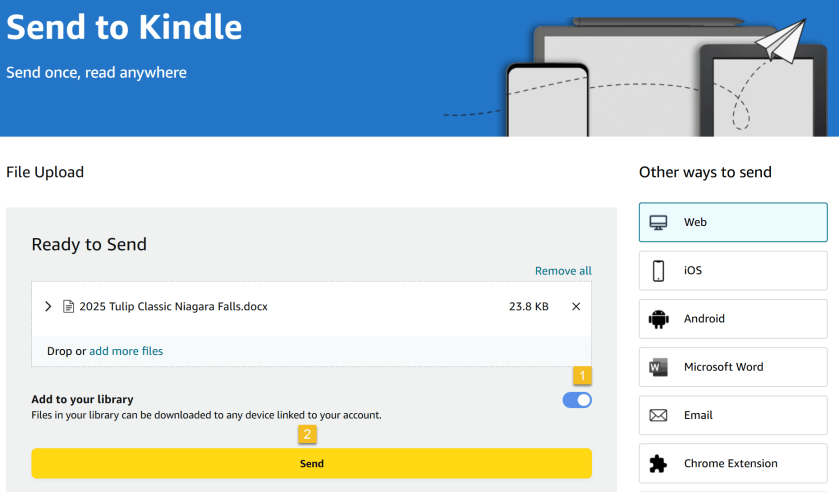
Now, a status bar will appear, letting you keep tabs on the upload. You will see a checkmark and an In Library notice when it’s ready. See the following image:

Amazon also has an app for Windows and macOS that lets you do the same thing. Chrome has an extension you can enable though results are mixed.
Use Your iPhone
If you have the Kindle app installed on your iPhone or Android device, you can add ebooks to your library with a few taps. In the example below we downloaded an ebook from Project Gutenberg on the iPhone.
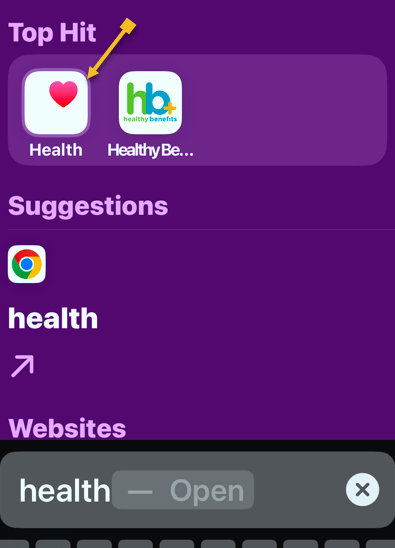
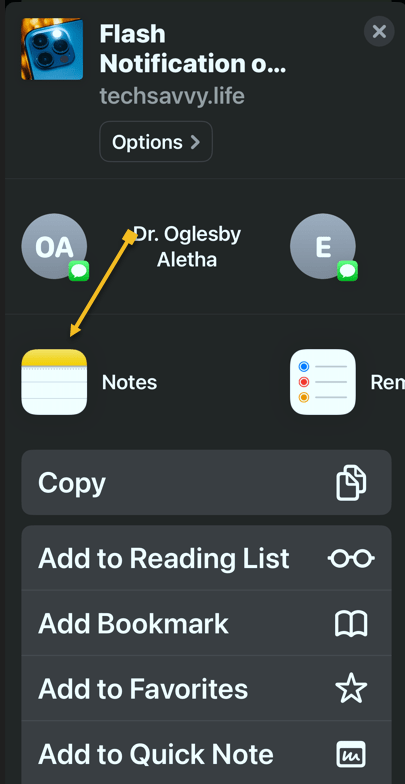
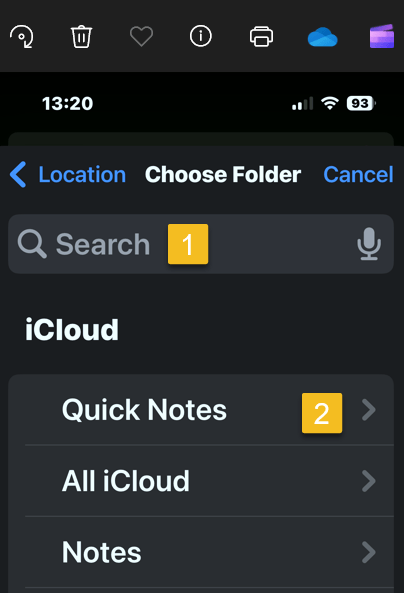
First, open your Kindle app on your iPhone and search for an ebook. Next, tap the ebook. From here, you can Download sample to see a preview or tap the Share icon. Now, locate the Kindle app and tap it. Refer to the below image:
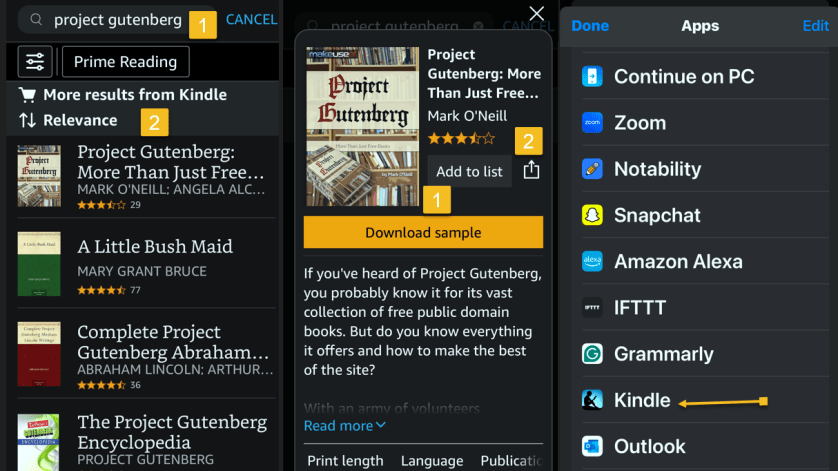
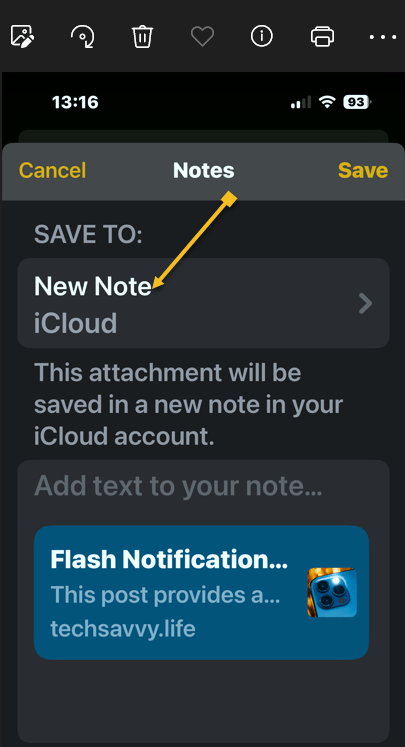
Next, ensure the Add to your library toggle is ON, then tap Send. Now, the ebook will be saved in your library in the Kindle app and on our Kindle device. The process is similar for Android. See the below image:

Use Your Kindle Email
Amazon also lets you email ebooks to your Kindle account via a specially crafted email address. First, to get your Kindle’s email address, go to:
or go to:
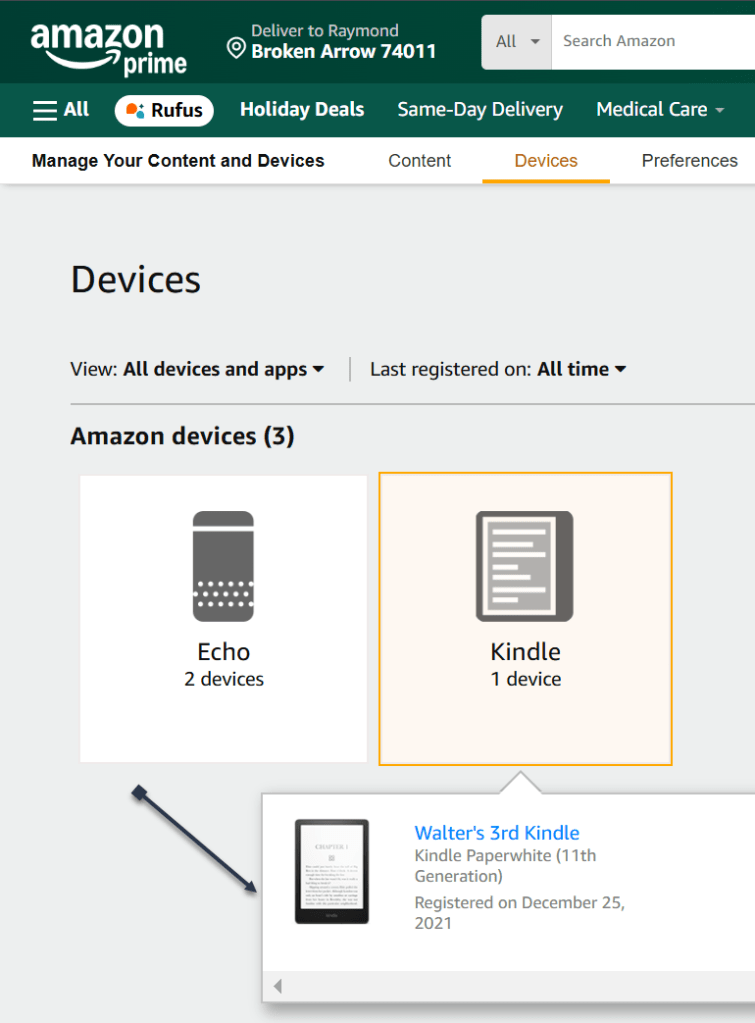
Account & Lists > Content Library > Devices
Next, in the list below, find your Kindle device and click it. In the drop-down window, click [your name’s] Kindle. See the following image:
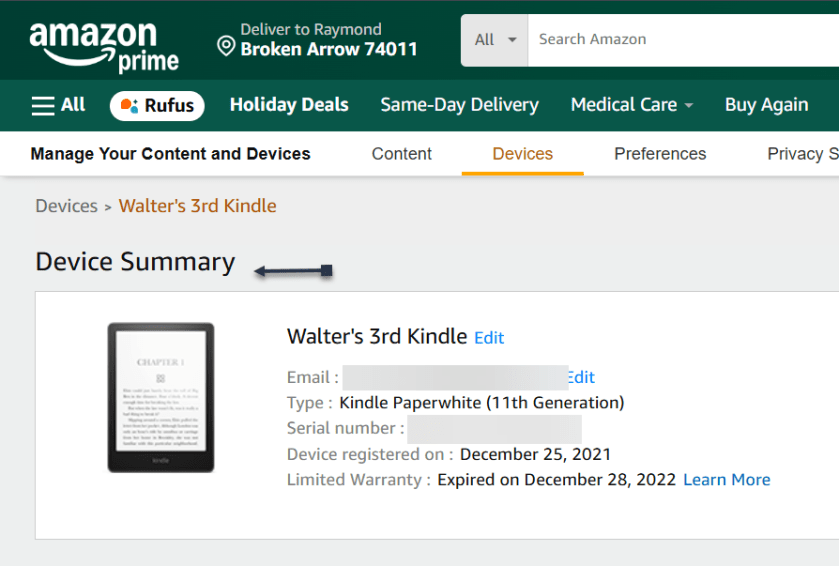
On the next page, you will see a Device Summary that lists your @kindle.com email address. (It’s set to a default address, but you can change it by clicking Edit.) Refer to the below page:
Back up top, click the Preferences tab, and scroll down to Personal Document Settings. Click the down arrow on the right and scroll to Approved Personal Document E-mail List. The email attached to your Amazon account should be listed here. If that’s the email address you will be using to send ebooks to your Kindle, you are all set. To use a different email, click:
Add a new approved e-mail address and enter the address you want to use.
Remember, your Kindle needs to be attached to a Wi-Fi network for this to work.
Use a PDF
Amazon can automatically convert PDFs into the Kindle format, but you get two formatting choices. If you want your Kindle to display every page in the PDF as if it were a graphic, just email the .pdf file to your Kindle’s address without a subject line, upload it via the Send to Kindle website, or drag and drop the file onto a Kindle that’s attached to your PC with a USB cable.
That will maintain the formatting and graphics; it will appear on your Kindle like on your laptop. However, the font size may be too small to read.
Your other option is to attach the PDF file to an email and make the subject line “convert”—just that word. Send it to your Kindle email address and your PDF will be converted into a Kindle version that will let you mark it up and change the formatting. The graphics will still be in there as well, but you will lose the layout of the original PDF.
Third-party software, such as MiniTool PDF Editor – Kindle format converter, can also convert PDF files to Kindle formats like Word, image, TXT, and HTML.
Where to Find Your eBooks
Once you have emailed your ebook, on your Kindle head to:
Home > From Your Library
It might take a few minutes, but if your Kindle is connected to Wi-Fi, it should update automatically and the ebook will appear.
Want to delete the ebook? Tap the Menu icon (the three-dots) on the bottom right of your ebook in Your Library and select Remove download to remove it from your Kindle or Permanently Delete to remove it from your Amazon account.
Where to Find Free eBooks
- Amazon hosts periodic Stuff Your Kindle Days, where select ebooks are free for a 24-hour period. They are usually grouped by theme.
- To hook into public library catalogs and send ebooks to your Kindle, check out the Libby app from OverDrive. (Hoopla offers a similar service.)
- If you want classics, Project Gutenberg has 70,000+ copyright-free ebooks.
- For historical and academic texts, check out archive.org.
- ManyBooks.net has a mix of free and paid classics and self-published titles.
- Free-Ebooks.net has a large collection of self-published ebooks and classics; provide your email address to get five free ebooks per month.
- If you like science fiction, the publisher Baen also has a set of free ebooks.
- BookBub has a free ebook section filled with romance novels and other casual reads.
Source: Amazon, PC Mag
Disclaimer
Technology is always changing. Rarely is there static tech for smartphones and desktops. Thus, the contents of this post are only valid at the time of writing. Blog posts older than six months may have directions incompatible with your device or OS. Hopefully, older post content will continue to work as advertised. Thank you for reading TechSavvy.Life for Technology at Work For You.
Quote For the Day
Technology is just a tool. In terms of getting the kids working together and motivating them, the teacher is the most important.
-Bill Gates
X (Twitter) Info
That’s it. Please feel free to share this post! One way to share is via Twitter.
Just click the Tweet icon below. This will launch Twitter where you click its icon to post the Tweet.
Checkout TechSavvy.Life for blog posts on smartphones, PCs, and Macs! You may email us at contact@techsavvy.life for comments or questions.
Tweet
I Would Like to Hear From You
Was this post helpful? We would love to hear your comments. Do you have a computer or smart device tech question? I will do my best to answer your inquiry. Just send an email to contact@techsavvy.life. Please mention the device, app, and version you are using. To help us, you can send screenshots of the data related to your question.
The author’s Vietnam eBook on the “Battle for Tra Bong Vietnam: Events and Aftermath” can be accessed from a Kindle device or the Kindle App for a desktop or smartphone. The apps are free.