RAYMOND OGLESBY @RaymondOglesby2
June 16, 2022
Are you not a big fan of Google Chrome’s Live Captions, which displays the text version of your media files? If so, it’s easy to turn this feature off/on both temporarily and permanently. Let’s explore this feature.
This is for devices using Google Chrome. Screenshots are from Windows 10

Temporary Disable Live Captions
You can turn off Chrome’s Live Captions for a specific playback session while keeping it enabled for all other sessions.
First, open a video containing a voice. The speaker’s voice will be displayed as Live Captions. To close this Live Captions, in the top right-hand corner of Chrome’s Live Captions box, click the “X” icon. Note! We are assuming the Live Captions option has been disabled (see below section). Refer to the below image:
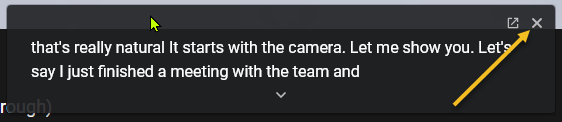
Live Captions will immediately disappear from your screen, and you can enjoy your media playback without any interruptions.
Permanently Stop Live Captions
If you do not wish to see live captions for any of your media playbacks in Chrome, turn the feature OFF permanently and it will not bother you anymore.
First, from Chrome’s top right-hand corner, select the three dots icon (the Menu icon). See the below image:

Next, in the Menu box, click Settings. See the following image:

Now, on the Settings screen, from the left sidebar, select Advanced. Refer to the below image:

Next, in the expanded Advanced menu, click Accessibility. See the below image:

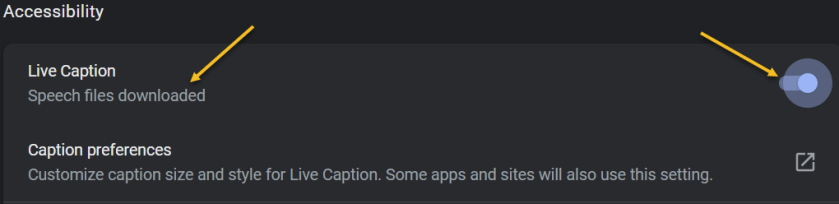
Now, on the right, in the Accessibility pane, toggle the Live Caption option to OFF. See the following image:

If you want to enable the option again, toggle the Live Caption option to ON. You may see the message “Speech files downloaded” below the Live Caption. Refer to the below image:
Going forward, Chrome will not display any captions for your media playbacks in the browser.
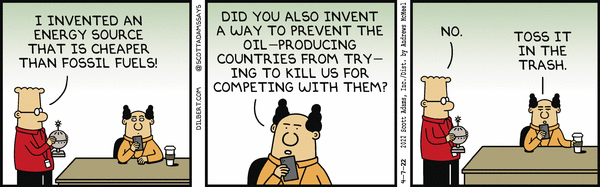
Quote For the Day
Technology is supposed to make our lives easier, allowing us to do things more quickly and efficiently. But too often it seems to make things harder, leaving us with fifty-button remote controls, digital cameras with hundreds of mysterious features and book-length manuals, and cars with dashboard systems worthy of the space shuttle.
James Surowiecki
Tweet Info
You are finished. Please feel free to share this post! One way to share is via Twitter.
Just click the Tweet icon below. This will launch Twitter where you click its icon to post the Tweet.
Check out TechSavvy.Life for blog posts on smartphones, PCs, and Macs! You may email us at contact@techsavvy.life for comments or questions.
Tweet
I Would Like to Hear From You
Please feel free to leave a comment. I would love to hear from you. Do you have a computer or smart device tech question? I will do my best to answer your inquiry. Just send an email to contact@techsavvy.life. Please mention the device, app, and version you are using. To help us out, you can send screenshots of your data related to your question.
Author’s E-book
You can access the e-book from a Kindle device, the Kindle App for the desktop or smartphone, which is a free app.